


0. 要实现的效果
让树莓派可以识别身边的一些物品,比如电脑,鼠标,键盘,杯子,行李箱,双肩包,床,椅子等
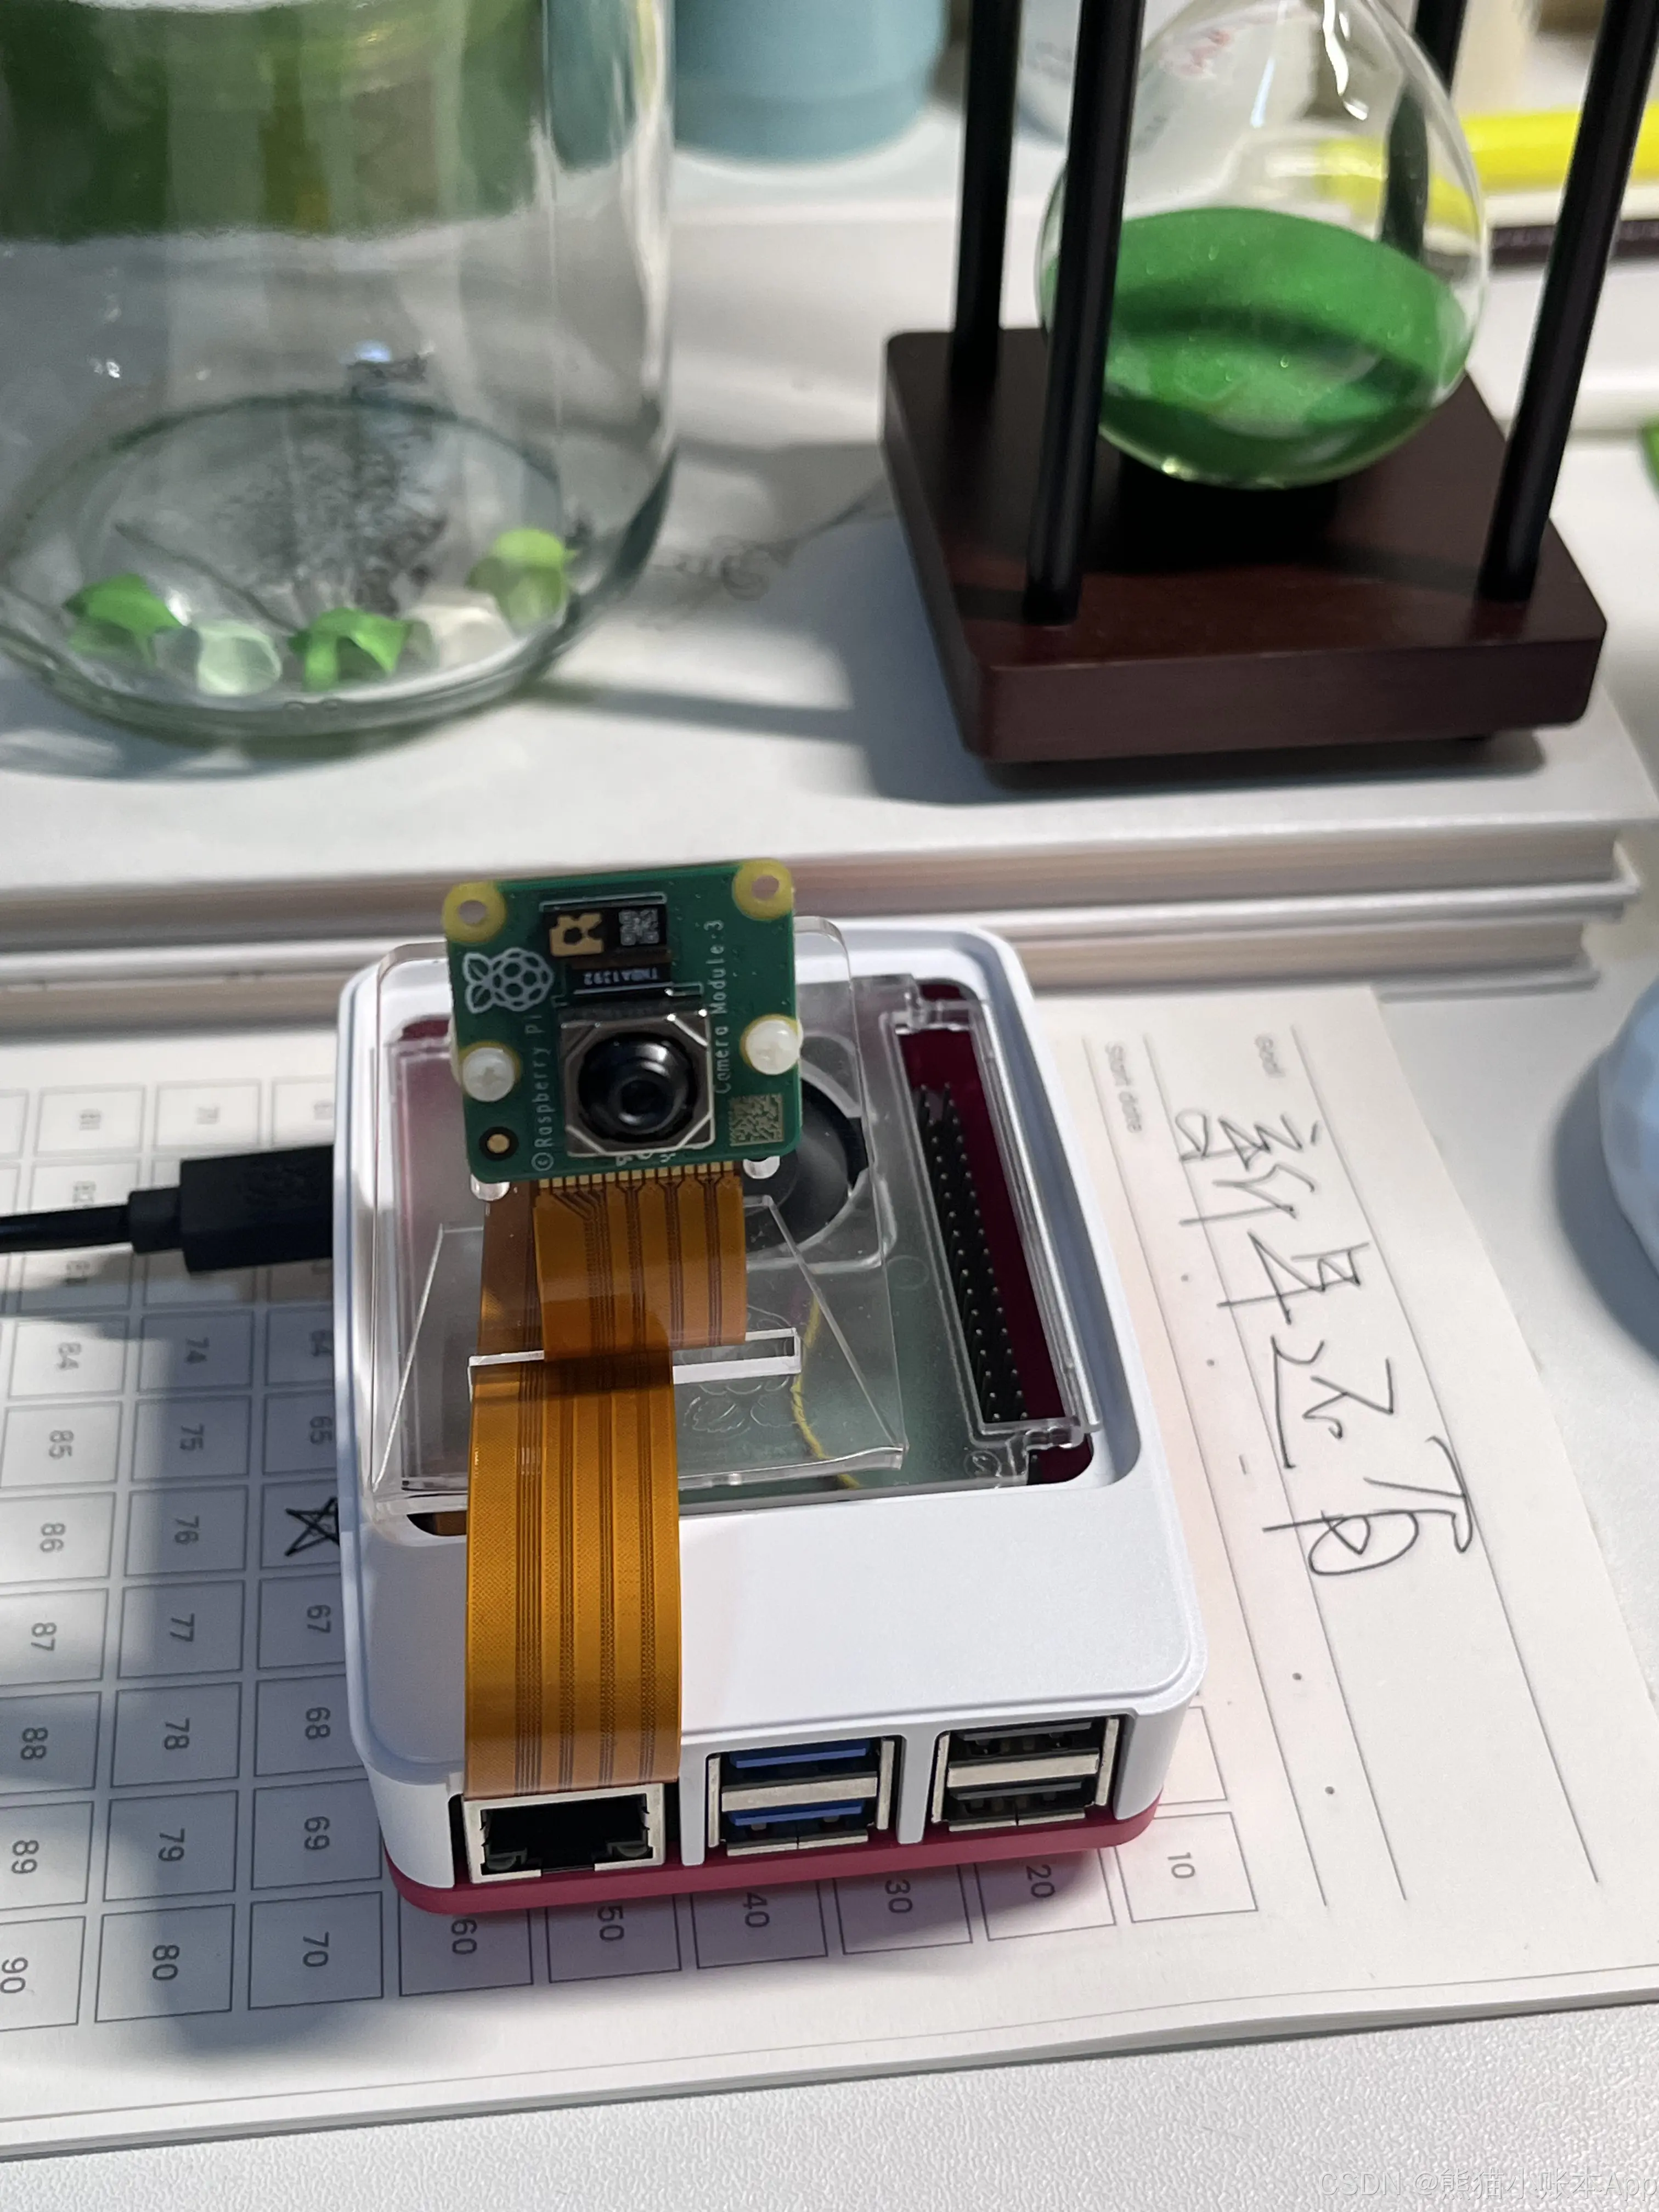
1. 硬件设备
- 树莓派 5 raspberrypi.com/products/raspberry-pi-5/
- 树莓派官方摄像头 v3 raspberrypi.com/products/camera-module-3/
- 自己的电脑,windows 或者 mac
2. 前置条件
- 给树莓派烧录好操作系统,下面我们会用现在最新的(2024年12月) bookworm
- VNC 连接或者用一根 HDMI 或者用官方的 raspberrypi connect
我写过一篇关于给树莓派烧录操作系统的 blog blog.csdn.net/u013633921/article/details/121433186
也有一篇 VNC 的 blog blog.csdn.net/u013633921/article/details/129677105
3. 开始!
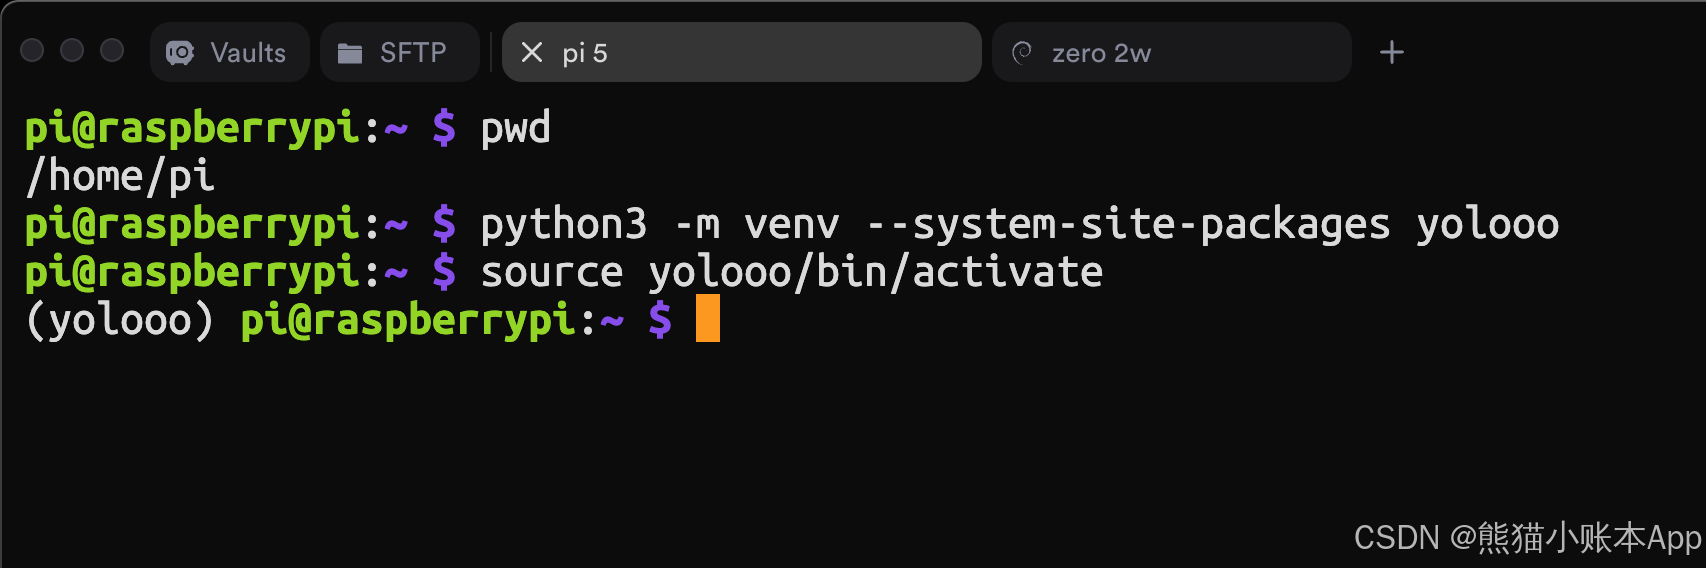
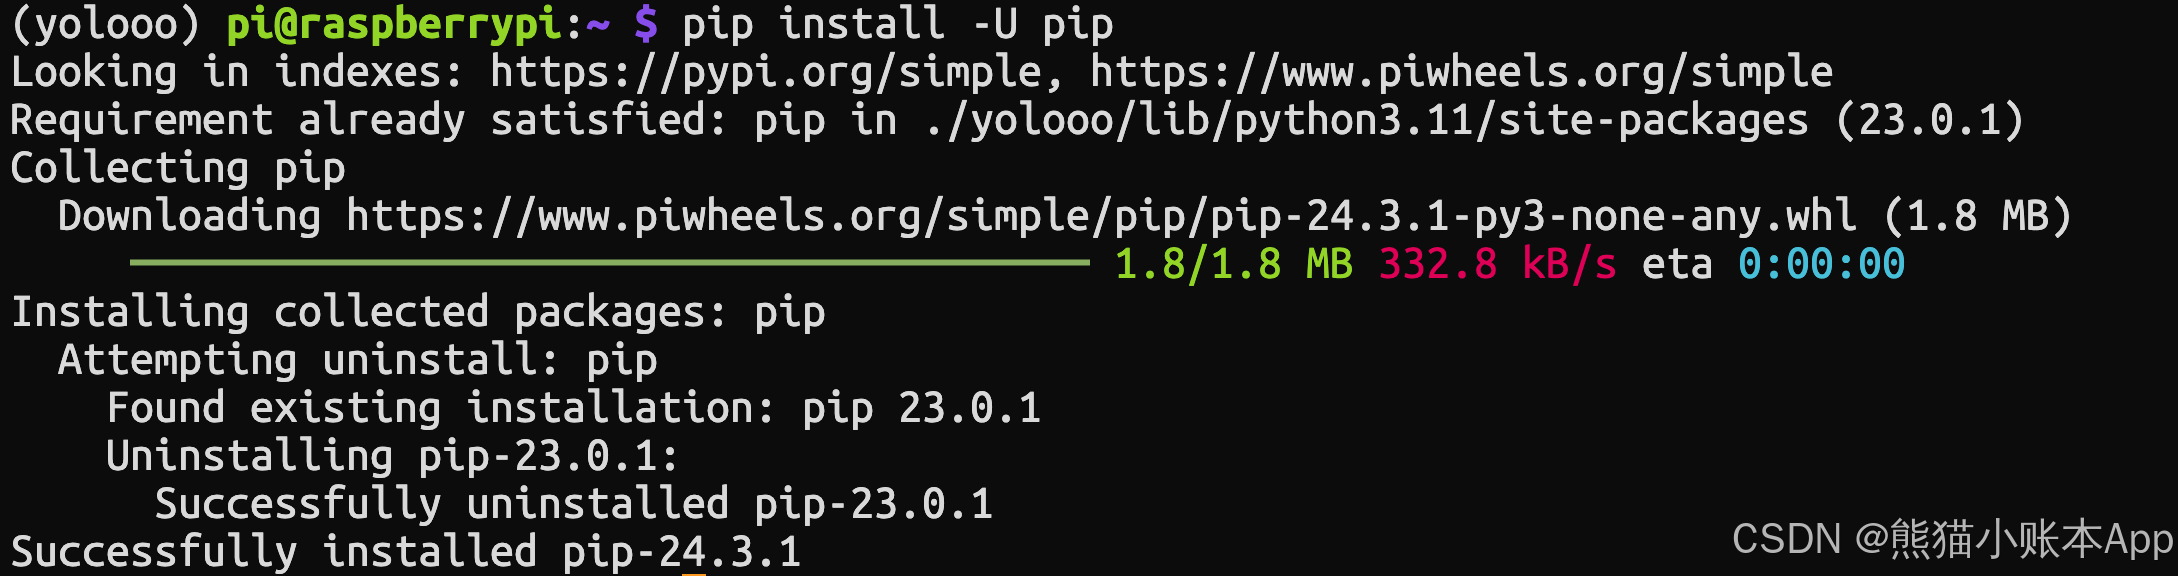
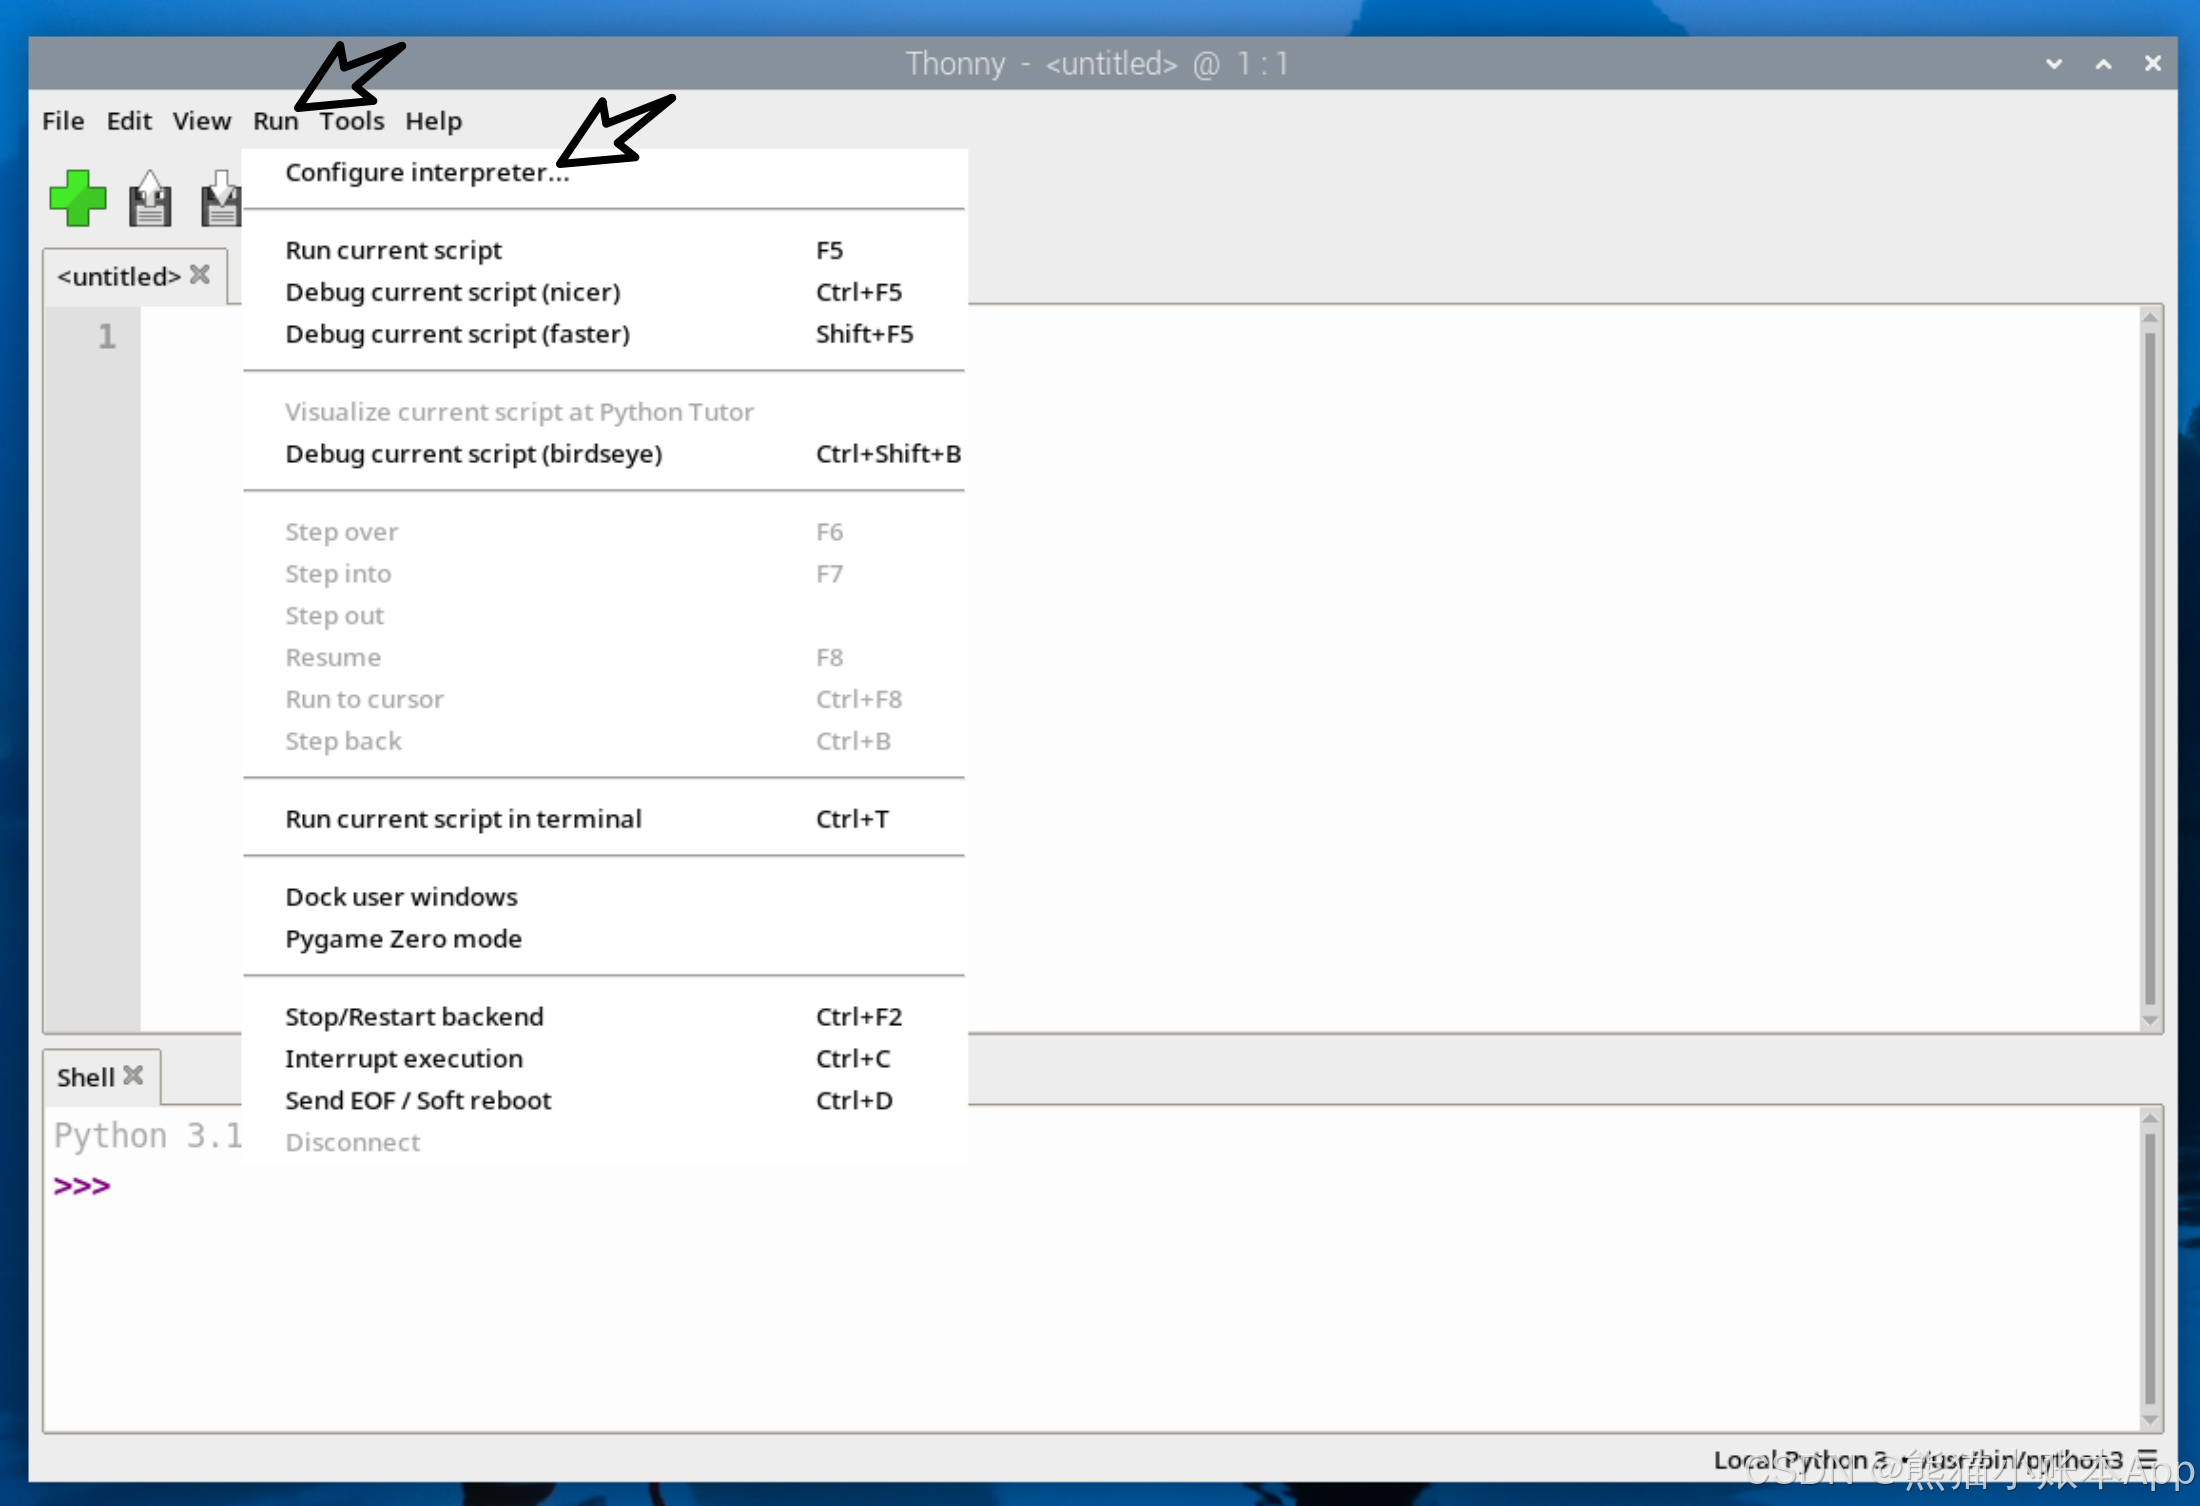
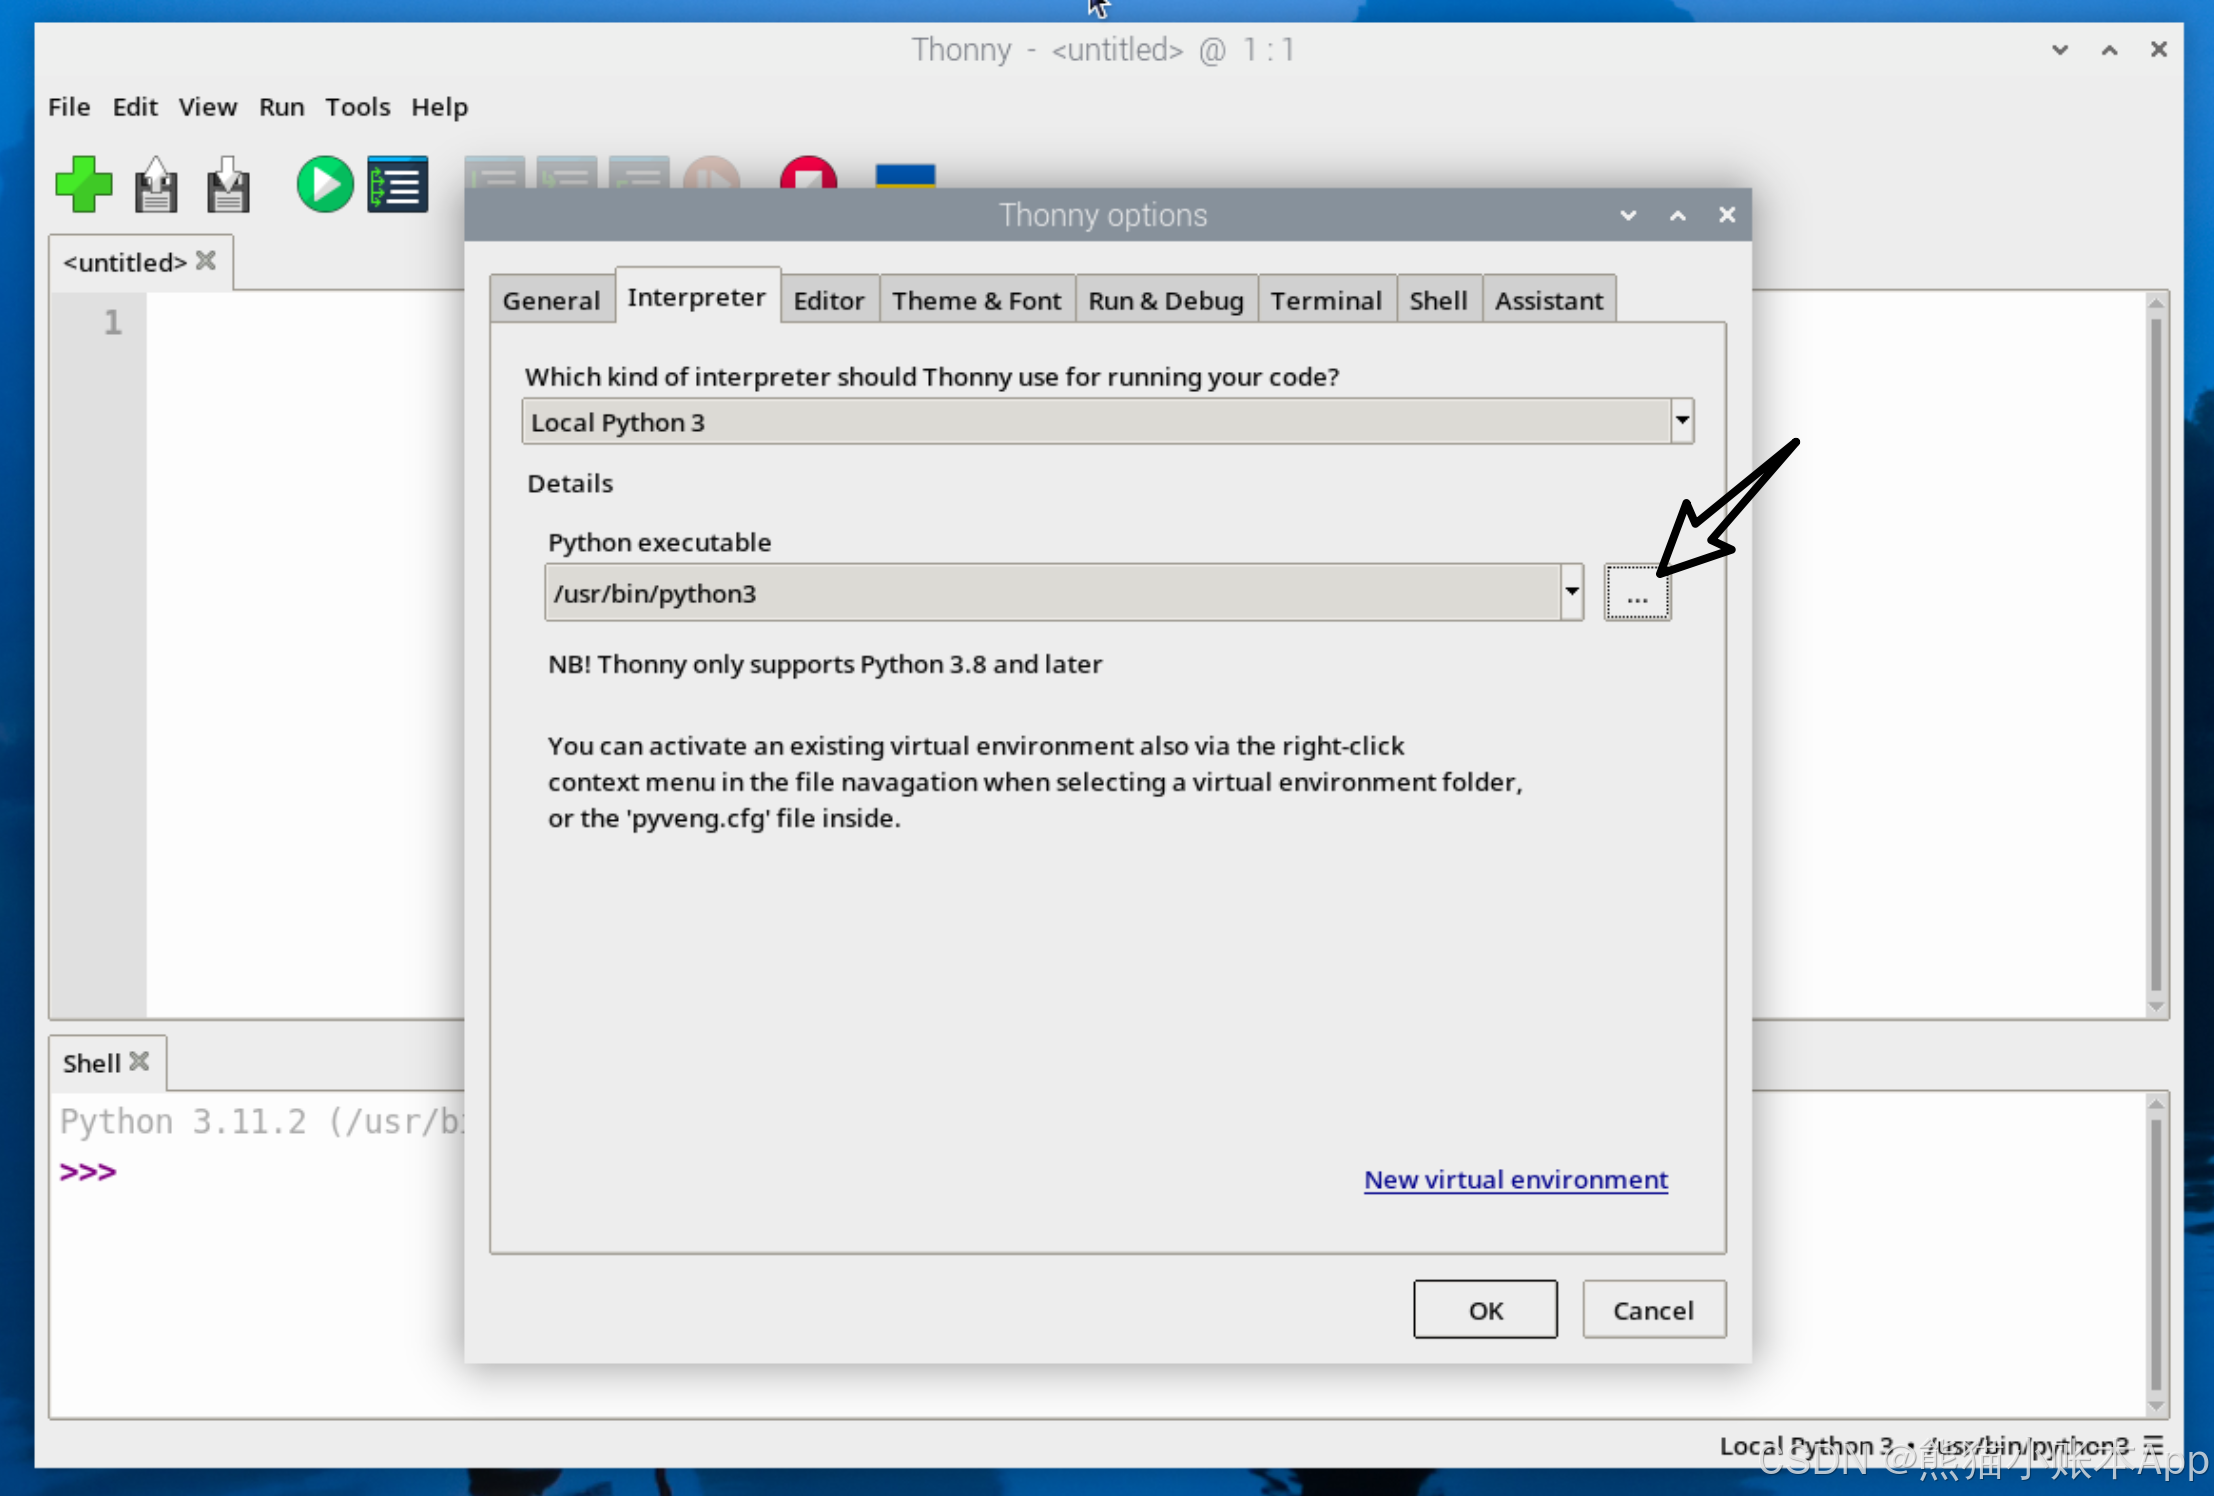
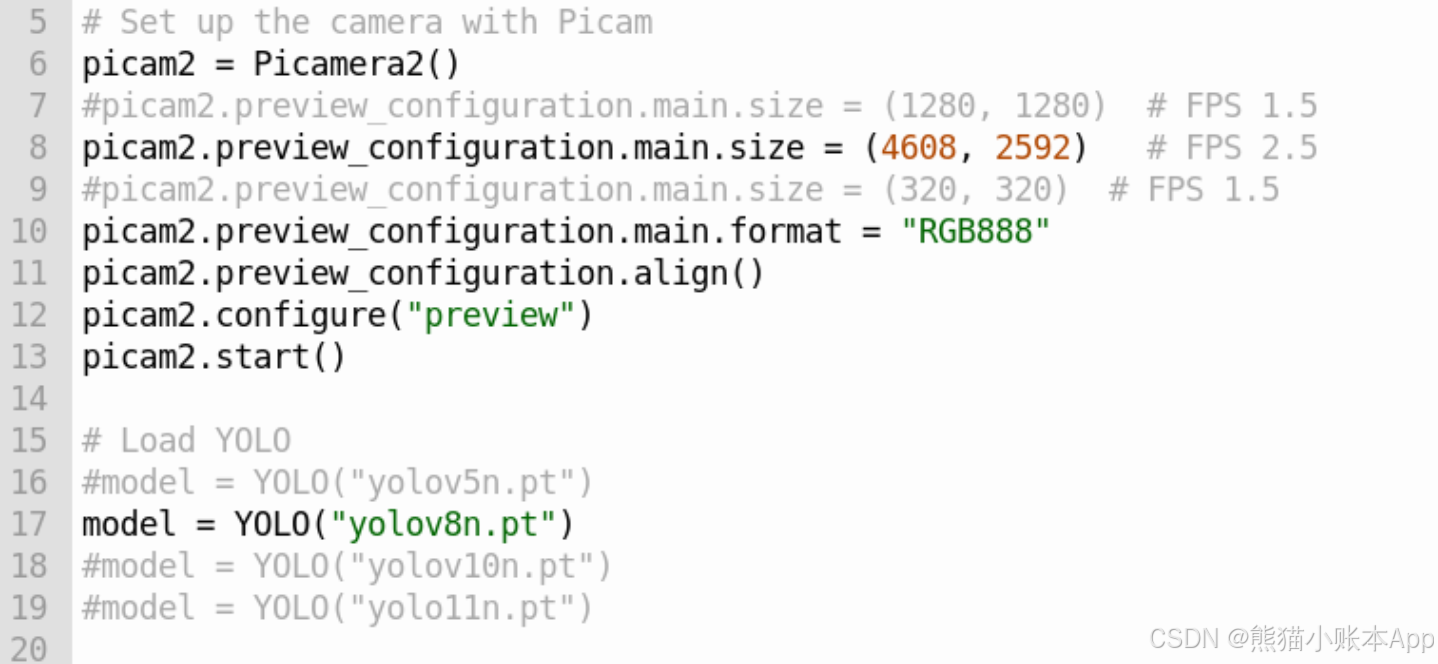
更新一下,下面 4 个截图都好理解,不懂问问 AI

下面这条命令将安装 OpenCV 以及运行 YOLO 所需的基础设施
pip install ultralytics[export]
还会安装大量其他软件包,容易失败
如果安装失败(会显示一大片红色)
只需重新执行,已经安装过的不会再安装
我是一次过的,哈哈哈哈哈哈~(过程大概有 2 个小时 🤔)
安装后,重启树莓派
Pi 5 有物理按键,连续按两次会关机。等等再按一次,就会启动。
4. Thonny
切换到常规模式。

关闭 Thonny 再打开 Thonny。


用 Thonny 创建个文件 yolo.py
import cv2
from picamera2 import Picamera2
from ultralytics import YOLO

# Set up the camera with Picam
picam2 = Picamera2()
picam2.preview_configuration.main.size = (1280, 1280)
picam2.preview_configuration.main.format = "RGB888"
picam2.preview_configuration.align()
picam2.configure("preview")
picam2.start()

# Load YOLOv8
model = YOLO("yolov8n.pt")

while True:
    # Capture a frame from the camera
    frame = picam2.capture_array()

    # Run YOLO model on the captured frame and store the results
    results = model(frame)

    # Output the visual detection data, we will draw this on our camera preview window
    annotated_frame = results[0].plot()

    # Get inference time
    inference_time = results[0].speed['inference']
    fps = 1000 / inference_time  # Convert to milliseconds
    text = f'FPS: {fps:.1f}'

    # Define font and position
    font = cv2.FONT_HERSHEY_SIMPLEX
    text_size = cv2.getTextSize(text, font, 1, 2)[0]
    text_x = annotated_frame.shape[1] - text_size[0] - 10  # 10 pixels from the right
    text_y = text_size[1] + 10  # 10 pixels from the top

    # Draw the text on the annotated frame
    cv2.putText(annotated_frame, text, (text_x, text_y), font, 1, (255, 255, 255), 2, cv2.LINE_AA)

    # Display the resulting frame
    cv2.imshow("Camera", annotated_frame)

    # Exit the program if q is pressed
    if cv2.waitKey(1) == ord("q"):
        break

# Close all windows
cv2.destroyAllWindows()
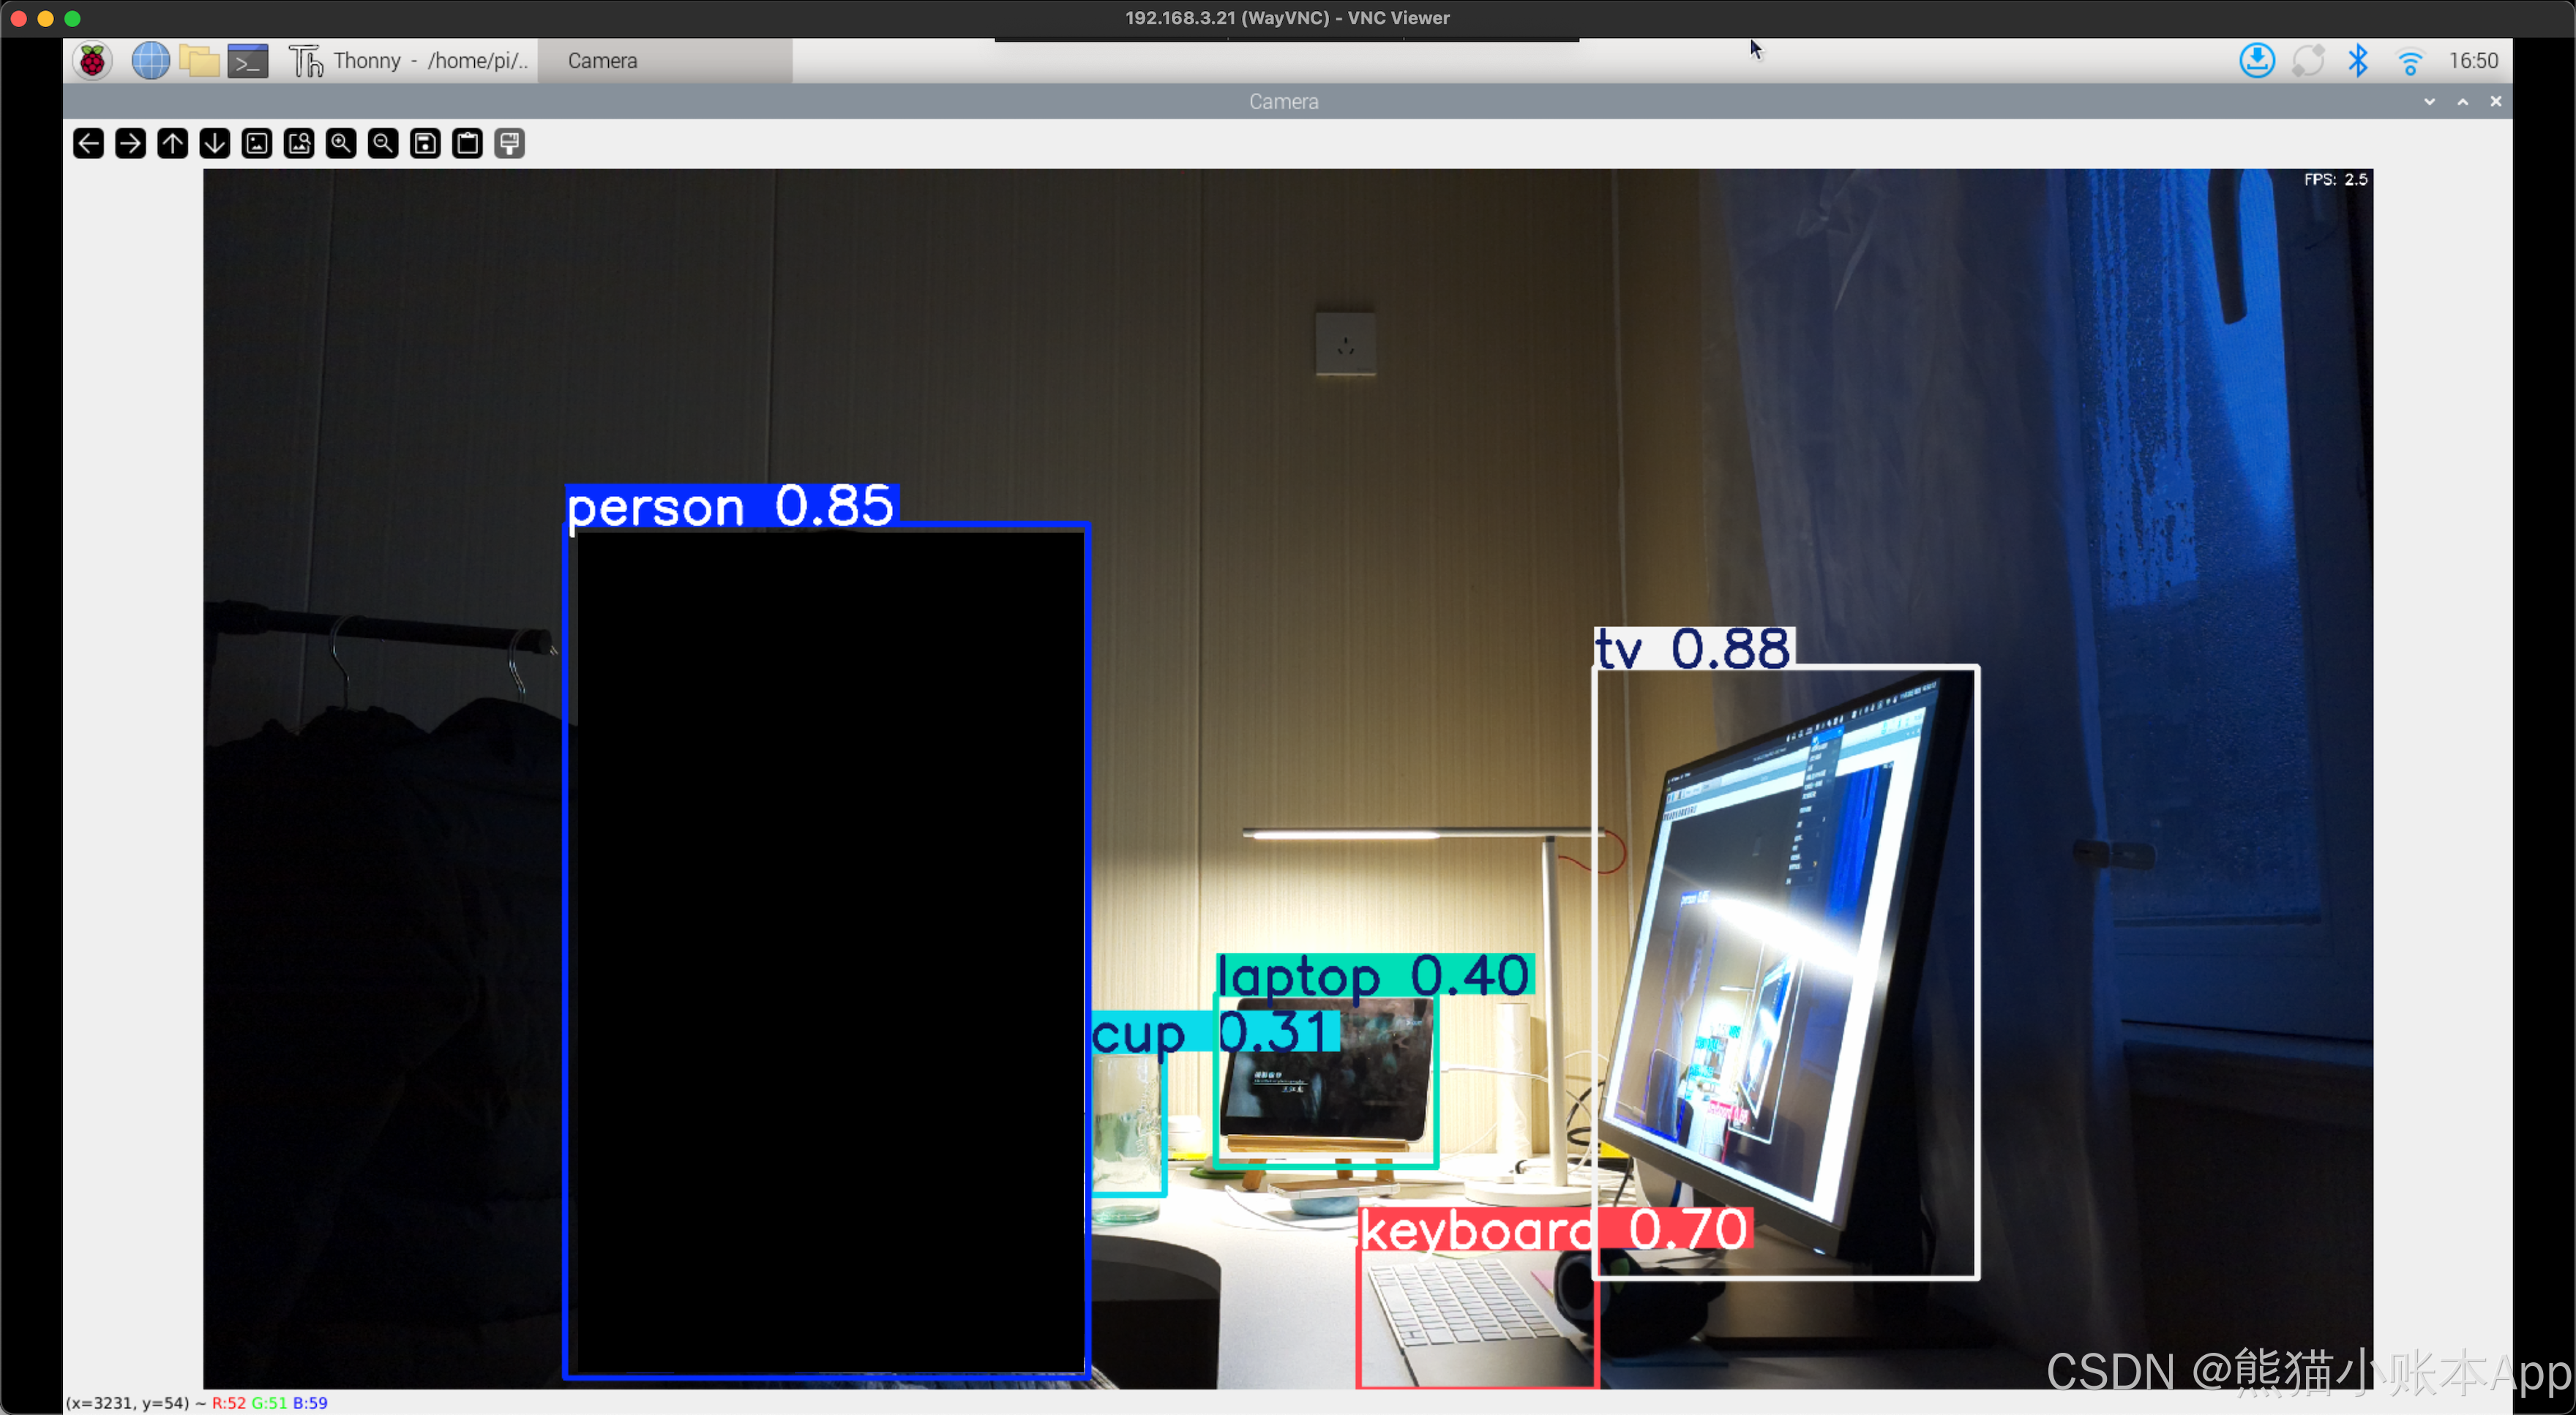
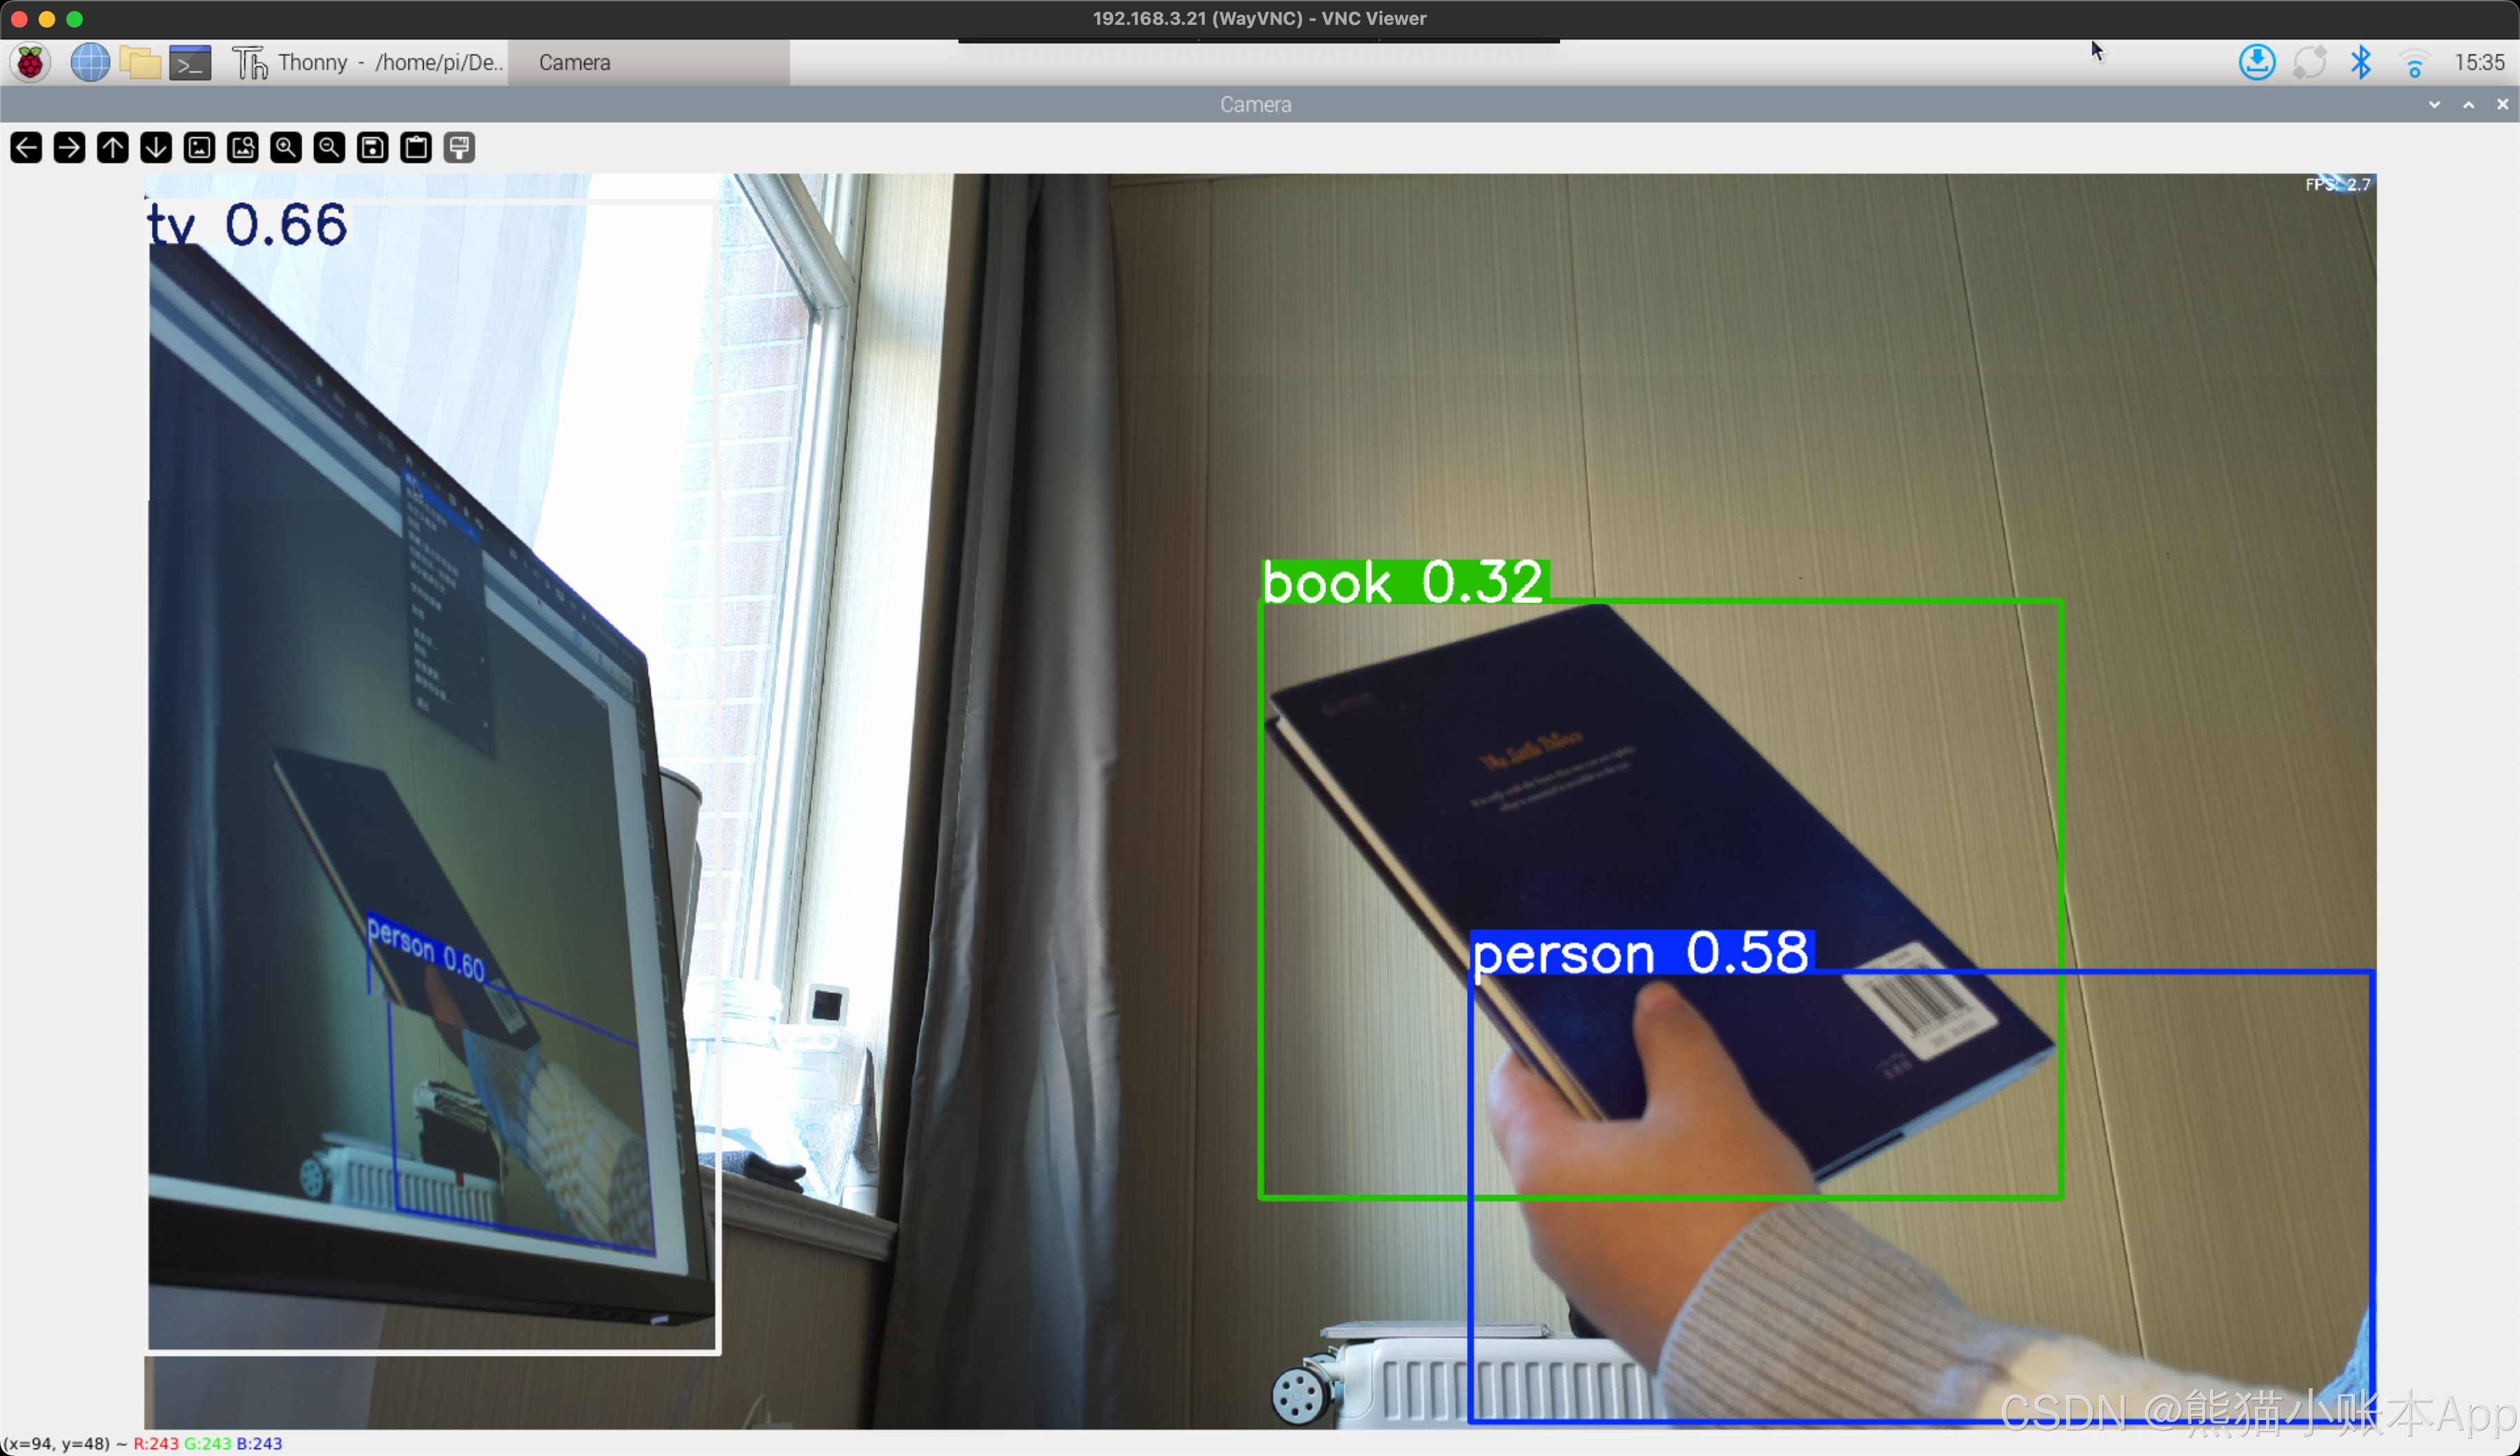
点一下绿色 Run 按钮(三角),等一小会,
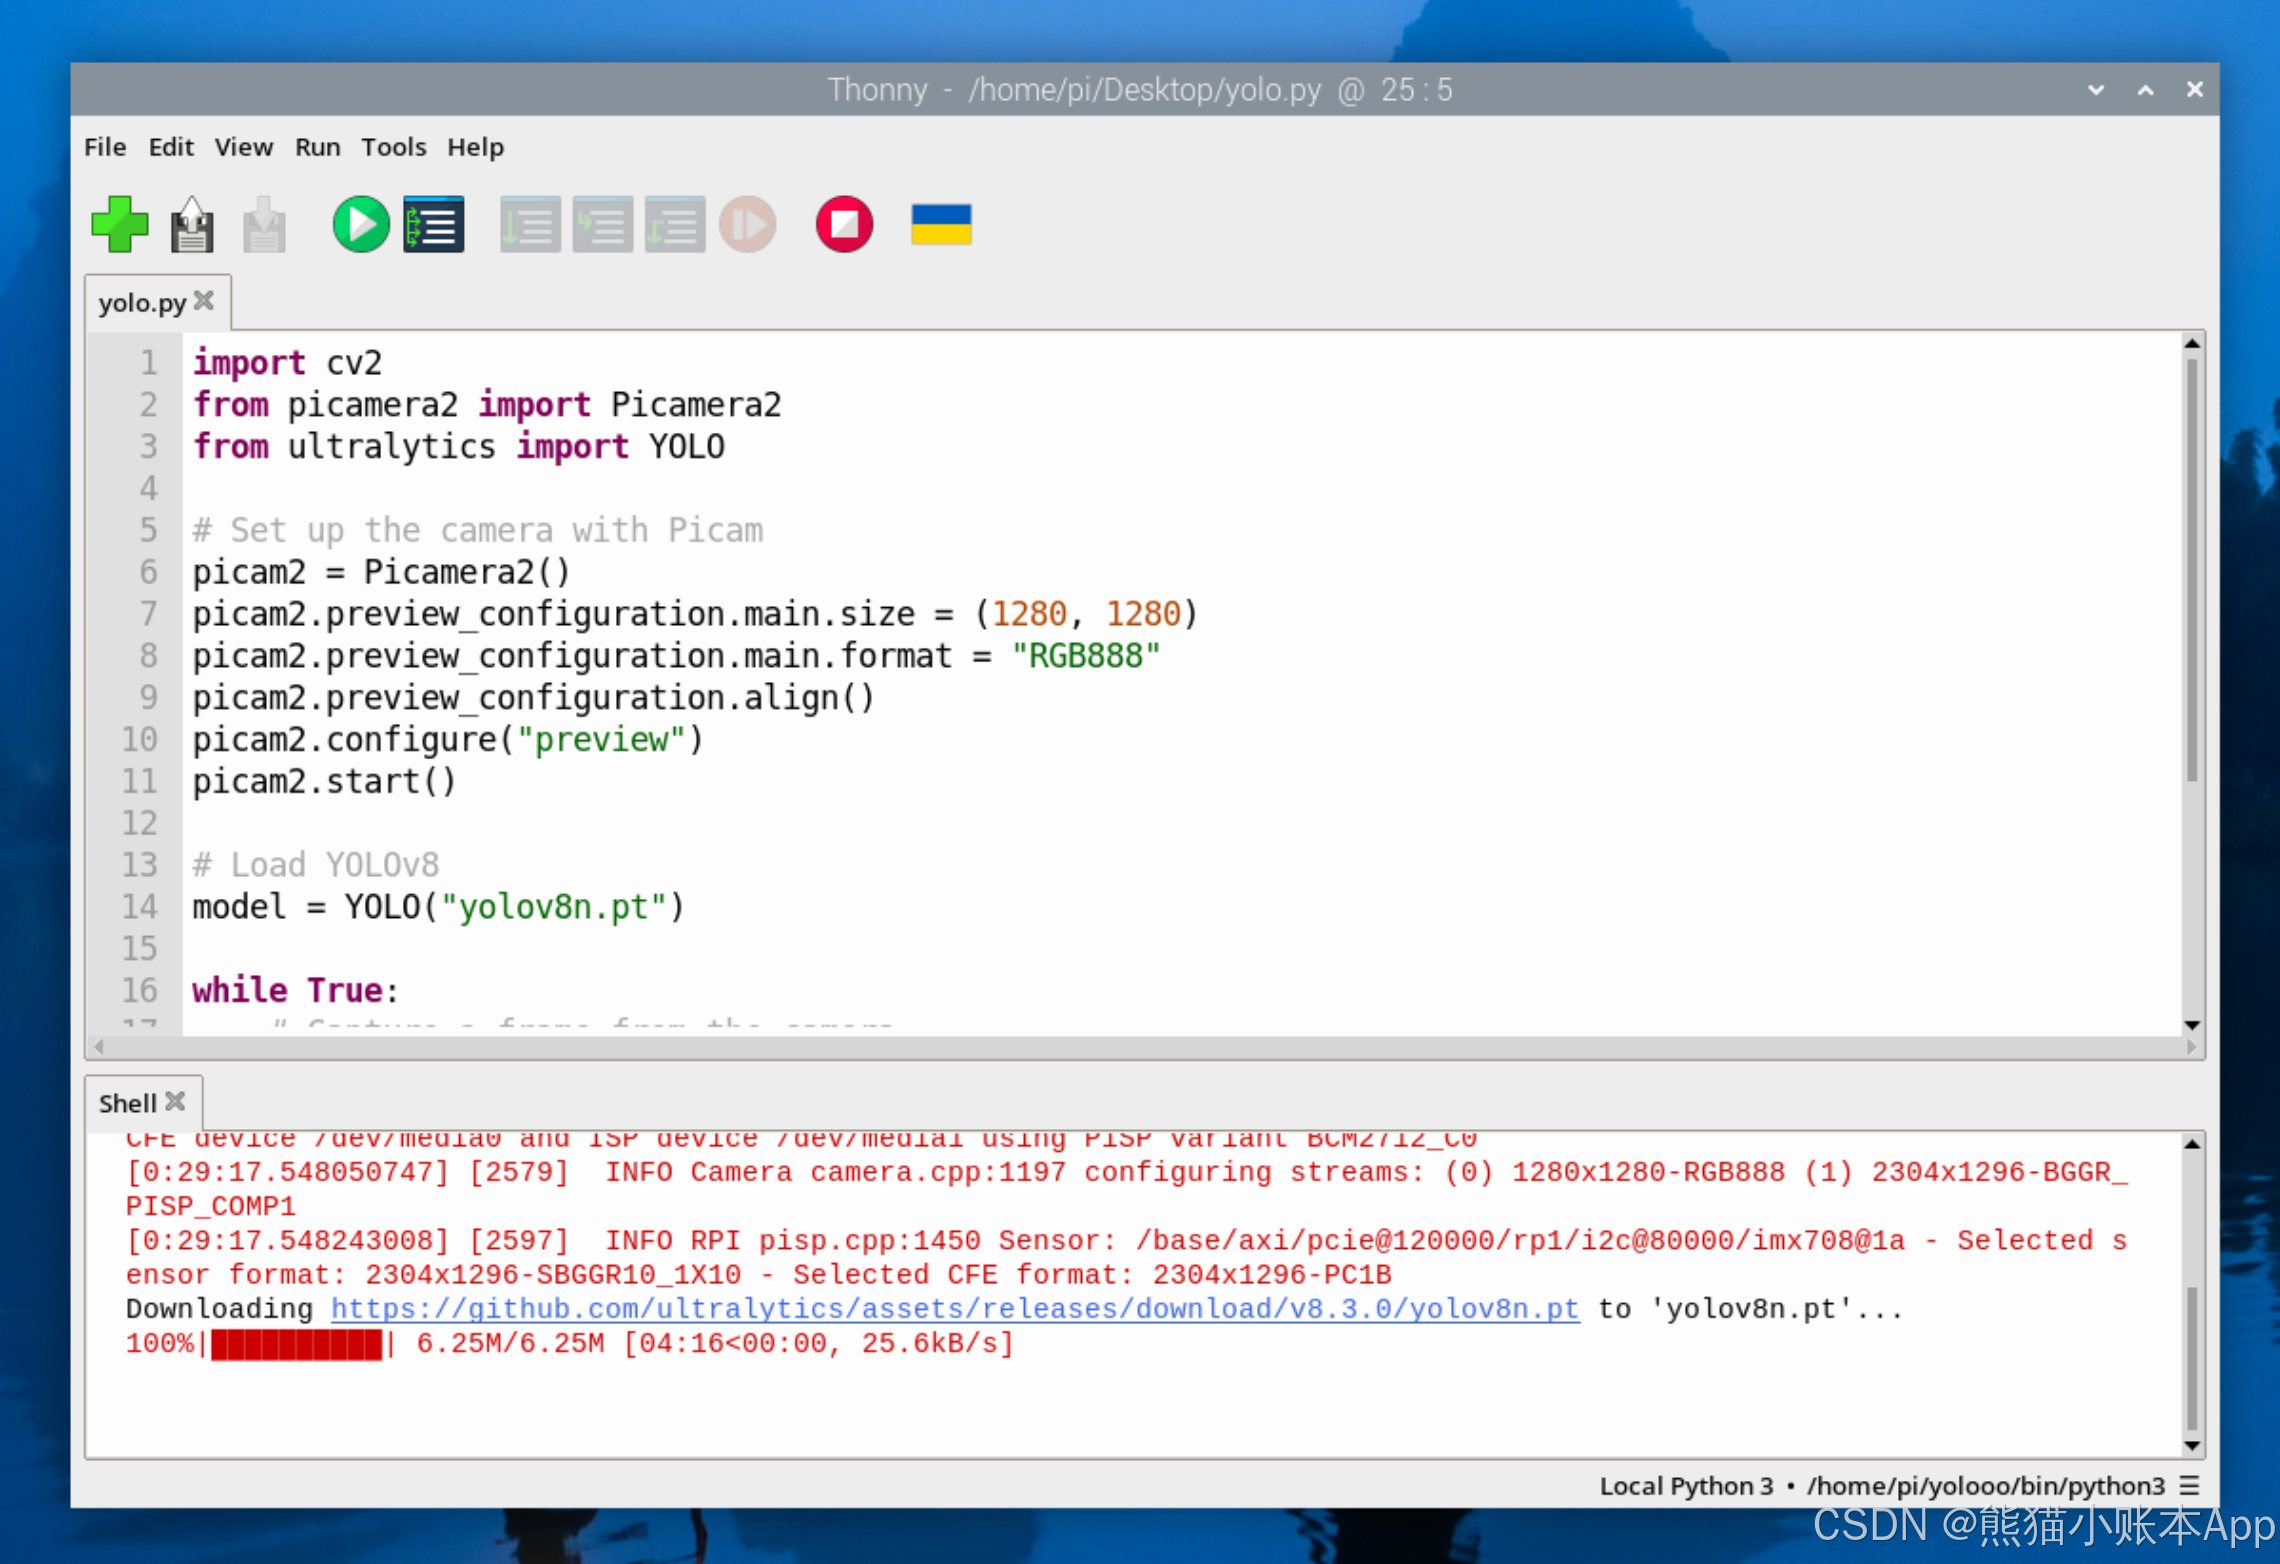
然后你就能看到这样的运行效果了。按 q 可以关闭。

可以改改第 7 行,第 14 行,再运行看看
喜欢或对你有帮助,点个赞吧,自己先点个嘿嘿。
有错误或者疑问还请评论指出。
我的个人网站 点击访问 hongweizhu.com。
END
推荐一下我写的的 App 熊猫小账本
熊猫小账本 一个简洁的记账 App,用于记录日常消费开支收入,使用 iCloud 保存同步数据。
- 支持备注,自定义时间偶尔忘记记账也没关系。
- 搜索历史记账,支持分类、金额、备注。
- 启动时需要面容/指纹验证,保护个人隐私。
- 支持自定义分类功能,自由添加修改分类。
- 统计图表,支出收入一目了然。
- 每天提醒记账,不会有其他推送。
- 桌面锁屏小组件等。


 505
505

 被折叠的 条评论
为什么被折叠?
被折叠的 条评论
为什么被折叠?
 到【灌水乐园】发言


