


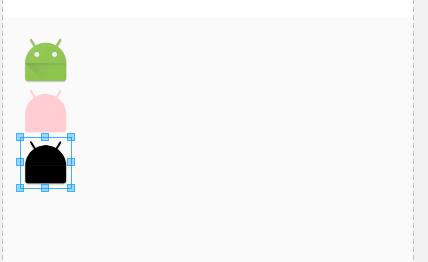
作用:可以为图片设置不同的颜色
样图(一张图片实现不同的效果):
直接在xml中设置:
<ImageView
        android:layout_width="wrap_content"
        android:layout_height="wrap_content"
        android:src="@mipmap/ic_launcher"
        android:id="@+id/img1"/>

    <ImageView
        android:layout_width="wrap_content"
        android:layout_height="wrap_content"
        android:src="@mipmap/ic_launcher"
        android:tint="#FFCDD2"
        android:id="@+id/img2"/>
    <ImageView
        android:layout_width="wrap_content"
        android:layout_height="wrap_content"
        android:src="@mipmap/ic_launcher"
        android:tint="@color/colorAccent"
        android:id="@+id/img3"/>
主要就是:
android:tint="@color/colorAccent"属性通过Tint来为控件设置选择器的效果和改变图片的颜色
package dom.com.mydome;
import android.content.res.ColorStateList;
import android.graphics.drawable.Drawable;
import android.graphics.drawable.StateListDrawable;
import android.support.annotation.ColorInt;
import android.support.annotation.NonNull;
import android.support.v4.content.ContextCompat;
import android.support.v4.graphics.drawable.DrawableCompat;
import android.support.v7.app.AppCompatActivity;
import android.os.Bundle;
import android.widget.ImageView;
import butterknife.BindView;
import butterknife.ButterKnife;

public class MainActivity extends AppCompatActivity {
    @BindView(R.id.img1)
    ImageView img1;

    @BindView(R.id.img3)
    ImageView img3;

    @Override
    protected void onCreate(Bundle savedInstanceState) {
        super.onCreate(savedInstanceState);
        setContentView(R.layout.activity_main);
        ButterKnife.bind(this);

        //获取到图片
        Drawable drawable = ContextCompat.getDrawable(this, R.mipmap.ic_launcher);


        //简单的使用tint改变图片的颜色
        Drawable drawable1 = getTintDrawable(drawable, ContextCompat.getColor(this, R.color.pink));
        img1.setImageDrawable(drawable1);


        //使用一张图片通过变化图片的颜色来为一个图片控件设置选择器
        selectDrawable(drawable);


    }

    //使用一张图片通过变化图片的颜色来为一个图片控件设置选择器
    private void selectDrawable(Drawable drawable) {
        //要变换颜色的数组
        int[] colors = new int[]{ContextCompat.getColor(this, R.color.pink), ContextCompat.getColor(this, R.color.pink1)};

        //使用代码设置选择器的状态
        int[][] states = new int[2][];
        states[0] = new int[]{android.R.attr.state_pressed};//此处设置为点击触发
        states[1] = new int[]{};

        //StateListDrawable对应的XML根元素是<selector>,它可以根据View的状态的不同匹配展示不同的Drawable。
        //比如点击时背景是红色,不点击时时白色
        StateListDrawable stateListDrawable = getStateListDrawable(drawable, states);
        Drawable drawable3 = getStateDrawable(stateListDrawable, colors, states);//将图片与选择状态绑定,返回一个新的Drawable
        img3.setImageDrawable(drawable3);//设置新的图片
    }


    /**
     * 将图片与选择状态绑定,返回一个新的Drawable
     * @param drawable
     * @param colors
     * @param states
     * @return
     */
    private Drawable getStateDrawable(Drawable drawable, int[] colors, int[][] states) {
        //传递的参数为选择器的状态和颜色数组,并将选择器的状态与颜色值对应起来
        ColorStateList colorList = new ColorStateList(states, colors);
        //ConstantState:每个 Drawable 类对象类都关联有一个 ConstantState 类对象,这是为了保存 Drawable 类对象的一些恒定不变的数据,
        //此处用于判断是否为同一个图片
        Drawable.ConstantState state = drawable.getConstantState();

        drawable = DrawableCompat.wrap(state == null ? drawable : state.newDrawable()).mutate();
        //使用DrawableCompat为Drawable与ColorStateList关联起来,起到选择器的效果
        DrawableCompat.setTintList(drawable,colorList);
        return drawable;
    }


    //实例化StateListDrawable,并将其绑定给Drawable
    @NonNull
    private StateListDrawable getStateListDrawable(Drawable drawable, int[][] states) {
        //创建StateListDrawable对象
        StateListDrawable stateListDrawable = new StateListDrawable();
        //为图片绑定选择器的状态
        for (int[] state:states) {
            stateListDrawable.addState(state,drawable);
        }
        return stateListDrawable;
    }


    //使用代码设置图片的颜色
    private Drawable getTintDrawable(Drawable drawable,@ColorInt int color) {
        Drawable.ConstantState state = drawable.getConstantState();
        Drawable drawable1 = DrawableCompat.wrap(state == null ? drawable : state.newDrawable()).mutate();
        drawable1.setBounds(0, 0, drawable.getIntrinsicWidth(), drawable.getIntrinsicHeight());
        DrawableCompat.setTint(drawable1, color);
        return drawable1;
    }

}
布局:
<?xml version="1.0" encoding="utf-8"?>
<LinearLayout xmlns:android="http://schemas.android.com/apk/res/android"
    xmlns:tools="http://schemas.android.com/tools"
    android:id="@+id/activity_main"
    android:layout_width="match_parent"
    android:layout_height="match_parent"
    tools:context="dom.com.mydome.MainActivity"
    android:orientation="vertical">

    <ImageView
        android:layout_width="wrap_content"
        android:layout_height="wrap_content"
        android:id="@+id/img1"
        android:clickable="true"/>

    <ImageView
        android:layout_width="wrap_content"
        android:layout_height="wrap_content"
        android:id="@+id/img3"
        android:layout_marginTop="39dp"
        android:clickable="true"/>
</LinearLayout>


 1万+
1万+

 被折叠的 条评论
为什么被折叠?
被折叠的 条评论
为什么被折叠?
 到【灌水乐园】发言


