


飞龙公司的规模进一步扩大,现在已经在2个城市都有了分公司,分公司都有局域网,为了组建整个企业的内部网络,单区域的OSPF配置已经使路由器的负载太大,所以决定组建多区域的OSPF网络。
实验目的:
1、 按照拓扑图将路由器的OSPF进程启动
2、 在路由器B和D上注入外部路由,察看各个路由器的链路状态数据库和路由表
3、 将区域1配置成末梢区域和完全末梢区域,然后查看C路由器的链路状态数据库和路由表,看看和没有配置末梢区域以前有何区别?
4、 配置区域2成为NSSA区域,查看各路由器的链路状态数据库和路由表,看看和最初有何不同。
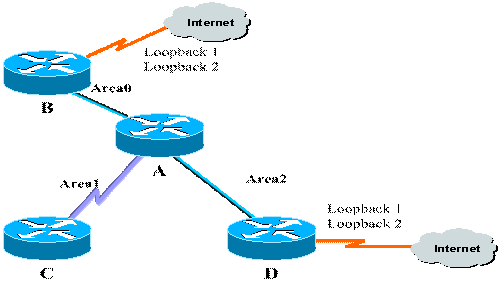
实验拓扑:
| 实验目的 | 掌握多域的配置,掌握不同协议之间的学习路由,掌握末梢和完全末梢区域的配置。 |
| 实验步骤 以3640为主 | 说明: R1和r2的E0/0口属于area1,r2的e0/1和r3的E0/1属于area0, 它们都属于ospf路由协议的路由器。r3的e0/0和r4属于rip路由 协议的路由器。 第一步:r1上的配置。 Router(config)#hostname r1 r1(config)#int loopback 0 r1(config-if)#ip add 10.0.0 .1 255.0.0.0 r1(config-if)#no sh r1(config-if)#int e0/0 r1(config-if)#ip add 111.111.0.1 255.255.0.0 r1(config-if)#no sh r1(config-if)#exit r1(config)#router ospf 10 r1(config-router)#network 10.0.0 .0 0.255.255.255 area 1 r1(config-router)#network 111.111.0.0 0.0.255.255 area 1 r1(config-router)#end r1#show ip route 第二步:r2上的配置。 r2(config)#int e0/0 r2(config-if)#ip add 111.111.0.2 255.255.0.0 r2(config-if)#no sh r2(config)#int e0/1 r2(config-if)#ip add 111.112.0.1 255.255.0.0 r2(config-if)#no sh r2(config-if)#exit r2(config)#router ospf 10 r2(config-router)#network 111.111.0.0 0.0.255.255 area 1 r2(config-router)#network 111.112.0.0 0.0.255.255 area 0 r2(config-router)#end r2#show ip route 第三步:r3上的配置。 r3(config)#int e0/1 r3(config-if)#ip add 111.112.0.2 255.255.0.0 r3(config-if)#no sh r3(config-if)#int e0/0 r3(config-if)#ip add 111.113.0.1 255.255.0.0 r3(config-if)#no sh r3(config-router)#router ospf 10 r3(config-router)#network 111.112.0.0 0.0.255.255 area 0 r3(config-router)#exit r3(config)#router rip r3(config-router)#network 111.0.0.0 r3(config-router)#version 2 r3(config-router)#no auto-summary r3(config-router)#do show ip route 第四步:r4上的配置。 r4(config)#int e0/0 r4(config-if)#ip add 111.113.0.2 255.255.0.0 r4(config-if)#no sh r4(config-if)#int e0/1 r4(config-if)#ip add 111.114.0.1 255.255.0.0 r4(config-if)#no sh r4(config)#router rip r4(config-router)#network 111.0.0.0 r4(config-router)#version 2 r4(config-router)#no auto-summary r4(config-router)#do show ip route (以上是多区域的ospf的配置。)注:此时ospf协议区域内的路由器不能学习到rip协议区域的路由条目;rip协议区域的路由器不能学习到ospf协议区域内的路由条目。 第五步:配置不同协议之间的互学路由条目时在r3路由器上的配置。(r3位于两协议交界处。) r3(config)#router ospf 10 r3(config-router)#redistribute rip metric 2000 subnets r3(config-router)#exit r3(config)#router rip r3(config-router)#redistribute ospf 10 metric 5 r3(config-router)#do show ip route
第六步:把area1配置成末梢区域时r1和r2上的配置。(所有的area1中的路由器都要配置,包括边界路由器。) R1上的配置: r1(config)#router ospf 10 r1(config-router)#area 1 stub r1(config-router)#do show ip route 注:此时路由表中没有了rip协议区域的网段了,并增加了一条默认路由。 R2上的配置: R2(config)#router ospf 10 R2(config-router)#area 1 stub 第七步:把area1配置成完全末梢区域时r2上的配置。(因为只在边界路由器上做配置。) R2上的配置: R2(config)#router ospf 10 r2(config-router)#area 1 stub no-summary r1上查看路由表: r1(config-router)#do show ip route 注:与处于末梢区域时相比,r1的路由条目少了 这一条目,说明不止外部路由条目学习不到了连本自治系统的不同区域间的路目也学习不到了。 第八步:验证。 r1(config-router)#do ping 111.114.0.1 第九步:ospf多区域配置常用的检查命令。 Show ip route (查看路由表信息) Show ip route ospf (只查看ospf学习到的路由) Show ip protocol (查看ospf协议配置信息) Show ip ospf (查看在路由器上ospf是如何配置的和abr) Show ip ospf database (查看LSDB内的所有LSA数据信息) Show ip ospf interface (接口上OSPF配置的信息,进程ID,R-ID,COST,priority,邻居的数量) Show ip ospf neighbor (查看ospf邻居和邻接的状态) Show ip ospf neighbor detail(查看ospf邻居的详细信息包括DR,BDR) Debug ip ospf adj (查看路由器“邻接”的整个过程) Debug ip ospf packet (查看每个ospf数据包的信息包含版本,R-ID) Clear ip route (清空路由表) |


 424
424

 被折叠的 条评论
为什么被折叠?
被折叠的 条评论
为什么被折叠?
 到【灌水乐园】发言


