


这段时间由于项目需要,要做银行卡识别。所以从很早开始就开始了解opencv了,而项目的界面框架主要是qml实现的,
这时就需要将opencv封装成qml控件。我们都知道qml是c++的扩展,opencv原本就是用c++实现的,所以这个并不是很难。
qml绘图的基元素是Item,Item是由QuickItem实现的。所以这里我们应该从QuickItem入手。为简单易用,我写成了qml插件
的形式。
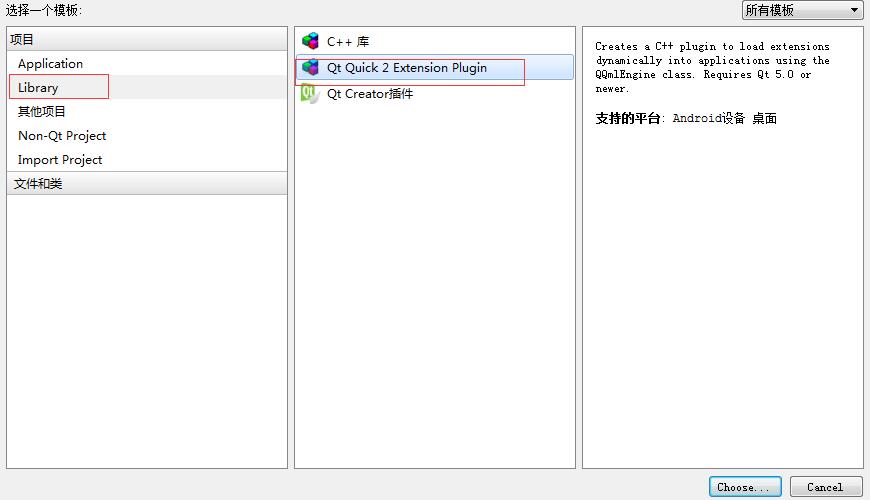
第一步:新建一个qml插件工程
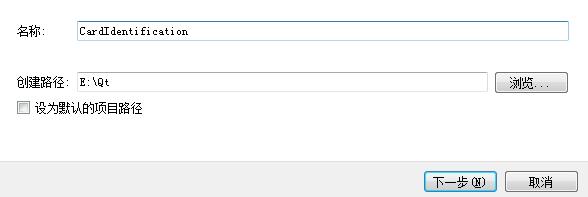
我使用的名字如下
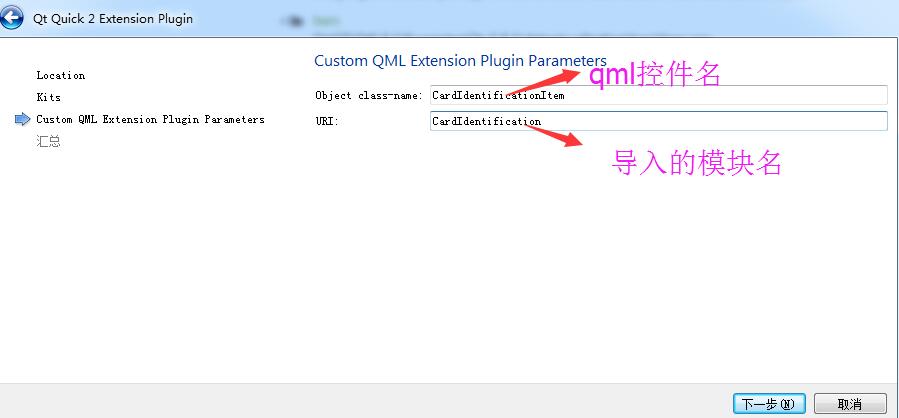
依次往后点,在下面这个界面时注意一下,就可以了
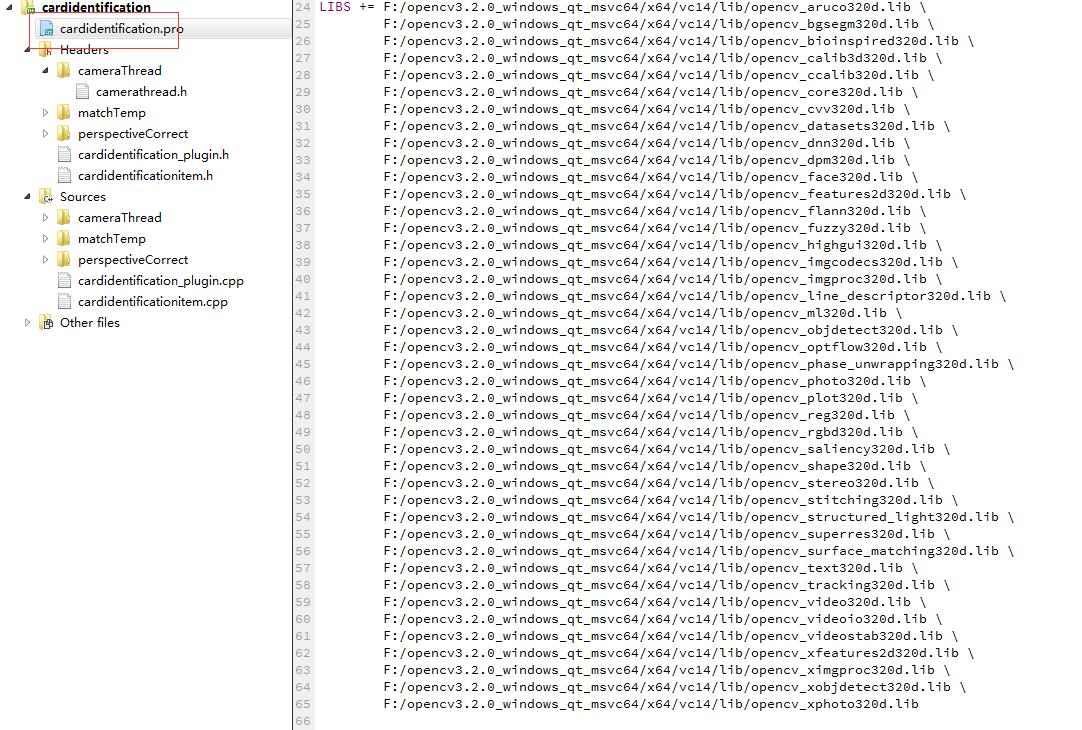
第二步:在.pro文件中导入opencv的库,我的opencv库有contrib模块,所以有点多
第三步:编写子线程代码。在打开cardidentificationitem.cpp之后,我们在构造函数中可以看到下面这些话

说明我们只要重写updatePaintNode()这个函数就可以了。我们都知道GUI线程是不能够阻塞的,所以这里应该很容易想到另起一个线程;
以信号槽的方式来实现,子线程执行opencv的操作,将图片转化后发送到主线程显示。这里将不介绍qml的基础知识,不懂的可以先到网上补
补;以下是cardidentificationitem.h
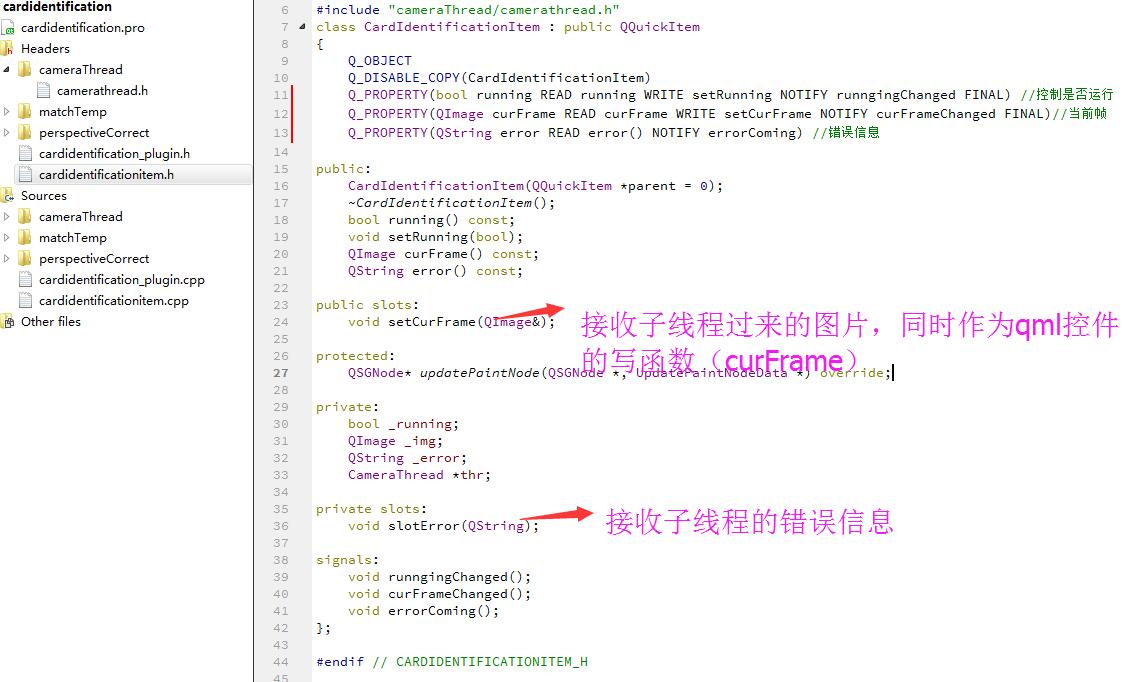
我的子线程类是CameraThread。
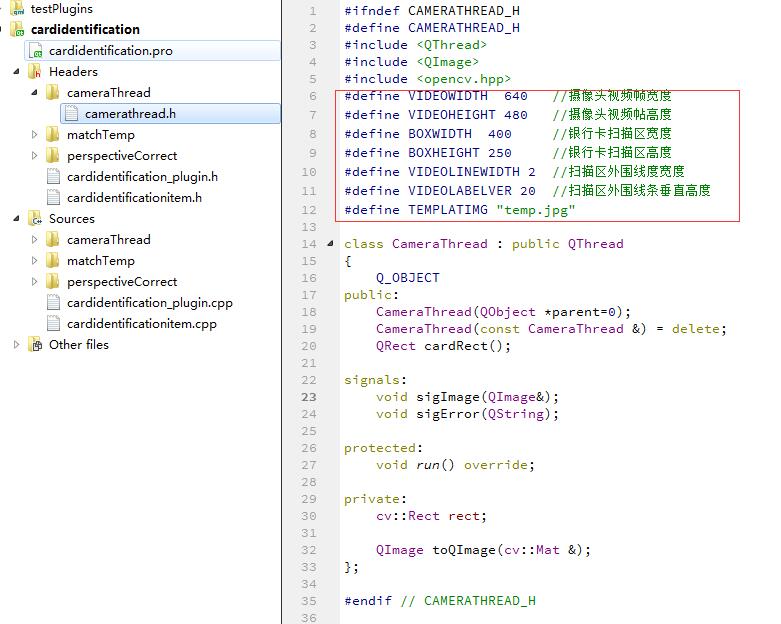
这个类比较简单,主要就是重写run()函数,上面红框部分是我自己在中心做的一个扫描显示框的一些参数和摄像头采集帧的长、宽。
为什么要加一个中心扫描框呢?那是因为我要做的是一个银行卡识别,所以加个框更好。
我们的原是图片是Mat类型要显示的话要QImage,这里我们需要有一个转换
QImage CameraThread::toQImage(Mat & srcFrom)
{
    Mat rgbFrame;
    cvtColor(srcFrom,rgbFrame,CV_BGR2RGB);
    QImage img((const uchar*)rgbFrame.data,rgbFrame.cols,rgbFrame.rows,rgbFrame.step,QImage::Format_RGB888);
    img.bits(); //深拷贝,避免线程退出内存错误
    return img;
}void CameraThread::run()
{
assert(VIDEOWIDTH > BOXWIDTH && VIDEOHEIGHT > BOXHEIGHT);
VideoCapture capture(0);
if(!capture.isOpened()){
emit sigError(QStringLiteral("打开摄像头失败,请检查是否安装摄像头设备"));
return;
}
capture.set(CV_CAP_PROP_FRAME_WIDTH,VIDEOWIDTH);
capture.set(CV_CAP_PROP_FRAME_HEIGHT,VIDEOHEIGHT);
double frameWidth = capture.get(CV_CAP_PROP_FRAME_WIDTH);
double frameHight = capture.get(CV_CAP_PROP_FRAME_HEIGHT);
int boxX = (frameWidth - BOXWIDTH)/2;
int boxY = (frameHight - BOXHEIGHT)/2;
rect = Rect(boxX,boxY,BOXWIDTH,BOXHEIGHT);
//创建掩码矩阵
Mat frame,alphaROI,RGBFrame;
//在opencv中定位文本坐标
// String text(FRAMETEXT);
// int fontScale = 1,thick=2,baseLine=0;
// Size textSize = getTextSize(text,FONT_HERSHEY_PLAIN,fontScale,thick,&baseLine);
// Point org((frameWidth- textSize.width)/2,(frameHight-textSize.height)/2);
while(!isInterruptionRequested()){
capture >> frame;
//方法一:设置银行卡矩形框以外的亮度较暗,扫描框较亮
// alphaROI = frame(Rect(0,0,frameWidth,boxY));
// alphaROI.convertTo(alphaROI,-1,0.6,0);
// alphaROI = frame(Rect(0,boxY,boxX,BOXHEIGHT));
// alphaROI.convertTo(alphaROI,-1,0.6,0);
// alphaROI = frame(Rect(boxX + BOXWIDTH,boxY,boxX,BOXHEIGHT));
// alphaROI.convertTo(alphaROI,-1,0.6,0);
// alphaROI = frame(Rect(0,boxY + BOXHEIGHT,frameWidth,boxY));
// alphaROI.convertTo(alphaROI,-1,0.6,0);
//方法二:
frame.convertTo(frame,-1,0.5,0);
alphaROI = frame(rect);
alphaROI.convertTo(alphaROI,-1,2,0);
line(frame,Point(boxX - VIDEOLINEWIDTH,boxY),Point(boxX - VIDEOLINEWIDTH,boxY + VIDEOLABELVER),Scalar(0,255,0),VIDEOLINEWIDTH);
line(frame,Point(boxX - VIDEOLINEWIDTH,boxY - VIDEOLINEWIDTH),Point(boxX + BOXWIDTH,boxY - VIDEOLINEWIDTH),Scalar(0,255,0),VIDEOLINEWIDTH);
line(frame,Point(boxX + BOXWIDTH + 1,boxY),Point(boxX + BOXWIDTH + 1,boxY + VIDEOLABELVER),Scalar(0,255,0),VIDEOLINEWIDTH);
line(frame,Point(boxX - VIDEOLINEWIDTH,boxY + BOXHEIGHT - VIDEOLABELVER),Point(boxX - VIDEOLINEWIDTH,boxY + BOXHEIGHT),Scalar(0,255,0),VIDEOLINEWIDTH);
line(frame,Point(boxX - VIDEOLINEWIDTH,boxY + BOXHEIGHT + 1),Point(boxX + BOXWIDTH,boxY + BOXHEIGHT + 1),Scalar(0,255,0),VIDEOLINEWIDTH);
line(frame,Point(boxX + BOXWIDTH + 1,boxY + BOXHEIGHT - VIDEOLABELVER),Point(boxX + BOXWIDTH + 1,boxY + BOXHEIGHT),Scalar(0,255,0),VIDEOLINEWIDTH);
//在opencv中添加文本
// putText(frame,text,org,FONT_HERSHEY_PLAIN,fontScale,Scalar(0,255,0),thick);
//画出文本所在的矩形框
// rectangle(frame, org + Point(0, baseLine),
// org + Point(textSize.width, -textSize.height),
// Scalar(0,255,0));
//画出文本除去字体粗细后的下基准线
// line(frame, org + Point(0, thick),
// org + Point(textSize.width, thick),
// Scalar(0, 0, 255));
//转换格式,并发给GUI显示
emit sigImage(toQImage(frame));
waitKey(30);
MatchTemp matchBank(alphaROI,imread(TEMPLATIMG));
Rect m_rect = matchBank.match(CV_TM_SQDIFF);
if(m_rect.width == 0){
qDebug() << QStringLiteral("请插入银行卡");
continue;
}
qDebug() << QStringLiteral("已检测到银行卡") << m_rect.x << m_rect.y;
PerspectiveCorrect perspective(alphaROI);
perspective.correct(alphaROI);
emit sigImage(toQImage(frame)); //发送给主线程
}
}CardIdentificationItem::CardIdentificationItem(QQuickItem *parent):
QQuickItem(parent)
{
// By default, QQuickItem does not draw anything. If you subclass
// QQuickItem to create a visual item, you will need to uncomment the
// following line and re-implement updatePaintNode()
// setFlag(ItemHasContents, true);
setFlag(Flag::ItemHasContents,true);
thr = new CameraThread(this);
qRegisterMetaType<QImage>("QImage&");
connect(thr,SIGNAL(sigImage(QImage&)),this,SLOT(setCurFrame(QImage&)));
connect(thr,SIGNAL(sigError(QString)),this,SLOT(slotError(QString)));
}void CardIdentificationItem::setCurFrame(QImage &imgFrom)
{
_img = imgFrom;
update();
emit curFrameChanged(); //响应qml信号
}void CardIdentificationItem::slotError(QString str)
{
_error = str;
thr->quit();
thr->wait();
emit errorComing(); //响应qml信号
}QSGNode* CardIdentificationItem::updatePaintNode(QSGNode *node, UpdatePaintNodeData *)
{
QSGSimpleTextureNode *texture = static_cast<QSGSimpleTextureNode *>(node);
if (!texture) {
texture = new QSGSimpleTextureNode();
}
if(_img.isNull()){
_img = QImage(boundingRect().size().toSize(), QImage::Format_RGB888);
}
QSGTexture *sgTexture = window()->createTextureFromImage(_img.scaled(boundingRect().size().toSize()));
if(sgTexture){
QSGTexture *tt = texture->texture();
if(tt){
tt->deleteLater();
}
texture->setRect(boundingRect());
texture->setTexture(sgTexture);
}
return texture;
}void CardIdentificationItem::setRunning(bool flag)
{
_running = flag;
if(_running)
thr->start();
else{
thr->requestInterruption();
thr->wait();
}
emit runngingChanged();
}CardIdentificationItem::~CardIdentificationItem()
{
thr->requestInterruption();
thr->wait();
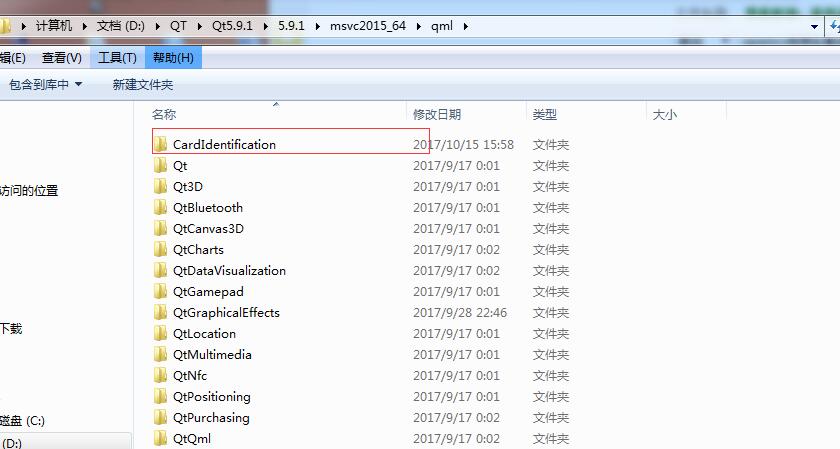
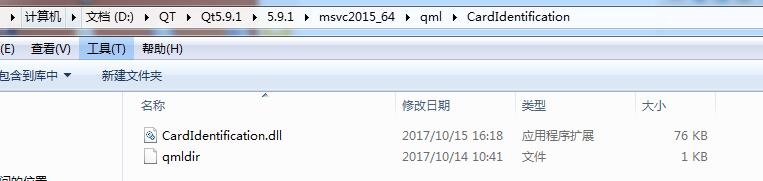
}第六步:配置插件:在qt的安装路径下,找到以下路径并创建目录、复制文件
在新建的目录中,将编译生成的dll我qmldir复制过来
第七步:测试:新建一个qml UI工程,代码如下
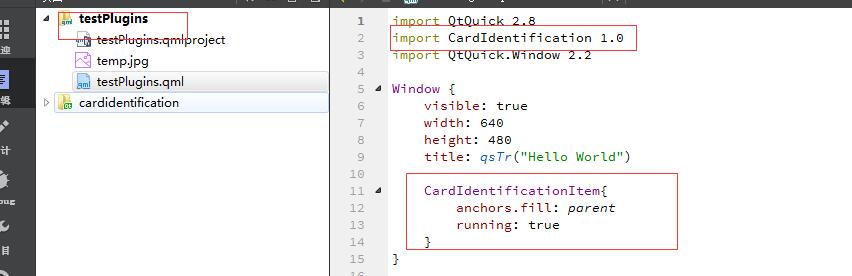
由于我要做银行卡检测,用的是模板匹配,需要一张模板图片,所以这里有一个temp.jpg
以下是运行截图。
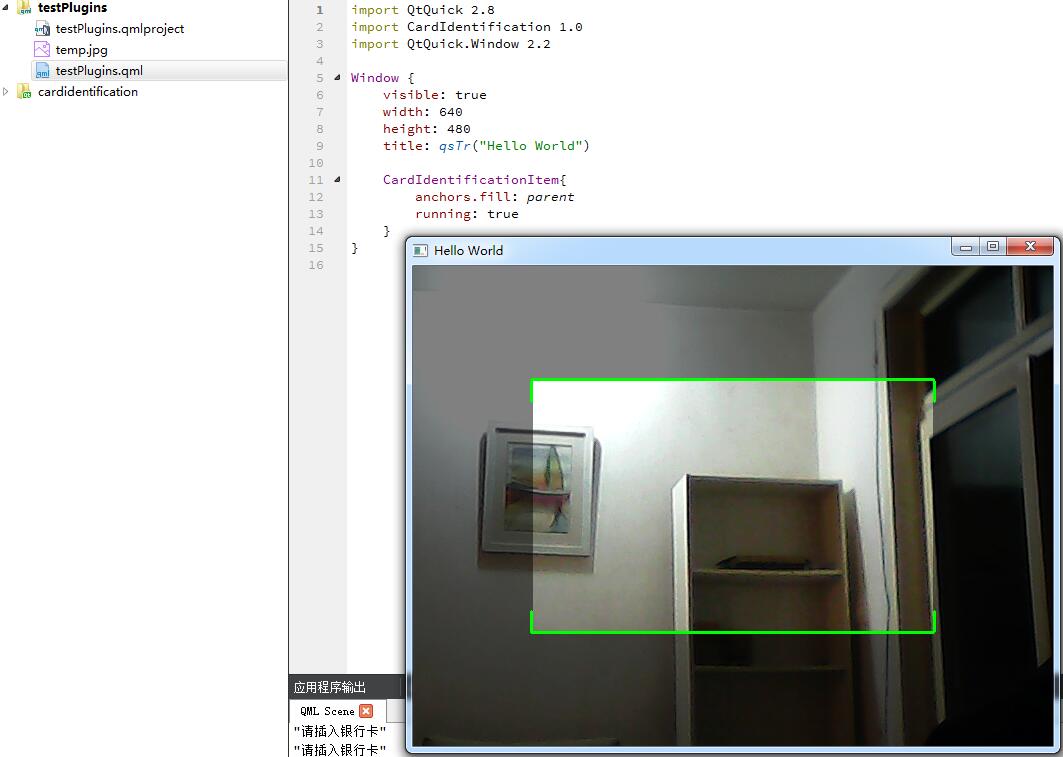
这个应用里面还有另外两个类,一个是用于模板匹配的,另外一个是图像矫正的;有兴趣的可以研究一下。
工程代码已上传到我的资源,点此下载。编译时,请将.po文件中的opencv库路径,改为你自己的opencv库路径


 5348
5348

 被折叠的 条评论
为什么被折叠?
被折叠的 条评论
为什么被折叠?
 到【灌水乐园】发言


