


 文章对比了I2C和SPI两种通信协议的特性,介绍了四脚和六脚OLED的区别,并详细展示了如何使用I2C驱动OLED显示,包括库函数的使用、汉字取模和STM32的配置。同时提到了SPI驱动OLED的基本步骤和初始化设置。
文章目录
1. I2C与SPI通信协议对比
| I2C(Inter-Integrated Circuit) | SPI(Serial Peripheral Interface) | |
|---|---|---|
| 传输方式 | 半双工 | 全双工 |
| 传输速度 | 低速,100Kbps----4Mbps | 高速,30Mbps以上 |
| 几线制 | 4线制:VCC,GND,SCL,SDA | 6/7线制:VCC,GND,SCLK(D0),MOSI(D1/SDA),DC,CS/SS |
| 主从模式 | 多主机总线,通过SDA上的地址信息锁定从机 | 只有一个主机,主机通过CS片选来确定从机 |
| 读写方式 | 读写时序比较固定统一,设备驱动编写方便 | 根据不同从机datasheet来实现读写,相对复杂一些 |
2. 四脚OLED与六脚OLED
四脚的OLED即使用I2C进行通信的接口,六脚的OLED即使用SPI/I2C进行通信的接口,也有七脚的OLED,多一个复位引脚RES.
3. I2C驱动OLED显示
通过oled.c、myiic.c等库函数的开发方式驱动oled显示中文字符、英文字符串,需要先掌握如何在keil中配置stm32工程模板,熟悉添加并使用库函数等。
oled.h & oled.c:
oled.h头文件包含了oled.c中的oled配置、控制函数声明:
void OLED_WR_Byte(unsigned dat,unsigned cmd);
void OLED_Display_On(void);
void OLED_Display_Off(void);
void OLED_Init(void);
void OLED_Clear(void);
void OLED_DrawPoint(u8 x,u8 y,u8 t);
void OLED_Fill(u8 x1,u8 y1,u8 x2,u8 y2,u8 dot);
void OLED_ShowChar(u8 x,u8 y,u8 chr,u8 Char_Size);
void OLED_ShowNum(u8 x,u8 y,u32 num,u8 len,u8 size);
void OLED_ShowString(u8 x,u8 y, u8 *p,u8 Char_Size);
void OLED_Set_Pos(unsigned char x, unsigned char y);
void OLED_ShowCHinese(u8 x,u8 y,u8 no);
void OLED_DrawBMP(unsigned char x0, unsigned char y0,unsigned char x1, unsigned char y1,unsigned char BMP[]);
void fill_picture(unsigned char fill_Data);
void OLED_Refresh_Gram(void);
void Boot_Animation(void);
void OLED_DrawCircle(u8 x0,u8 y0,u8 r);
void OLED_DrawLine(unsigned int x1, unsigned int y1, unsigned int x2,unsigned int y2);
void OLED_Write_Command(unsigned char IIC_Command);
void OLED_Write_Data(unsigned char IIC_Data);
oled.c包含了以上函数的具体封装。
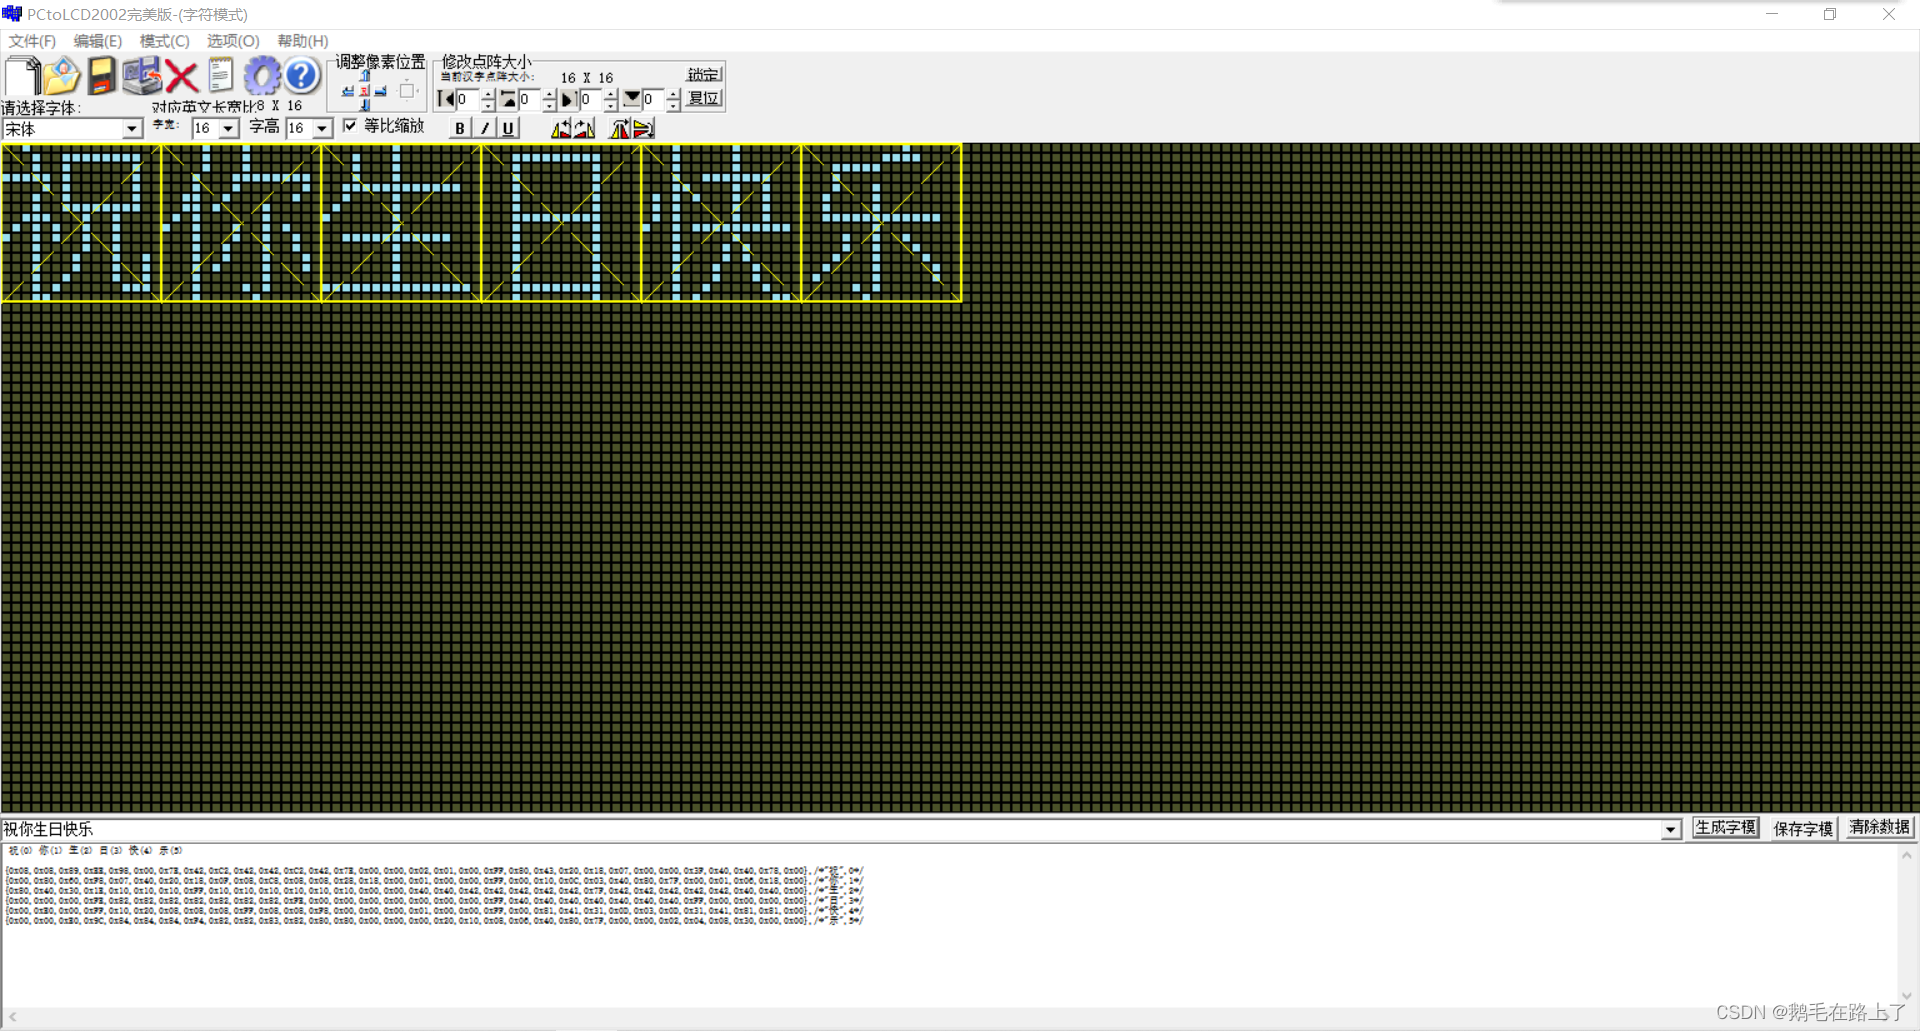
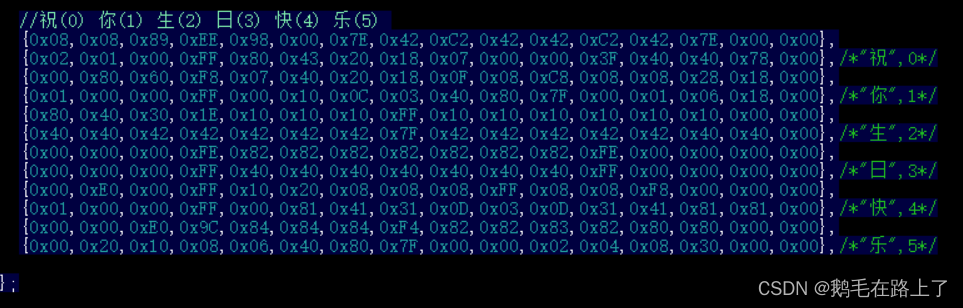
汉字取模 & oledfont.h:
Oled显示utf-8字符串可以直接使用OLED_ShowString,但要想显示汉字,则需要用字体取模软件获取输出数制,并保存在oledfont.h中:
main.c 显示示例:
int main(void)
{
	delay_init();	    	 //延时函数初始化
	USART1_Config();
	IIC_Init();
	OLED_Init();			//初始化OLED
	OLED_Clear();

	while(1)
	{
		OLED_Display_On();
		//显示16*16汉字, 第一行,第8位开始显示第一个中文字符,字体模值数据在oledfont.h中
		OLED_ShowCHinese(8,0,0);
		OLED_ShowCHinese(24,0,1);
		OLED_ShowCHinese(40,0,2);
		OLED_ShowCHinese(56,0,3);
		OLED_ShowCHinese(72,0,4);
		OLED_ShowCHinese(88,0,5);
		OLED_ShowCHinese(104,0,6);
		OLED_ShowString(0,2,"Hello,world!",16);		//显示字符串
		OLED_ShowString(20,4,"2023-02-11",16);
		OLED_ShowString(0,6,"STM32 ",16);
		OLED_ShowString(63,6,"OLED",16);
	}
}
连线方法:
通过OLED_ShowCHinese函数Go To Defination跳转至函数内部:
//显示汉字
void OLED_ShowCHinese(u8 x,u8 y,u8 no)
{
	u8 t,adder=0;
	OLED_Set_Pos(x,y);
	for(t=0;t<16;t++)
	{
		OLED_WR_Byte(Hzk[2*no][t],OLED_DATA);
		adder+=1;
	}
	OLED_Set_Pos(x,y+1);
	for(t=0;t<16;t++)
	{
		OLED_WR_Byte(Hzk[2*no+1][t],OLED_DATA);
		adder+=1;
	}
}
再Go To Defination“OLED_DATA”至myiic.h中可以定位到接口信息:SCLK连PB6,SDA连PB7,也可自行修改
/* 定义I2C总线连接的GPIO端口, 用户只需要修改下面4行代码即可任意改变SCL和SDA的引脚 */

#define	IIC_SCK_PIN		GPIO_Pin_6						/* 连接到SCK时钟线的GPIO */
#define IIC_SCK_PORT	GPIOB									/* GPIO端口 */
#define IIC_SCK_CLK		RCC_APB2Periph_GPIOB	/* GPIO端口时钟 */
#define IIC_SCL    		PBout(6)							//SCL

#define	IIC_SDA_PIN		GPIO_Pin_7						/* 连接到SDA时钟线的GPIO */
#define IIC_SDA_PORT	GPIOB									/* GPIO端口 */
#define IIC_SDA_CLK		RCC_APB2Periph_GPIOB	/* GPIO端口时钟 */
#define IIC_SDA    		PBout(7)							//SDA
#define READ_SDA   		PBin(7)								//输入SDA
4. SPI驱动OLED显示
利用库函数方式开发的main.c写法,同I2C方式驱动oled差不多,主要是走的协议不同,所以接线方式也不一样,oled初始化自然也不一样,需要了解SPI工作原理、时序图等:
//OLED的初始化——From 中景园电子
void OLED_Init(void)
{
	GPIO_InitTypeDef  GPIO_InitStructure;
 	RCC_APB2PeriphClockCmd(RCC_APB2Periph_GPIOA|RCC_APB2Periph_AFIO, ENABLE);	 //使能A端口时钟
	GPIO_PinRemapConfig(GPIO_Remap_SWJ_JTAGDisable, ENABLE);
	GPIO_InitStructure.GPIO_Pin = GPIO_Pin_0|GPIO_Pin_1|GPIO_Pin_2|GPIO_Pin_3|GPIO_Pin_4|GPIO_Pin_15;
 	GPIO_InitStructure.GPIO_Mode = GPIO_Mode_Out_PP; 		 //推挽输出
	GPIO_InitStructure.GPIO_Speed = GPIO_Speed_50MHz;//速度50MHz
 	GPIO_Init(GPIOA, &GPIO_InitStructure);	  //初始化GPIOA
 	GPIO_SetBits(GPIOA,GPIO_Pin_0|GPIO_Pin_1|GPIO_Pin_2|GPIO_Pin_3|GPIO_Pin_4|GPIO_Pin_15);

	OLED_RES_Clr();
	delay_ms(200);
	OLED_RES_Set();

	OLED_WR_Byte(0xAE,OLED_CMD);//--turn off oled panel
	OLED_WR_Byte(0x00,OLED_CMD);//---set low column address
	OLED_WR_Byte(0x10,OLED_CMD);//---set high column address
	OLED_WR_Byte(0x40,OLED_CMD);//--set start line address  Set Mapping RAM Display Start Line (0x00~0x3F)
	OLED_WR_Byte(0x81,OLED_CMD);//--set contrast control register
	OLED_WR_Byte(0xCF,OLED_CMD);// Set SEG Output Current Brightness
	OLED_WR_Byte(0xA1,OLED_CMD);//--Set SEG/Column Mapping     0xa0左右反置 0xa1正常
	OLED_WR_Byte(0xC8,OLED_CMD);//Set COM/Row Scan Direction   0xc0上下反置 0xc8正常
	OLED_WR_Byte(0xA6,OLED_CMD);//--set normal display
	OLED_WR_Byte(0xA8,OLED_CMD);//--set multiplex ratio(1 to 64)
	OLED_WR_Byte(0x3f,OLED_CMD);//--1/64 duty
	OLED_WR_Byte(0xD3,OLED_CMD);//-set display offset	Shift Mapping RAM Counter (0x00~0x3F)
	OLED_WR_Byte(0x00,OLED_CMD);//-not offset
	OLED_WR_Byte(0xd5,OLED_CMD);//--set display clock divide ratio/oscillator frequency
	OLED_WR_Byte(0x80,OLED_CMD);//--set divide ratio, Set Clock as 100 Frames/Sec
	OLED_WR_Byte(0xD9,OLED_CMD);//--set pre-charge period
	OLED_WR_Byte(0xF1,OLED_CMD);//Set Pre-Charge as 15 Clocks & Discharge as 1 Clock
	OLED_WR_Byte(0xDA,OLED_CMD);//--set com pins hardware configuration
	OLED_WR_Byte(0x12,OLED_CMD);
	OLED_WR_Byte(0xDB,OLED_CMD);//--set vcomh
	OLED_WR_Byte(0x40,OLED_CMD);//Set VCOM Deselect Level
	OLED_WR_Byte(0x20,OLED_CMD);//-Set Page Addressing Mode (0x00/0x01/0x02)
	OLED_WR_Byte(0x02,OLED_CMD);//
	OLED_WR_Byte(0x8D,OLED_CMD);//--set Charge Pump enable/disable
	OLED_WR_Byte(0x14,OLED_CMD);//--set(0x10) disable
	OLED_WR_Byte(0xA4,OLED_CMD);// Disable Entire Display On (0xa4/0xa5)
	OLED_WR_Byte(0xA6,OLED_CMD);// Disable Inverse Display On (0xa6/a7)
	OLED_Clear();
	OLED_WR_Byte(0xAF,OLED_CMD);
}


 2668
2668

 被折叠的 条评论
为什么被折叠?
被折叠的 条评论
为什么被折叠?
 到【灌水乐园】发言


