


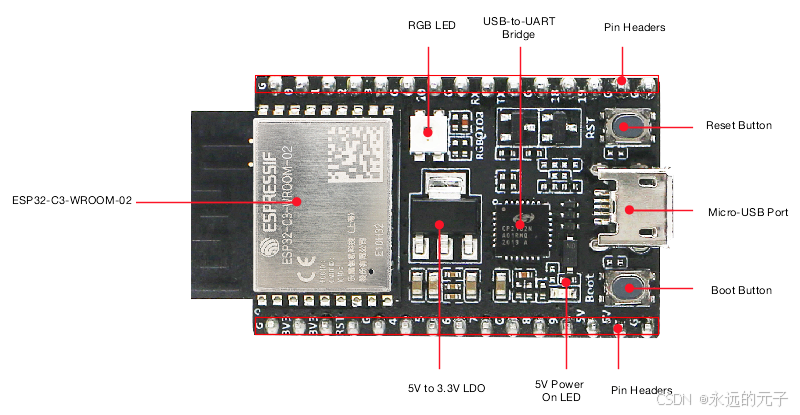
基于ESP32-C3-WROOM-02的核心模组的开发板ESP32-C3-DevKitC-02,缺少输入输出,为了调试程序方便,我们上节课讲解了OLED屏的显示,增加了输出方式,方便我们调试过程中显示一些必要的信息。今天我们讲解BLE,利用BLE通信,我们可以方便的增加输入及输出手段。
首先,我们需要对MicroPython的bluetooth模块有一些基本的了解。
MicroPython 蓝牙功能基于 bluetooth模块实现,主要支持低功耗蓝牙(BLE)协议,其功能实现与硬件平台密切相关。目前支持Central, Peripheral, Broadcaster, and Observer roles。
以下是关键要点总结:
一、模块功能与核心接口
-
BLE 对象创建
通过bluetooth.BLE()创建单例 BLE 对象,初始化蓝牙协议栈。import bluetooth ble = bluetooth.BLE() -
启动与关闭
使用active()方法控制蓝牙状态,返回当前激活状态。ble.active(True) -
角色与模式
支持 Central、Peripheral、Broadcaster、Observer 四种 BLE 角色,以及 GATT Server and Client -
BLE的配置
使用config()方法可以对BLE接口的诸多参数进行配置。ble.config(gap_name=name) -
添加中断处理事件
使用BLE.irq(),注册BLE事件的callback。
ble.irq(self.ble_irq) def ble_irq(self, event, data): global ble_msg if event == 1: #ble connected self.conn_handle, _, _ = data self.connected() elif event == 2: #ble disconnected self.advertiser() self.disconnected() elif event == 3: #write attribute buffer = self.ble.gatts_read(self.command_handle) ble_msg = buffer.decode('UTF-8').strip() -
注册service
    def register(self):
#        HR_UUID = bluetooth.UUID(0x180D)
#        HR_CHAR = (bluetooth.UUID(0x2A37), bluetooth.FLAG_READ | bluetooth.FLAG_NOTIFY,)
#        HR_SERVICE = (HR_UUID, (HR_CHAR,),)
        service_uuid = bluetooth.UUID('6E400001-B5A3-F393-E0A9-E50E24DCCA9E')
        command_uuid = (bluetooth.UUID('6E400002-B5A3-F393-E0A9-E50E24DCCA9E'),bluetooth.FLAG_WRITE)
        notify_uuid = (bluetooth.UUID('6E400003-B5A3-F393-E0A9-E50E24DCCA9E'), bluetooth.FLAG_READ | bluetooth.FLAG_NOTIFY)
        ble_services = ((service_uuid,(notify_uuid,command_uuid)),)
#        SERVICES = (HR_SERVICE, ble_services,)
#        ((hr,),(self.write_handle, self.rx,), ) = self.ble.gatts_register_services(SERVICES)
        ((self.notify_handle, self.command_handle,),  ) = self.ble.gatts_register_services(ble_services)
更多更详细的信息大家可以从 MicroPython网站上查询获取。
二、对BLE进行简单的封装
直接上代码吧,所有的知识点基本上前面都提到。
from machine import Pin,Timer
import bluetooth

ble_msg = ""

class ESP32_BLE(object):
    def __init__(self, name):
        # 获取定时器0句柄
 #       self.timer1 = Timer(0)
 #       self.led = Pin(2, Pin.OUT, value=0)
        self.conn_handle = None
        self.name = name
        self.ble = bluetooth.BLE()	#config ble.
        self.ble.active(True)
        self.ble.config(gap_name=name)	#Set the GAP device name
        self.disconnected()
        self.ble.irq(self.ble_irq)	#ble 中断处理
        self.register()		#register service
        self.advertise()		#advertise

    def connected(self):
        print("Peripheral Connected")
#       led.value(1)
#        self.timer1.deinit()

    def disconnected(self):
        print("Peripheral disconnected")
#        self.timer1.init(period=1000, mode=Timer.PERIODIC)

    # 蓝牙中断服务
    def ble_irq(self, event, data):

        global ble_msg
        if event == 1:		#ble connected
            self.conn_handle, _, _ = data
            self.connected()
        elif event == 2:		#ble disconnected
            self.advertiser()
            self.disconnected()
        elif event == 3:  	#write attribute
            buffer = self.ble.gatts_read(self.command_handle)
            ble_msg = buffer.decode('UTF-8').strip()
#            print(ble_msg)

    def register(self):
#        HR_UUID = bluetooth.UUID(0x180D)
#        HR_CHAR = (bluetooth.UUID(0x2A37), bluetooth.FLAG_READ | bluetooth.FLAG_NOTIFY,)
#        HR_SERVICE = (HR_UUID, (HR_CHAR,),)
        service_uuid = bluetooth.UUID('6E400001-B5A3-F393-E0A9-E50E24DCCA9E')
        command_uuid = (bluetooth.UUID('6E400002-B5A3-F393-E0A9-E50E24DCCA9E'),bluetooth.FLAG_WRITE)
        notify_uuid = (bluetooth.UUID('6E400003-B5A3-F393-E0A9-E50E24DCCA9E'), bluetooth.FLAG_READ | bluetooth.FLAG_NOTIFY)
        ble_services = ((service_uuid,(notify_uuid,command_uuid)),)
#        SERVICES = (HR_SERVICE, ble_services,)
#        ((hr,),(self.write_handle, self.rx,), ) = self.ble.gatts_register_services(SERVICES)
        ((self.notify_handle, self.command_handle,),  ) = self.ble.gatts_register_services(ble_services)

    def send(self, data):   #notify
#        global ble_msg
#        print(ble_msg)
        print(self.conn_handle)
        if self.conn_handle is not None:
            self.ble.gatts_notify(self.conn_handle, self.notify_handle, data + '\n')

    def get_rec_cmd(self):
        global ble_msg
        cmd = ble_msg
        ble_msg = ""
        return cmd

    def advertise(self):
        name = bytes(self.name, 'UTF-8')
        adv_data = bytearray('\x02\x01\x02', 'UTF-8') + bytearray((len(name) + 1, 0x09), 'UTF-8') + name
        self.ble.gap_advertise(100, adv_data)
有兴趣的朋友可以把更多的实用功能封到这个模块中。
三、BLE应用实例
接下来,我们讲解一个BLE的应用实例,这里我们通过BLE控制开发板上的WS2812灯珠。
对WS2812灯珠的控制代码的分析请参考:MicroPython 开发ESP32应用教程 之 开发板硬件介绍及ESP32 的GPIO操作讲解
如果想要了解更多WS2812灯珠的控制原理,请参考:
MicroPython 开发基于ESP32S3控制ws2812灯带的程序
我们这里,主要在ESP32 的GPIO操作讲解一文使用代码的基础上,增加了蓝牙控制及灯珠状态上传的功能:
        command = ble.get_rec_cmd()
        if command == 'LED ON':
            ws2812_status = WS2812_POWERON
#            print(ble.ble_msg)
            ble.send('LED is ON.')
#            ble.ble_msg = ''
        # 关闭LED
        elif command == 'LED OFF':
            ws2812_status = WS2812_POWEROFF
    #        print('LED is OFF.')
            ble.send('LED is OFF.')
#            ble.ble_msg = ''


    ble = ESP32_BLE("913 AI App")
    while True:

        if (p9.value() == 0):	#是否有按键?有,切换RGB灯的状态
            ws2812_status ^= 1
            while True:
                if (p9.value() == 1):  #等待按键释放
                    break
        if ws2812_status == WS2812_POWEROFF:
            ble.send('LED is OFF.')
            np.fill((0,0,0))
            np.write()   #关闭RGB灯
        else :
            ble.send('LED is ON')
            offset = ws2812_LED_On(offset)
            np.write()   #点亮RGB灯
完整代码请参考:ESP32C3硬件SPI驱动OLED屏,支持中文字符显示,蓝牙控制WS2812灯珠并上传灯珠状态资源-CSDN文库


 5062
5062

 被折叠的 条评论
为什么被折叠?
被折叠的 条评论
为什么被折叠?
 到【灌水乐园】发言


