


引言
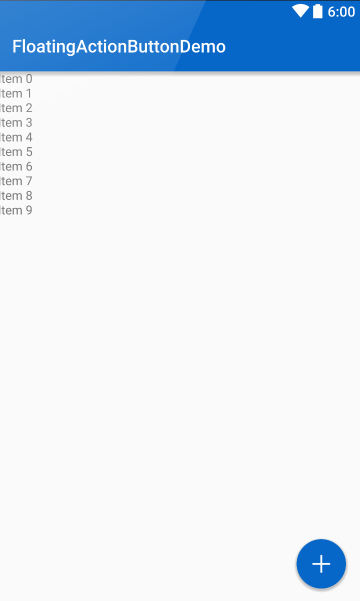
如果说前面提到的TextInputLayout、SnackBar的应用还不是很常见的话,那么今天提到的FloatingActionButton绝对是一个随处可见的Material Design控件了,无论是我们常用的知乎、印象笔记或者是可爱的谷歌全家桶套装都可以见到FloatingActionButton的身影,今天就来说说FloatingActionButton。
关于使用
其实我相信很多人都用过了Material Design控件了,但是还是要说一下,毕竟有些人接触的晚一些,一些人接触的早一些,先从最简单的使用看起:
| 属性值 | 作用 |
|---|---|
| app:elevation | 设置FAB未按下时的景深 |
| app:pressedTranslationZ | 设置FAB按下时的景深 |
| app:fabSize | 设置FAB的大小,默认只有normal和mini两种选项 |
| app:borderWidth | 设置FAB的边框宽度 |
| android:src | 设置FAB的drawaber |
| app:rippleColor | 设置FAB按下时的背景色 |
| app:backgroundTint | 设置FAB未按下时的背景色 |
| app:layout_anchor | 设置FAB的锚点 |
| app:layout_anchorGravity | 设置FAB相对于锚点的位置 |
| app:layout_behavior | 设置FAB的Behavior行为属性 |
大部分的属性还是很好理解的,这里要提一下几个注意的点
- app:borderWidth :这个一般设置为0dp,不然的话在4.1的sdk上FAB会显示为正方形,而且在5.0以后的sdk没有阴影效果
- app:rippleColor:当我使用
com.android.support:design:23.2.0的时候这个属性会失效,建议使用最新的com.android.support:design:23.3.0'或者适当的降低版本 - android:layout_marginBottom :由于FAB 支持库仍然存在一些 bug,在 Kitkat 和 Lollipop 中分别运行示例代码,可以看到如下结果:
Lollipop 中的 FAB:

Kitkat 中的 FAB:

很容易看出,Lollipop 中存在边缘显示的问题。为了解决此问题,API21+ 的版本统一定义底部与右边缘空白为 16dp,Lollipop 以下版本统一设置为 0dp.解决办法:
values/dimens.xml
<dimen name="fab_margin_right">0dp</dimen>
<dimen name="fab_margin_bottom">0dp</dimen>
values-v21/dimens.xml
<dimen name="fab_margin_right">16dp</dimen>
<dimen name="fab_margin_bottom">16dp</dimen>
布局文件的 FAB 中,也设置相应的值:
<android.support.design.widget.FloatingActionButton
    ...
    ...
    android:layout_marginBottom="@dimen/fab_margin_bottom"
android:layout_marginRight="@dimen/fab_margin_right"/>- app:layout_anchor:和
app:layout_anchorGravity属性一起搭配使用,可以做出不同的效果:
最简单的使用
 <android.support.design.widget.FloatingActionButton
        ...
        ...
        app:layout_anchor="@id/mRecycleView"
        app:layout_anchorGravity="bottom|right|end"
        ...
         />
更酷炫的效果
  <android.support.design.widget.FloatingActionButton
        ...
        app:layout_anchor="@id/collapsingToolbarLayout"
        app:layout_anchorGravity="bottom|center"
        ...
/> 
可以看出我们只要使用app:layout_anchor属性设置一个控件作为FAB的锚,然后通过app:layout_anchorGravity 属性放置FAB在这个相对的锚的位置,就能做出你想要的效果。
- app:layout_behavior:这个属性接下来会重点讲,也就是这个属性成就了Material Design的众多动画交互效果,我们熟知的SnackBar配合FAB可以侧滑以及APPBarLayout等动画效果都是通过Behavior做出来的
自定义Behavior
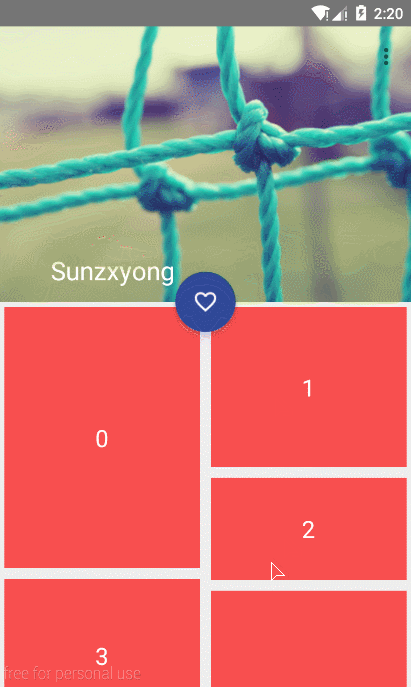
如果你还记得这张图的话:

或者说你见过这种交互效果:

其实这些都是通过Behavior这个类做出来的,以上的两种动画都是默认自带的Behavior,在CoordinatorLayout 内部有对Behavior类的描述:
/**
     * Interaction behavior plugin for child views of {@link CoordinatorLayout}.
     *
     * <p>A Behavior implements one or more interactions that a user can take on a child view.
     * These interactions may include drags, swipes, flings, or any other gestures.</p>
     *
     * @param <V> The View type that this Behavior operates on
     */
    public static abstract class Behavior<V extends View> {
可以看到这是一个抽象类,我们可以在各个Material Design去实现这个类,这里提到FAB,我们可以找一下FAB中的默认Behavior交互的实现:
 /**
     * Behavior designed for use with {@link FloatingActionButton} instances. It's main function
     * is to move {@link FloatingActionButton} views so that any displayed {@link Snackbar}s do
     * not cover them.
     */
    public static class Behavior extends CoordinatorLayout.Behavior<FloatingActionButton> {
        // We only support the FAB <> Snackbar shift movement on Honeycomb and above. This is
        // because we can use view translation properties which greatly simplifies the code.
        private static final boolean SNACKBAR_BEHAVIOR_ENABLED = Build.VERSION.SDK_INT >= 11;
这里只贴出一部分,如果英文不差的话看得懂注释的意思:大致就是说我们这里只提供API 11以上的Snackbar和FAB的运动交互效果,也就是我们上面动图中看到的效果:当出现了一个SnackBar时候,FAB会自动向上移动一段距离,当SnackBar消失的时候FAB会回到原来位置,那么如何定义一个属于我们自己的Behavior,先来看看需要用到的知识:
其实细分的话有两种情况:
1、当一个View的变化依赖于另一个View的尺寸、位置等变化的时候,我们只需要关注以下两种方法:
 * @param parent 第一个参数不用解释吧
 * @param 你要依赖别的View的那个View
 * @param dependency 你要依赖的View
 * @return return 如果找到了你依赖的那个View就返回true
         * @see #onDependentViewChanged(CoordinatorLayout, android.view.View, android.view.View)
         */
        public boolean layoutDependsOn(CoordinatorLayout parent, V child, View dependency) {
            return false;
        }
* @param parent 同上,不解释
* @param child 同上
* @param dependency 同上
* @return 如果这个Behavior改变了child的位置或者尺寸大小就返回true
*/
public boolean onDependentViewChanged(CoordinatorLayout parent, V child, View dependency) {
return false;
}其实FAB里面就是实现了这两种方法来与SnackBar交互的,看一下标准写法:
 @Override
        public boolean layoutDependsOn(CoordinatorLayout parent,
                FloatingActionButton child, View dependency) {
            // We're dependent on all SnackbarLayouts (if enabled)
            return SNACKBAR_BEHAVIOR_ENABLED && dependency instanceof Snackbar.SnackbarLayout;
        }
        ...
        ...
        @Override
        public boolean onDependentViewChanged(CoordinatorLayout parent, FloatingActionButton child,
                View dependency) {
            if (dependency instanceof Snackbar.SnackbarLayout) {
                updateFabTranslationForSnackbar(parent, child, dependency);
            } else if (dependency instanceof AppBarLayout) {
                // If we're depending on an AppBarLayout we will show/hide it automatically
                // if the FAB is anchored to the AppBarLayout
                updateFabVisibility(parent, (AppBarLayout) dependency, child);
            }
            return false;
        }
2、另一种情况是当一个View监听CoordinatorLayout内部滑动的View进行交互时,我们需要关注的方法稍微多一点,这些方法都写在了NestedScrollingParent接口里面,而且CoordinatorLayout已经对这个接口有了默认实现:
onStartNestedScroll
         * @param coordinatorLayout the CoordinatorLayout parent of the view this Behavior is
         *                          associated with
         * @param child the child view of the CoordinatorLayout this Behavior is associated with
         * @param directTargetChild the child view of the CoordinatorLayout that either is or
         *                          contains the target of the nested scroll operation
         * @param target the descendant view of the CoordinatorLayout initiating the nested scroll
         * @param nestedScrollAxes the axes that this nested scroll applies to. See
         *                         {@link ViewCompat#SCROLL_AXIS_HORIZONTAL},
         *                         {@link ViewCompat#SCROLL_AXIS_VERTICAL} 滑动时是横轴和纵轴
         * @return true if the Behavior wishes to accept this nested scroll
         *
         * @see NestedScrollingParent#onStartNestedScroll(View, View, int)
         */
        public boolean onStartNestedScroll(CoordinatorLayout coordinatorLayout,
                V child, View directTargetChild, View target, int nestedScrollAxes) {
            return false;
        }
onNestedPreScroll
         * @param coordinatorLayout the CoordinatorLayout parent of the view this Behavior is
         *                          associated with
         * @param child the child view of the CoordinatorLayout this Behavior is associated with
         * @param target the descendant view of the CoordinatorLayout performing the nested scroll
         * @param dx the raw horizontal number of pixels that the user attempted to scroll
         * @param dy the raw vertical number of pixels that the user attempted to scroll
         * @param consumed out parameter. consumed[0] should be set to the distance of dx that
         *                 was consumed, consumed[1] should be set to the distance of dy that
         *                 was consumed
         *
         * @see NestedScrollingParent#onNestedPreScroll(View, int, int, int[])
         */
        public void onNestedPreScroll(CoordinatorLayout coordinatorLayout, V child, View target,
                int dx, int dy, int[] consumed) {
            // Do nothing
        }
onNestedFling
         * @param coordinatorLayout the CoordinatorLayout parent of the view this Behavior is
         *                          associated with
         * @param child the child view of the CoordinatorLayout this Behavior is associated with
         * @param target the descendant view of the CoordinatorLayout performing the nested scroll
         * @param velocityX horizontal velocity of the attempted fling
         * @param velocityY vertical velocity of the attempted fling
         * @param consumed true if the nested child view consumed the fling
         * @return true if the Behavior consumed the fling
         *
         * @see NestedScrollingParent#onNestedFling(View, float, float, boolean)
         */
        public boolean onNestedFling(CoordinatorLayout coordinatorLayout, V child, View target,
                float velocityX, float velocityY, boolean consumed) {
            return false;
        }
onNestedScroll
         * @param coordinatorLayout the CoordinatorLayout parent of the view this Behavior is
         *                          associated with
         * @param child the child view of the CoordinatorLayout this Behavior is associated with
         * @param target the descendant view of the CoordinatorLayout performing the nested scroll
         * @param dxConsumed horizontal pixels consumed by the target's own scrolling operation
         * @param dyConsumed vertical pixels consumed by the target's own scrolling operation
         * @param dxUnconsumed horizontal pixels not consumed by the target's own scrolling
         *                     operation, but requested by the user
         * @param dyUnconsumed vertical pixels not consumed by the target's own scrolling operation,
         *                     but requested by the user
         *
         * @see NestedScrollingParent#onNestedScroll(View, int, int, int, int)
         */
        public void onNestedScroll(CoordinatorLayout coordinatorLayout, V child, View target,
                int dxConsumed, int dyConsumed, int dxUnconsumed, int dyUnconsumed) {
            // Do nothing
        }
如果是码农的话上面的英文注释应该不难吧,这四个方法的区别如下:
onStartNestedScroll :当你想要初始化一个滑动的时候调用
onNestedPreScroll 和onNestedScroll:存在着两个方法的原因是一些Behaviors(比如和AppBarLayout使用的)可能会消费掉部分滚动事件,我们可以在onNestedPreScroll方法内部计算需要滚动的距离,具体的话请看这里
onNestedScroll:当target正尝试滑动或者已经滑动时候调用这个方法
onNestedFling:看到Fling就明白是这是Fling情况下调用的方法,Fling最直观的体现是你滑动一个ListView时松手的时候ListView还会因为惯性自动滑动一小段距离
这么看可能太笼统了,看一下这一类Behavior的实际体现,我们自己自定义一个Behavior:
public class FadeBehavior extends FloatingActionButton.Behavior {


    /**
     * 因为是在XML中使用app:layout_behavior定义静态的这种行为,
     * 必须实现一个构造函数使布局的效果能够正常工作。
     * 否则 Could not inflate Behavior subclass error messages.
     * @param context
     * @param attrs
     */
    public FadeBehavior(Context context, AttributeSet attrs) {
        super();
    }

    /**
     * 处理垂直方向上的滚动事件
     *
     *  @param coordinatorLayout
     *  @param child
     *  @param directTargetChild
     *  @param target
     *  @param nestedScrollAxes
     *  @return
     */
    @Override
    public boolean onStartNestedScroll(CoordinatorLayout coordinatorLayout,
                                       FloatingActionButton child, View directTargetChild, View target, int nestedScrollAxes) {

        // Ensure we react to vertical scrolling
        return nestedScrollAxes == ViewCompat.SCROLL_AXIS_VERTICAL ||
                super.onStartNestedScroll(coordinatorLayout, child, directTargetChild, target,
                        nestedScrollAxes);
    }

    /**
     * 检查Y的位置,并决定按钮是否动画进入或退出
     * @param coordinatorLayout
     * @param child
     * @param target
     * @param dxConsumed
     * @param dyConsumed
     * @param dxUnconsumed
     * @param dyUnconsumed
     */
    @Override
    public void onNestedScroll(CoordinatorLayout coordinatorLayout, FloatingActionButton child,
                               View target, int dxConsumed, int dyConsumed, int dxUnconsumed, int dyUnconsumed) {
        super.onNestedScroll(coordinatorLayout, child, target, dxConsumed, dyConsumed, dxUnconsumed,
                dyUnconsumed);

        if (dyConsumed > 0 && child.getVisibility() == View.VISIBLE) {
            // User scrolled down and the FAB is currently visible -> hide the FAB
            child.hide();
        } else if (dyConsumed < 0 && child.getVisibility() != View.VISIBLE) {
            // User scrolled up and the FAB is currently not visible -> show the FAB
            child.show();
        }
    }
}
这里继承了FAB的Behavior写了一个我们自己的实现,注意实现自己的Behavior的时候一定要重写两个参数的构造方法,因为CoordinatorLayout会从我们在XML中定义的app:layout_behavior属性去找这个Behavior,了解自定义View的对这个应该不会陌生,一般的写法是:
app:layout_behavior=".FadeBehavior "在查资料的过程中发现很多人把自定义Behavior类所在的包名也写进去了,其实亲测没必要这样做,而且CoordinatorLayout里面也有专门的方法去解析:
static Behavior parseBehavior(Context context, AttributeSet attrs, String name) {
        if (TextUtils.isEmpty(name)) {
            return null;
        }

        final String fullName;
        if (name.startsWith(".")) {
            // Relative to the app package. Prepend the app package name.
            fullName = context.getPackageName() + name;
        } else if (name.indexOf('.') >= 0) {
            // Fully qualified package name.
            fullName = name;
        } else {
            // Assume stock behavior in this package (if we have one)
            fullName = !TextUtils.isEmpty(WIDGET_PACKAGE_NAME)
                    ? (WIDGET_PACKAGE_NAME + '.' + name)
                    : name;
        }

        try {
            Map<String, Constructor<Behavior>> constructors = sConstructors.get();
            if (constructors == null) {
                constructors = new HashMap<>();
                sConstructors.set(constructors);
            }
            Constructor<Behavior> c = constructors.get(fullName);
            if (c == null) {
                final Class<Behavior> clazz = (Class<Behavior>) Class.forName(fullName, true,
                        context.getClassLoader());
                c = clazz.getConstructor(CONSTRUCTOR_PARAMS);
                c.setAccessible(true);
                constructors.put(fullName, c);
            }
            return c.newInstance(context, attrs);
        } catch (Exception e) {
            throw new RuntimeException("Could not inflate Behavior subclass " + fullName, e);
        }
    }
可以看到用这种方式的系统会自动给我们加上包名,写太多反而显的累赘,这个自定义Behavior应该很好理解,效果就是随着RecycleView的滑动FAB会隐藏/显示,是一个很常见的效果:

只要向上滚动FAB就会消失,向下滚动FAB就是显示,这里要注意的是FAB可以与RecycleView形成这种效果,但是暂时并不支持ListView,没关系,反正RecycleView当成ListView来用就好,接下来仿照实现知乎的FAB效果的实现,先看一下知乎的效果:

可以很清楚的看到FAB随着RecycleView的滑动呈现出滚动推出的效果,并且点击FAB会出现旋转效果并且弹出一个蒙版,我们可以先自定义一个用于执行FAB旋转的Behavior,可以看到这里FAB是逆时针旋转135度,那么代码就可以这么写:
public class RotateBehavior extends CoordinatorLayout.Behavior<FloatingActionButton> {
    private static final String TAG = RotateBehavior.class.getSimpleName();

    public RotateBehavior() {

    }

    public RotateBehavior(Context context, AttributeSet attrs) {
        super(context, attrs);
    }

    @Override
    public boolean layoutDependsOn(CoordinatorLayout parent, FloatingActionButton child, View dependency) {
        return dependency instanceof Snackbar.SnackbarLayout;
    }

    @Override
    public boolean onDependentViewChanged(CoordinatorLayout parent, FloatingActionButton child, View dependency) {
        float translationY = getFabTranslationYForSnackBar(parent, child);
        float percentComplete = -translationY / dependency.getHeight();
        child.setRotation(-135 * percentComplete);
        child.setTranslationY(translationY);
        return true;
    }

    private float getFabTranslationYForSnackBar(CoordinatorLayout parent,
                                                FloatingActionButton fab) {
        float minOffset = 0;
        final List<View> dependencies = parent.getDependencies(fab);
        for (int i = 0, z = dependencies.size(); i < z; i++) {
            final View view = dependencies.get(i);
            if (view instanceof Snackbar.SnackbarLayout && parent.doViewsOverlap(fab, view)) {
                //view.getHeight()固定为144
                //ViewCompat.getTranslationY(view)从144-0,再从0-144
                minOffset = Math.min(minOffset,
                        ViewCompat.getTranslationY(view) - view.getHeight());
                Log.d("TranslationY",ViewCompat.getTranslationY(view)+"");
                Log.d("Height",view.getHeight()+"");
            }
        }

        return minOffset;
    }
}
这里可能就这段代码比较难理解:
minOffset = Math.min(minOffset,
ViewCompat.getTranslationY(view) - view.getHeight());我在上面打了两个Log,分别得出了ViewCompat.getTranslationY(view) 和view.getHeight() ,这样看代码就比较容易看懂,但是为什么ViewCompat.getTranslationY(view) 是正数呢,这里的的View我们都知道指的是SnackBar,我们都知道向上移动的话getTranslationY 应该是负数啊,其实SnackBar的源代码中有一个这样的动作:
ViewCompat.setTranslationY(mView, mView.getHeight());
            ViewCompat.animate(mView)
                    .translationY(0f)
                    .setInterpolator(FAST_OUT_SLOW_IN_INTERPOLATOR)
                    .setDuration(ANIMATION_DURATION)
也就是说SnackBar一开始就向下移动了mView.getHeight()的长度,当SnackBar出现的时候只是向着它原来的位置移动,本质上还是相当于从它原来的位置移动了一段距离,只是这个距离随着SnackBar向上浮动的越来越多而变得越来越小,直至回到原来的位置,这么说应该可以理解了,接下来我们在XML文件中加入一个TextView作为蒙版:
    <TextView
        android:id="@+id/hide"
        android:layout_width="match_parent"
        android:layout_height="match_parent"
        android:background="#ffff"
        android:visibility="gone" />
因为CoordinatorLayout相当于帧布局是一层一层叠加的所以这个蒙版放在RecycleView和FAB中间,整个布局代码:
<?xml version="1.0" encoding="utf-8"?>
<android.support.design.widget.CoordinatorLayout xmlns:android="http://schemas.android.com/apk/res/android"
    xmlns:app="http://schemas.android.com/apk/res-auto"
    android:id="@+id/coor"
    android:layout_width="match_parent"
    android:layout_height="match_parent">

    <android.support.v7.widget.RecyclerView
        android:id="@+id/mRecycleView"
        android:layout_width="match_parent"
        android:layout_height="match_parent">

    </android.support.v7.widget.RecyclerView>

    <TextView
        android:id="@+id/hide"
        android:layout_width="match_parent"
        android:layout_height="match_parent"
        android:background="#ffff"
        android:visibility="gone" />

    <android.support.design.widget.FloatingActionButton
        android:id="@+id/fab"
        android:layout_width="wrap_content"
        android:layout_height="wrap_content"
        android:layout_marginBottom="@dimen/fab_margin_bottom"
        android:layout_marginEnd="@dimen/fab_margin_right"
        android:src="@mipmap/plus"
        app:backgroundTint="#0767C8"
        app:borderWidth="0dp"
        app:elevation="6dp"
        app:fabSize="normal"
        app:layout_anchor="@id/mRecycleView"
        app:layout_anchorGravity="bottom|right|end"
        app:layout_behavior=".FadeBehavior"
        app:pressedTranslationZ="12dp"
        app:rippleColor="#0767C8" />

</android.support.design.widget.CoordinatorLayout>
看看效果:

是不是有一个很奇怪的地方,知乎的FAB并没有SnackBar弹出啊,那就说明一开始的思路错了,但是一个FAB只能设置一个app:layout_behavior ,如果我们把这个Behavior用作FAB的旋转效果那么FAB的滚动移出视图的效果就没了,所以换一种思路,用Object动画来做FAB的旋转效果:
  //开始旋转
    public void turnLeft(View v) {
        ObjectAnimator objectAnimator = ObjectAnimator.ofFloat(v, "rotation", 0, -155, -135);
        objectAnimator.setDuration(300);
        objectAnimator.setInterpolator(new AccelerateDecelerateInterpolator());
        objectAnimator.start();
        hide.setVisibility(View.VISIBLE);
        AlphaAnimation alphaAnimation = new AlphaAnimation(0, 0.75f);
        alphaAnimation.setDuration(300);
        alphaAnimation.setFillAfter(true);
        hide.startAnimation(alphaAnimation);
        hide.setClickable(true);
        isOpen = true;
    }

    //回到起始位置
    public void turnRight(View v) {
        ObjectAnimator objectAnimator = ObjectAnimator.ofFloat(v, "rotation", -135, 20, 0);
        objectAnimator.setDuration(300);
        objectAnimator.setInterpolator(new AccelerateDecelerateInterpolator());
        objectAnimator.start();
        hide.setVisibility(View.GONE);
        AlphaAnimation alphaAnimation = new AlphaAnimation(0.75f, 0);
        alphaAnimation.setDuration(300);
        alphaAnimation.setFillAfter(true);
        hide.startAnimation(alphaAnimation);
        hide.setClickable(false);
        isOpen = false;
    }
//注:hide就是TextView控件(蒙版)
然后实现FAB的滚动移出视图效果的Behavior:
public class ScrollAwareFABBehavior extends FloatingActionButton.Behavior {
    //先慢后快再慢
    private static final Interpolator INTERPOLATOR = new FastOutSlowInInterpolator();
    private boolean mIsAnimatingOut = false;

    public ScrollAwareFABBehavior(Context context, AttributeSet attrs) {
        super();
    }

    //初始条件
    @Override
    public boolean onStartNestedScroll(final CoordinatorLayout coordinatorLayout, final FloatingActionButton child,
                                       final View directTargetChild, final View target, final int nestedScrollAxes) {
        //垂直滚动
        return nestedScrollAxes == ViewCompat.SCROLL_AXIS_VERTICAL
                || super.onStartNestedScroll(coordinatorLayout, child, directTargetChild, target, nestedScrollAxes);
    }

    @Override
    public void onNestedScroll(final CoordinatorLayout coordinatorLayout, final FloatingActionButton child,
                               final View target, final int dxConsumed, final int dyConsumed,
                               final int dxUnconsumed, final int dyUnconsumed) {
        super.onNestedScroll(coordinatorLayout, child, target, dxConsumed, dyConsumed, dxUnconsumed, dyUnconsumed);
        if (dyConsumed > 0 && !this.mIsAnimatingOut && child.getVisibility() == View.VISIBLE) {
            // User scrolled down and the FAB is currently visible -> hide the FAB
            animateOut(child);
        } else if (dyConsumed < 0 && child.getVisibility() != View.VISIBLE) {
            // User scrolled up and the FAB is currently not visible -> show the FAB
            animateIn(child);
        }
    }

    // Same animation that FloatingActionButton.Behavior uses to hide the FAB when the AppBarLayout exits
    private void animateOut(final FloatingActionButton button) {
        if (Build.VERSION.SDK_INT >= 14) {
            //withLayer()使动画中的某些操作变得更顺畅,加速渲染,API 14以后
            ViewCompat.animate(button).translationY(button.getHeight() + getMarginBottom(button)).setInterpolator(INTERPOLATOR).withLayer()
                    .setListener(new ViewPropertyAnimatorListener() {
                        public void onAnimationStart(View view) {
                            ScrollAwareFABBehavior.this.mIsAnimatingOut = true;
                        }

                        public void onAnimationCancel(View view) {
                            ScrollAwareFABBehavior.this.mIsAnimatingOut = false;
                        }

                        public void onAnimationEnd(View view) {
                            ScrollAwareFABBehavior.this.mIsAnimatingOut = false;
                            view.setVisibility(View.GONE);
                        }
                    }).start();
        } else {

        }
    }

    // Same animation that FloatingActionButton.Behavior uses to show the FAB when the AppBarLayout enters
    private void animateIn(FloatingActionButton button) {
        button.setVisibility(View.VISIBLE);
        if (Build.VERSION.SDK_INT >= 14) {
            ViewCompat.animate(button).translationY(0)
                    .setInterpolator(INTERPOLATOR).withLayer().setListener(null)
                    .start();
        } else {

        }
    }

    private int getMarginBottom(View v) {
        int marginBottom = 0;
        final ViewGroup.LayoutParams layoutParams = v.getLayoutParams();
        if (layoutParams instanceof ViewGroup.MarginLayoutParams) {
            marginBottom = ((ViewGroup.MarginLayoutParams) layoutParams).bottomMargin;
        }
        return marginBottom;
    }
最后实现的效果:

这里部分参考了仿知乎FloatingActionButton浮动按钮动画效果实现
至于FAB弹出的InBox这里就不去实现了,比较麻烦,可以参考第三方的实现:

写在末尾
主要参考:
浮动操作按钮的选择
FloatingActionButton.Behavior
codepath教程:浮动操作按钮详解
Design Support Library (II): Floating Action Button
CoordinatorLayout高级用法-自定义Behavior
写文章不容易,如果可以的话请给个赞


 1万+
1万+

 被折叠的 条评论
为什么被折叠?
被折叠的 条评论
为什么被折叠?
 到【灌水乐园】发言


