ios swiftui
One of the greatest powers of Apple’s iOS platform is the diversity of built-in frameworks. There are many gems to be found which provide easy-to-use but advanced functionality. One of these examples is the Vision framework which was introduced in iOS 11.
苹果iOS平台的最大功能之一就是内置框架的多样性。 有许多宝石可以提供易于使用但先进的功能。 这些示例之一是iOS 11中引入的Vision框架。
The goal we want to achieve in this tutorial is to implement an on-device text recognition app, which allows our code to work even without an internet connection. In addition, we want to be able to scan documents right from our camera feed and extract the text from there. If you think this will require a complex dark-magic machine-learning masterplan you will be proven wrong by the end of this article.
我们在本教程中要实现的目标是实现一个设备上的文本识别应用程序,该应用程序即使没有互联网连接也能使我们的代码正常工作。 此外,我们希望能够直接从相机源中扫描文档并从中提取文本。 如果您认为这需要复杂的,不可思议的机器学习总体规划,那么到本文结尾将被证明是错误的。
All of the work we’ll be doing uses built-in functionality available in iOS. We will also incorporate SwiftUI into our little project because it’s hip and cool (if you haven’t tried it: trust me on this one). So without further ado — let’s jump right in.
我们将要进行的所有工作都使用iOS中提供的内置功能。 我们还将SwiftUI合并到我们的小项目中,因为它既时尚又酷(如果您还没有尝试过的话:请相信我)。 因此,事不宜迟,让我们直接进入。
(Note: the entire code is also available in this repository on my Github)
(注意:整个代码也可以在我的Github上的此存储库中找到 )
设置我们的项目 (Setting up our project)

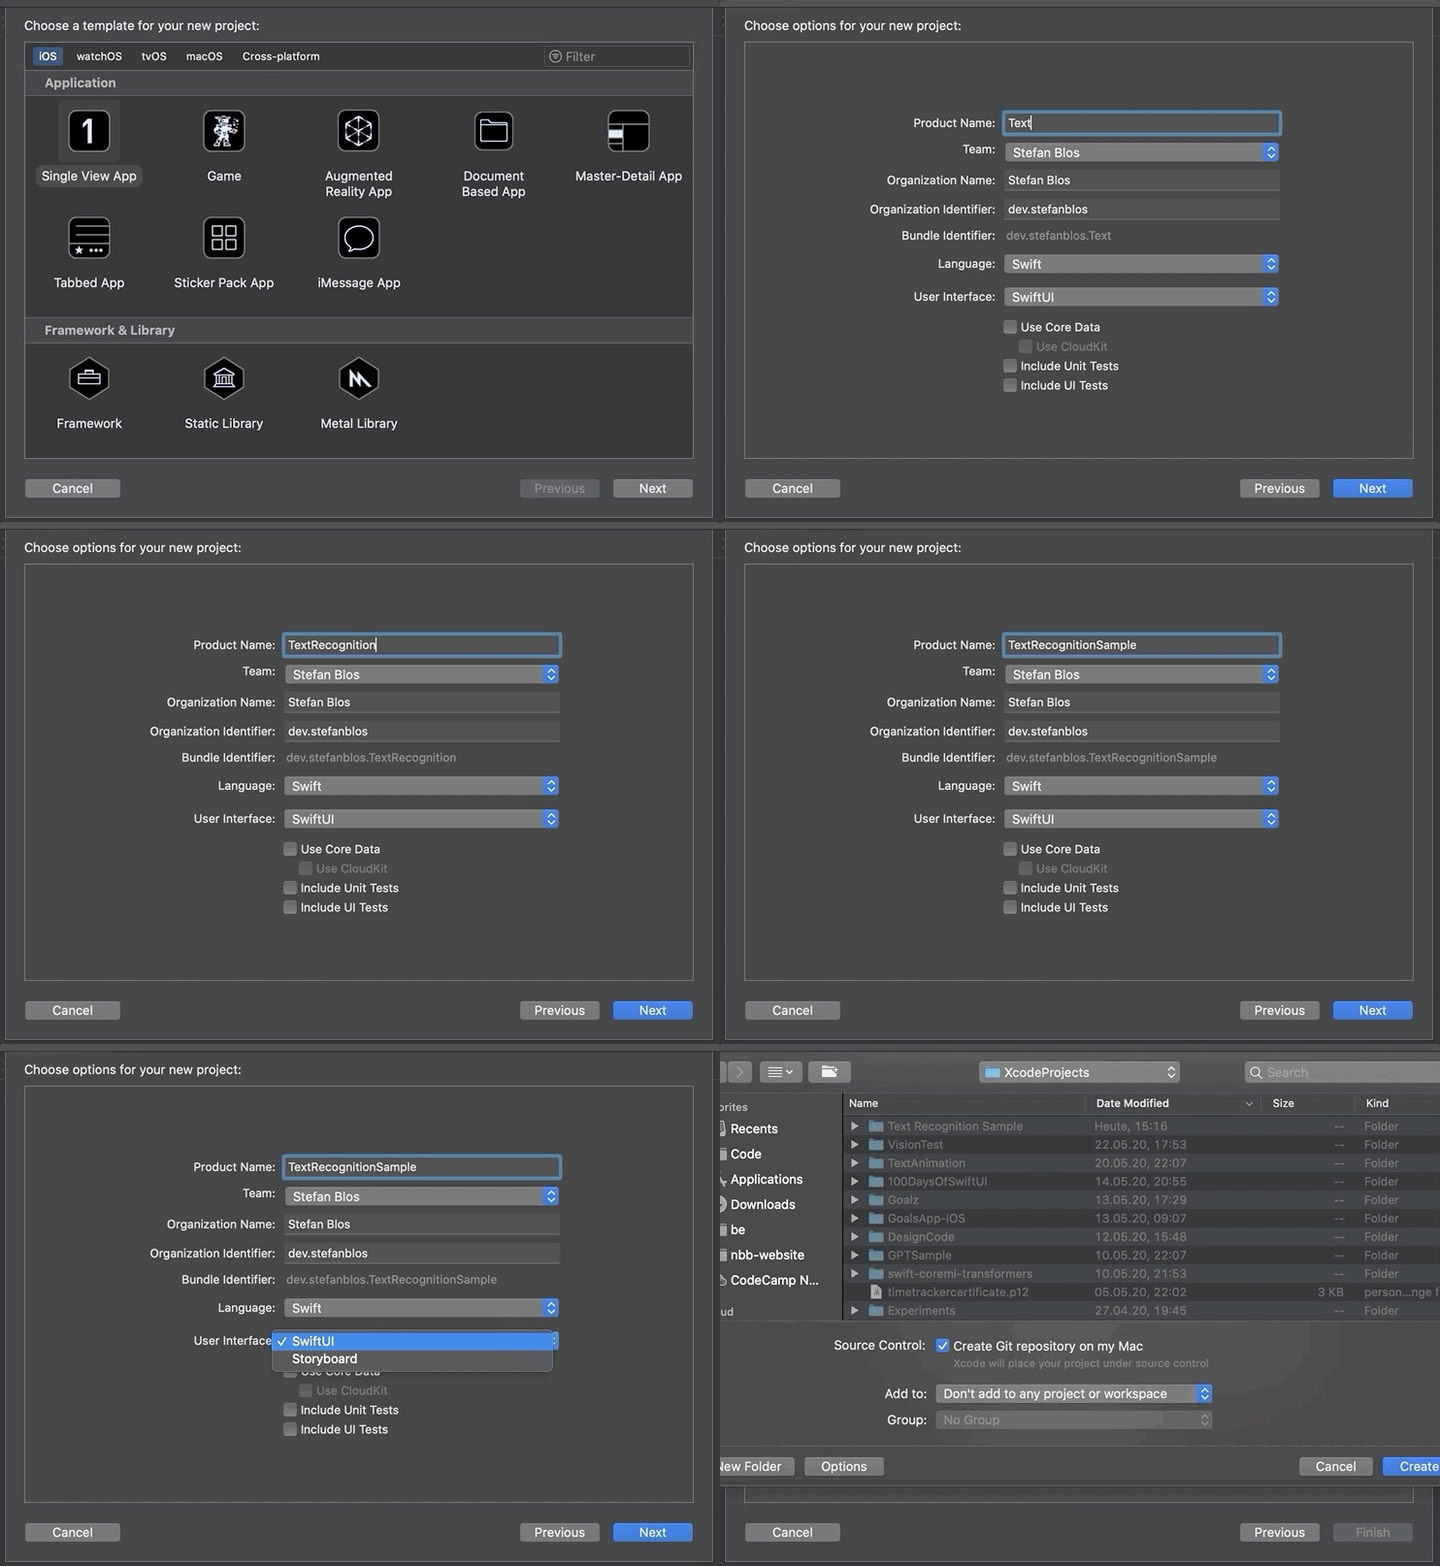
The first thing to do is to open up Xcode and create a new project. We select Single View App and give it a nice, modern, startup-like name such as “Text Recognition Sample”. It is important to select SwiftUI for the User Interface.
要做的第一件事是打开Xcode并创建一个新项目。 我们选择Single View App,并给它一个漂亮的,现代的,类似启动的名称,例如“ Text Recognition Sample”。 为用户界面选择SwiftUI很重要。
I will not go into too much detail about the project structure here as I assume you have basic knowledge of SwiftUI. If not, there are plenty of great tutorials out there either from Apple directly or in this list by Paul Hudson.
由于我假设您具有SwiftUI的基本知识, 因此在这里我不会对项目结构进行过多介绍 。 如果没有,那么直接从Apple那里或Paul Hudson的这份清单中会有很多很棒的教程。
We are going to build a basic UI focused on functionality. This means that we wrap a Text element inside of a ScrollView (because we might scan a LOT of text) and a Button to start scanning. This means that our body (with a little styling) will be:
我们将构建一个专注于功能的基本UI。 这意味着我们将Text元素包装在ScrollView (因为我们可能会扫描很多文本)和一个Button开始扫描。 这意味着我们的身体(略微造型)将是:
There are two things to mention here. First is that we haven’t implemented the functionality of the Button yet. Rather we used a placeholder comment of // start scanning here. Second, the Text element uses a variable. To be able to change the content of our View we need to create a State property which we call recognizedText:
这里有两件事要提到。 首先,我们尚未实现Button的功能。 相反,我们使用占位符注释// start scanning此处// start scanning 。 其次, Text元素使用变量。 为了能够更改我们的View的内容,我们需要创建一个State属性,我们将其称为recognizedText :
@State private var recognizedText = "Tap button to start scanning."The ide


 本文介绍了如何在iOS应用中利用SwiftUI进行设备上的文本识别,通过链接到原始文章,提供了详细的实现步骤和技术细节。
 最低0.47元/天 解锁文章


 1382
1382

 被折叠的 条评论
为什么被折叠?


