


heroku
For smaller projects, CSV is a great format for storing data. But what if you want to up your data management game? A relational database offers a more robust way to organise and manage your data. In this post, I show how you can transform your CSV files into a PostgreSQL database in three simple steps. I’ll also discuss some the advantages of using a relational database.
对于较小的项目,CSV是一种很好的存储数据的格式。 但是,如果您想升级数据管理游戏怎么办? 关系数据库提供了一种更强大的方法来组织和管理数据。 在本文中,我将展示如何通过三个简单的步骤将CSV文件转换为PostgreSQL数据库。 我还将讨论使用关系数据库的一些优点。
关系数据库的优点 (The advantages of a relational database)
A relational database is a database that divides data into linked tables that have shared data points. These shared data points allow us to combine information and create novel tables or views with one simple query. Popular flavours of relational databases include MySQL, SQLite, and PostgreSQL.
关系数据库是将数据划分为具有共享数据点的链接表的数据库。 这些共享的数据点使我们能够组合信息并通过一个简单的查询创建新颖的表或视图。 关系数据库的流行形式包括MySQL , SQLite和PostgreSQL 。
Building a proper relational database takes time and effort. But, when done well, it has a number of advantages.
建立适当的关系数据库需要花费时间和精力。 但是,如果做得好,它具有许多优点。
First, relational databases enable you to see the relationship between different parts of your data more easily. Data is divided into tables and can be combined (“joined”) using Structured Query Language (SQL) queries that include simple math operations.
首先,关系数据库使您可以更轻松地查看数据不同部分之间的关系。 数据被分为表,并可以使用包含简单数学运算的结构化查询语言(SQL)查询进行组合(“联接”)。
Second, relational databases offer superior data management with greater consistency and flexibility. Other formats such as CSV files quickly become unmanageable, even for smaller projects. A relational database allows you enforce data types using schemas thus reducing a major potential source of error. Relational databases also offer greater flexibility since you can generate more complex data from relatively simple tables using complex queries.
其次,关系数据库提供了具有更高一致性和灵活性的出色数据管理。 其他格式(例如CSV文件)很快变得难以管理,即使对于较小的项目也是如此。 关系数据库允许您使用架构强制执行数据类型,从而减少潜在的主要错误源。 关系数据库还提供了更大的灵活性,因为您可以使用复杂的查询从相对简单的表中生成更复杂的数据。
Third, relational databases solve the problem of data redundancy: a good relational database is designed around minimising data duplication and inconsistent dependencies, through a process called “normalization”. Normalization is the process of organising the data in your database, and involves both creating tables and defining the relations between them.
第三,关系数据库解决了数据冗余的问题:一个好的关系数据库旨在通过称为“规范化”的过程来最大程度地减少数据重复和不一致的依赖关系。 规范化是组织数据库中数据的过程 ,包括创建表和定义它们之间的关系。
Fourth, relational databases have become the industry standard and database management systems (DBMS) typically offer an advanced set of features that you’d want for any database such as backups, failover, and mirroring.
第四,关系数据库已成为行业标准,并且数据库管理系统(DBMS)通常为您的任何数据库提供您想要的一组高级功能,例如备份,故障转移和镜像。
One important caveat when reading the instructions below: this post is not intended to explain how to design and set up a production-level architecture for your relational database. When designing databases for a production environment, you’ll want to think more carefully about permissions, creating a read-only versus write version, versioning, and so on. Instead, I show how you can quickly and easily create your own database for personal use.
一个重要的警告阅读以下说明时:这个帖子是不是意在说明如何设计和建立了关系数据库产品级架构。 在为生产环境设计数据库时,您将需要更仔细地考虑权限,创建只读版本还是写入版本,版本控制等等。 相反,我展示了如何快速,轻松地创建自己的数据库供个人使用。
With this in mind, let’s dive in and build a relational database from CSV files using Heroku and Python.
考虑到这一点,让我们深入使用Heroku和Python从CSV文件中构建关系数据库。
步骤1:在Heroku上设置PostgreSQL数据库 (Step 1: Setting up a PostgreSQL database on Heroku)
We’ll start with setting up a PostgreSQL instance on Heroku. Heroku is a platform as a service (PaaS) based on Amazon Web Services (AWS), and offers a free tier for PostgreSQL. The free plan is limited to 10,000 rows and has a maximum concurrency of 20. You also won’t be able to use the more advanced features like rollback and failover, which both are advisable for any production-level database. It does have a manual backup feature, which allows you to generate and download a backup of your database.
我们将从在Heroku上设置PostgreSQL实例开始。 Heroku是基于Amazon Web Services(AWS)的平台即服务(PaaS),并为PostgreSQL提供免费层 。 免费计划限于10,000行,最大并发数为20。您也将无法使用回滚和故障转移等更高级的功能,这对于任何生产级数据库都是建议的。 它确实具有手动备份功能,使您可以生成和下载数据库的备份。
To set up a PostgreSQL instance on Heroku first log into your Heroku account and create a new app from the drop-down menu.
要在Heroku上设置PostgreSQL实例,请先登录您的Heroku帐户,然后从下拉菜单中创建一个新应用。

Pick a name and region for your app and hit the “Create app” button.
为您的应用选择名称和区域,然后点击“创建应用”按钮。

Provision a PostgreSQL database for your new app.
为新应用设置PostgreSQL数据库。

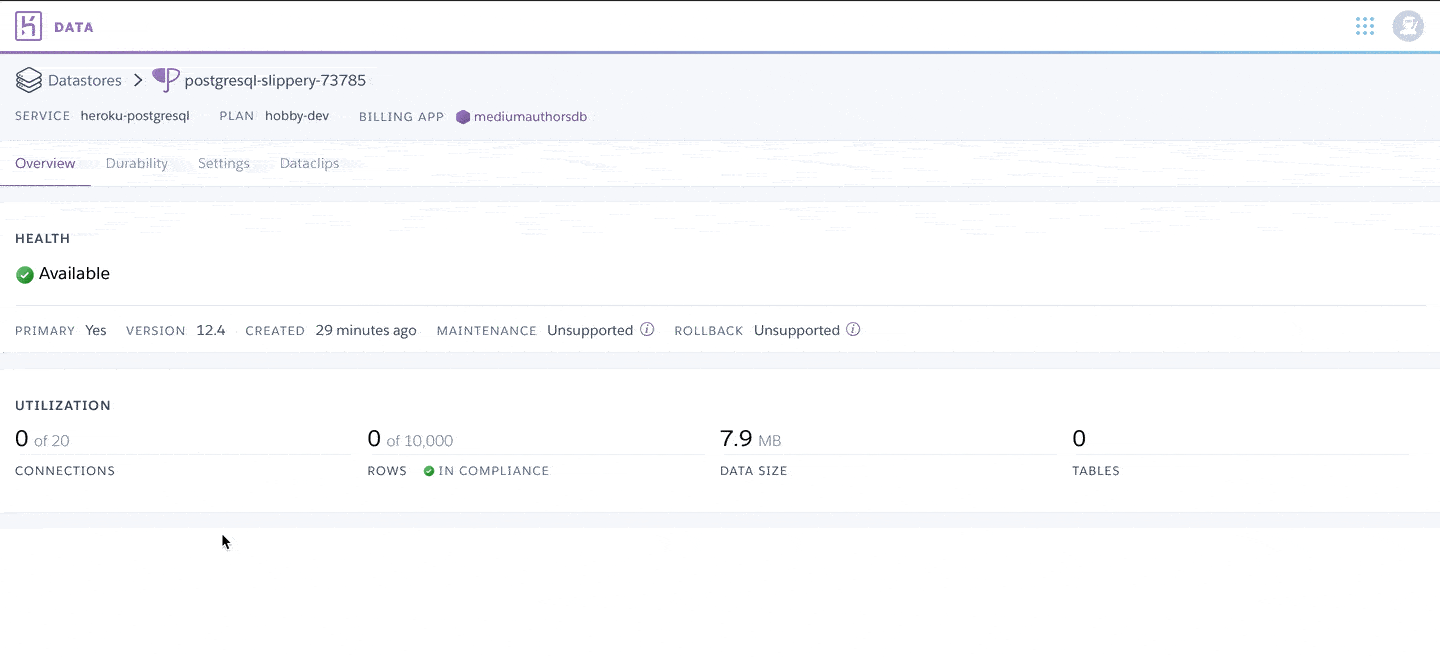
Finally, find and copy your database Credentials (you’ll need them to set up the connection in Python). And that’s it, you have your own PostgreSQL database up and running!
最后,找到并复制您的数据库凭据(您将需要它们来使用Python建立连接)。 就是这样,您已经建立并运行了自己的PostgreSQL数据库!
步骤2:定义架构 (Step 2: Defining your schemas)
In this example, we’ll build a database consisting of randomly generated Medium authors and their articles, and store this data as two CSV files. The first CSV file (or: “table”) is the “author table”, and the second CSV file contains data on their posts. These CSV files and the script used to generate them are available on Github.
在此示例中,我们将建立一个由随机生成的中型作者及其文章组成的数据库,并将此数据存储为两个CSV文件。 第一个CSV文件(或“表”)是“作者表”,第二个CSV文件包含其帖子中的数据。 这些CSV文件和用于生成它们的脚本在Github上可用 。
Let’s take a look at the schemas of these tables. A “schema” is a formal language representation of a table in your database. It defines the columns, their names and types, the partitioning rules, and so on.
让我们看一下这些表的模式。 “模式”是数据库中表的正式语言表示。 它定义列,列的名称和类型, 分区规则等。
The authors table contains a timestamp for when the entry was written to the table (row_timestamp), a universally unique identifier (UUID) for the author (author_id), the author’s first and last name (author_first_name; author_last_name), and their email address (email).
authors表包含条目何时写入表的时间戳记( row_timestamp ),作者的通用唯一标识符(UUID)( author_id ),作者的姓氏和名字( author_first_name ; author_last_name )以及他们的电子邮件地址( email )。
row_timestamp TIMESTAMP NOT NULL,
author_id VARCHAR PRIMARY KEY NOT NULL,
author_first_name VARCHAR NOT NULL,
author_last_name VARCHAR NOT NULL,
email VARCHAR NOT NULL
The posts table also includes a row_timestamp, a unique identifier for each article (post_id), a secondary key that refers back to the author_id column in our authors table, and each post’s title (article_title).
posts表还包括row_timestamp ,每个文章的唯一标识符( post_id ),指向我们authors表中author_id列的辅助键,以及每个帖子的标题( article_title )。
row_timestamp TIMESTAMP NOT NULL,
post_id VARCHAR PRIMARY KEY NOT NULL,
author_id VARCHAR REFERENCES authors(author_id),
article_title VARCHAR NOT NULL
We’ll use these schemas later when setting up our tables in our PostgreSQL database.
稍后在PostgreSQL数据库中设置表时将使用这些模式。
第3步:一点Python魔术 (Step 3: A touch of Python magic)
In our third and final step, we need a bit of Python code to set up a connection with our PostgreSQL database using the psycopg2 library. We first create three functions to add tables to our database, and to inject data into our database. The first function, run_syntax, is a helper function that executes syntax using the database connection. The second function, create_table, takes a schema definition and table and database name and adds the table to our database. The third function, populate_table, takes a pandas data frame and populates the specified table in the database with that data.
在第三步(也是最后一步)中,我们需要一些Python代码才能使用psycopg2库与PostgreSQL数据库建立连接。 我们首先创建三个函数以将表添加到数据库中,并将数据注入到数据库中。 第一个函数run_syntax是一个辅助函数,该函数使用数据库连接执行语法。 第二个函数create_table接受模式定义以及表和数据库名称,并将表添加到我们的数据库中。 第三个函数populate_table获取一个熊猫数据框,并使用该数据填充数据库中的指定表。
Note that I use environment variables for the database access credentials. It’s good practice to never include such credentials in your code, even for smaller (non-production) projects. You might forget to remove them when pushing your code to Github, exposing your database to other users.
请注意,我将环境变量用于数据库访问凭据。 最好不要在代码中包含此类凭据,即使对于较小的(非生产)项目也是如此。 将代码推送到Github时,您可能会忘记删除它们,从而将数据库暴露给其他用户。
import psycopg2
import pandas as pd
import os
from datetime import datetime


def run_syntax(db_connection: psycopg2, syntax: str) -> None:
    """
    Run syntax.

    :param db_connection: Database connection object.
    :param syntax: Syntax for execution.
    """
    cur = db_connection.cursor()
    cur.execute(syntax)
    cur.close()


def create_table(schema: str, table: str) -> None:
    """
    Create a table in the DB based on a schema.

    :param schema: The table schema.

    :param schema: The schema.
    :param table: The name of the table.
    """
    db_connection = psycopg2.connect(
        host=os.environ["hostname"],
        user=os.environ["user"],
        password=os.environ["password"],
        dbname=os.environ["database"],
    )


    # Create table if it does not yet exist
    run_syntax(db_connection=db_connection, syntax=f"CREATE TABLE IF NOT EXISTS {table}({schema})")


    db_connection.commit()
    db_connection.close()


def populate_table(table_name: str, df: pd.DataFrame) -> None:
    """
    Populate a table in the database from a pandas dataframe.

    :param table_name: The name of the table in the DB that we will add the values in df to.
    :param df: The dataframe that we use for puplating the table.
    """
    db_connection = psycopg2.connect(
        host=os.environ["hostname"],
        user=os.environ["user"],
        password=os.environ["password"],
        dbname=os.environ["database"],
    )


    # Check that all columns are present in the CSV file
    cur = db_connection.cursor()
    cur.execute(f"SELECT * FROM {table_name} LIMIT 0")
    cur.close()


    col_names = [i[0] for i in cur.description]
    df["row_timestamp"] = [datetime.now().strftime("%m-%d-%Y %H:%M:%S")] * len(df.index)


    missing_columns = set(col_names).difference(df.columns)
    assert not missing_columns, f"The following columns are missing in your CSV file: {','.join(missing_columns)}"


    # Re-order CSV
    df = df[col_names]


    # Inject data
    for index, row in df.iterrows():
        run_syntax(db_connection=db_connection, syntax=f"INSERT INTO {table_name} VALUES{tuple(row.values)}")
    db_connection.commit()
    db_connection.close()
放在一起 (Putting it all together)
To set up the tables in your PostgreSQL instance, you’ll have to add the schema definitions that we defined earlier, and add a bit of code to execute the create_table function as shown in the script below.
要在PostgreSQL实例中设置表,您必须添加我们之前定义的模式定义,并添加一些代码来执行create_table函数,如下面的脚本所示。
from db_management import create_table


authors_schema = """
row_timestamp TIMESTAMP NOT NULL,
author_id VARCHAR PRIMARY KEY NOT NULL,
author_first_name VARCHAR NOT NULL,
author_last_name VARCHAR NOT NULL,
email VARCHAR NOT NULL
"""


posts_schema = """
row_timestamp TIMESTAMP NOT NULL,
post_id VARCHAR PRIMARY KEY NOT NULL,
author_id VARCHAR REFERENCES authors(author_id),
article_title VARCHAR NOT NULL
"""


create_table(table="authors", schema=authors_schema)
create_table(table="posts", schema=posts_schema)
To inject data into these tables from your CSV files, use the following script:
要将数据从CSV文件注入这些表中,请使用以下脚本:
import pandas as pd
from db_management import populate_table


authors_df = pd.read_csv("medium_authors_table.csv")
populate_table(table_name="authors", df=authors_df)


posts_df = pd.read_csv("medium_posts_table.csv")
populate_table(table_name="posts", df=posts_df)
使用IDE或终端 (Using an IDE or terminal)
To use the above code in an IDE, you’ll have to add your credentials as environment variables to the Python configuration (I use Pycharm). If, alternatively, you want to run the above scripts from terminal, you’ll need to take some additional steps. First, add the credentials as environment variables in terminal, by running the following syntax, replacing the placeholders with the database credentials that you obtained from Heroku earlier.
要在IDE中使用上述代码,您必须将凭据作为环境变量添加到Python配置中(我使用Pycharm)。 或者,如果您想从终端运行以上脚本,则需要采取一些其他步骤。 首先,通过运行以下语法,将凭据添加为终端中的环境变量,将占位符替换为您先前从Heroku获得的数据库凭据。
hostname = <my_hostname>
user = <my_user>
password = <my_password>
database = <my_database>
In a second step, you’ll need to pass the environment variables to the Python process, by adding the following code to the db_management module shown above:
在第二步中,您需要通过将以下代码添加到上面显示的db_management模块中,将环境变量传递给Python进程:
os.environ["hostname"] = hostname
os.environ["user"] = user
os.environ["password"] = password
os.environ["database"] = database
Finally, execute the Python code to populate your database from terminal using the create_tables.py and populate_table.py scripts shown above, using the following commands:
最后,使用以下命令,使用上面显示的create_tables.py和populate_table.py脚本执行Python代码以从终端填充数据库:
python create_tables.py
python populate_tables.py
后续步骤:使用数据库 (Next steps: Using your database)
Now you have a PostgreSQL database that you can connect to, and query from. Let’s check that this works. Heroku has a neat dataclips feature that you can use to embed query output on your website, or to share with collaborators.
现在,您有了一个可以连接并查询的PostgreSQL数据库。 让我们检查一下是否可行。 Heroku具有简洁的数据剪辑功能 ,可用于将查询输出嵌入到您的网站中,或与协作者共享。

With your database in place, you can continue managing your data directly in Python using the psycopg2 library, or start using a free database tool like DBeaver. You’ll now be able to use a range of simple SQL commands to view, manage, and gain new insights from your data, or use your database for other applications such as a dashboard or website.
放置好数据库后,您可以继续使用psycopg2库直接在Python中管理数据,或者开始使用免费的数据库工具(例如DBeaver) 。 现在,您将能够使用一系列简单SQL命令来查看,管理数据并从中获得新的见解,或者将数据库用于其他应用程序(例如仪表板或网站)。
Thanks for reading!
谢谢阅读!
heroku


 498
498

 被折叠的 条评论
为什么被折叠?
被折叠的 条评论
为什么被折叠?
 到【灌水乐园】发言


