


As a Python developer, you may run into a scenario where you need to access a C++ library from Python code. An efficient way to pass data from Python to C++ and vice versa is by using Python bindings, which are libraries that bridge the two programming languages together.
作为Python开发人员,您可能会遇到需要从Python代码访问C ++库的情况。 将数据从Python传递到C ++以及反之亦然的有效方法是使用Python 绑定 , 这是将两种编程语言联系在一起的库。
Some of the many tools and modules that can be used for creating Python bindings include CFFI, PyBind11, PyBindGen, SIP, and Cython. In this article, we’ll run through a step-by-step example using the ctypes module, which is part of the standard Python library, to load a dynamic-link library generated by Xcode on macOS.
可用于创建Python绑定的许多工具和模块中的一些工具包括CFFI , PyBind11 , PyBindGen , SIP和Cython 。 在本文中,我们将使用ctypes模块(它是标准Python库的一部分)逐步介绍一个示例,以在MacOS上加载Xcode生成的动态链接库。
用例 (Use Cases)
A Python developer may need to call a C++ library in the following scenarios:
在以下情况下,Python开发人员可能需要调用C ++库:
- The C++ library may be used by multiple applications and languages. To ensure that the library remains portable in different languages, having the core library in C++ will reduce the need for duplicate code and increase portability. C ++库可由多种应用程序和语言使用。 为了确保库可以使用不同的语言移植,拥有C ++的核心库将减少重复代码的需求并提高可移植性。
- It’s no secret that C++ has considerable performance gains over Python. The application written in Python can take advantage of the faster execution speed and multi-threading by accessing the compiled C++ library rather than relying on interpreted Python code. 众所周知,C ++比Python具有可观的性能提升。 用Python编写的应用程序可以通过访问已编译的C ++库而不是依靠解释的Python代码来利用更快的执行速度和多线程。
- Perhaps there’s an existing C++ library that has all of the features and functionality you need. Instead of duplicating the functionality in Python, creating bindings reduces duplicate code in the overlying system, simplifies the number of unit tests, and diminishes the likelihood of finding bugs. 也许有一个现有的C ++库,其中包含您需要的所有功能。 创建绑定而不是复制Python中的功能,而是减少了上层系统中的重复代码,简化了单元测试的数量,并减少了发现错误的可能性。
从Xcode C ++项目生成dylib文件 (Generate the dylib File From an Xcode C++ Project)
On macOS, dynamic-link libraries are known as dylib files. This is the equivalent to a DLL on Windows and a shared library (or .so library) on Linux. The first step is to create a C++ project that contains our library and build target specifications needed to generate a dylib file.
在macOS上,动态链接库称为dylib文件。 这等效于Windows上的DLL和Linux上的共享库(或.so库)。 第一步是创建一个包含我们的库的C ++项目,并构建生成dylib文件所需的目标规范。
Note: The steps and screenshots below were generated from Xcode version 11.7.
注意:以下步骤和屏幕截图是从Xcode 11.7版生成的。
设置dylib目标 (Set up the dylib target)
- Create a new Xcode code project. The project type should be “Command Line Tool.” 创建一个新的Xcode代码项目。 项目类型应为“命令行工具”。
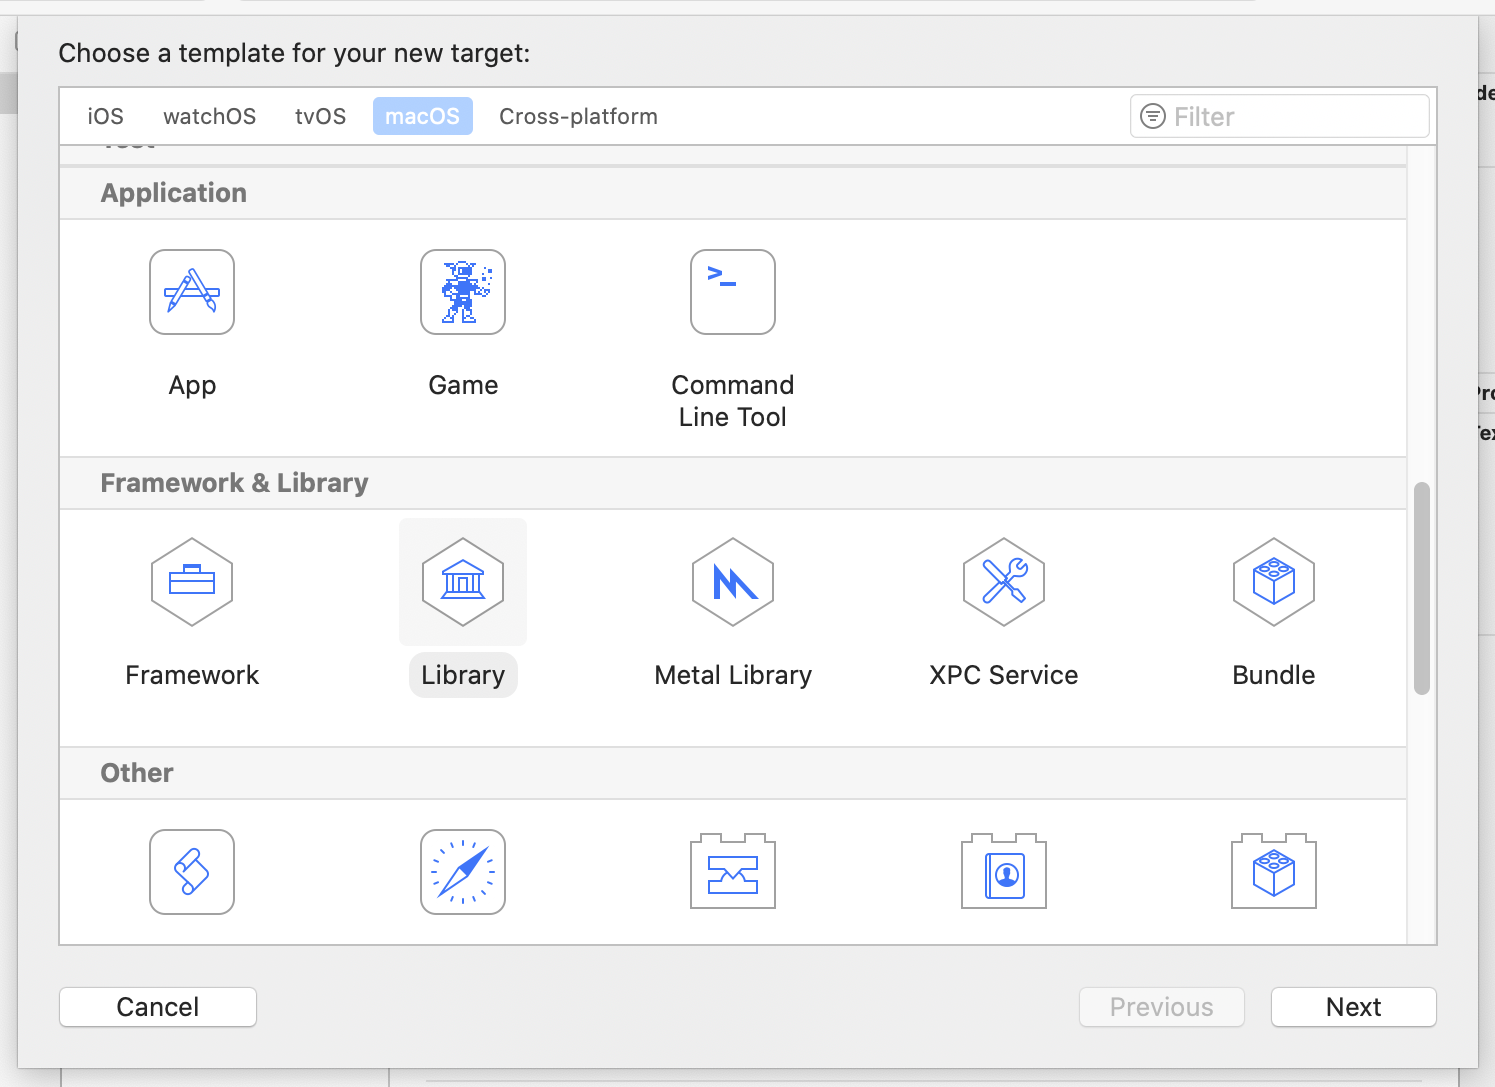
Add an additional target that will generate the
dylibfile.添加将生成
dylib文件的其他目标。
- Go to Editor -> Add Target and select “Library.” 转到编辑器->添加目标,然后选择“库”。
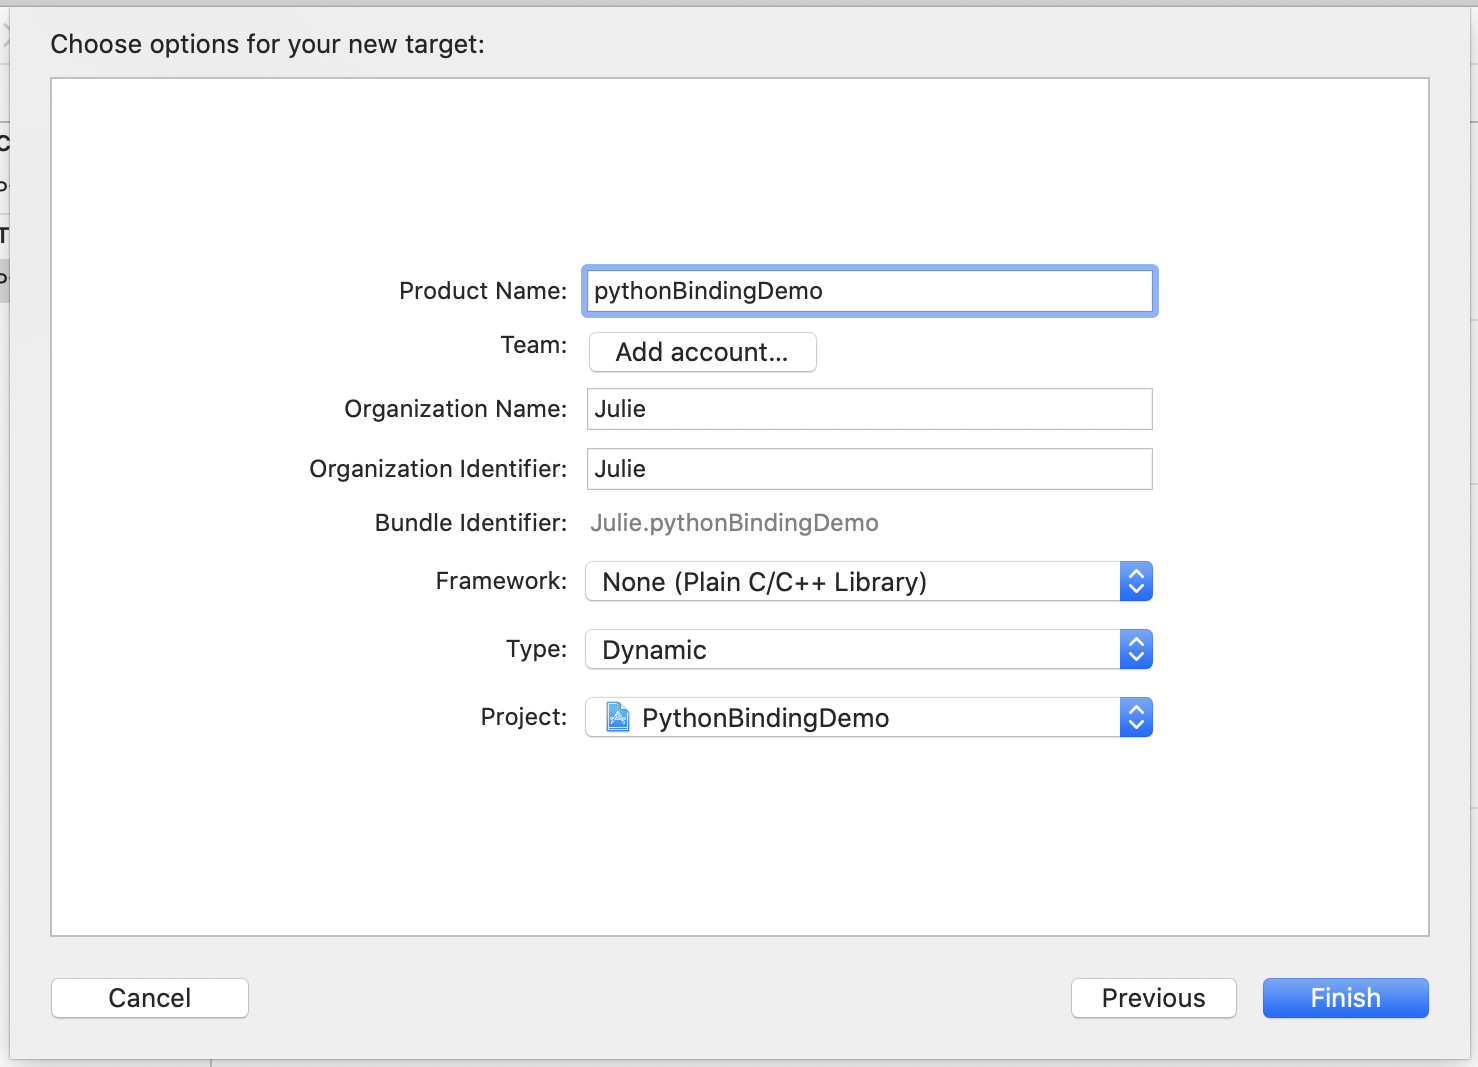
3. Type in the library name. Make sure that the target type is set to “Dynamic.”
3.键入库名称。 确保目标类型设置为“动态”。
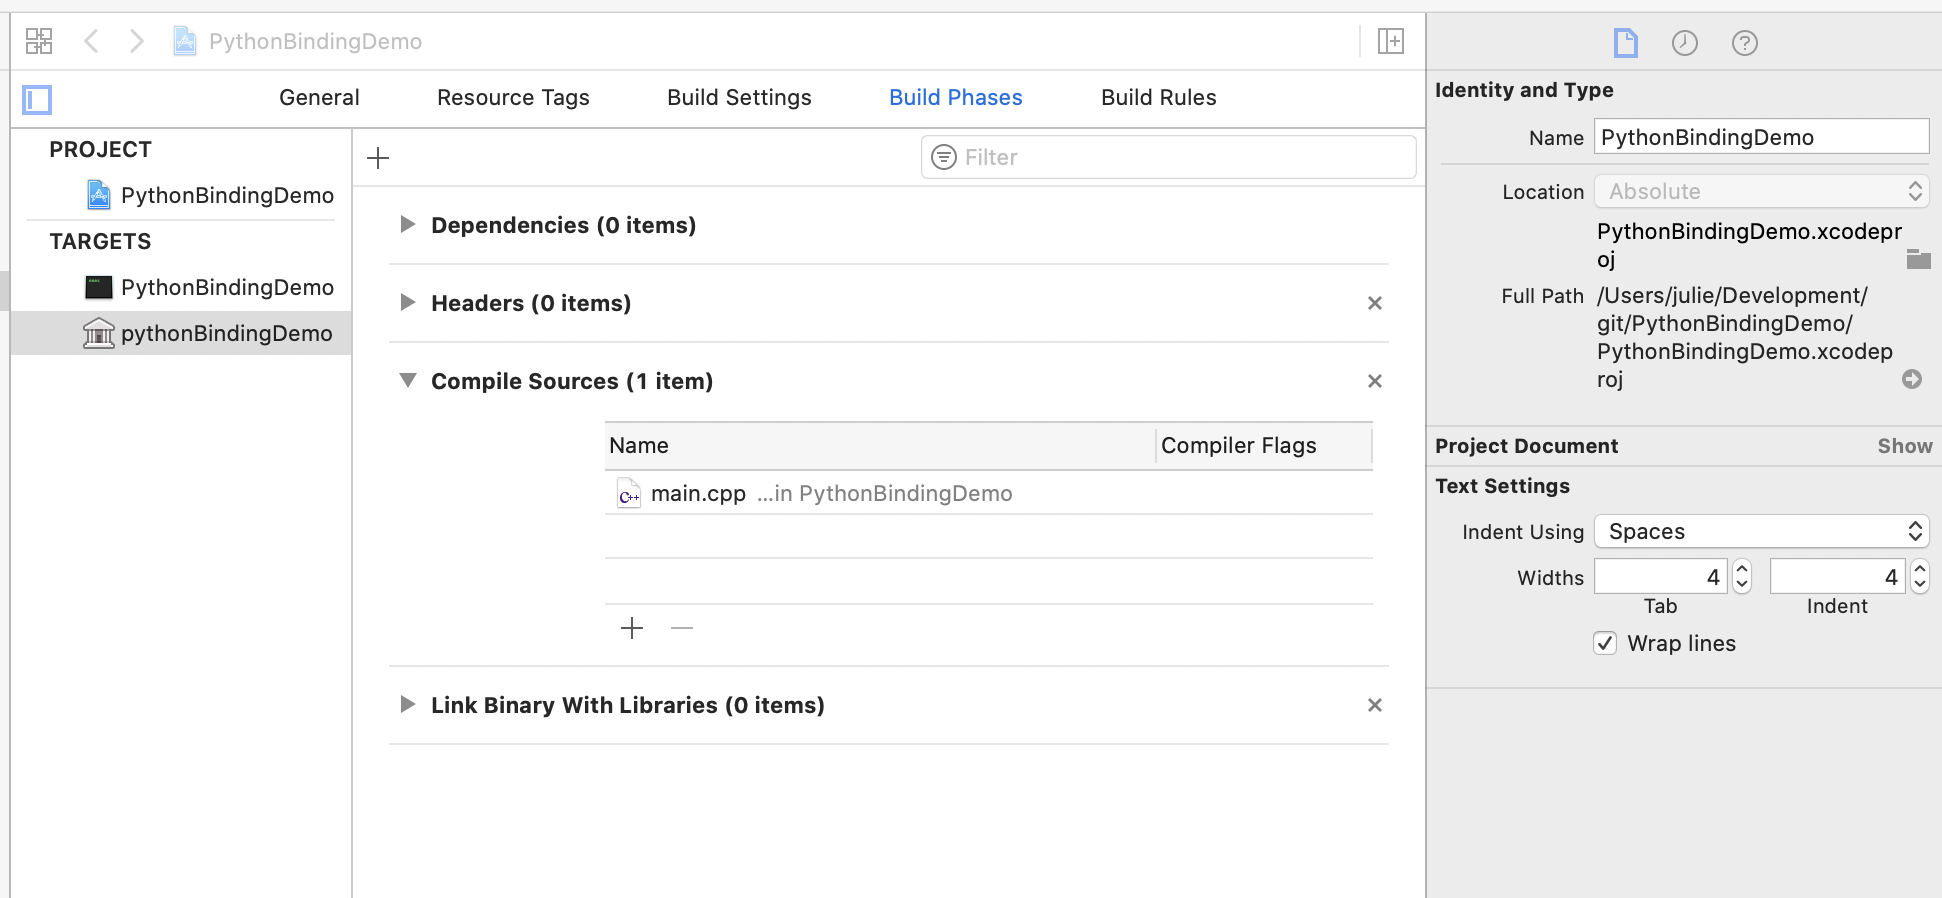
4. Select the newly created dylib target and “Build Phases” tab. Add the compile sources and headers:
4.选择新创建的dylib目标,然后选择“构建阶段”选项卡。 添加编译源和头文件:
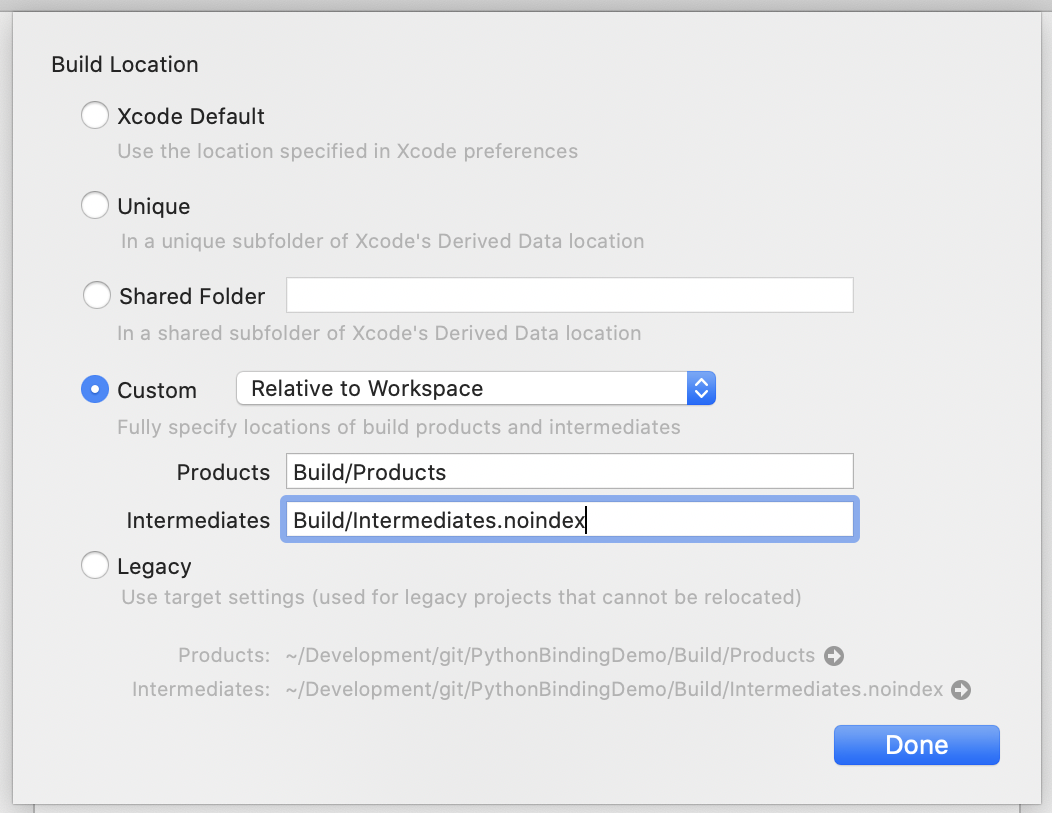
5. Verify the export settings to ensure that the dylib file will be generated in the expected directory.
5.验证导出设置,以确保将在预期目录中生成dylib文件。
- Go to File -> Project Settings. 转到文件->项目设置。
- If the build path in the Project Settings is not pointing to the expected location, click the “Advanced” button to update the build location. 如果项目设置中的构建路径未指向预期位置,请单击“高级”按钮以更新构建位置。
To generate the
dylibin the project folder, set the “Custom” option to be “Relative to Workspace.”要在项目文件夹中生成
dylib,请将“自定义”选项设置为“相对于工作区”。
写绑定 (Write the bindings)
When writing the bindings, we need to make sure that all functions can be called from C since Python is written in C. This is achieved by placing a C wrapper around the code using the extern “C" keyword.
编写绑定时,由于Python是用C编写的,因此我们需要确保可以从C调用所有函数。 这是通过使用extern “C"关键字在代码周围放置C包装程序来实现的。
extern "C"
{
  float add(float v1, float v2)
  {
      return v1 + v2;
  }


  float subtract(float v1, float v2)
  {
      return v1 - v2;
  }


  float multiply(float v1, float v2)
  {
      return v1 * v2;
  }


  float divide(float v1, float v2)
  {
      return v1 / v2;
  }
}
编译 (Compile)
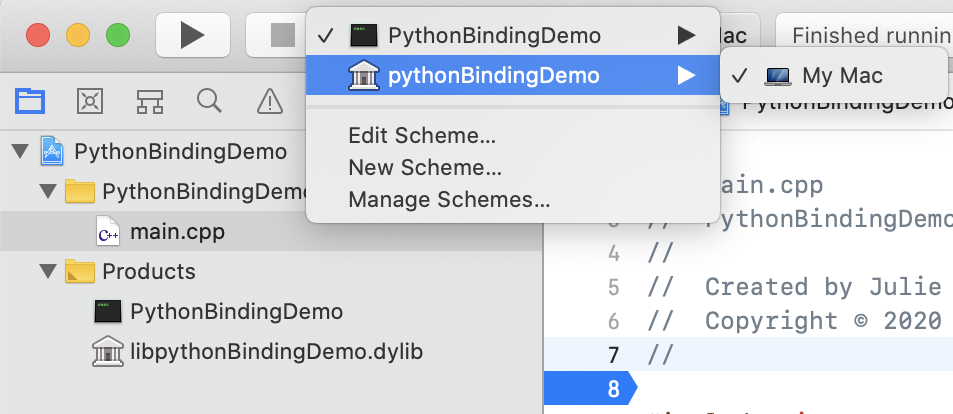
Change the current target in Xcode to point to the dylib target and run!
在Xcode中更改当前目标以指向dylib目标并运行!
检查符号 (Check symbols)
Once the dylib has been generated, check to make sure that symbols have been generated for each function to be included in the binding.
生成dylib ,请检查以确保已为要包含在绑定中的每个函数生成了符号。
nm -gU <dylib file>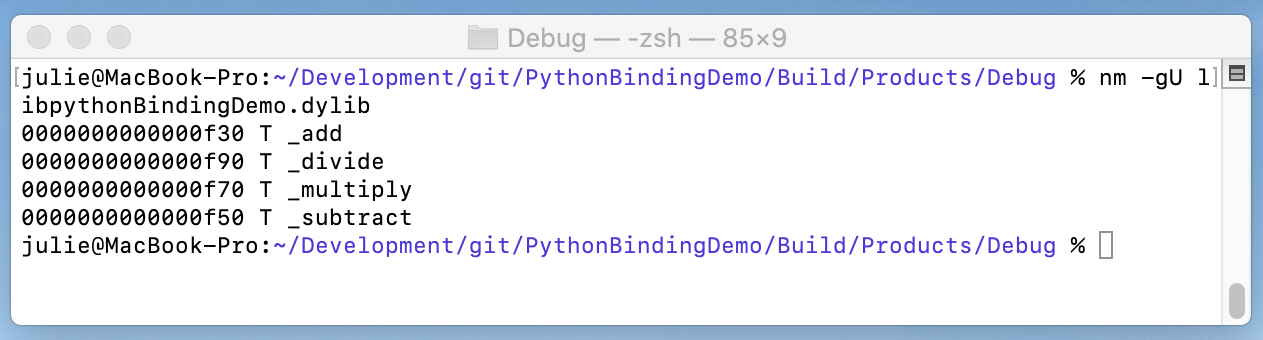
从Python加载dylib文件 (Load the dylib File From Python)
To load the dynamic-link library from Python, we’ll use the ctypes library, which is part of the standard Python library. Creating a Python binding using ctypes involves loading the dynamic-link library, wrapping the input parameters using the ctype valid type, and specifying the return type of the function. By default, functions will return an int type.
要从Python加载动态链接库,我们将使用ctypes库,该库是标准Python库的一部分。 使用ctypes创建Python绑定包括加载动态链接库,使用ctype有效类型包装输入参数以及指定函数的返回类型。 默认情况下,函数将返回一个int类型。
import ctypes


if __name__ == "__main__":
    # Load the shared library into ctypes
    libname = "libpythonBindingDemo.dylib"
    c_lib = ctypes.cdll.LoadLibrary(libname)


    # Declare the return type
    c_lib.multiply.restype = ctypes.c_float
    output = c_lib.multiply(ctypes.c_float(3), ctypes.c_float(4))
    print(output)
结论 (Conclusion)
You have now created a Python binding! Calling C++ libraries from Python allows the developer to build an application that takes advantage of the best of Python and C++. The result is an application that combines both speed and simplicity.
您现在已经创建了Python绑定! 从Python调用C ++库使开发人员可以构建一个利用Python和C ++的优点的应用程序。 结果是一个结合了速度和简单性的应用程序。
翻译自: https://medium.com/better-programming/power-your-python-with-c-using-ctypes-7095ffbbcec5


 2132
2132

 被折叠的 条评论
为什么被折叠?
被折叠的 条评论
为什么被折叠?
 到【灌水乐园】发言


