


windows原型设计工具
The topic for today is on Lunacy, a free native Windows graphic design app that works offline and supports .sketch files. Based on the official documentation, it has 3 major goals:
今天的主题是Lunacy,这是一个免费的本机Windows图形设计应用程序,可离线运行并支持.sketch文件。 根据官方文档 ,它有3个主要目标:
- To create a full-scale alternative to Sketch for Windows 创建适用于Windows的Sketch的全面替代方案
- To automate the tasks designers used to do 自动执行设计人员以前执行的任务
- To operate with the components, not polygons and bitmaps. 要使用组件,而不是多边形和位图。
Lunacy is fully compatible with .sketch format and you can freely import and export sketch files. There are 4 sections in this tutorial.
Lunacy与.sketch格式完全兼容,您可以自由导入和导出草图文件。 本教程共有4个部分。
- Setup 建立
- Basic Features 基本特征
- Code Preview 代码预览
- Conclusion 结论
Let’s get started.
让我们开始吧。
1.设定 (1. Setup)
Head over to the official website and download the installer by clicking on the Download button. Alternatively, you can get it from the Windows Store as well (installation via Windows Store only work for Windows 10). Run the installer and launch the Lunacy app once you are done. You should see the following interface. I am using Version 4.9 for this tutorial as it is the latest version at the time of this writing.
转到官方网站并通过单击“ Download按钮下载安装程序。 另外,您也可以从Windows应用商店获取它(通过Windows应用商店安装仅适用于Windows 10)。 完成后,运行安装程序并启动Lunacy应用程序。 您应该看到以下界面。 我正在使用本教程的4.9版本,因为它是撰写本文时的最新版本。
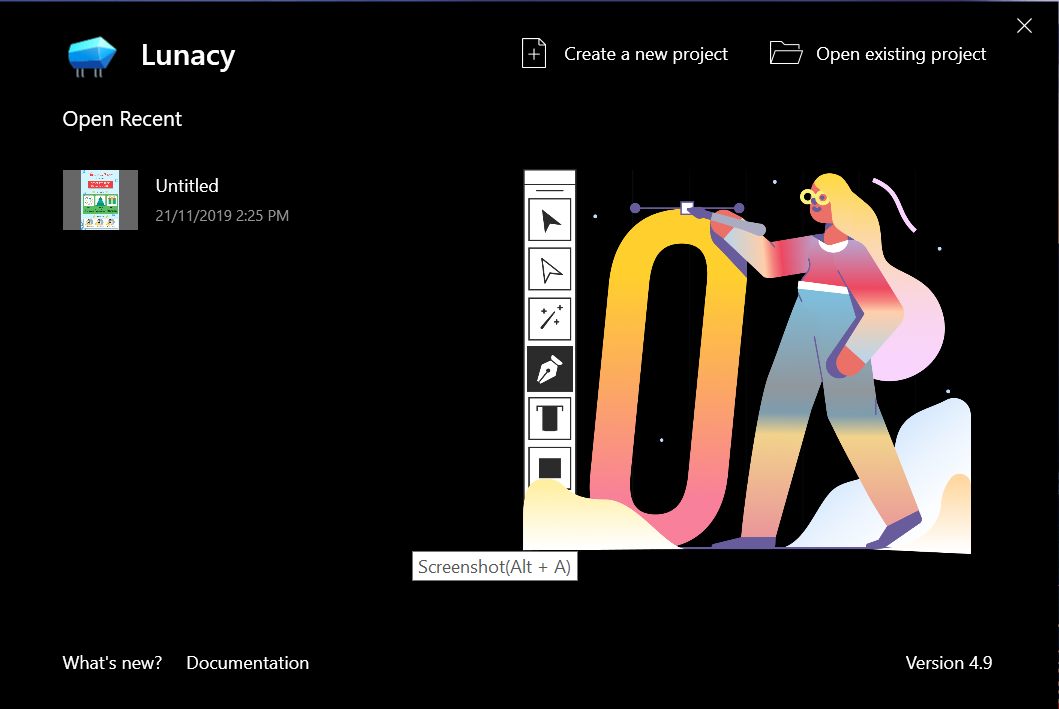
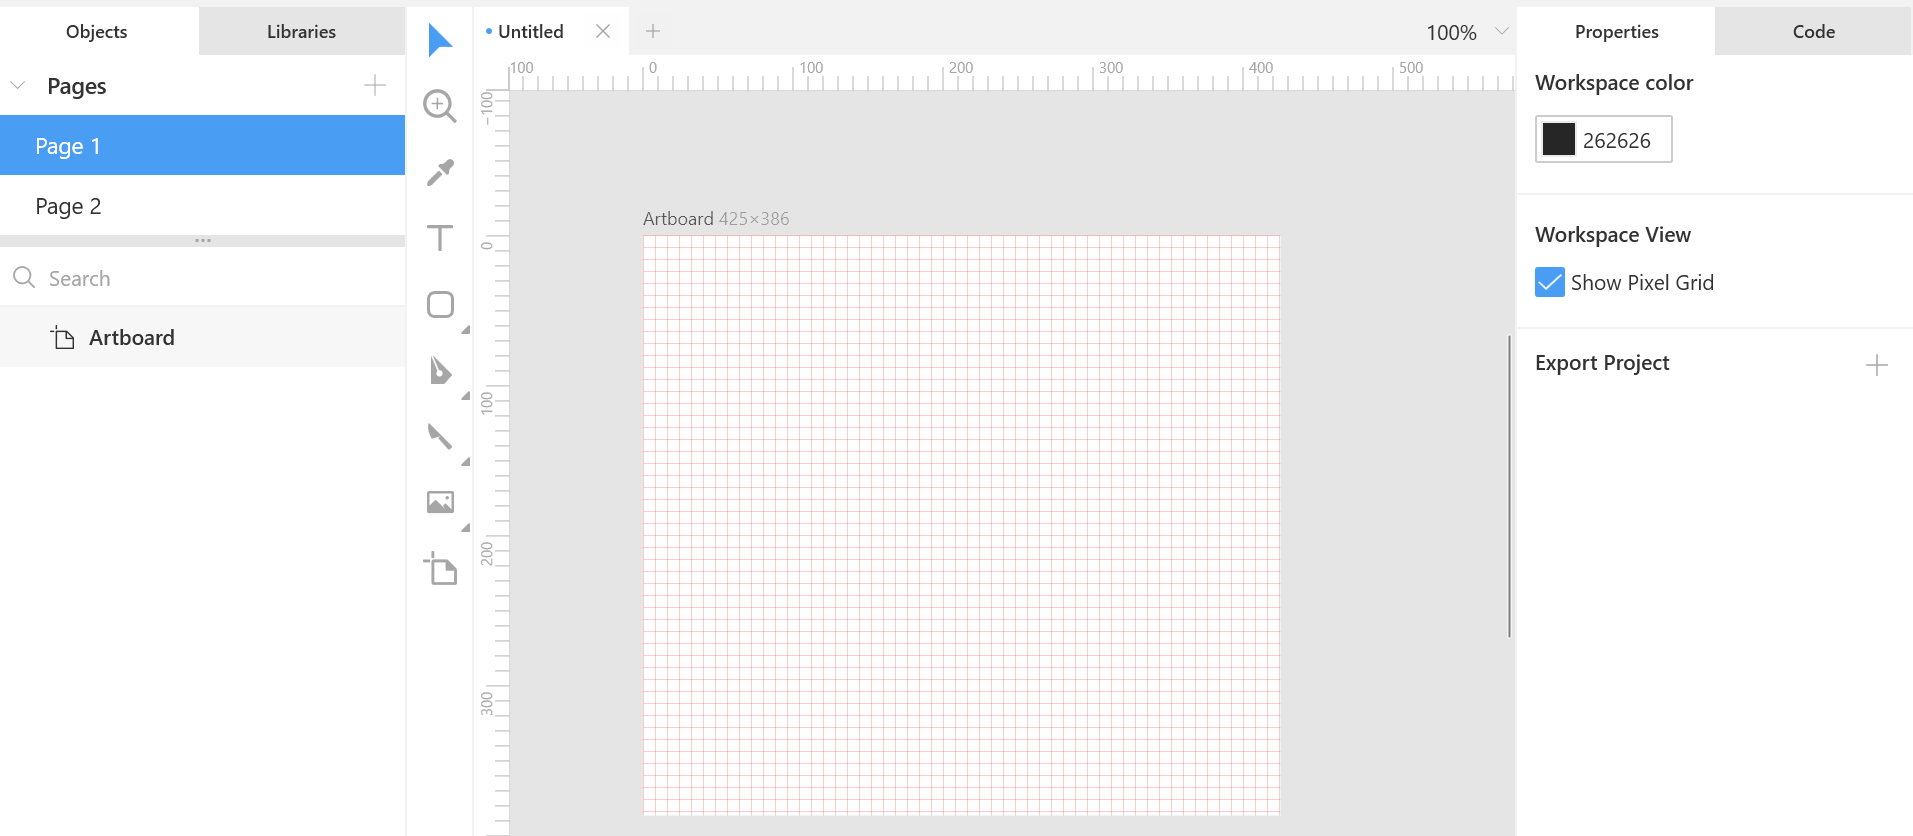
You can create a new project or open an existing project. Let’s create a new project and check out the user interface.
您可以创建一个新项目或打开一个现有项目。 让我们创建一个新项目并签出用户界面。
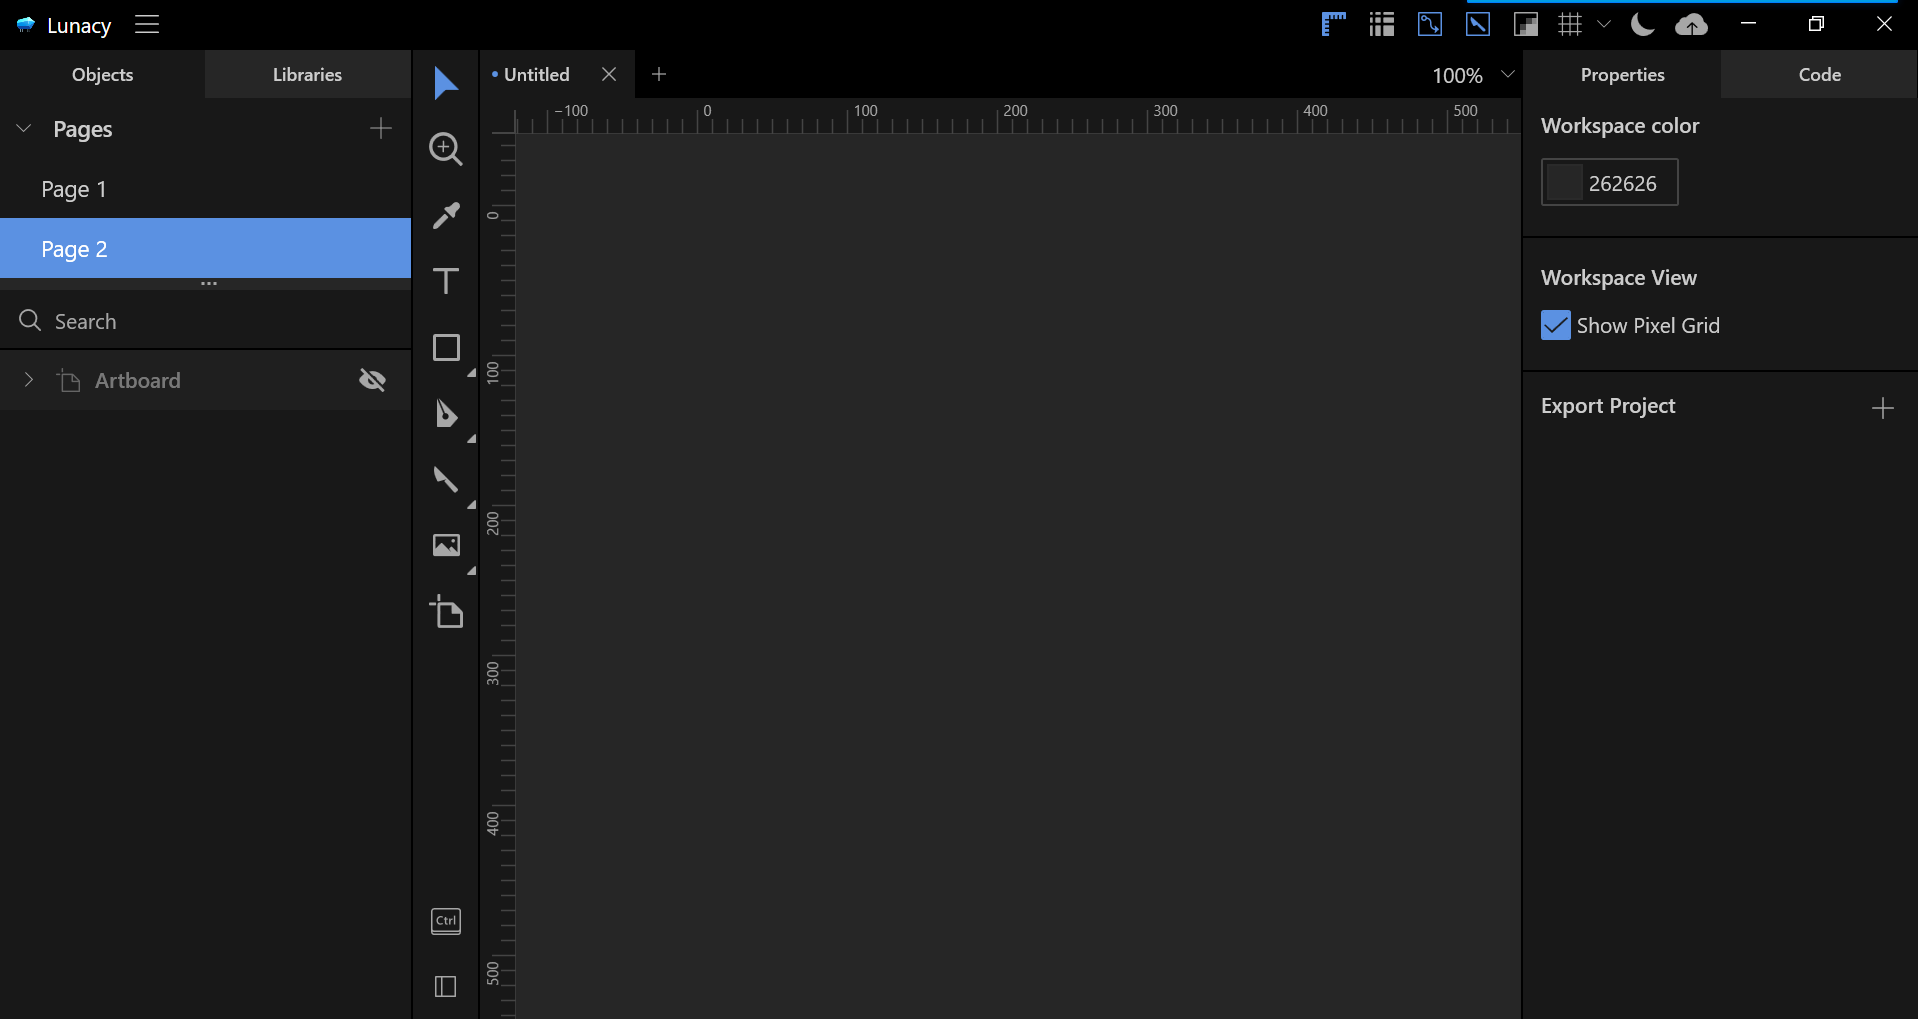
The main interface provides us with quite a number of tools to prototype the UI for our project. Besides, you can import ready-to-use assets via the Libraries menu. Click on the Libraries menu and you should be able to see the following
主界面为我们提供了许多工具来为项目的UI制作原型。 此外,您可以通过“ Libraries菜单导入即可使用的资产。 单击库菜单,您应该可以看到以下内容
At the end of the day, you should be able to create a quick prototype of the UI that you desired just like the one below.
归根结底,您应该能够像下面的示例一样快速创建所需的UI原型。

In the next section, we will explore further on the basic features provided.
在下一节中,我们将进一步探讨所提供的基本功能。
2.基本特征 (2. Basic Features)
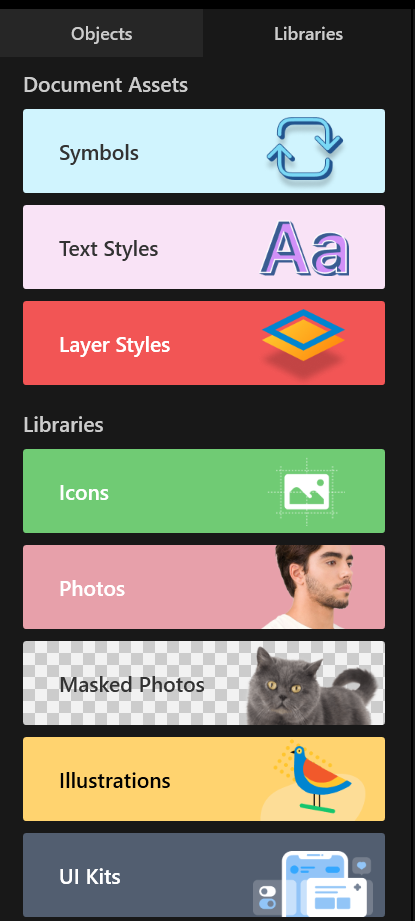
The interface cane be categorized into the following blocks
接口甘蔗可分为以下几类
High level actions block mainly focuses on the setting and configuration for the artboard.
高级动作块主要集中在画板的设置和配置上。
显示标尺(Ctrl + R) (Show ruler (Ctrl+R))
Toggle the ruler indicator. It is really helpful when you are resizing the size of the objects.
切换标尺指示器。 调整对象大小时,这确实很有帮助。

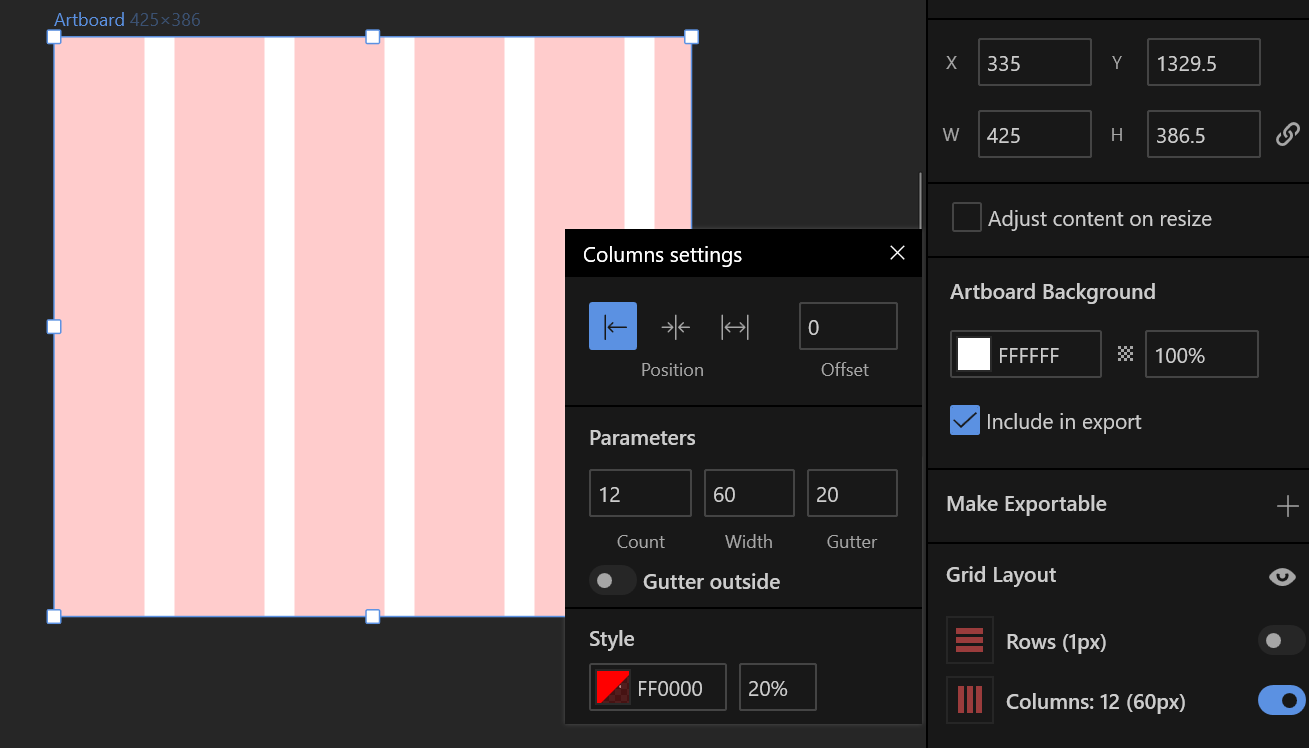
显示布局(Ctrl + :) (Show layout (Ctrl+:))
Toggle the layout indicator. When you click on the artboard object, you will see the layout setting for both the rows and columns in the inspector.
切换布局指示器。 单击画板对象时,您将在检查器中看到行和列的布局设置。
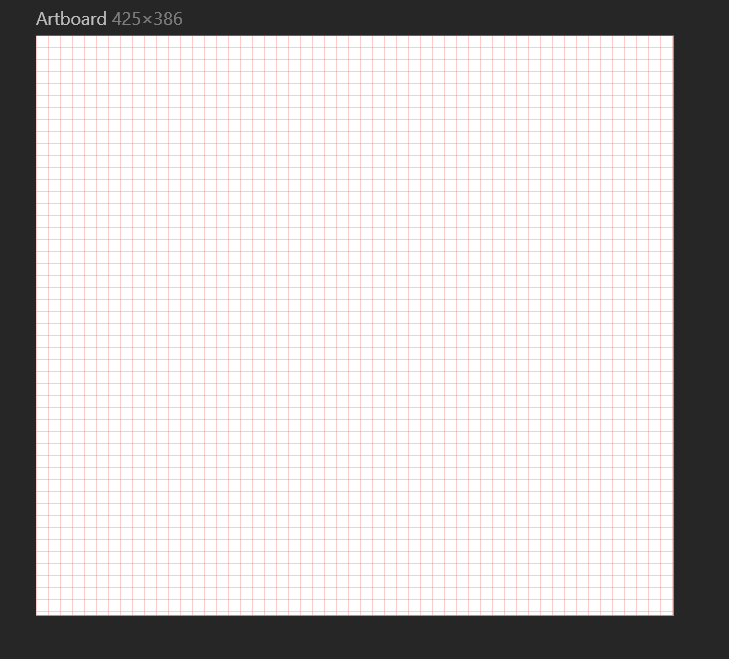
显示网格(Ctrl +') (Show grid (Ctrl+’))
Toggle the grid indicator. You set the size of the grid by clicking on the down arrow button besides it. The default is 8 pixels per grid.
切换网格指示器。 您可以通过单击网格旁边的向下箭头按钮来设置网格的大小。 默认值为每个网格8像素。
禁用暗模式 (Disable dark mode)
Toggle between dark or light theme. The following is example of how the light theme looks like.
在深色或浅色主题之间切换。 以下是灯光主题外观的示例。
发布到网络 (Publish to web)
Uploads the file to Icons8 CDN servers and generate an URL link. You can use it directly instead of saving the image to a file. A link will be generated which can be used directly in your web application.
将文件上传到Icons8 CDN服务器并生成URL链接。 您可以直接使用它,而不必将图像保存到文件中。 将生成一个链接,该链接可以直接在您的Web应用程序中使用。
画板工具(A) (Artboard Tool (A))
Artboard tool allows you to create a fixed frame inside the canvas. You can think of it as a container for the objects that you are going to create later. It is recommended to create a new artboard for each new interface. Click on the artboard tool and move over to the canvas. Click on a starting point and start dragging to create the container of your choice.
画板工具允许您在画布内部创建固定框架。 您可以将其视为稍后将要创建的对象的容器。 建议为每个新界面创建一个新的画板。 单击画板工具,然后移至画布。 单击起点并开始拖动以创建您选择的容器。
An artboard object will be created in the hierarchy. You can lock it to prevent any further editing .or hide it by disabling the visibility via the lock and eye button.
画板对象将在层次结构中创建。 您可以锁定它以防止进一步编辑。或者通过锁定和眼睛按钮禁用可见性来隐藏它。

影像工具(M) (Image Tool (M))
You can easily import any kind of image into the canvas via the Image tool. Alternatively, you can simply drop an image inside the canvas from a directory.
您可以通过“图像”工具轻松地将任何类型的图像导入画布。 或者,您可以简单地从目录将图像放入画布。
When you click on the object at the hierarchy, you will be able to see additional tools for object manipulation depends on the type of objects.
单击层次结构上的对象时,您将能够看到其他对象操作工具,具体取决于对象的类型。

Some of the most useful tools includes:
一些最有用的工具包括:
Flip horizontally— Flip the object horizontally.Flip horizontally—Flip horizontally翻转对象。Flip vertically— Flip the object vertically.Flip vertically—Flip vertically翻转对象。Group— Group the selected objects.Group-分组选定的对象。Ungroup— Ungroup the selected objects.Ungroup—取消组合所选对象。
If you are dealing with more than one objects, Boolean Operation tool can be useful to create your desired vector.
如果要处理多个对象,则Boolean Operation工具可用于创建所需的矢量。
Union— Create a vector that is the combination of both vectors’ areas.Union—创建一个矢量,将两个矢量的面积组合在一起。Subtract— Create a vector where the top shape minus the shape of the shapes below it.Subtract—创建一个矢量,其中顶部形状减去其下方形状的形状。Intersect— Create a vector where the area of the shapes have overlapped.Intersect—创建一个矢量,其中形状的面积重叠。Difference— Create a vector where the area of the shapes did not overlap. It’s the inverse of an intersect operation.Difference—创建一个矢量,形状的面积不重叠。 这是相交操作的逆过程。Flatten Selection— Reduce all the selected objects into a single vector shape.Flatten Selection—将所有选定对象缩小为单个矢量形状。
头像工具(Q) (Avatar Tool (Q))
This powerful tool creates a random avatar for you.
这个功能强大的工具会为您创建一个随机化身。
The images inside the avatar are randomly selected but you can customize it via the configuration in the inspector. There are also additional settings available such as borders, shadows, inner shadow and Gaussian blur. Simply click on the + sign to add the effect to the current object.
化身内部的图像是随机选择的,但是您可以通过检查器中的配置对其进行自定义。 还有其他可用设置,例如边框,阴影,内部阴影和高斯模糊。 只需单击+号即可将效果添加到当前对象。
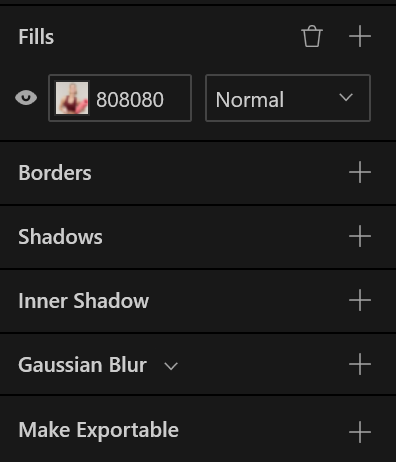
If you simply dislike the current image and would like to change to a new random image, you can click on the rotate button which is located at the top left of the avatar.
如果您只是不喜欢当前图像并想更改为新的随机图像,则可以单击头像左上方的“旋转”按钮。
笔工具(P) (Pen Tool (P))
Pen tool can be used to create a customized shapes. It is highly recommended to toggle on Grid when you attempt to draw the vector. Additional effects can be added to the vector via the inspector.
Pen tool可用于创建自定义形状。 强烈建议您在尝试绘制矢量时在网格上切换。 可以通过检查器将附加效果添加到矢量。
铅笔工具(N) (Pencil Tool (N))
This tool allows us to draw anything the canvas. The will be treated as line vector based on the input strokes.
这个工具允许我们在画布上绘制任何东西。 将根据输入笔划将其作为线向量。
形状 (Shape)
Lunacy also provides us with a few tools that are meant to create shapes. At the time of this writing, the full list is as follow:
Lunacy还为我们提供了一些用于创建形状的工具。 在撰写本文时,完整列表如下:
- Triangle Tool 三角工具
- Rectangle Tool 矩形工具
- Star Tool 星形工具
- Round rectangle Tool 圆角矩形工具
- Ellipse Tool 椭圆工具
- Polygon Tool 多边形工具
- Line Tool 线工具
- Arrow Tool 箭头工具
Let’s have a look at how to create a simple triangle and change the fill. You can map a customized photo inside the shape as well.
让我们看一下如何创建一个简单的三角形并更改填充。 您也可以在形状内映射自定义照片。

文字工具(T) (Text Tool (T))
You can fill the canvas with your desired text via the Text Tool.
您可以通过Text Tool用所需的文本填充画布。
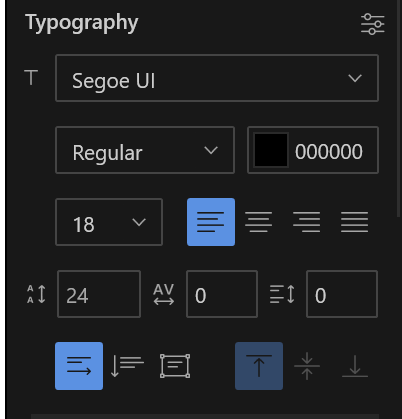
At the inspector, you can find the Typography setting such as family font, font style, font size and others.
在检查器中,您可以找到“版式”设置,例如家庭字体,字体样式,字体大小等。
吸管工具(I) (Eyedropper Tool (I))
You can instantly modify the colour of the vector by utilizing the Eyedropper Tool. Simply find the color of you preferences and click on it.
您可以使用Eyedropper Tool立即修改矢量的颜色。 只需找到您的首选项颜色,然后单击即可。
其他 (Others)
The latest version of Lunacy contains two additional tool:
最新版本的Lunacy包含两个附加工具:
Slice Tool— Slice the canvas to create a single image out of it.Slice Tool—切片画布以从中创建单个图像。Hotspot Tool— Create an object that can link to other artboard. The target can be in any page. At the time of this writing, you have to rely on the inspector to move to target.Hotspot Tool-创建可以链接到其他画板的对象。 目标可以在任何页面中。 在撰写本文时,您必须依靠检查员来确定目标。
3.代码预览 (3. Code Preview)
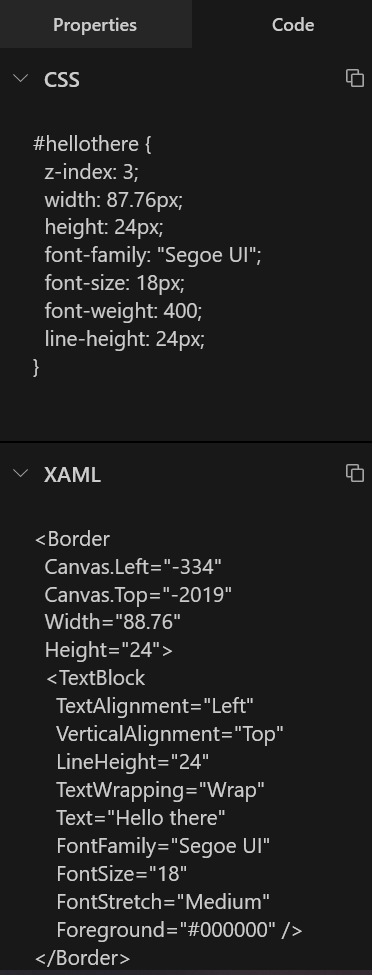
One of the most useful feature for Lunacy is that it can preview the code for you based on what you have created so far. Simply select an object and click on the Code menu in the Inspector. It is located at the top right of the user interface. You will be able to see code preview for:
Lunacy最有用的功能之一是,它可以根据到目前为止创建的内容为您预览代码。 只需选择一个对象,然后在Inspector单击“ Code菜单。 它位于用户界面的右上方。 您将能够看到以下代码的预览:
- CSS CSS
- XAML XAML
- SVG SVG
4。结论 (4. Conclusion)
Let’s recap on what we have learned today. We started off downloading the installer from the official websites. Then, we ran the installation and launched Lunacy.
让我们回顾一下我们今天学到的东西。 我们开始从官方网站下载安装程序。 然后,我们运行安装程序并启动Lunacy 。
After that, we explored the main user interfaces of the program. The tools, canvas and inspector are all organized neatly into the respective blocks. Besides, we also tested some useful tools such as Avatar Tool, Text Tool and Eyedropper Tool.
之后,我们探索了程序的主要用户界面。 工具,画布和检查器都整齐地组织在相应的块中。 此外,我们还测试了一些有用的工具,例如Avatar Tool , Text Tool和Eyedropper Tool 。
Moreover, you can get a few lines of code snippet by simply clicking on the Code menu in the Inspector. Having said that, it does not really generate a full fledged front-end code for you that caters to any kind of frameworks.
此外,您只需单击Inspector的Code菜单,就可以获得几行代码片段。 话虽如此,它并不能真正为您生成适合任何框架的完整的前端代码。
Thanks for reading and see you again in the next article.
感谢您的阅读,下篇再见。
翻译自: https://uxdesign.cc/introduction-to-lunacy-prototyping-tool-for-windows-3a14c7fefaab
windows原型设计工具


 836
836

 被折叠的 条评论
为什么被折叠?
被折叠的 条评论
为什么被折叠?
 到【灌水乐园】发言


