


 本文分享了开发iOS 14小部件的10个实用技巧,包括设计、交互和性能优化等方面,帮助iOS开发者提升小部件的用户体验。
ios开发技巧
Widgets have been one of the top features of iOS 14 during WWDC 2020, where the biggest change ever of iOS home screen has been unveiled. On the user point of view, they represent a new type of interaction, a new entry point for apps; on a technology point of view, they are a manifesto of the way chosen by Apple, where SwiftUI (the only way to build widget’s views) and an optimized universality (widgets are available on iOS, iPadOS and macOS) are key elements. After experimenting with the WidgetKit framework on iOS 14 and Xcode 12 betas, I want to share 10 interesting tips that could be useful for many use cases when coding widgets for your apps. Disclaimer: I assume you already know how to create a simple widget and basic related APIs. Let’s start! 👨🏼💻
小部件一直是WWDC 2020期间iOS 14的主要功能之一,其中揭露了iOS主屏幕的最大变化。 从用户的角度来看,它们代表了一种新型的交互方式,是应用程序的新切入点。 从技术角度来看,它们是Apple选择的方式的宣言 ,其中SwiftUI(构建小部件视图的唯一方法)和优化的通用性(iOS,iPadOS和macOS上有小部件)是关键要素。 在iOS 14和Xcode 12 beta上使用WidgetKit框架进行实验之后,我想分享10个有趣的技巧,这些技巧在为应用程序编码小部件时对于许多用例很有用。 免责声明:我想您已经知道如何创建简单的小部件和基本的相关API。 开始吧! 💻
1. UserDefaults Suite (1. UserDefaults Suite)
Very likely, you’ll need to use UserDefaults from your widgets, in order to read user preferences or some other small amount of data. To do so, the standard container isn’t the way, because its content isn’t shared between different targets; instead, as for any other app extension, you have to rely (from the app and from widgets) to the shared “suite”, named with the App Group ID, using the dedicated api:
很可能,您需要使用窗口小部件中的UserDefaults才能读取用户首选项或其他少量数据。 为此, standard容器是不可能的,因为它的内容不会在不同的目标之间共享。 相反,对于其他任何应用程序扩展,您都必须使用专用api(从应用程序和小部件)依赖于以应用程序组ID命名的共享“套件” :
let userDefaults = UserDefaults(suiteName: “your-app-group-id”)The App Group is a capability available in the “Signin & Capabilities” tab of your targets: remember to add the App Group capability both in the app’s target and in the widget’s target, otherwise it won’t work.
应用程序组的功能在目标的“登录和功能”选项卡中可用:请记住在应用程序的目标和小部件的目标中都添加应用程序组的功能,否则将无法使用。
2.位置许可 (2. Location permission)
As a general rule, widgets inherit every permission status from the parent app and it’s not allowed to prompt requests from the widget itself. Location permission represents an exception: starting from beta 5, when a widget using location is added to the home screen, the user will be automatically requested to grant permission through an alert; the choice can be changed anytime from the Settings, as a new “While Using the App or Widgets” option is available.
通常,小部件会继承父应用程序的所有权限状态,并且不允许提示来自小部件本身的请求。 位置权限代表一个例外:从beta 5开始,将使用位置的小部件添加到主屏幕后,系统会自动要求用户通过警报授予权限; 由于可以使用新的“在使用应用程序或窗口小部件时”选项,因此可以随时从“设置”中更改选择。
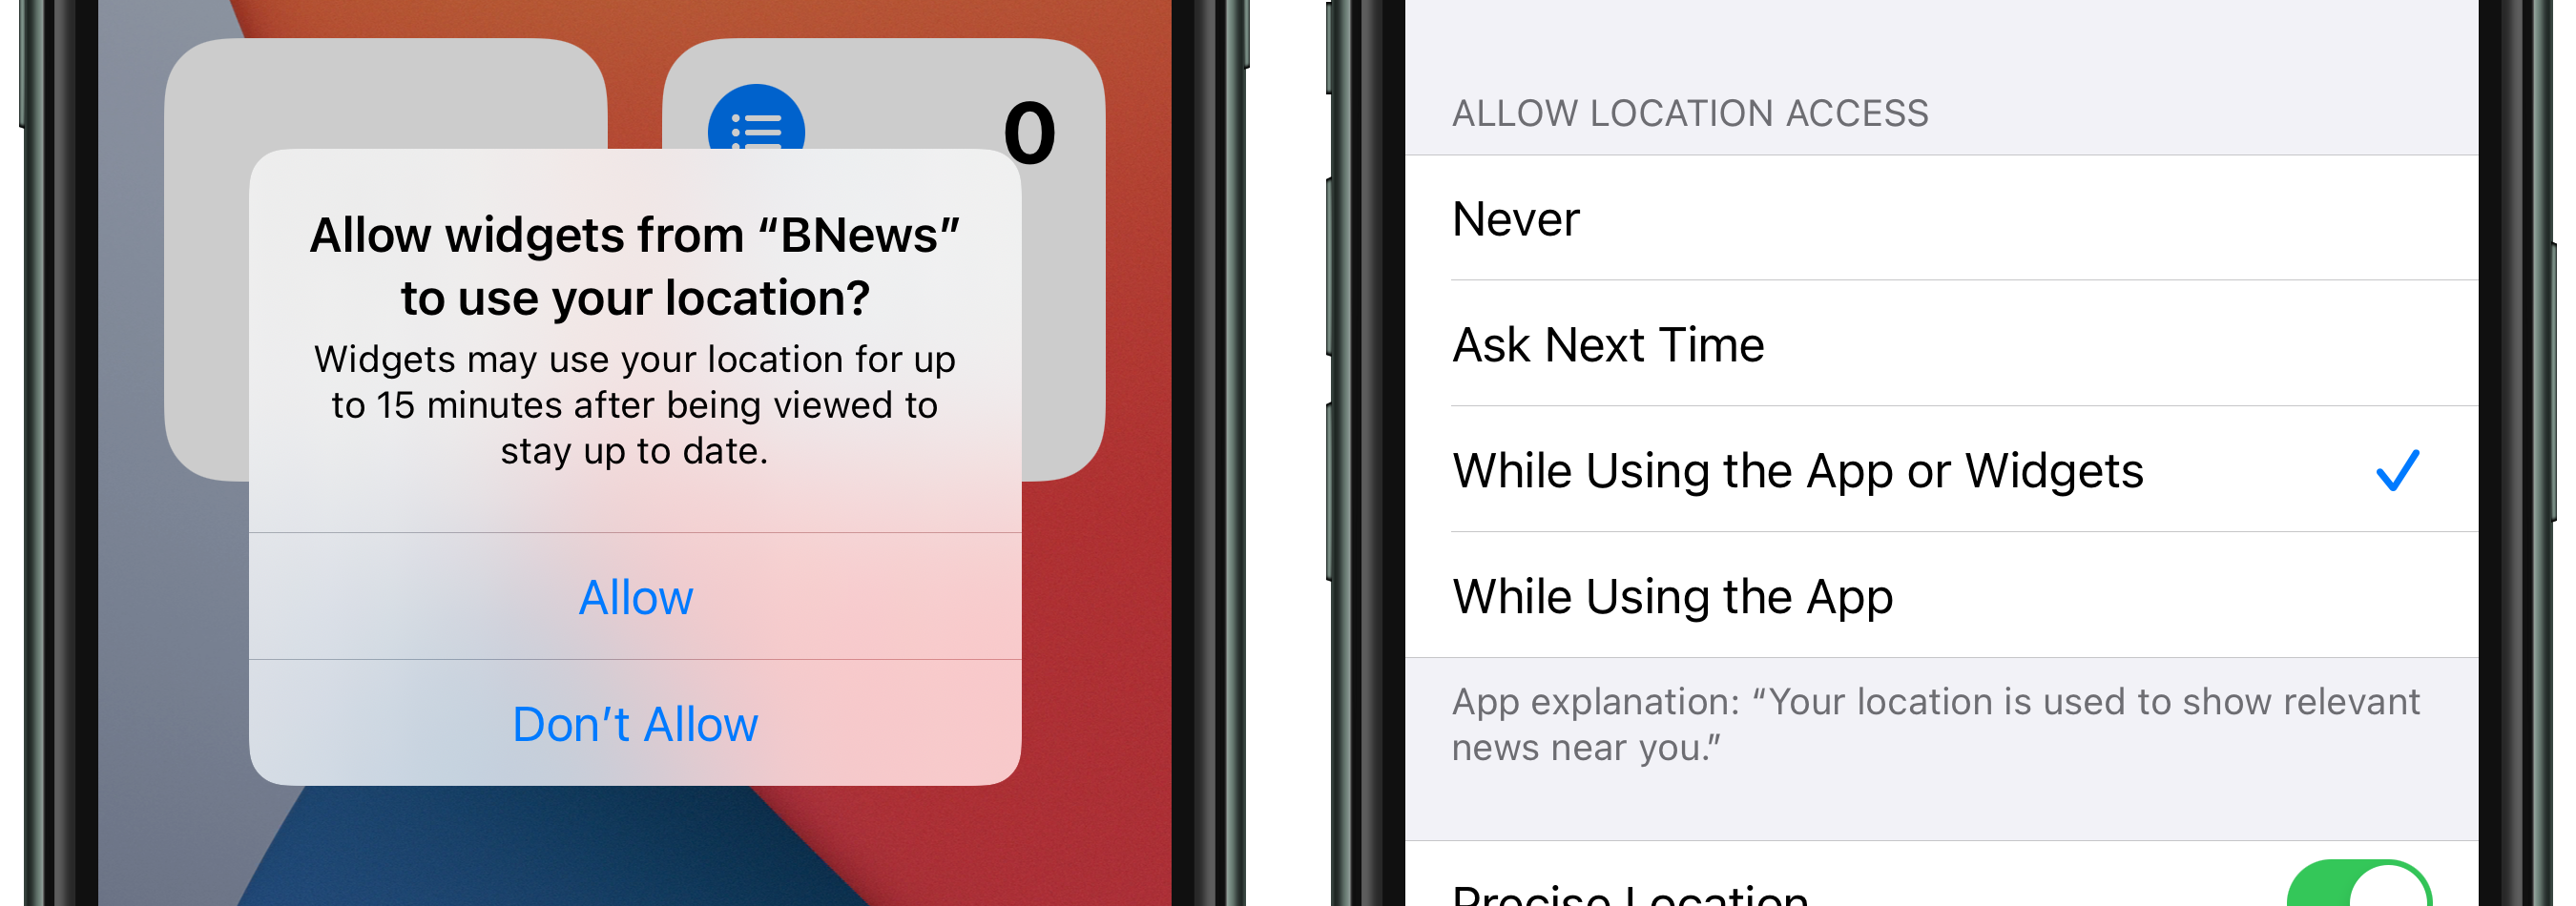
In addition, remember to put the NSWidgetWantsLocation (boolean) and NSLocationUsageDescription keys in the widget extension Info.plist to get location services work properly.
另外,请记住将NSWidgetWantsLocation (布尔)和NSLocationUsageDescription键放在小部件扩展Info.plist以使位置服务正常工作。

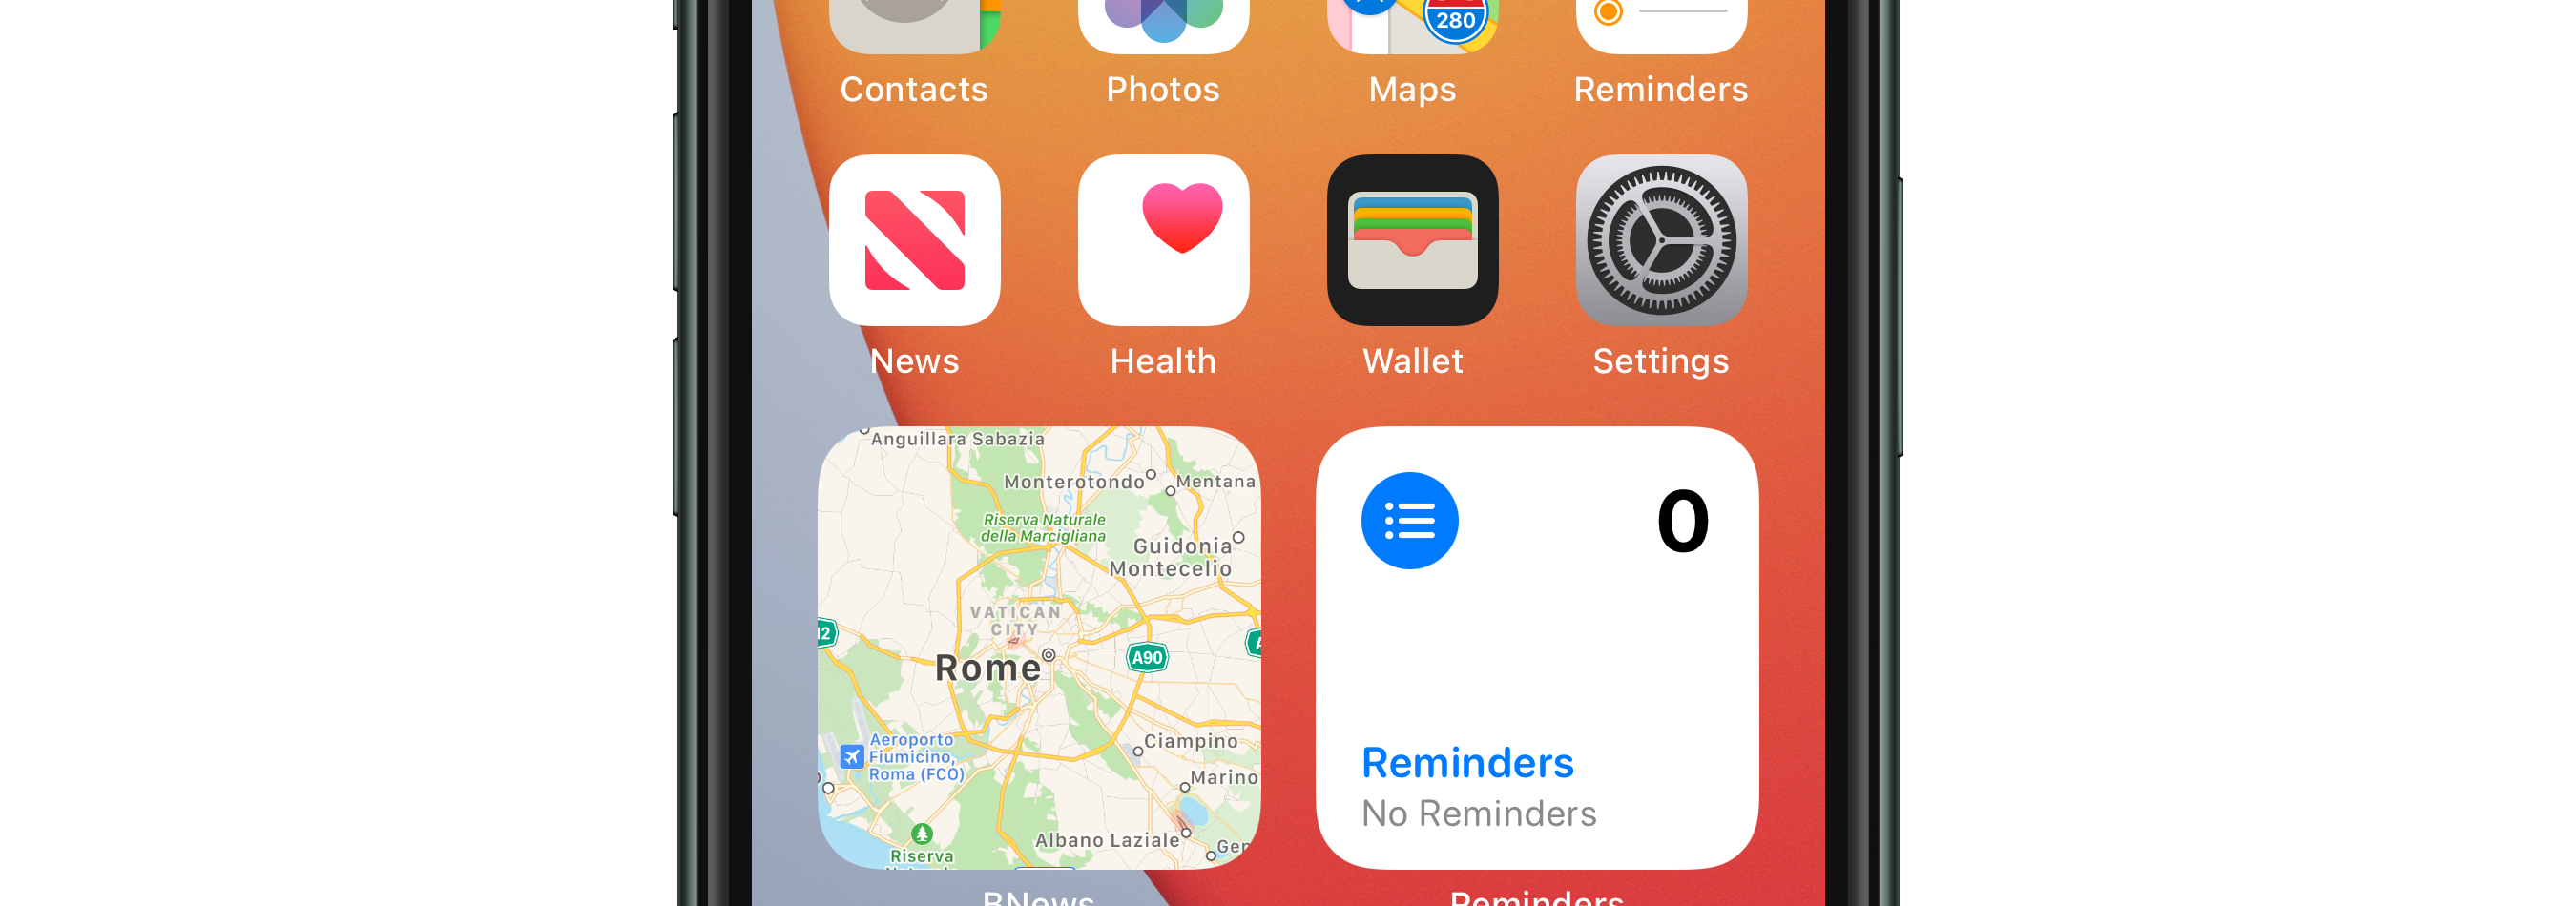
3.使用MKMapSnapshotter进行地图 (3. Maps with MKMapSnapshotter)
Talking about location, another question could come up: what is the best way to present a map view inside a widget? The recommended option is to use a MKMapSnapshotter in place of a MKMapView; in fact, the standard map view doesn't work at all. The snapshot captures the map’s contents in a simple image. To get the desired MKMapSnapshotter.Snapshot:
关于位置,可能会出现另一个问题: 在小部件内呈现地图视图的最佳方法是什么? 推荐的选项是使用MKMapSnapshotter代替MKMapView ; 实际上,标准地图视图根本不起作用。 快照以简单的图像捕获地图的内容。 要获取所需的MKMapSnapshotter.Snapshot :
func getMapSnapshot(completionHandler: @escaping (Image) -> Void) {
    let coordinate = self.locationManager.location?.coordinate ?? self.defaultCoordinate
    let options = MKMapSnapshotter.Options()
    options.region = MKCoordinateRegion(center: coordinate, span: self.span)
    let snapshot = MKMapSnapshotter(options: options)
    snapshot.start { (snapshot, error) in
        let image = Image(uiImage: snapshot?.image ?? UIImage(named: "map-placeholder")!)
        completionHandler(image)
    }
}
The closure is perfect to be used in the getTimeline(in:completion:) function of TimelineProvider protocol: once the image is loaded, you can create your entries and define the timeline. The snapshot is highly customizable and you find the full documentation here.
该闭包非常适合在TimelineProvider协议的getTimeline(in:completion:)函数中使用:加载图像后,您可以创建条目并定义时间线。 快照是高度可定制的,您可以在此处找到完整的文档。
4.内存限制 (4. Memory limit)
The map shapshot is a great example of how light should be widget’s content. Videos, animations and so on aren’t available in widgets: moreover, UIKit views wrapped in UIViewRepresentable don’t work in widgets. Related to this topic, you should take into consideration the limit on memory allocation: it’s not explicitly stated in docs, but widgets exceeding 30 Mb seems to crash in available betas, so keep in mind this.
地图快照是光应如何成为小部件内容的一个很好的例子。 视频,动画等在小部件中不可用:而且,包装在UIViewRepresentable UIKit视图在小部件中不起作用。 与该主题相关,您应该考虑内存分配的限制:在文档中没有明确说明,但是超过30 Mb的小部件在可用beta中似乎崩溃了,因此请记住这一点。
5.更新政策 (5. Updates policy)
I’m not going through different ways to update your widget and manage the associated timeline (it would request a dedicated article 😁), but an unclear point about this is: how often can a widget be updated? Even in this case the documentation doesn’t point to a precise policy, but thanks to this thread on the Apple Developer Forum, we can say that 15 minutes is probably the minimum time interval to not run out of limited available updates.
我不会通过不同的方式来更新您的窗口小部件并管理相关的时间轴(这将要求专门的文章😁),但是目前尚不清楚的一点是: 窗口小部件可以多久更新一次? 即使在这种情况下,文档也没有指出精确的策略,但是由于Apple Developer Forum上的该线程 ,我们可以说15分钟可能是不耗尽有限的可用更新的最短时间间隔。
6. ContainerRelativeShape (6. ContainerRelativeShape)
Another interesting as simple UI trick is relative to views’ shape inside widgets. To be consistent with the widget corner radius (which changes across different devices), Apple suggests to use the SwiftUI ContainerRelativeShape api, instead of defining custom radius: it will automatically make shapes concentric with the widget corner radius. Here’s an example:
另一个有趣的简单UI技巧是与小部件内部视图的形状有关。 为了与小部件角半径(在不同设备上有所变化)保持一致,Apple建议使用SwiftUI ContainerRelativeShape api,而不是定义自定义半径:它将自动使形状与小部件角半径同心。 这是一个例子:
Image("map-placeholder")
    .clipShape(ContainerRelativeShape())
7.链接与widgetUrl (7. Link vs widgetUrl)
Once the user interacts (taps) with a widget, the parent app is launched to handle the request: you can specify an url to be passed to the app, in order to do specific actions. There are 2 ways: by using widgetUrl(_:) modifier to define a unique behavior, as it will be applied to all the widget target, or by using the Link control to define different urls for different targets in the view’s hierarchy. As the small widget allows just one single tap target, it’s preferable to use the widgetUrl modifier for it. Let’s see an example:
用户与小部件进行交互(轻击)后,将启动父应用程序以处理请求:您可以指定要传递给应用程序的URL,以执行特定操作。 有两种方法:通过使用widgetUrl(_:)修饰符定义唯一的行为(将其应用于所有窗口小部件目标),或使用Link控件为视图层次结构中的不同目标定义不同的url。 由于小窗口部件只允许一个单击目标,因此最好对其使用widgetUrl修饰符。 让我们来看一个例子:
struct WidgetView : View {
    var entry: Provider.Entry
    @Environment(\.widgetFamily) var family


    @ViewBuilder
    var body: some View {
        switch family {
        case .systemSmall:
            NewsView(news: entry.newsArray.first)
                .widgetURL(entry.newsArray.first.deeplink)
        default:
            HStack(alignment: .top) {
                ForEach(entry.newsArray, id: \.self) { news in
                    Link(destination: news.deeplink!) {
                        NewsView(news: news)
                    }
                }
            }
        }
    }
}
In the case of medium or large widgets, you can use the two options together: each Link’s url is used for taps in its target view and the widgetUrl for taps anywhere else. The url is handled by the application(_:open:options:) method for apps with classic AppDelegate, or by the onOpenUrl(perform:) api for SwiftUI life cycle apps introduced with iOS 14.
对于中型或大型窗口小部件,可以一起使用这两个选项:每个链接的url用于其目标视图中的水龙头,而widgetUrl用于其他位置的水龙头。 对于具有经典AppDelegate的应用,该URL由application(_:open:options:)方法处理;对于iOS 14引入的SwiftUI生命周期应用,由onOpenUrl(perform:) API处理。
8.小部件捆绑 (8. Widgets Bundle)
Another great feature is the ability to distribute more than a widget for the same app, using the WidgetBundle api:
另一个很棒的功能是使用WidgetBundle api可以为同一个应用分发更多的小部件:
import WidgetKit
import SwiftUI


@main
struct BundleExample: WidgetBundle {
    @WidgetBundleBuilder
    var body: some Widget {
        MapWidget()
        NewsWidget()
    }
}
After some experiments, it seems you can bundle up to 5 different widgets, each with the 3 sizes available, but in this thread there’s a way to overcome this limit.
经过一些实验,似乎您可以捆绑多达5个不同的小部件,每个小部件具有3种可用大小,但是在此线程中,有一种方法可以克服此限制。
9. WidgetPreviewContext (9. WidgetPreviewContext)
While coding your widget, it comes really handy to have a preview of what you’re creating in the canvas area of Xcode Previews. You achieve this by specifying a PreviewProvider; the preview is the widget’s view where the PreviewContext is set as a WidgetPreviewContext:
在编码小部件时,在Xcode Previews的画布区域中预览正在创建的内容非常方便。 您可以通过指定PreviewProvider来实现; 预览是小部件的视图,其中PreviewContext设置为WidgetPreviewContext :
import WidgetKit
import SwiftUI


struct WidgetPreviewSmall_Previews: PreviewProvider {
    static var previews: some View {
        NewsWidgetView(entry: Entry.placeholder)
            .previewContext(WidgetPreviewContext(family: .systemSmall))
            .previewDisplayName("News Widget Small")
            .environment(\.colorScheme, .dark)
    }
}
It’s possible to define more than a single preview, to see widgets in all available family types, as well as modify some environment’s keys: in the example, I previewed a widget in dark mode.
可以定义多个预览,以查看所有可用族类型的小部件,以及修改某些环境的键:在示例中,我以暗模式预览了一个小部件。
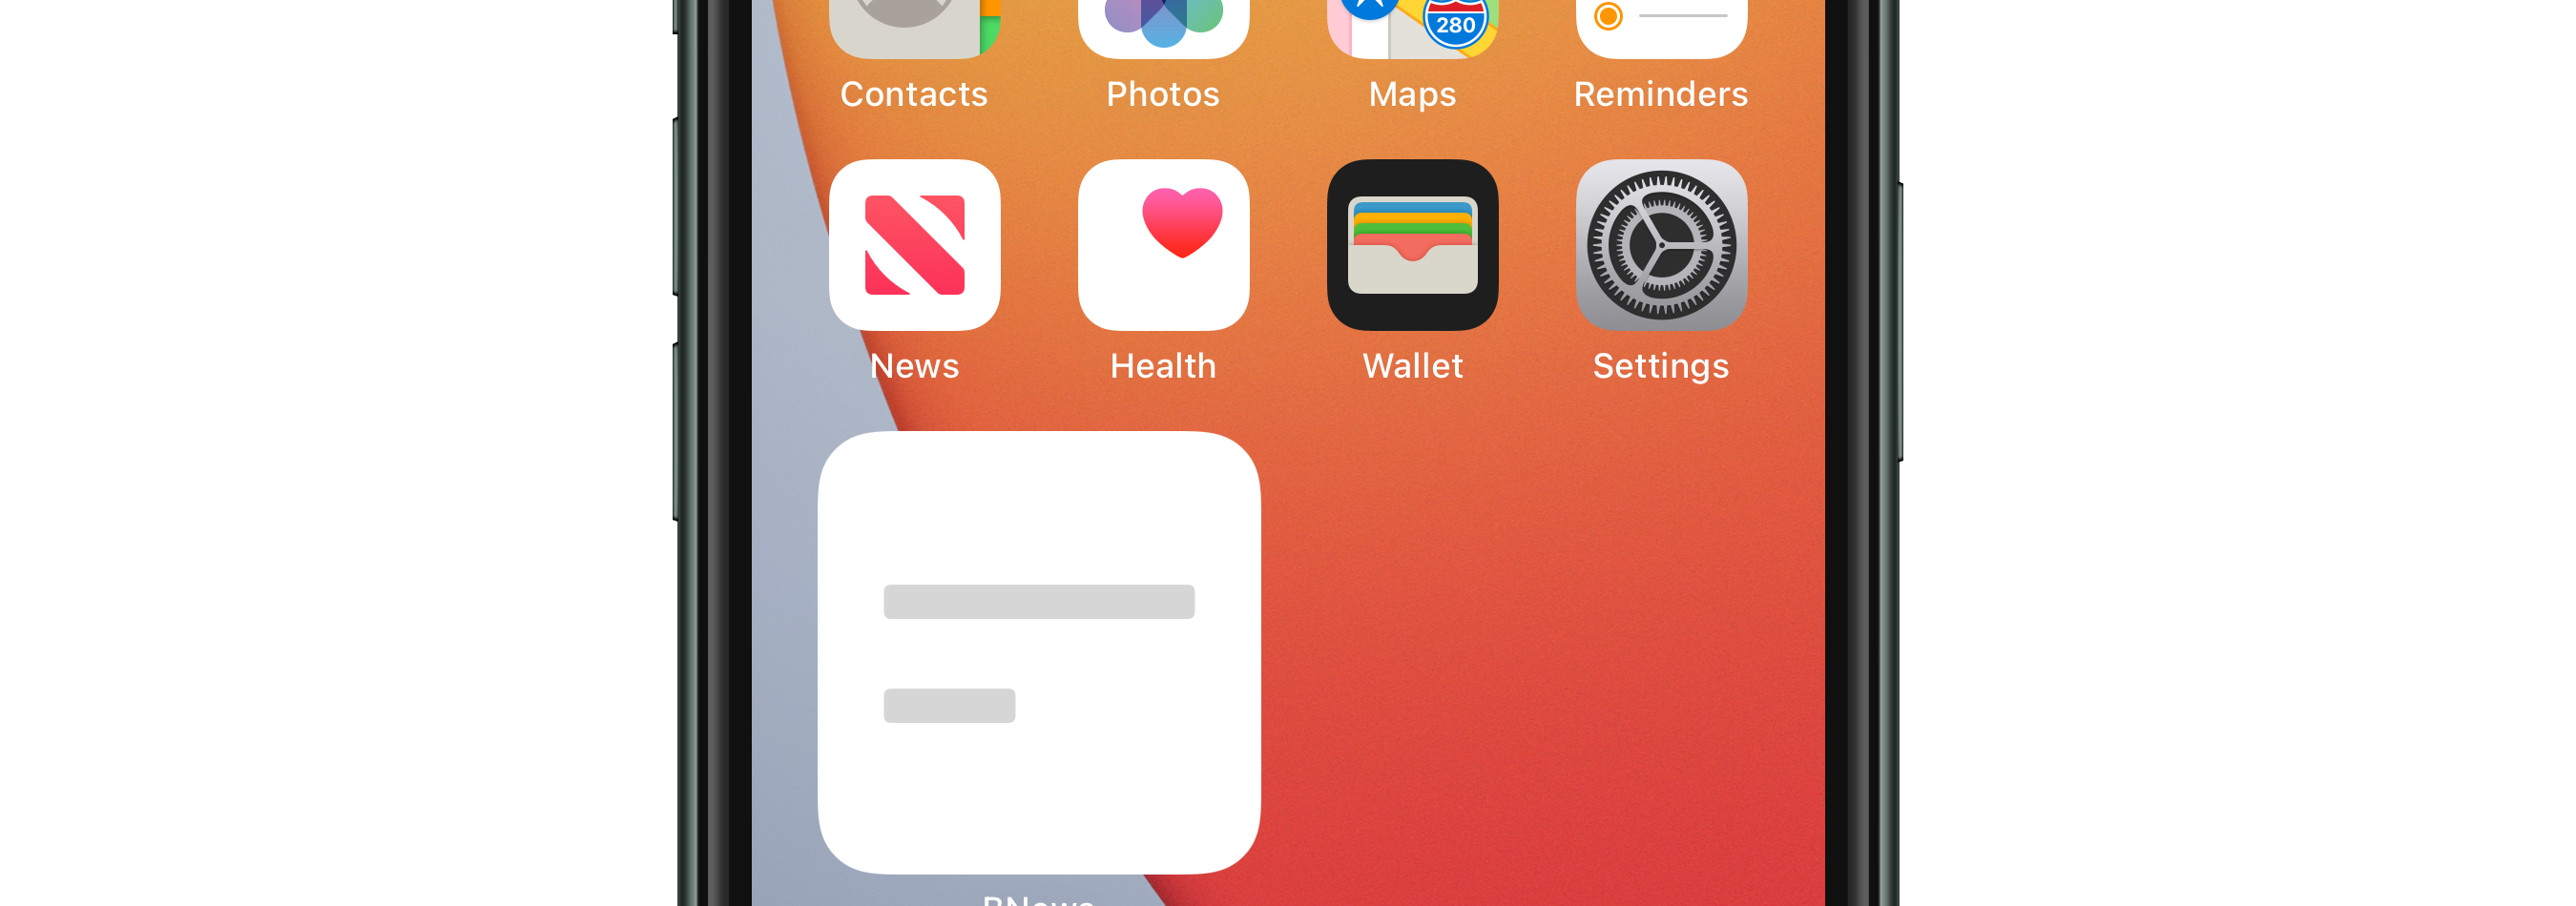
10.占位符 (10. Placeholders)
Placeholders are used to show a generic representation of the widget view while it loads the first time is added to the homescreen. Through betas, the way to define a placeholder has been simplified and now you just have to implement the required placeholder(in:) function of TimelineProvider, returning a normal TimelineEntry: the redacted(reason: .placeholder) view modifier will be automatically applied. 2 points about this: as now, images aren’t modified by the redacted effect. The second: you can prevent views from being redacted by using the unredacted() view modifier.
占位符用于显示窗口小部件视图的一般表示,该视图在第一次加载时添加到主屏幕。 通过beta版,简化了定义占位符的方式,现在您只需要实现TimelineProvider所需的placeholder(in:)函数,返回一个正常的TimelineEntry redacted(reason: .placeholder)视图修饰符将被自动应用。 关于这一点有2点:到现在为止,图像并未通过编辑效果进行修改。 第二个:您可以使用unredacted()视图修饰符防止视图被编辑。
翻译自: https://medium.com/swlh/10-tips-on-developing-ios-14-widgets-f17b865fbdbc
ios开发技巧


 2100
2100

 被折叠的 条评论
为什么被折叠?
被折叠的 条评论
为什么被折叠?
 到【灌水乐园】发言


