


测试beta测试
Expo is a platform for making native apps using languages that web-developers are familiar with (Javascript + React), streamlining the process and learning curve of launching an app.
Expo是一个平台,用于使用Web开发人员熟悉的语言(Javascript + React)制作本机应用程序,从而简化了启动应用程序的过程和学习过程。
In this article, you will learn how to launch an Expo managed app to TestFlight so users can start to experiment and test your app. Throughout the guide, I will attempt to give rough estimates of time and cost where appropriate.
在本文中,您将学习如何将Expo托管的应用程序启动到TestFlight,以便用户可以开始试验和测试您的应用程序。 在整个指南中,我将尝试在适当的时候粗略估算时间和成本。
你会需要: (You will need:)
- An email. 一封电邮。
- A debit/credit card to pay for Apple Developer. 用于支付Apple Developer费用的借记卡/信用卡。
- An apple computer, preferably macOS. 苹果计算机,最好是macOS。
让我们开始吧 (Let’s get started)
注册一个Apple开发者帐户 (Register an Apple Developer Account)
To distribute an app to iOS Apple Users, you will need to open a developer account and enroll in the Apple Developer Program. Without enrolling in the Apple Developer Program, you will be able to access basic features such as downloading Xcode and associated tools, as well as access to forums, documentation, and guides on building on the iOS platform. However, you will not be able to access AppConnect and TestFlight which are required to distribute your app. At the time of writing, the cost for enrolling in the Apple Developer Program is $149 AUD/annually.
要将应用程序分发给iOS Apple用户,您需要打开开发者帐户并注册Apple开发者计划 。 无需注册Apple Developer Program,您将能够访问基本功能,例如下载Xcode和相关工具,以及访问论坛,文档和在iOS平台上构建的指南。 但是,您将无法访问AppConnect 和 分发您的应用程序所需的TestFlight 。 在撰写本文时,注册Apple Developer Program的费用为每年149澳元。
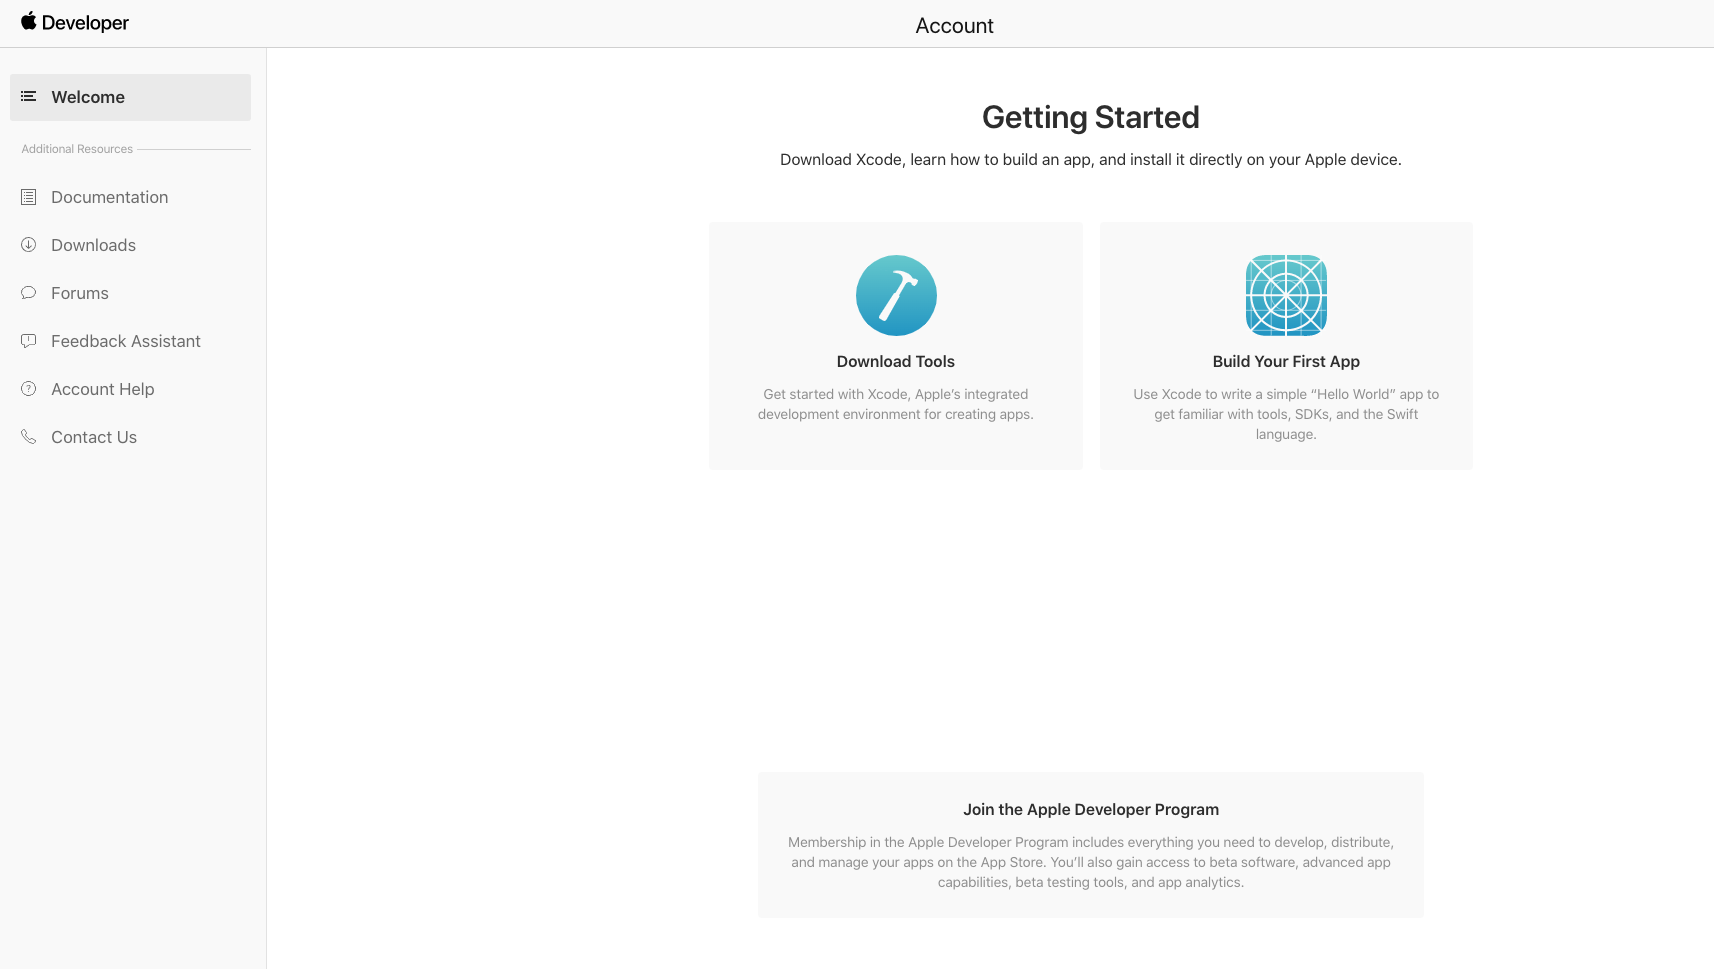
Visit https://developer.apple.com/account and sign in with an Apple ID, if you don’t have one yet, register one with the email that you want to associate your app with.
访问https://developer.apple.com/account并使用Apple ID登录,如果您还没有Apple ID,请在要与您的应用程序关联的电子邮件中注册一个。
2. Enroll in the Developer Program by following the steps on https://developer.apple.com/programs/enroll. You will need to enter your personal information, select your entity type (individual, business, not for profit, etc.) and pay the annual enrollment fee.
2.按照https://developer.apple.com/programs/enroll上的步骤注册开发人员计划。 您将需要输入您的个人信息,选择您的实体类型(个人,业务,非营利性等)并支付年度注册费。
3. Return to https://developer.apple.com/account and wait roughly 10 minutes for Apple to process your payment and you should have additional access to Program Resources.
3.返回到https://developer.apple.com/account并等待大约10分钟,Apple才能处理您的付款,您应该可以访问程序资源。
创建捆绑包标识符 (Creating a bundle identifier)
Once you have access to the full features of the Apple Developer Program, you will need to generate a bundle identifier for your Expo App.
一旦可以访问Apple Developer Program的全部功能,则需要为Expo App生成捆绑包标识符。
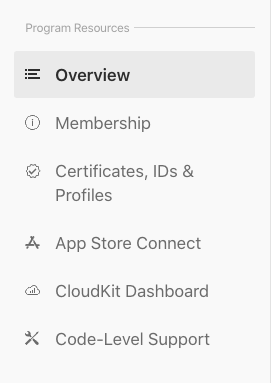
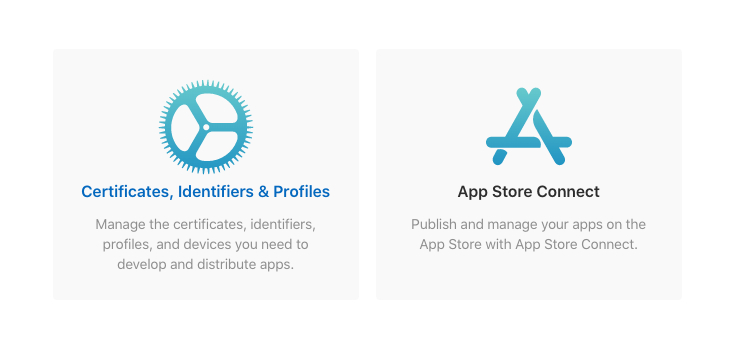
Revisit your developer dashboard and select Certificates, Identifiers & Profiles
重新访问开发人员仪表板,然后选择证书,标识符和配置文件
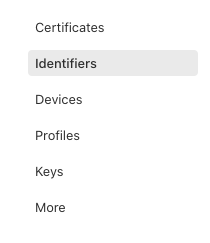
2. You should be on the URL https://developer.apple.com/account/resources/certificates/list where you want to navigate to Identifiers on the sidebar.
2.您应该位于URL https://developer.apple.com/account/resources/certificates/list上 ,您要在其中导航到侧栏上的“ 标识符 ”。
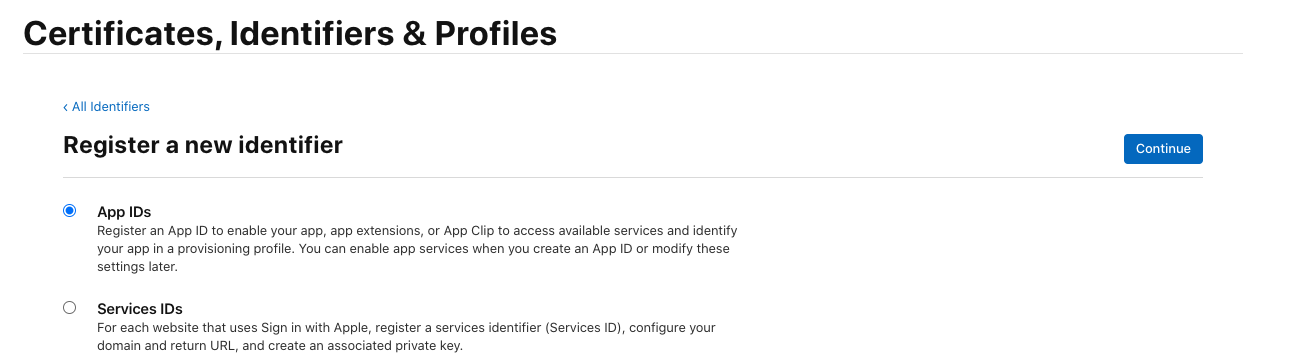
3. Clicking on the blue add icon, you will then run through the flow to create a new identifier — select App IDs, press continue, and select the App box.
3.单击蓝色的添加图标,然后您将在流程中创建一个新的标识符-选择“应用程序ID”,按“继续”,然后选择“应用程序”框。
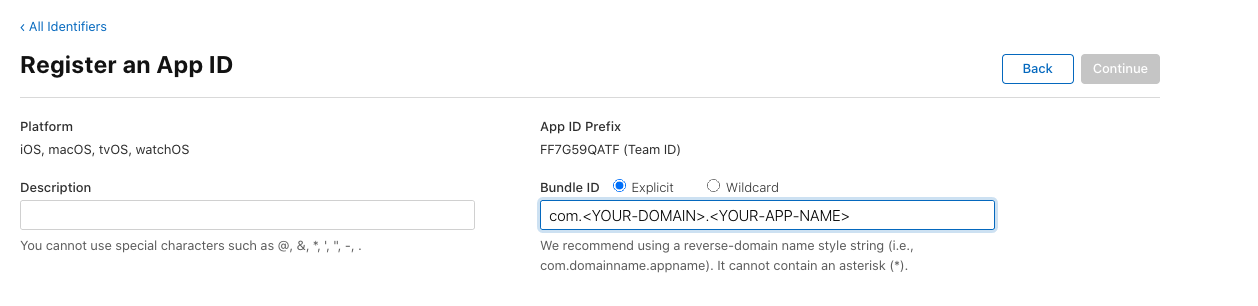
4. At this step, you will then register an App ID and will be able to configure the capabilities that your app can handle such as Apple Pay. For the purpose of this guide, we are going to leave these configurations for production.
4.在此步骤中,您将注册一个应用程序ID,并将能够配置您的应用程序可以处理的功能,例如Apple Pay。 就本指南而言,我们将这些配置留待生产。
5. When you are on the Register an App ID screen. Create an explicit bundle ID using Apple’s recommendations for a reverse-domain-name (com.<YOUR-DOMAIN-NANE>.<YOUR-APP-NAME> and press continue.
5.在“ 注册应用程序ID”屏幕上。 使用Apple推荐的反向域名(com。<YOUR-DOMAIN-NANE>。<YOUR-APP-NAME>)创建一个明确的捆绑包ID,然后按继续。
6. Congratulations you have registered your first app with Apple.
6.祝贺您已经向Apple注册了第一个应用程序。
Now let’s return to our Expo App Project.
现在,让我们回到我们的Expo App Project。
添加应用图标 (Add an app icon)
Before we run through the expo publish and build flow, we need to create an App Icon. The icon will need to be 1024px x 1024px in size. You can create this icon using your preferred design tool.
在完成博览会的发布和构建流程之前,我们需要创建一个应用程序图标。 该图标的大小必须为1024px x 1024px。 您可以使用首选的设计工具来创建此图标。
配置您的app.json (Configure your app.json)
In an Expo Managed App, the app.json file is used to configure all the meta-data and settings for your app. If you need help setting up your app.json view their guide at https://docs.expo.io/workflow/configuration/
在Expo Managed App中,app.json文件用于配置应用程序的所有元数据和设置。 如果您在设置app.json时需要帮助,请访问https://docs.expo.io/workflow/configuration/查看其指南。
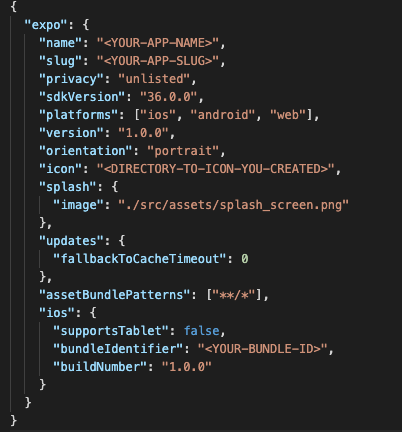
Attached above is the example of the app.json I have for my app. The main steps you have to configure are:
上面附带的是我为我的应用程序创建的app.json的示例。 您必须配置的主要步骤是:
icon — add the path to the icon you created in Step C within your project (i.e ../../assets/icon.png)
图标 -将路径添加到您在项目中的步骤C中创建的图标(即../../assets/icon.png)
Under ios, you want to configure your build number (the number you should manage and increment depending on the version of your app that you want to publish) and bundle identifier generated in Step B.
在ios下,您要配置内部版本号(应管理的数字,并根据要发布的应用程序的版本递增)和在步骤B中生成的捆绑包标识符。
It is time to run through Expo’s Standalone Build Workflow.
现在是运行Expo的独立构建工作流的时候了。
运行Expo CLI命令以发布和构建您的应用程序。 (Running Expo CLI commands to publish and build your app.)
In the Expo Managed Workflow, Expo does most of the heavy lifting for you.
在“世博管理的工作流程”中,世博会为您完成大部分繁重的工作。
- If you haven’t already, you will need to install the Expo CLI 如果尚未安装,则将需要安装Expo CLI
Using NPM (node package manager):
使用NPM(节点程序包管理器):
npm install -g expo-cliCheck Expo CLI is successfully installed with:
使用以下命令成功安装Expo CLI:
expo --version2. Once you have Expo CLI installed, you can then run their build command for ios within your app project root. You will then be prompted to log in to your Expo account if you have not logged in already.
2.一旦安装了Expo CLI,就可以在应用程序项目根目录中运行ios的build命令。 如果尚未登录,将提示您登录Expo帐户。
expo build:ios3. Follow the command line instructions, you will need to log in with the Apple ID that you used to enroll in the Developer Program in Step A.
3.按照命令行说明进行操作,您将需要使用在步骤A中用于注册开发人员计划的Apple ID登录。
$ expo build:ios
[16:44:37] Checking if current build exists...
[16:44:37] No currently active or previous builds for this project.
[16:44:37]
We need your Apple ID/password to manage certificates, keys
and provisioning profiles from your Apple Developer account.
Note: Expo does not keep your Apple ID or your Apple ID password.
? What's your Apple ID? xxx@yyy.zzz
? Password? [hidden]
✔ Authenticated with Apple Developer Portal successfully!
[16:44:46] You have 4 teams associated with your account
? Which team would you like to use? 3) ABCDEFGHIJ "John Turtle" (Individual)
✔ Ensured App ID exists on Apple Developer Portal!
[16:44:59] We do not have some credentials for you: Apple Distribution Certificate, Apple Push Notifications service key, Apple Provisioning Profile
? How would you like to upload your credentials? (Use arrow keys)
❯ Expo handles all credentials, you can still provide overrides
  I will provide all the credentials and files needed, Expo does limited validation
4. In the steps, you will have the opportunity to configure credentials and certificates, but for your first build you may want to let Expo handle all of them for you.
4.在这些步骤中,您将有机会配置凭据和证书,但是对于首次构建,您可能希望让Expo为您处理所有凭据和证书。
5. Once you have inputted all your configurations, Expo will start to publish and build your app. This build may take a while depending on how busy Expo’s build machines are (see https://expo.io/turtle-status). The command line will also print out a URL that you can follow. Alternatively, visit your Expo account dashboard at https://expo.io/dashboard/<YOUR-EXPO-ACCOUNT-SLUG>/builds to view the status of your build.
5.输入所有配置后,Expo将开始发布和构建您的应用程序。 此构建可能需要一段时间,具体取决于Expo的构建机器的繁忙程度(请参阅https://expo.io/turtle-status )。 命令行还将打印出您可以跟随的URL。 或者,访问https://expo.io/dashboard/<YOUR-EXPO-ACCOUNT-SLUG>/builds的 Expo帐户仪表板,以查看构建状态。
7. Once the build has been completed, you will be able to visit your Expo Dashboard (example URL above) where you can then download the .IPA artifact of your app.
7.构建完成后,您将可以访问Expo Dashboard(上面的示例URL),然后可以在其中下载应用程序的.IPA工件。

8. You will need this .IPA file to publish your app to TestFlight and the Appstore.
8.您将需要此.IPA文件将您的应用发布到TestFlight和Appstore。
Let’s go back to our Apple Developer Account.
让我们回到我们的Apple开发者帐户。
在App Store Connect中创建我们的应用 (Creating our app in App Store Connect)
In this step, you will have to return to your Apple Developer dashboard and discover App Store Connect.
在此步骤中,您将必须返回到Apple Developer仪表板并发现App Store Connect。
This is where you can manage your iOS app, add testers, and submit to the AppStore.
您可以在这里管理iOS应用,添加测试人员并提交到AppStore。
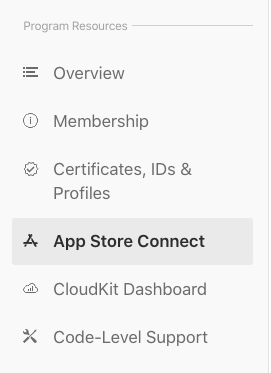
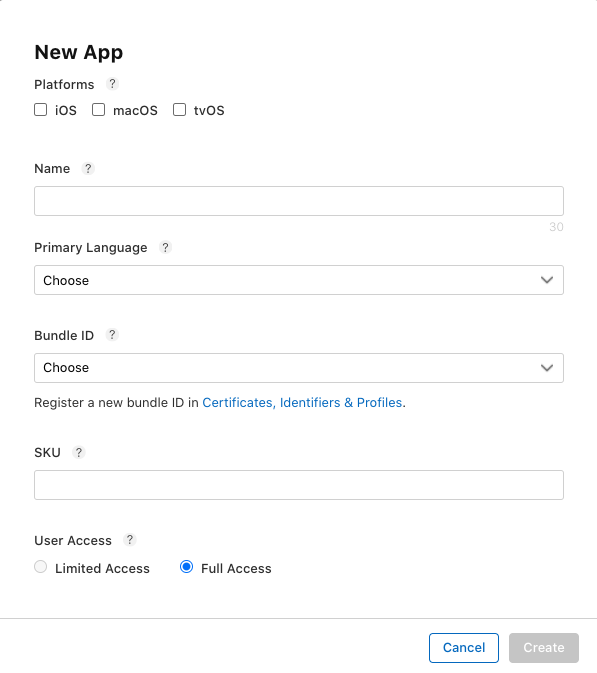
By clicking the App Store Connect button on the Apple Developer Dashboard you should end up at the URL https://appstoreconnect.apple.com/apps, press the blue + icon and select New App in the dropdown.
通过单击Apple Developer Dashboard上的App Store Connect按钮,您应该以URL https://appstoreconnect.apple.com/apps结尾,按蓝色+图标,然后在下拉列表中选择New App 。

2. You will be prompted with a New App modal, this is where you can configure details about the app that you are able to create. In this step, the most important field is selecting the Bundle ID that you created in the earlier step.
2.系统将提示您“ 新应用程序”模式,您可以在此处配置有关您可以创建的应用程序的详细信息。 在此步骤中,最重要的字段是选择在先前步骤中创建的捆绑包ID 。
After we have created the app in App Store Connect we are ready to upload our app.
在App Store Connect中创建应用程序后,我们就可以上传应用程序了。
将我们的应用上传到App-Connect (Uploading our App to App-Connect)
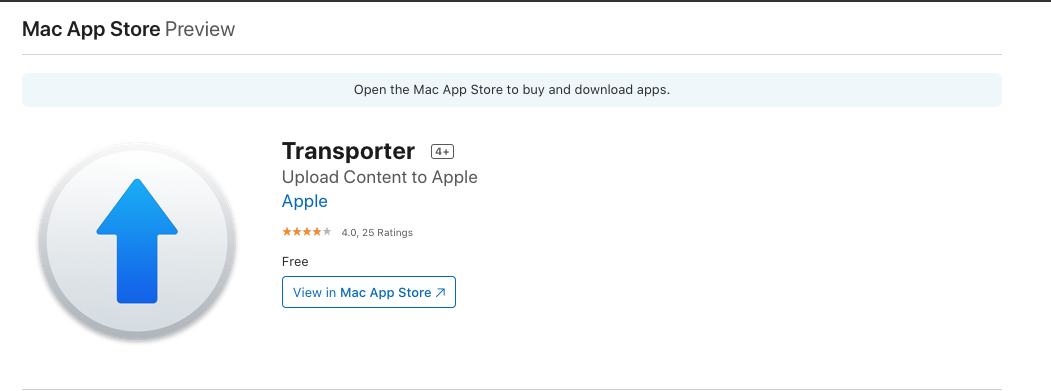
We will need to install a macOS application that is required to upload our .IPA to App Store Connect.
我们将需要安装macOS应用程序,该应用程序需要将我们的.IPA上传到App Store Connect。
Visit https://apps.apple.com/us/app/transporter/id1450874784?mt=12 on the Mac App Store and download the application.
在Mac App Store上访问https://apps.apple.com/us/app/transporter/id1450874784?mt=12并下载该应用程序。
2. When Transporter has finished downloading, launch the application. You will then be prompted to log into your Apple ID, use the credentials of the Apple ID that you registered in the first step (“Register an Apple Developer Account”)
2. Transporter完成下载后,启动应用程序。 然后,系统将提示您登录Apple ID,使用在第一步中注册的Apple ID的凭据(“注册Apple开发者帐户”)
3. Click on the + icon which prompts a file explorer, locate your .IPA file that you have downloaded from your Expo dashboard and upload it.
3.单击+图标,提示文件浏览器,找到从Expo仪表板下载的.IPA文件并上传。
4. Select Deliver on the app you want to upload and Apple will begin to upload the app to App Store Connect.
4.选择你要上传和苹果将开始应用程序上传到App Store的连接应用交付 。
在App Connect上查看我们的应用并添加Beta测试器 (Viewing our app on App Connect and adding Beta Testers)
After using the transporter to deliver the app to App-Connect, we need to wait for Apple to build our app as well as beta review it before our users can download the app on TestFlight.
在使用运输工具将应用程序交付给App-Connect之后,我们需要等待Apple构建我们的应用程序并进行Beta测试,然后我们的用户才能在TestFlight上下载该应用程序。
Return to https://appstoreconnect.apple.com/apps and click on the app you have just uploaded. Here we can view the status of our app (Building, Testing) as well as configure our app details for when we want to publish to the AppStore.
返回https://appstoreconnect.apple.com/apps ,然后单击刚刚上传的应用程序。 在这里,我们可以查看应用程序的状态(构建,测试),以及为要发布到AppStore的时间配置应用程序详细信息。
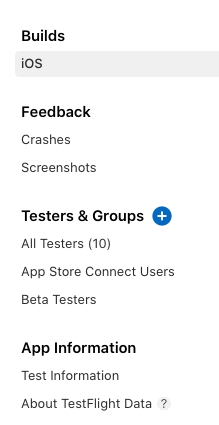
For beta testing we only care about adding users to our iOS build, this is done through the TestFlight tab. In this panel, we can view the status of our iOS build (Building or Testing)
对于Beta测试,我们只关心将用户添加到我们的iOS版本中,这是通过TestFlight选项卡完成的。 在此面板中,我们可以查看iOS版本的状态(“ 构建”或“测试”)

3. When our app has finished building (which took ~1.5 hours) the app will need to be reviewed by Apples Beta Review Team (which took ~1.5 days for me). Meanwhile, we can begin to add our beta testing users who will receive an email invite once the build has been approved.
3.当我们的应用程序完成构建(耗时约1.5个小时)后,将需要由Apple Beta审核小组进行审核(对我而言耗时约1.5天)。 同时,我们可以开始添加Beta测试用户,一旦构建获得批准,他们将收到电子邮件邀请。
4. Visit the left-hand navigation and click on + to add a new group of testers. Here I have made a group called Beta Testers.
4.访问左侧导航,然后单击+添加新的测试人员组。 在这里,我成立了一个名为Beta测试人员的小组。
5. Clicking into the group allows you to view an interface that lets you add the emails of the users to test your app.
5.单击进入该组,您可以查看一个界面,该界面可让您添加用户的电子邮件以测试您的应用程序。
At the finalization of this step, our app is now able to be downloaded on TestFlight by our users to test!
完成此步骤后,我们的用户现在可以在TestFlight上下载我们的应用进行测试!
What if we need to publish new bug fixes and updates to our users?
如果我们需要向用户发布新的错误修复和更新该怎么办?
世博会的无线更新 (Over-The-Air Updates from Expo)
So you’ve finally completed this guide to launching your app to beta testers on TestFlight, now you’re probably wondering if you need to follow this guide every time you fix a bug or deploy a new feature on your app. Luckily, the answer is no. Expo provides a quick and easy way to do this through OTA updates.
因此,您终于完成了本指南,以在TestFlight上向Beta测试人员启动应用程序,现在您可能想知道,每次修复错误或在应用程序上部署新功能时是否需要遵循本指南。 幸运的是,答案是否定的。 世博会提供了一种通过OTA更新来实现此目的的便捷方法。
To publish any changes to your users, all you need to do is run
要将所有更改发布给用户,您需要做的就是运行
expo publishwithin your project directory.
在您的项目目录中。
After it has finished publishing, your users will need to download the update (automatically downloaded when a user exits the app and relaunches) to view the latest changes.
发布完成后,您的用户将需要下载更新(当用户退出应用并重新启动时自动下载)以查看最新更改。
To configure how and when users receive updates, you can visit their comprehensive OTA guide here https://docs.expo.io/guides/configuring-ota-updates which show creative ways to make the update seamless and non-blocking to your users.
要配置用户接收更新的方式和时间,您可以在https://docs.expo.io/guides/configuring-ota-update上访问其全面的OTA指南,该指南显示了使更新无缝且不阻塞您的创新方法。用户。
结语 (Wrapping up)
In this guide, you have learned how to launch an Expo-managed app on TestFlight. You should now also be able to easily publish changes to your app so that your users can receive and test following app iterations.
在本指南中,您学习了如何在TestFlight上启动由Expo管理的应用程序。 现在,您还应该能够轻松地将更改发布到您的应用程序,以便您的用户可以接收和测试以下应用程序迭代。
Happy testing!
测试愉快!
翻译自: https://codeburst.io/how-to-launch-an-expo-managed-app-to-beta-testers-in-2020-61b5121089c8
测试beta测试


 5303
5303


 被折叠的 条评论
为什么被折叠?
被折叠的 条评论
为什么被折叠?
 到【灌水乐园】发言


