


Hello readers!
各位读者好!
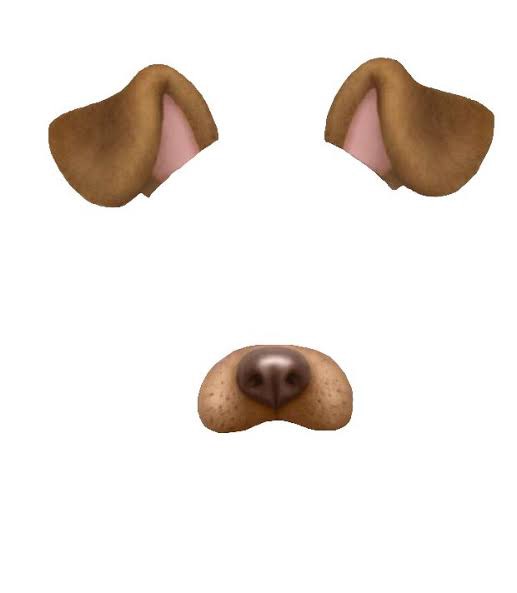
Today in this article we discuss about the realtime face detection and how to apply filters like instagram or snapchat features. In this project we will create some super cool filters like spiderman mask, dog filters etc…
今天,在本文中,我们将讨论实时面部检测以及如何应用instagram或snapchat功能等过滤器。 在这个项目中,我们将创建一些超酷的滤镜,例如蜘蛛侠面具,狗滤镜等。
检测脸部特征 (Detecting face features)
In JavaScript there is a library available called clmtrackr. It is used to detect the face on the image. It also finds the nose, ears etc…
在JavaScript中,有一个称为clmtrackr的库。 它用于检测图像上的脸部。 它还可以找到鼻子,耳朵等…
Generally this library provides generic model which is already pre-trained and ready to use the following number the features as well.
通常,该库提供通用模型,该模型已经过预训练,并准备使用以下功能。
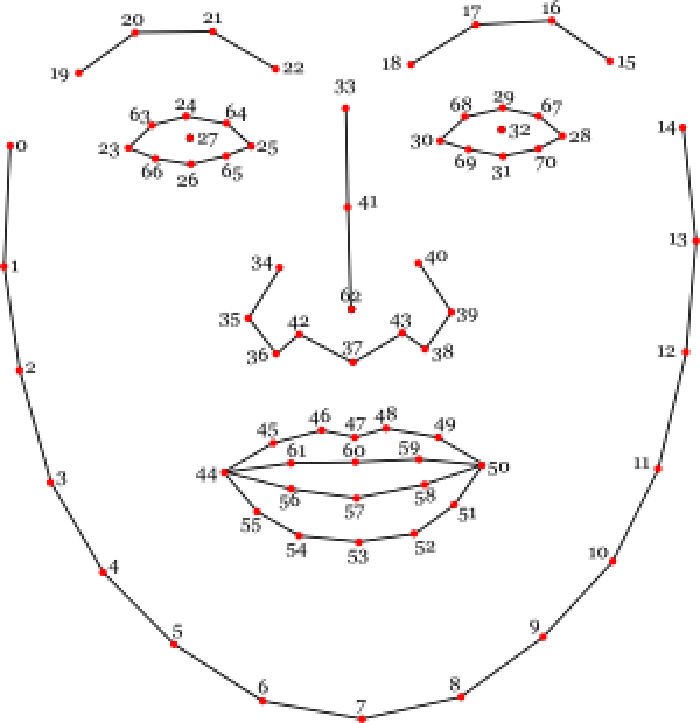
If we process an image with the library, it will return an array for each point on the map. Each point is identified by x and y axis position. If you want to replace anything you can use the number on that points. Let’s start building this amazing project.
如果我们使用库处理图像,它将为地图上的每个点返回一个数组。 每个点由x和y轴位置标识。 如果您想更换任何东西,可以在那一点上使用数字。 让我们开始构建这个惊人的项目。
基本代码结构 (Basic code structure)
To build this application we are going to use p5.js. It is a JavaScript library mainly designed to working with canvas. It is not a traditional UI library, but it will define when to build the UI when update needed to it. It contains three main events:
要构建此应用程序,我们将使用p5.js。 这是一个JavaScript库,主要用于处理画布。 它不是传统的UI库,但是它将定义何时需要更新UI时何时构建。 它包含三个主要事件:
preload: It is used to execute the right library that loads before and after the building any UI on the screen.
preload :用于执行正确的库,该库在构建屏幕上的任何UI之前和之后加载。
setup: It is also executed once, after the preload, when we prepare to build the initial UI.
setup :在预加载之后 ,当我们准备构建初始UI时,也会执行一次。
draw: It is a function called in within a loop, and it is executed every time the system when the system requires to render the screen.
draw :这是一个在循环中调用的函数,当系统需要渲染屏幕时,它将在系统每次执行时执行。
预载 (Preload)
Now we will use preload event to load the image into the screen. Let’s see the following code:
现在,我们将使用preload事件将图像加载到屏幕中。 让我们看下面的代码:
function preload() {
    // Spiderman Mask Filter asset
    imgSpidermanMask = loadImage("https://i.ibb.co/9HB2sSv/spiderman-mask-1.png");
    // Dog Face Filter assets
    imgDogEarRight = loadImage("https://i.ibb.co/bFJf33z/dog-ear-right.png");
    imgDogEarLeft = loadImage("https://i.ibb.co/dggwZ1q/dog-ear-left.png");
    imgDogNose = loadImage("https://i.ibb.co/PWYGkw1/dog-nose.png");
}
创建画布 (Creating the Canvas)
Inorder to make this more responsive, the canvas has to dynamic size from the window size. The aspect ratio are of 4:3. It’s not ideal option one, but we have to make some assumptions to keep the code efficient. Now we will create one with the P5.js function createCanvas by using the following code as follows:
为了使响应速度更快,画布必须从窗口大小动态调整大小。 长宽比为4:3。 这不是理想的选择之一,但是我们必须做一些假设以保持代码高效。 现在,我们将使用以下代码使用P5.js函数createCanvas创建一个代码:
const maxWidth = Math.min(windowWidth, windowHeight);
pixelDensity(1);
outputWidth = maxWidth;
outputHeight = maxWidth * 0.75; // 4:3
createCanvas(outputWidth, outputHeight);
捕捉视频流 (Capture the video stream)
Now we know the canvas is working properly, then we need to capture the video via our webcam or camera. P5.js function will make this using videoCapture function.
现在我们知道画布可以正常工作,然后我们需要通过网络摄像头或摄像机捕获视频。 P5.js函数将使用videoCapture函数来实现此目的 。
// webcam capture
videoInput = createCapture(VIDEO);
videoInput.size(outputWidth, outputHeight);
videoInput.hide();
建立筛选器选择 (Build the filter selection)
Now we need to build a filter, we have to provide more options for filters. We can use simply the drop down function for this project. We can create this using p5.js createSelect() function.
现在我们需要构建一个过滤器,我们必须为过滤器提供更多选项。 我们可以仅对该项目使用下拉功能。 我们可以使用p5.js createSelect()函数来创建它。
// select filter
const sel = createSelect();
const selectList = ['Spiderman Mask', 'Dog Filter']; // list of filters
sel.option('Select Filter', -1); // Default no filter
for (let i = 0; i < selectList.length; i++)
{
    sel.option(selectList[i], i);
}
sel.changed(applyFilter);
创建图像捕获 (Create image capturing)
Now for image capturing, the image tracker is an object for video feed and it will identify each frame in the faces. The tracker need to be setup for only once.
现在用于图像捕获,图像跟踪器是用于视频输入的对象,它将识别面部中的每个帧。 跟踪器只需要设置一次。
// tracker
faceTracker = new clm.tracker();
faceTracker.init();
faceTracker.start(videoInput.elt);
绘制视频滤镜 (Drawing the video filters)
For this we need to update the draw event in P5.js. The output of the video source to the canvas will apply any filter in which we are selected. In our case the draw function is very simple. It will pushing the complexity into each filter definition.
为此,我们需要更新P5.js中的draw事件。 视频源到画布的输出将应用选择了我们的任何过滤器。 在我们的例子中,绘制函数非常简单。 它将复杂性推到每个过滤器定义中。
function draw() {
  image(videoInput, 0, 0, outputWidth, outputHeight); // render video from webcam
  // apply filter based on choice
  switch(selected)
  {
    case '-1': break;
    case '0': drawSpidermanMask(); break;
    case '1': drawDogFace(); break;
  }
}
建立过滤器 (Building the filters)
For building the filter it is either easy or complex process. Actually it depends upon the filter we are going to build. For building mask we need to add the mask image to the center of the screen. First we have to make sure that our faceTracker object is actually detected a face by using faceTraker.getCurrentPosition().
对于构建过滤器,这是简单或复杂的过程。 实际上,这取决于我们要构建的过滤器。 对于构建蒙版,我们需要将蒙版图像添加到屏幕中心。 首先,我们必须通过使用faceTraker.getCurrentPosition()确保我们的faceTracker对象实际上被检测到一张脸。
Once the face detected, we have to use P5.js to render the image using the face point 62 to center the image. And then with width and height which represent the size of the face as follows.
一旦检测到面部,我们就必须使用P5.js使用面部点62来使图像居中。 然后用表示脸部尺寸的宽度和高度如下。
const positions = faceTracker.getCurrentPosition();
if (positions !== false)
{
    push();
    const wx = Math.abs(positions[13][0] - positions[1][0]) * 1.2; // The width is given by the face width, based on the geometry
    const wy = Math.abs(positions[7][1] - Math.min(positions[16][1], positions[20][1])) * 1.2; // The height is given by the distance from nose to chin, times 2
    translate(-wx/2, -wy/2);
    image(imgSpidermanMask, positions[62][0], positions[62][1], wx, wy); // Show the mask at the center of the face
    pop();
}
结论 (Conclusion)
I hope you enjoyed a lot and learnt how to create a basic filters using JavaScript library. You can create more amazing filters on your own and add to it.
我希望您喜欢它,并学习了如何使用JavaScript库创建基本过滤器。 您可以自己创建更多惊人的过滤器并将其添加。
Thanks for reading!
谢谢阅读!


 1922
1922

 被折叠的 条评论
为什么被折叠?
被折叠的 条评论
为什么被折叠?
 到【灌水乐园】发言


