致谢 (Acknowledgement)
The data is collected from NewsApi.org
数据是从NewsApi.org收集的
Github Repository Url
Github储存库网址
If you want the code, here is the link. If you want to read the description, continue reading.
如果您需要代码,请点击这里。 如果您想阅读说明,请继续阅读。
Update 12/11/2020: I have updated the code with online and offline support. Please refer at the bottom part of the story.
更新12/11/2020:我已经使用在线和离线支持更新了代码。 请参考故事的底部。
预习 (Preview)

描述 (Description)
Hello there!
你好!
So I was struggling with this android pagination stuffs for quite some time now. You see, most of the tutorials are either really old(you don’t want to see them), some only show you the paging library with networking support only, some only show database support, some don’t show a loader at the ena of recyclerView and so on.Finally, last night I was able to code a sample pagination app successfully with networking, database support, a little loader at the bottom and an extra row at top(you know, for displaying stories/my day/ whatever you call it). So finally after understanding all these things properly, I wish to keep all of it in this project. I hope you’ll like it.
因此,我在相当长一段时间内一直在使用这种Android分页程序。 您会看到,大多数教程要么真的很旧(您不想看到它们),有些仅向您显示仅具有网络支持的分页库,有些仅显示了数据库支持,有些并未在ena显示加载器最后,昨晚我能够通过网络,数据库支持,底部的一个小加载程序和顶部的一排额外代码成功编写了一个示例分页应用程序(您知道,用于显示故事/我的一天/您称之为)。 最后,在正确理解所有这些内容之后,我希望将所有内容保留在该项目中。 我希望你会喜欢。
We’ll be using android paging library 2.1.2 as it is production ready. Though the paging library 3.0 alpha is released, it’s still in alpha. So it might not be a good idea to use it in production. Hence the version 2.1.2.
我们将使用Android分页库2.1.2,因为它已可以投入生产。 尽管分页库3.0 alpha已发布,但仍处于alpha状态。 因此,在生产中使用它可能不是一个好主意。 因此,版本为2.1.2。
添加新闻Api键 (Add News Api Key)
we need this key to fetch data from newsapi.org. In production, we want to keep these keys secret. In this case, I’ll be putting this in local.properties file as it is ignored by the git. If you keep it in some other file, add it in the .gitignore file.
我们需要此密钥才能从newsapi.org获取数据。 在生产中,我们希望对这些密钥保密。 在这种情况下,我会将其放置在local.properties文件中,因为它会被git忽略。 如果将其保存在其他文件中,请将其添加到.gitignore文件中。
So in local.properties (OR your desired file), add this, may be at the end:
因此,在local.properties (或您所需的文件)中,添加此内容可能在末尾:
newsApiKey=123_your_top_secret_key_789Now open your app gradle file, and:
现在打开您的应用程序gradle文件,并:
def getNewsApiKey() {
    Properties properties = new Properties()
    properties.load(project.rootProject.file('local.properties').newDataInputStream())
    return properties.getProperty("newsApiKey");
}
Then add this line in default config:
然后在默认配置中添加以下行:
android{
  // ... other lines
  defaultConfig{
    // ... other config
    buildConfigField "String", "NEWS_API_KEY", "\""+getNewsApiKey()+"\""        // <-- Add this line
    // ... other config
  }
}
Now create a file, say , Const.kt. We can create a constant string and initialize it with the actual api key like this:
现在创建一个文件,例如Const.kt 。 我们可以创建一个常量字符串,并使用实际的api密钥将其初始化,如下所示:
object Const {
    const val BASE_URL = "https://newsapi.org/v2/";
    const val API_KEY = BuildConfig.NEWS_API_KEY;
}
添加翻新客户端,房间 (Add Retrofit Client, Room)
We’ll be using retrofit to use our api, and Room database library to work with sqlite. I created some models according to api response.
我们将使用改造来使用我们的api,而Room数据库库将与sqlite一起使用。 我根据api响应创建了一些模型。
添加RecyclerView适配器 (Add RecyclerView Adapter)
This is just a typical recyclerView code. However, we’ll be extending PagedListAdapter<Article, RecyclerView.ViewHolder>. I also created some viewHolders to show 1. Stories at the top, 2. actual news items in the middle, 3. a footer at the bottom showing a loader.
这只是典型的recyclerView代码。 但是,我们将扩展PagedListAdapter<Article, RecyclerView.ViewHolder> 。 我还创建了一些viewHolders来显示1.顶部的故事,2.中间的实际新闻,3.底部的页脚显示装载程序。
Now to keep things clear, rename position to uiposition (ie, onBindViewHolder(holder: RecyclerView.ViewHolder, position: Int) to onBindViewHolder(holder: RecyclerView.ViewHolder, uiPosition: Int) etc).
现在要保持清晰,将position重命名为uiposition (即, onBindViewHolder(holder: RecyclerView.ViewHolder, position: Int)改为onBindViewHolder(holder: RecyclerView.ViewHolder, uiPosition: Int)等)。
And inside, we define,
在内部,我们定义
dataPosition = uiPosition - OFFSET_KOUNT;
                OFFSET_KOUNT = number of header rows
Suppose, we have N items loaded from database / network. But in the ui, we have (1 header for story) + (N data items) + (1 footer) = N+2 ui items. So we need to make a proper mapping between our uiPosition and actual data position. So in this case, ith data will go to (i+1)th uiPosition.
假设我们从数据库/网络加载了N项目。 但是在ui中,我们有(故事的1个标头)+(N个数据项)+(1个页脚)= N + 2个ui项。 因此,我们需要在uiPosition和实际数据位置之间进行适当的映射。 因此,在这种情况下,第i个数据将到达第(i + 1)个uiPosition。
Similarly, if we had OFFSET_KOUNT=m headers, then dataPosition = uiPosition - m would be the relation. For now, the OFFSET_KOUNT = 0. Later, I'll change it and we'll see how to implement it.
同样,如果我们有OFFSET_KOUNT=m标头,则dataPosition = uiPosition - m是关系。 现在,OFFSET_KOUNT =0。稍后,我将对其进行更改,然后我们将了解如何实现它。
将RecyclerView与数据库连接 (Connect RecyclerView with Database)
We need to create a pagedList of Articles from database. For that we write this method:
我们需要从数据库创建pagedList of Articles。 为此,我们编写此方法:
private fun initList() {
        val config:PagedList.Config = PagedList.Config.Builder()
            .setPageSize(30)
            .setEnablePlaceholders(false)
            .build();        liveArticleList = initializedPagedListBuilder(config).build();    }
And,
和,
private fun initializedPagedListBuilder(config: PagedList.Config):
            LivePagedListBuilder<Int, Article> {        val database:NewsRoomDatabase = NewsRoomDatabase.getDatabase(this);
        val livePageListBuilder = LivePagedListBuilder<Int, Article>(
            database.newsDao().articles,
            config);        livePageListBuilder.setBoundaryCallback(NewsBoundaryCallback(database));
        return livePageListBuilder
    }
So now we create NewsBoundaryCallback.kt file. It extends BoundaryCallBack class. Whenever, we reach at the end of recyclerview, this callback is triggered. It will handle network call to fetch new data.
因此,现在我们创建NewsBoundaryCallback.kt文件。 它扩展了BoundaryCallBack类。 每当我们到达recyclerview的末尾时,都会触发此回调。 它将处理网络呼叫以获取新数据。
When we reach to the end of our pagedList, we need to make a network call, insert the data inside the database and show it to out recyclerView. This is a complicated task. Luckily we have PagingRequestHelper.java to help us. It is written by the same dudes who wrote the paging library. For some weirdo reason, it is not inside the library itself, so we need to copy/download it from github, and use it.
当我们到达pagedList的末尾时,我们需要进行网络调用,将数据插入数据库中并将其显示给recyclerView。 这是一项复杂的任务。 幸运的是,我们有PagingRequestHelper.java帮助我们。 它是由编写分页库的同一个人编写的。 由于某些奇怪的原因,它不在库本身内部,因此我们需要从github复制/下载它并使用它。
If we run our code, we’ll see that there is nothing. So next we’ll connect with network to actually populate the database and show it to recyclerView.
如果运行代码,我们将看不到任何内容。 因此,接下来我们将与网络连接以实际填充数据库并将其显示给recyclerView。
使用边界回调来触发API (Use Boundary Callback to Trigger the API)
Open the NewsBoundaryCallback.kt file and add the following code:
打开NewsBoundaryCallback.kt文件并添加以下代码:
/** override methods */
    override fun onZeroItemsLoaded() {
        super.onZeroItemsLoaded();        helper.runIfNotRunning(PagingRequestHelper.RequestType.INITIAL){
                helperCallback: PagingRequestHelper.Request.Callback? ->
            var call:Call<NewsApiResponse> = api.fetchFeed("bbc-news", Const.API_KEY, pageNumber, Const.PAGE_SIZE);
            call.enqueue(object: Callback<NewsApiResponse>{
                override fun onResponse(call: Call<NewsApiResponse>, response: Response<NewsApiResponse>) {
                  if(response.isSuccessful && response.body()!=null) {
                      Log.e(TAG, "onSuccess");
                      val articles: List<Article>? = response.body()?.articles?.map { it };
                      executor.execute{
                          db.newsDao().insertAll(articles?: listOf()); // ?: listOf(); -> if null create emptyList
                          pageNumber++;
                          helperCallback?.recordSuccess();
                      }
                  }else{
                    Log.e(TAG, "onError");
                      helperCallback?.recordFailure(Throwable("onError"));
                  }
                }                override fun onFailure(call: Call<NewsApiResponse>, t: Throwable) {
                    Log.e(TAG, "onFailure");
                    helperCallback?.recordFailure(t);
                }            })
        };
    }    override fun onItemAtEndLoaded(itemAtEnd: Article) {
        super.onItemAtEndLoaded(itemAtEnd);
        helper.runIfNotRunning(PagingRequestHelper.RequestType.AFTER){
                helperCallback: PagingRequestHelper.Request.Callback? ->
            var call:Call<NewsApiResponse> = api.fetchFeed("bbc-news", Const.API_KEY, pageNumber, Const.PAGE_SIZE);
            call.enqueue(object: Callback<NewsApiResponse>{
                override fun onResponse(call: Call<NewsApiResponse>, response: Response<NewsApiResponse>) {
                    if(response.isSuccessful && response.body()!=null) {
                        Log.e(TAG, "onSuccess");
                        val articles: List<Article>? = response.body()?.articles?.map { it };
                        executor.execute{
                            db.newsDao().insertAll(articles?: listOf()); // ?: listOf(); -> if null create emptyList
                            pageNumber++;
                            helperCallback?.recordSuccess();
                        }
                    }else{
                        Log.e(TAG, "onError");
                        helperCallback?.recordFailure(Throwable("onError"));
                    }
                }                override fun onFailure(call: Call<NewsApiResponse>, t: Throwable) {
                    Log.e(TAG, "onFailure");
                    helperCallback?.recordFailure(t);
                }            })
        };
    }
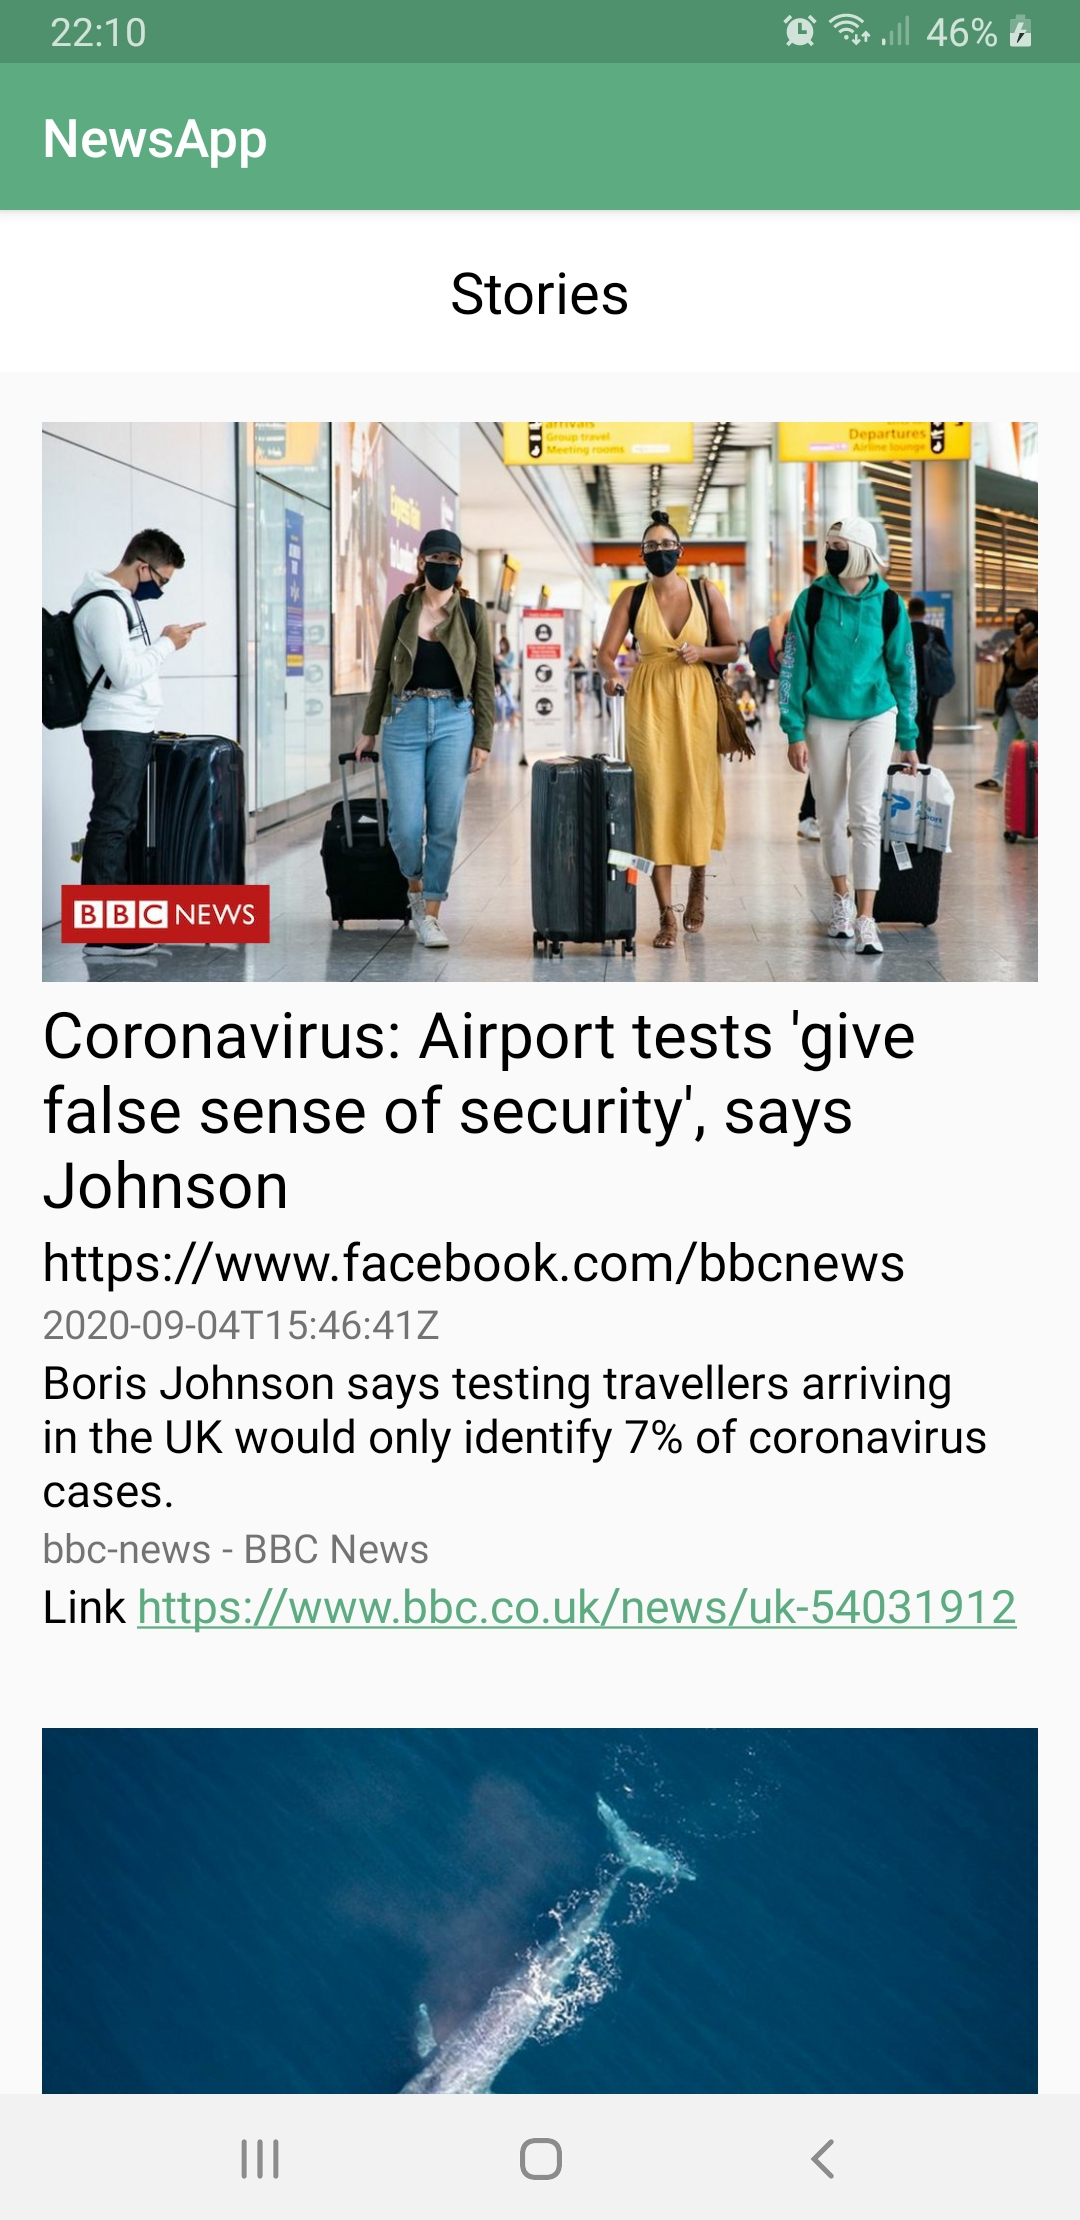
Basically we have to write some codes in onZeroItemsLoaded() and onItemAtEndLoaded() methods. We have PagingRequestHelper helper. Inside Helper.runIfNotRunning we conplete this lambda. This is where we write our networking code. Just some trivial retrofit call. On success, we insert the result in our database. If we run our code, we'll see something like this!
基本上,我们必须在onZeroItemsLoaded()和onItemAtEndLoaded()方法中编写一些代码。 我们有PagingRequestHelper助手。 在Helper.runIfNotRunning内部,我们Helper.runIfNotRunning该lambda。 这是我们编写网络代码的地方。 只是一些琐碎的改造工作。 成功后,我们将结果插入数据库中。 如果我们运行代码,我们将看到类似这样的内容!

添加页脚/加载 (Add a Footer / Loading)
Now we want to add a loader to make things a bit pretty. Create an enum
现在,我们想添加一个加载器,使事情变得更漂亮。 创建一个枚举
enum class LoaderState {
    DONE, LOADING, ERROR
}
This will help us to keep track of our loading states. In the main activity, create a LiveData object. LiveData helps us with some trigger stuffs. Whenever the liveData value changes, it will auto-trigger a change. So all we have to do is, define what changes will take place (in this case, show / hide a loader).
这将有助于我们跟踪加载状态。 在主活动中,创建一个LiveData对象。 LiveData可以帮助我们解决一些触发器问题。 每当liveData值更改时,它将自动触发更改。 因此,我们要做的就是定义将要发生的更改(在这种情况下,显示/隐藏加载程序)。
So in main activity, we add this:
因此,在主要活动中,我们添加以下内容:
liveLoaderState.observe(this, Observer<LoaderState>{
            newState -> newsFeedAdapter?.setLoaderState(newState);
        })
Now open the adapter, and make these changes:
现在打开适配器,并进行以下更改:
override fun getItemCount(): Int {
        return OFFSET_KOUNT + super.getItemCount() + isLoading();
    }    /** private methods */
    fun isLoading():Int {
        if(state.equals(LoaderState.LOADING))
            return 1;
        return 0;
    }    /** public apis */
    public fun setLoaderState(newState: LoaderState) {
        this.state = newState;
        notifyDataSetChanged();      // <-- this tells the adapter to update the ui
    }
Finally, we make a change in out NewsBoundaryCallback class by passing a liveLoaderState: MutableLiveData<LoaderState> parameter. Create a field to hold on to this reference. Now inside onZeroItemsLoaded() and onItemAtEndLoaded() we will simply update it's value like this:
最后,我们通过传递liveLoaderState: MutableLiveData<LoaderState>参数来对NewsBoundaryCallback类进行更改。 创建一个字段以保留该参考。 现在在onZeroItemsLoaded()和onItemAtEndLoaded()我们将像这样简单地更新它的值:
var call:Call<NewsApiResponse> = api.fetchFeed("bbc-news", Const.API_KEY, pageNumber, Const.PAGE_SIZE);    liveLoaderState.postValue(LoaderState.LOADING);  // <-----    call.enqueue(object: Callback<NewsApiResponse>{
           override fun onResponse(call: Call<NewsApiResponse>, response: Response<NewsApiResponse>) {
             // check if successfull
             liveLoaderState.postValue(DONE);
             // ...
           }           override fun onFailure(call: Call<NewsApiResponse>, t: Throwable){
             liveLoaderState.postValue(ERROR);
           }
    }
Simply run the code, and you’ll see the loader. Now it might be hard to see the loader if your network connection is good. If you can’t see it properly, try this: open Const.kt file and change PAGE_SIZE = 1, this will allow you to see the loader(but don't try this on your production app!)
只需运行代码,您就会看到加载器。 现在,如果您的网络连接良好,可能很难看到加载程序。 如果看不到它,请尝试以下操作:打开Const.kt文件并更改PAGE_SIZE = 1 ,这将使您能够看到加载程序(但不要在生产应用程序上尝试此操作!)

为故事添加顶行 (Add a top Row for Stories)
You may want to add one or two extra rows on top. Say, facebook / instagram stories, stuff like that. Open the NewsFeedAdapter, and add val OFFSET_KOUNT = 1; Then on bindViewHolder add this at the top:
您可能需要在顶部添加一两个额外的行。 说,facebook / instagram故事之类的东西。 打开NewsFeedAdapter ,并添加val OFFSET_KOUNT = 1; 然后在bindViewHolder上在顶部添加:
override fun onBindViewHolder(holder: RecyclerView.ViewHolder, uiPosition: Int) {
        var dataPosition:Int = uiPosition - OFFSET_KOUNT;        if(uiPosition < OFFSET_KOUNT) {                                                   //  <-- Add this block at top
            // top row                                                                    //
            var storiesViewHolder: StoriesViewHolder = holder as StoriesViewHolder;       //
            storiesViewHolder.bind(images);                                               // <-- Add this block at top
        }        else if(0 <= dataPosition && dataPosition < super.getItemCount()) {
            var article: Article? = getItem(dataPosition);
            var articleViewHolder:ArticleViewHolder = holder as ArticleViewHolder;
            articleViewHolder.bind(article);
        }else {
          // bind the footer
        }
    }
And in getItemViewType, add :
然后在getItemViewType中添加:
override fun getItemViewType(uiPosition: Int): Int {
        var dataPosition:Int = uiPosition - OFFSET_KOUNT;
        if(uiPosition == 0) {
            return STORY_TYPE;
        } else if(dataPosition < super.getItemCount()) {
            return ARTICLE_TYPE;
        }
        return FOOTER_TYPE;
    }
Finally, save and run the code. You should see a title Stories at the top.
最后,保存并运行代码。 您应该在顶部看到一个标题Stories 。

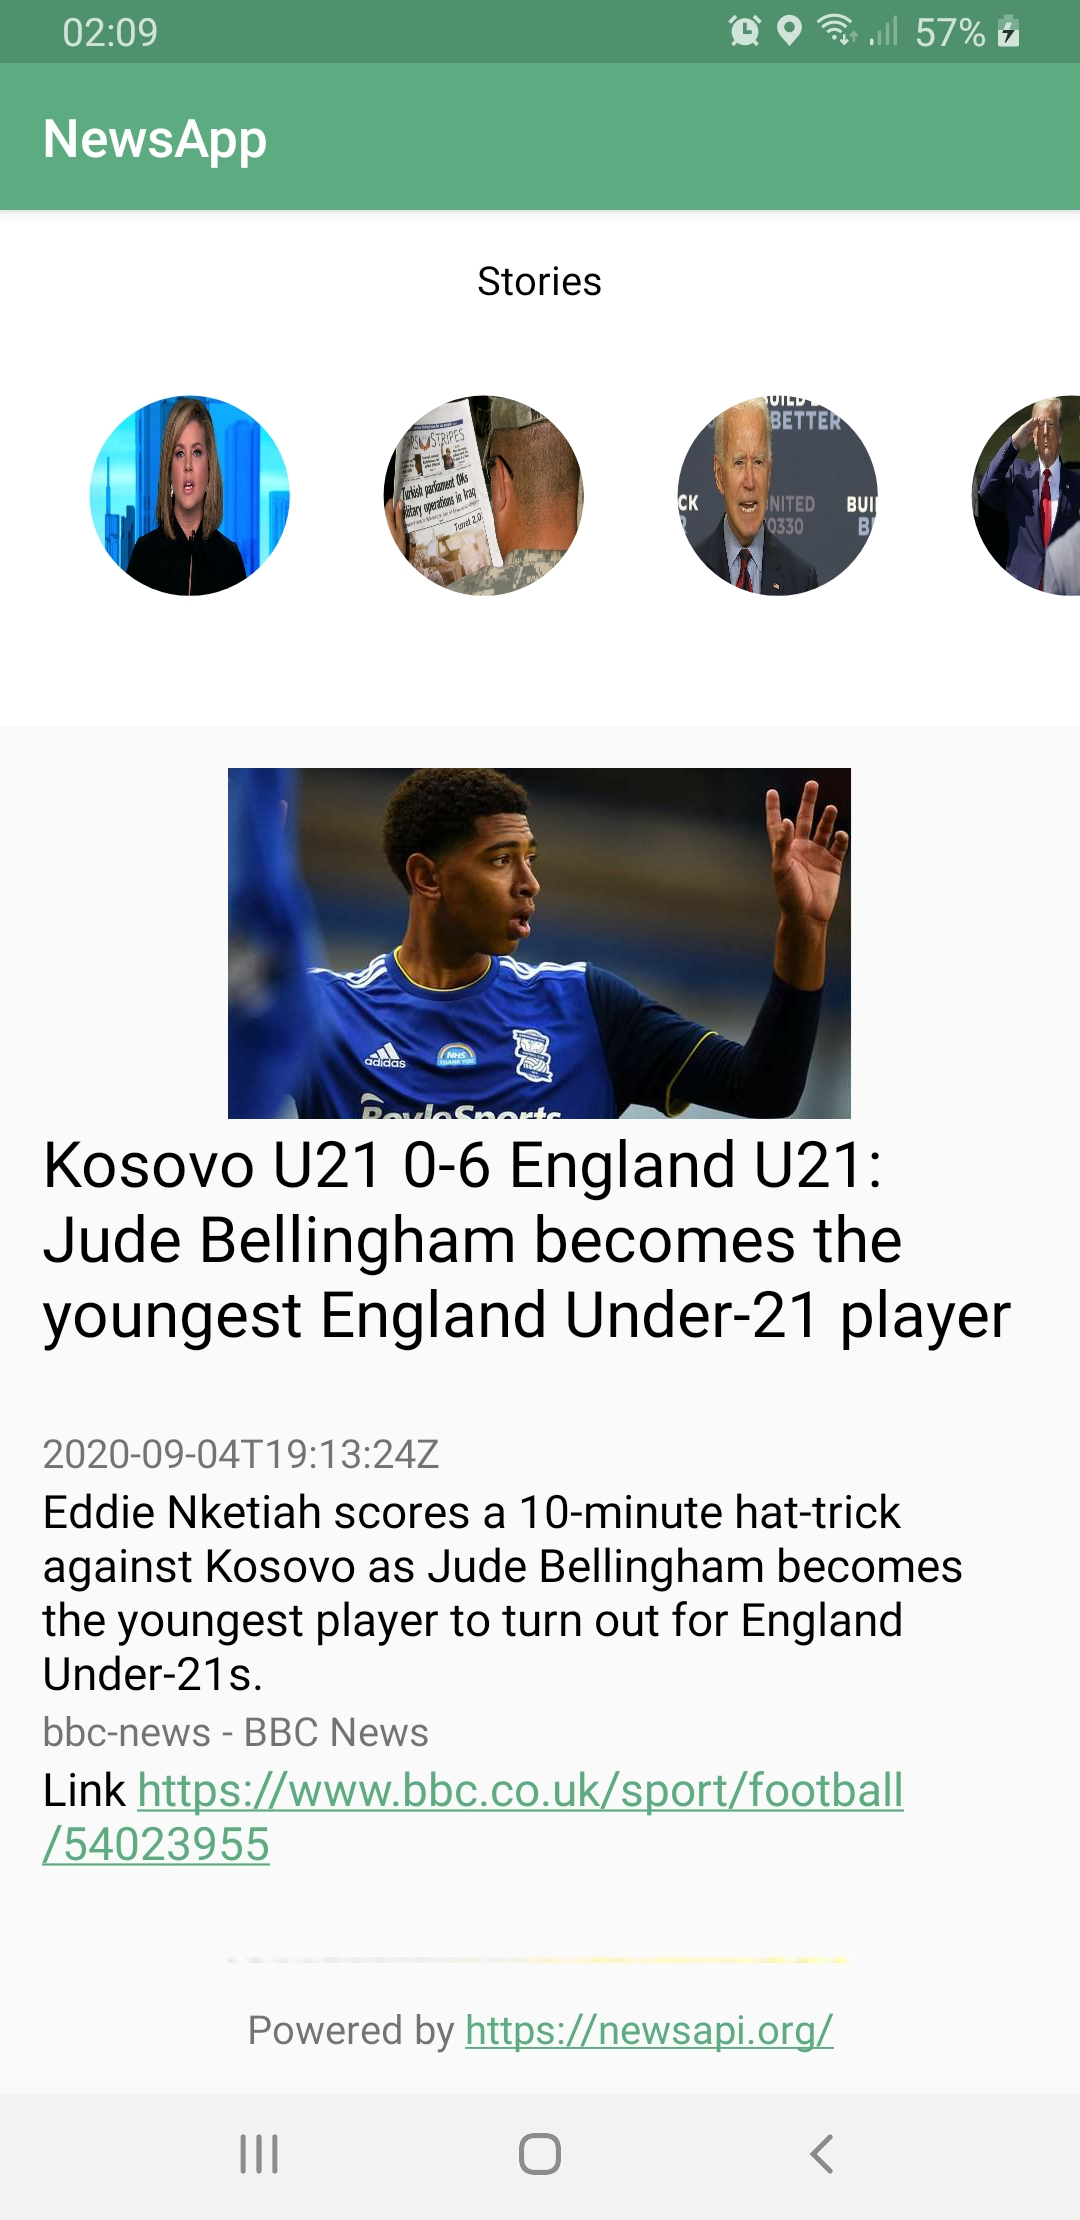
Now this is too boring. So I used newsapi to fetch the top headlines. I only took their photos. Then I added a horizontal recyclerView to show them. Now it looks much better. Now it looks like this:
现在,这太无聊了。 因此,我使用了newsapi来获取头条新闻。 我只拍了他们的照片。 然后,我添加了一个水平的recyclerView来显示它们。 现在看起来好多了。 现在看起来像这样:

MVVM (MVVM)
Finally we are gonna use view model in our project. All the data so far are in the main activity class. But under certain situations, say the user is frequently rotating the device, the activity recreates itself and so it the same data needs to be loaded again and again. This is bad. So we simply move all our working data inside ViewModel / AndroidViewModel as data inside the viewModel can survive beyond activity lifecycle. For large projects, it is a good idea to keep the data in a Repository class and create an object of that Repositorty inside the VideModel class.
最后,我们将在项目中使用视图模型。 到目前为止,所有数据都在主活动类中。 但是在某些情况下,例如用户经常旋转设备,活动会重新创建,因此需要一次又一次加载相同的数据。 这不好。 因此,我们只需将所有工作数据移至ViewModel / AndroidViewModel内,因为viewModel内的数据可以保留超过活动生命周期的生存期。 对于大型项目,最好将数据保存在Repository类中,并在VideModel类中创建该Repositorty的对象。
So I simply created NewsRepository, moved all the data inside there. Then create a ViewModel, and create a NewsRepository object. Finally, in the main activity, I am accessing the data through the viewModel. Check out the codes.
因此,我只是创建了NewsRepository,将所有数据移到了那里。 然后创建一个ViewModel,并创建一个NewsRepository对象。 最后,在主要活动中,我将通过viewModel访问数据。 检查代码。
刷卡时强制刷新 (Force Refresh on Swipe)
Now we want to add a swipe forced refresh.
现在我们要添加滑动强制刷新。
Note that, I’m not sure how to use newsapi to ask for specific / new items. That's why I am gonna delete the existing data from my app. But I suppose in production, one should properly check and request for just the necessary portions of data. So suppose, I have the news from id = 1234 to id = 2345, or maybe greatest timestamp = todat 10:00 am. Then I should ask the api to give me news with id > 2345 or timestamp 10:00 am, things like that.
请注意,我不确定如何使用newsapi来请求特定/新项目。 这就是为什么我要从我的应用程序中删除现有数据。 但是我想在生产中,应该适当地检查和请求仅必要的数据部分。 假设我有从id = 1234到id = 2345的新闻,或者也许是最大时间戳=上午10:00的新闻。 然后,我应该要求api给我提供ID> 2345或时间戳为10:00 am的新闻,类似的事情。
That being said, to refesh news, first put your recyclerView inside a SwipeRefreshLayout. Next in your main activity, add this:
话虽如此,要刷新新闻,请首先将您的recyclerView放入SwipeRefreshLayout 。 接下来在您的主要活动中,添加以下内容:
swipeRefreshLayout = findViewById(R.id.swipeRefreshLayout);
        swipeRefreshLayout.setOnRefreshListener(SwipeRefreshLayout.OnRefreshListener {
            // todo: refresh
            newsViewModel.newsRepository.forcedRefresh();
            swipeRefreshLayout.isRefreshing = false;        });
Now go to the NewsRepository.kt file and add:
现在转到NewsRepository.kt文件并添加:
fun forcedRefresh() {
        val handlerThread = HandlerThread("dbHandlerThread");
        handlerThread.start();
        val looper = handlerThread.looper;
        val handler = Handler(looper);
        handler.post(Runnable {
            database.newsDao().deleteAll();
        });
        newsBoundaryCallback?.pageNumber = 1L;
        var dataSource = datasourceFactory.create();
        dataSource.invalidate();
    }
There are some other changes, such as converting some local variables into private fields, and some private fields into public ones for convenience.
还有一些其他更改,例如为方便起见将一些局部变量转换为私有字段,并将某些私有字段转换为公共字段。
If you have any questions, feel free to ask me and I’ll try my utmost to answer you.
如果您有任何疑问,请随时问我,我会尽全力回答您。

更新:2020/12/11 (Update: 12/11/2020)
使用工厂模式正确支持在线-离线模式 (Use a Factory Pattern to Properly Support Online-Offline modes)
Previously, the data was read from database. When end of data were reached, a network call was triggered to fetch new data. It was a bit awkward. So after studying and experimenting for some more time, I came up with a factory pattern to properly manage the online offline modes.
以前,数据是从数据库中读取的。 到达数据结尾时,将触发网络调用以获取新数据。 有点尴尬。 因此,在学习和试验了一段时间之后,我想出了一种工厂模式来正确管理在线离线模式。
So first, we’ll be creating a class named NewsDataSource that extends PageKeyedDataSource<Long, Article>. Here, we use Long as our news api uses number type to indicate next page. If your api uses something else (say, String), then you should use PageKeyedDataSource<String, Article> somwthing like that.
因此,首先,我们将创建一个名为NewsDataSource的类,该类扩展了PageKeyedDataSource<Long, Article> 。 在这里,我们使用Long作为新闻api使用数字类型来指示下一页。 如果您的api使用其他内容(例如String ),则应使用PageKeyedDataSource<String, Article> 。
Now you have to complete loadInitial, loadBefore, loadAfter. If you google for paging library tutorial, this is the thing that pops up everywhere. Just follow one if you need details. My personal favourite is https://www.raywenderlich.com/6948-paging-library-for-android-with-kotlin-creating-infinite-lists. So I’m gonna skip this part.
现在,您必须完成loadInitial,loadBefore,loadAfter。 如果您用Google搜索分页库教程,那么这是随处可见的东西。 如果您需要详细信息,请遵循一个。 我个人最喜欢的是https://www.raywenderlich.com/6948-paging-library-for-android-with-kotlin-creating-infinite-lists 。 所以我要跳过这一部分。
Once you’re done with it, we’ll start making the data factory. Create a class named NewsFactory. This is the most important part of the code:
完成后,我们将开始制作数据工厂。 创建一个名为NewsFactory的类。 这是代码中最重要的部分:
/** Private methods */
    // offline data
    private fun offlinePagedListBuilder(): LivePagedListBuilder<Int, Article> {
        val livePageListBuilder = LivePagedListBuilder<Int, Article>(offlineDataSourceFactory, config);
        return livePageListBuilder
    }// online data
    private fun onlinePagedListBuilder(): LivePagedListBuilder<Long, Article> {
        val dataSourceFactory = object : DataSource.Factory<Long, Article>() {
            override fun create(): DataSource<Long, Article> {
                val newsDataSource = NewsDataSource(context, liveLoaderState);
                dataSource = newsDataSource;
                return newsDataSource;
            }
        };
        val livePageListBuilder = LivePagedListBuilder<Long, Article>(dataSourceFactory, config);
        return livePageListBuilder;
    }/** Public apis */
    fun getLivePagedArticles(type: Int): LiveData<PagedList<Article>> {
        if(type == Const.OFFLINE) {
            Log.e("NewsFactory", "NewsFactory->OfflineDataSet");
            val livePagedListArticles: LiveData<PagedList<Article>> = offlinePagedListBuilder().build();
            return livePagedListArticles;
        }else if(type == Const.ONLINE) {
            Log.e("NewsFactory", "NewsFactory->OnlineDataSet");
            val livePagedListArticles: LiveData<PagedList<Article>> = onlinePagedListBuilder().build();
            return livePagedListArticles;
        }else{
            // todo: if you have other sources, maybe place them here...
            Log.e("NewsFactory", "NewsFactory->OtherDataSet");
            return MutableLiveData(); // empty live data :/ some weirdo kotlin thing...
        }
    }
Once done, go to NewsRepository class, and initialize your Live<PagedList<Article> > in this way:
完成后,转到NewsRepository类,并以这种方式初始化Live<PagedList<Article> > :
fun initList() {
        var lastNewsUpdateTimeMillis:Long = sharedpreferences.getLong(Const.LAST_NEWS_UPDATE_TIME, 0);if(   System.currentTimeMillis() - lastNewsUpdateTimeMillis > (Const.ONE_DAY_IN_MILLIS)  ) {  // once dailythis.liveArticleList = newsFactory.getLivePagedArticles(Const.ONLINE);
            var editor: SharedPreferences.Editor = sharedpreferences.edit();
            editor.putLong(Const.LAST_NEWS_UPDATE_TIME, System.currentTimeMillis());
            editor.apply();
        }else{
            this.liveArticleList = newsFactory.getLivePagedArticles(Const.OFFLINE);
        }
    }
Now if you run it, you will see that each day, on the first time, the data will load from network call, and then it will be stored in the database. After that, it will load data from database only. You can see the evidence yourself if you run the code and check the log prints.
现在,如果运行它,您将看到每天第一次从网络调用中加载数据,然后将其存储在数据库中。 之后,它将仅从数据库加载数据。 如果您运行代码并检查日志记录,则可以自己查看证据。
Finally, for the force refresh part, I did this:
最后,对于强制刷新部分,我这样做:
fun forcedRefresh() {
        val handlerThread = HandlerThread("dbHandlerThread");
        handlerThread.start();
        val looper = handlerThread.looper;
        val handler = Handler(looper);
        handler.post(Runnable {
            database.newsDao().deleteAll();
        });
        liveArticleList = newsFactory.getLivePagedArticles(Const.ONLINE);
        newsFactory.dataSource?.invalidate();                                // <------ This is the important line
    }
This will delete the old news, and restart loading data from network. Although this is not the ideal way. I really don’t understand how to tell the newsapi to give me only the latest news. So I did this.
这将删除旧新闻,并重新开始从网络加载数据。 虽然这不是理想的方法。 我真的不明白如何告诉newsapi只给我最新消息。 所以我做到了。
Thank you for reading.
感谢您的阅读。
翻译自: https://medium.com/@qazifahimfarhan/creating-a-newsapp-in-android-7160afe398e8


 485
485

 被折叠的 条评论
为什么被折叠?


