


android数据绑定
Data binding is a technique used when you want to glue together pieces of information (your data) to some visual user input elements. In this process, whenever the input gets updated, the data behind it gets updated as well. This is far from a new concept, and there are a plethora of frameworks that have incorporated this into their design (AngularJS/React/Vue). Our attention in this article is not on front-end frameworks but rather on a mobile setting. Google introduced the Data Binding Library in Android, which is part of Android Jetpack.
数据绑定是一种用于将信息(您的数据)粘合到某些可视用户输入元素上的技术。 在此过程中,每当输入更新时,其背后的数据也会更新。 这远不是一个新概念,并且有许多框架已将其纳入其设计中(AngularJS / React / Vue)。 本文中我们的关注点不在前端框架上,而是在移动设备上。 Google在Android中引入了数据绑定库 ,该库是Android Jetpack的一部分。
If you are unfamiliar with the Jetpack library suite, it might be because Google has announced that it will be dropping development for its support libraries and instead will move into supporting AndroidX libraries (which are the newer version of the support libraries).
如果您不熟悉Jetpack库套件,则可能是因为Google宣布将放弃其支持库的开发,而将转向支持AndroidX库(这是支持库的更新版本)。
I am aware that there are many articles explaining how to use data binding using an adapter, but this piece won’t focus on that. Instead, I will show a bare-bones, minimal approach to data binding that can save you time by minimizing the amount of code you have to write.
我知道有很多文章介绍了如何使用适配器来使用数据绑定,但是本文不会重点讨论。 取而代之的是,我将展示一种基本的,最小的数据绑定方法,该方法可以通过减少必须编写的代码量来节省您的时间。
为什么要使用数据绑定? (Why Use Data Binding?)
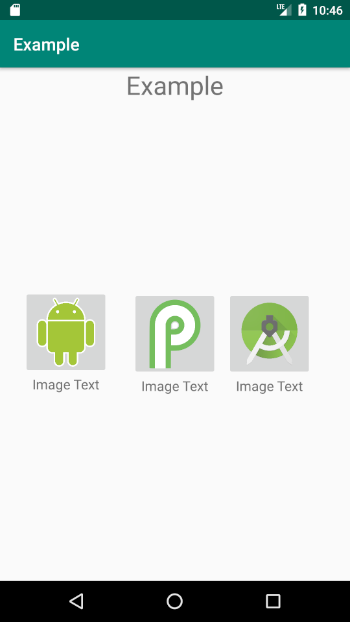
If you aren’t sold yet, let’s take a few minutes to explain the benefit of using data binding by showing an example. Let’s say you have a menu with three custom buttons, where each button is a layout within itself.
如果您还没有出售产品,那么让我们花一些时间通过举例说明使用数据绑定的好处。 假设您有一个包含三个自定义按钮的菜单,其中每个按钮都是其内部的布局。
One way to generate all of this is by using four different XML layouts: one for the main layout and one for each of the three buttons.
生成所有这些内容的一种方法是使用四种不同的XML布局:一种用于主布局,一种用于三个按钮。
You need to do this since each button will direct the user to a different part in your application and therefore needs different text and a different image.
您需要执行此操作,因为每个按钮会将用户定向到应用程序中的不同部分,因此需要不同的文本和不同的图像。
Granted, this isn’t a lot of code duplication as we are only handling three layouts. But if you think about it, it’s quite a waste of time dealing with all that code. If you take into account an application that has a more complicated layout, one that might showcase products and their images, this can lead to a lot of tedious code replication.
当然,这不是很多代码重复,因为我们仅处理三种布局。 但是,如果您考虑一下,那么处理所有这些代码都是很浪费时间的。 如果考虑到具有更复杂布局的应用程序,该应用程序可能会展示产品及其图像,那么这可能会导致很多繁琐的代码复制。
With data binding, we will manage to create only one XML layout that will be used by all of our buttons.
通过数据绑定,我们将设法仅创建一个XML布局,以供所有按钮使用。
我们从哪里开始? (Where Do We Start?)
We need to let our project enable data binding, and for that, we need to add the dataBinding element in our application’s build.gradle file:
我们需要让我们的项目实现数据绑定,并为这一点,我们需要添加dataBinding在我们的应用程序的元素build.gradle文件:
After synchronizing our project, we’ll create our data class, which we will use to bind the layout to.
同步项目后,我们将创建数据类,将其用于绑定布局。
Pay attention to the fact that we have two fields in our ButtonData class:
请注意, ButtonData类中有两个字段:
buttonText— This is the text that will show up beneath our image.buttonText—这是将显示在图像下方的文本。buttonImageSrc— This is responsible for the button’s image.buttonImageSrc—这负责按钮的图像。
If we wanted more data, we would just add more fields to our data class.
如果我们想要更多的数据,我们只需将更多字段添加到我们的数据类中。
实际约束 (The Actual Binding)
Next, we need to declare a variable property in our layout so that it can be used. This variable will be bounded to the data class that we created. To do this, there are two things we need to do:
接下来,我们需要在布局中声明一个变量属性,以便可以使用它。 此变量将绑定到我们创建的数据类。 为此,我们需要做两件事:
- Wrap our root layout element in a layout tag. 将我们的根布局元素包装在layout标签中。
Add a data tag that will contain the declaration of our variable (
buttonData).添加一个数据标签,其中将包含我们的变量声明(
buttonData)。
Notice that we can remove the schema from our previous main layout as it was moved to the root layout tag. Also, the variable we added is tied directly to our data class.
请注意,在将模式移到根布局标记时,可以将其从之前的主布局中删除。 同样,我们添加的变量直接绑定到我们的数据类。
In our MainActivity file, we need to add code to handle the binding:
在我们的MainActivity文件中,我们需要添加代码来处理绑定:
Each time you create a variable inside of a layout, a binding class is generated for that layout automatically. In our case, our layout is called activity_main, so the binding class will be named ActivityMainBinding.
每次在布局内部创建变量时,都会自动为该布局生成绑定类。 在我们的例子中,我们的布局称为activity_main ,因此绑定类将命名为ActivityMainBinding 。
The convention is always the name of the layout with Binding added at the end.
约定始终是最后添加Binding的布局名称。
Since we declared buttonData as our variable in the layout, it gets appended to the binding object and we can assign it a new instance of our ButtonData class.
由于我们在布局buttonData声明为变量,因此将其附加到绑定对象,然后可以为其分配ButtonData类的新实例。
After doing all that, we can finally use the data that we just bound in our layout.
完成所有这些操作之后,我们最终可以使用刚在布局中绑定的数据。
And the result is:
结果是:

等一会儿… (Wait a Second…)
We have three buttons and our data class can only be used for one button, so how do we get past this?
我们有三个按钮,而我们的数据类只能用于一个按钮,那么如何克服这个问题呢?
We need to create a new data class, ButtonData, to hold a list of ButtonData objects.
我们需要创建一个新的数据类ButtonData ,以保存ButtonData对象的列表。
We had to override the get method as it needs to be recognized when we use it in our layout.
我们必须重写get方法,因为在布局中使用它时需要识别它。
Then, we need to change the references in our activity_main.xml:
然后,我们需要更改我们的activity_main.xml的引用:
And we have to create a new binding to the new data class:
并且我们必须创建一个新的绑定到新的数据类:
We create three instances of the ButtonData class. Then we instantiate a ButtonsData object and attach it to our binding object.
我们创建ButtonData类的三个实例。 然后,我们实例化一个ButtonsData对象,并将其附加到我们的绑定对象上。
Lastly, we can now use our data class properly in our layout:
最后,我们现在可以在布局中正确使用数据类:

资源资源 (Resources)
Thanks for reading!
谢谢阅读!
翻译自: https://medium.com/better-programming/how-to-bind-data-in-android-bbb1e180a928
android数据绑定


 713
713


 被折叠的 条评论
为什么被折叠?
被折叠的 条评论
为什么被折叠?
 到【灌水乐园】发言


