


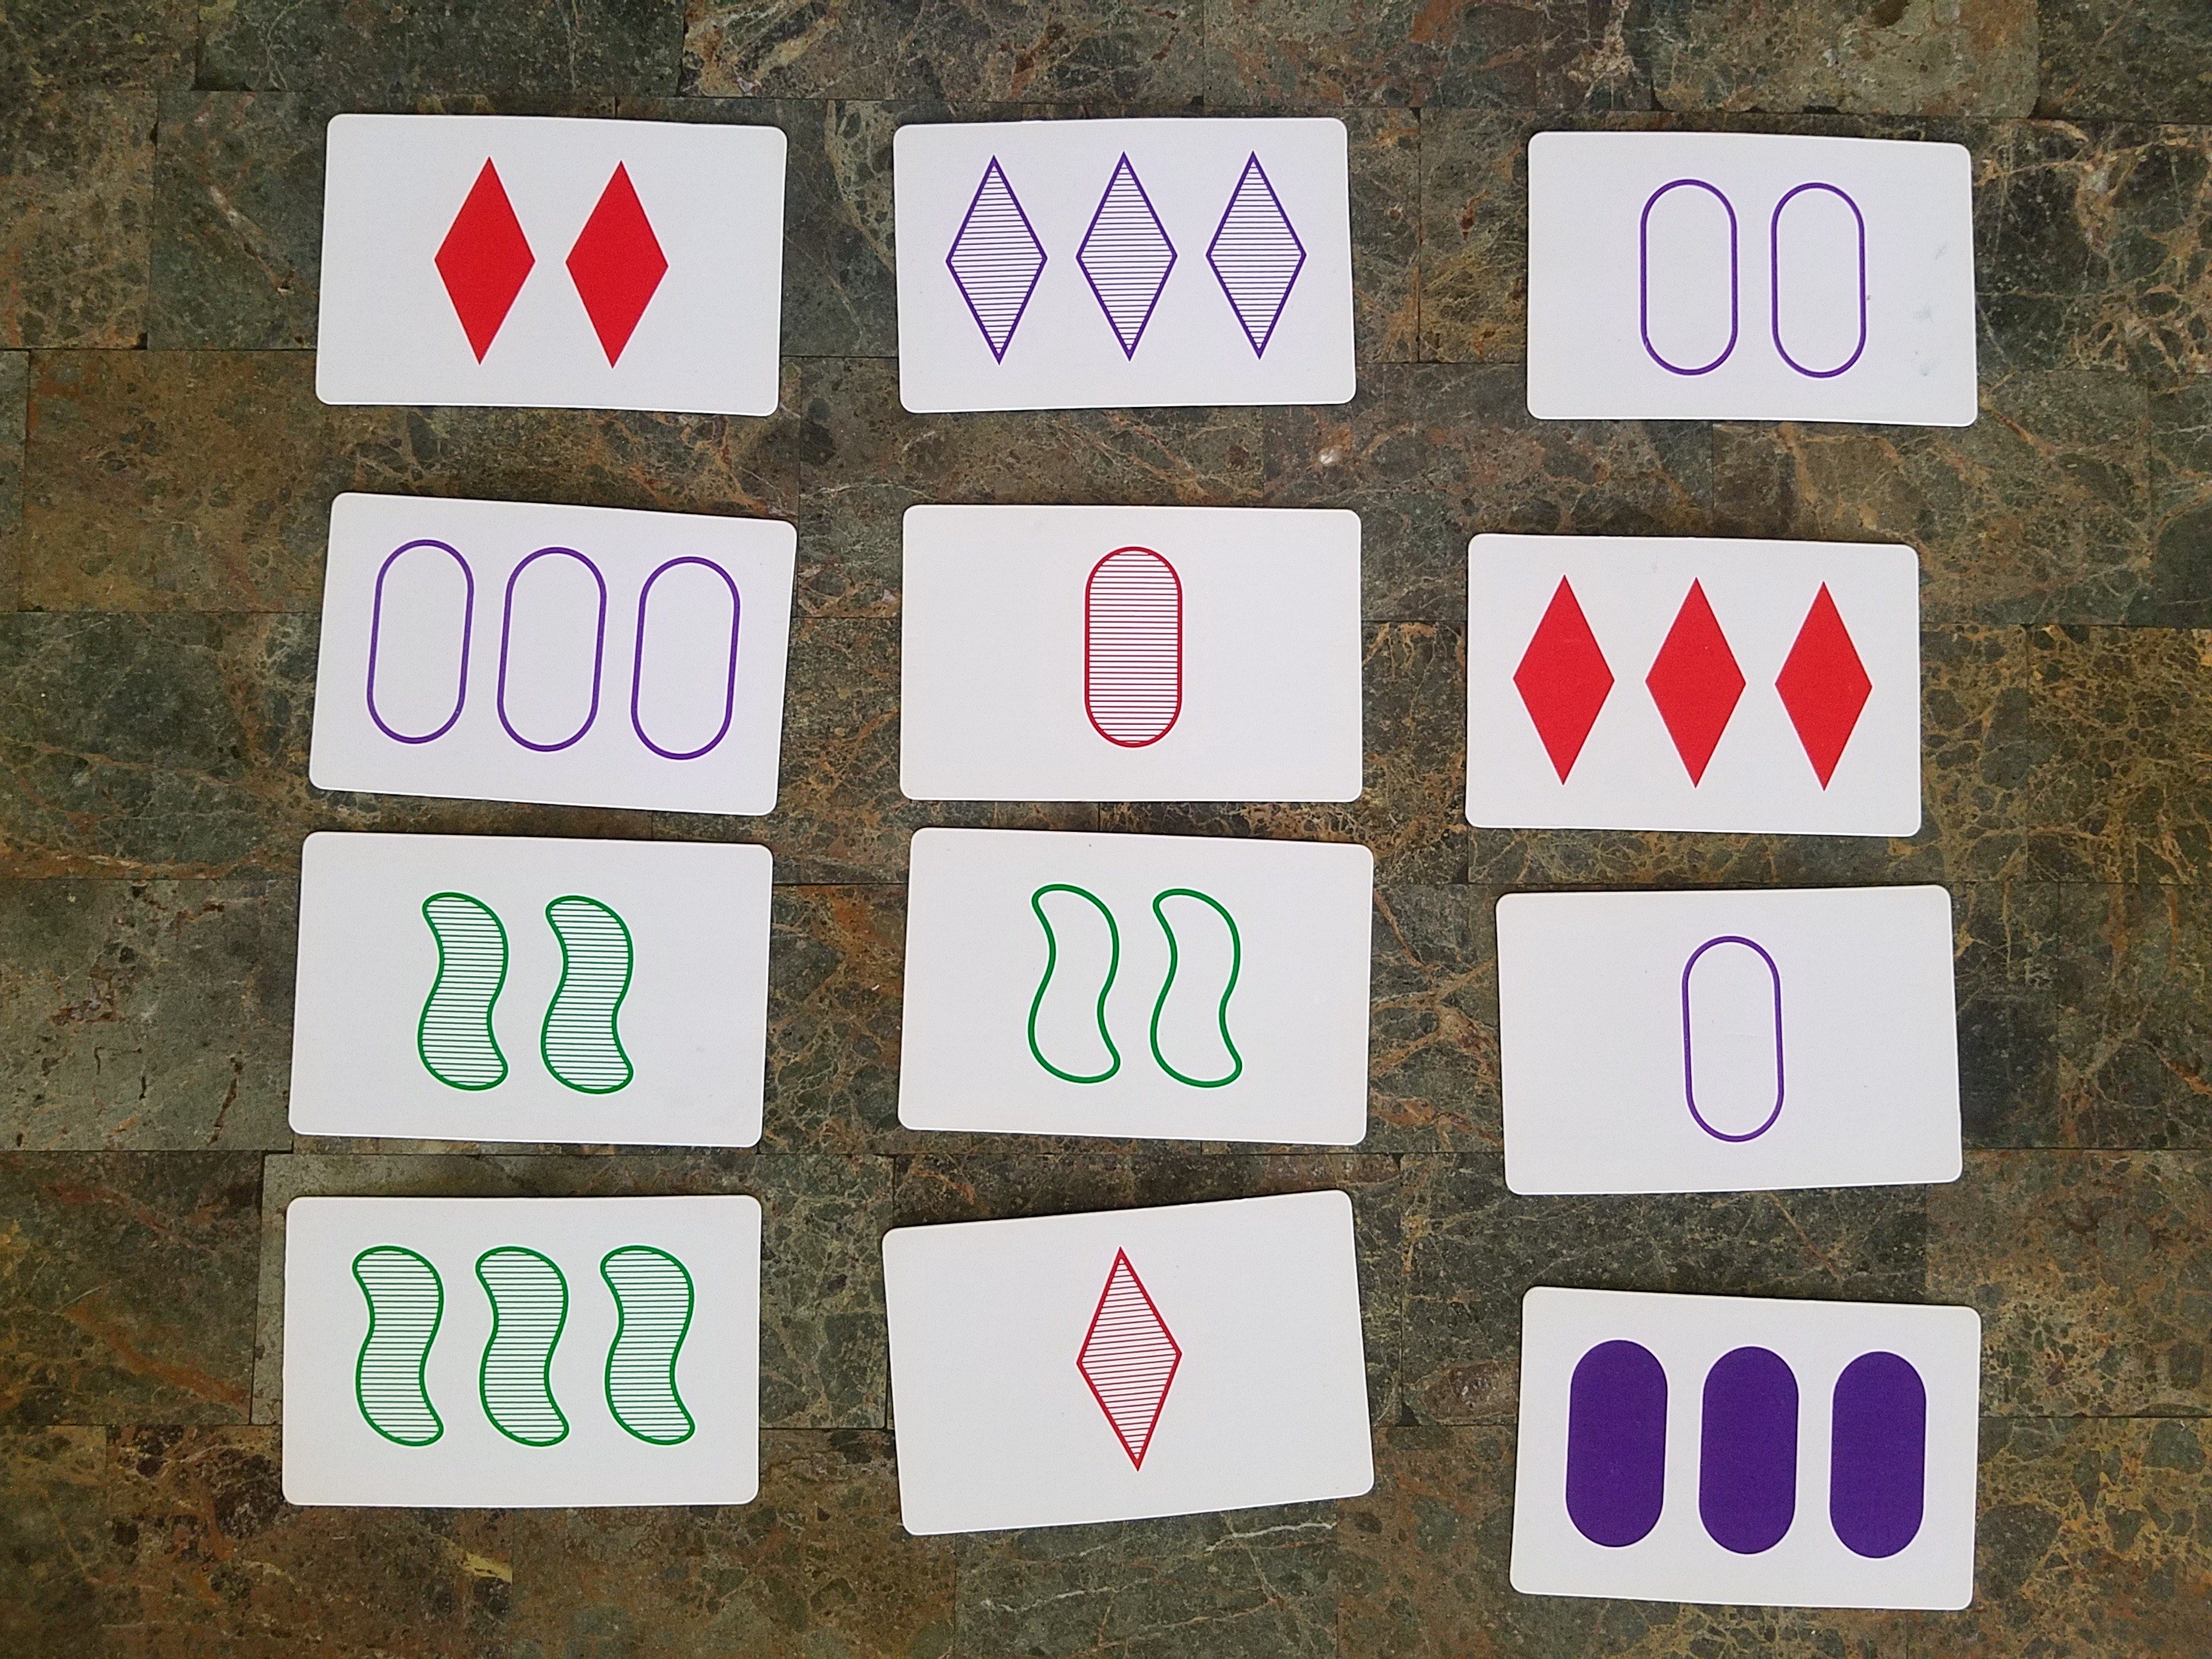
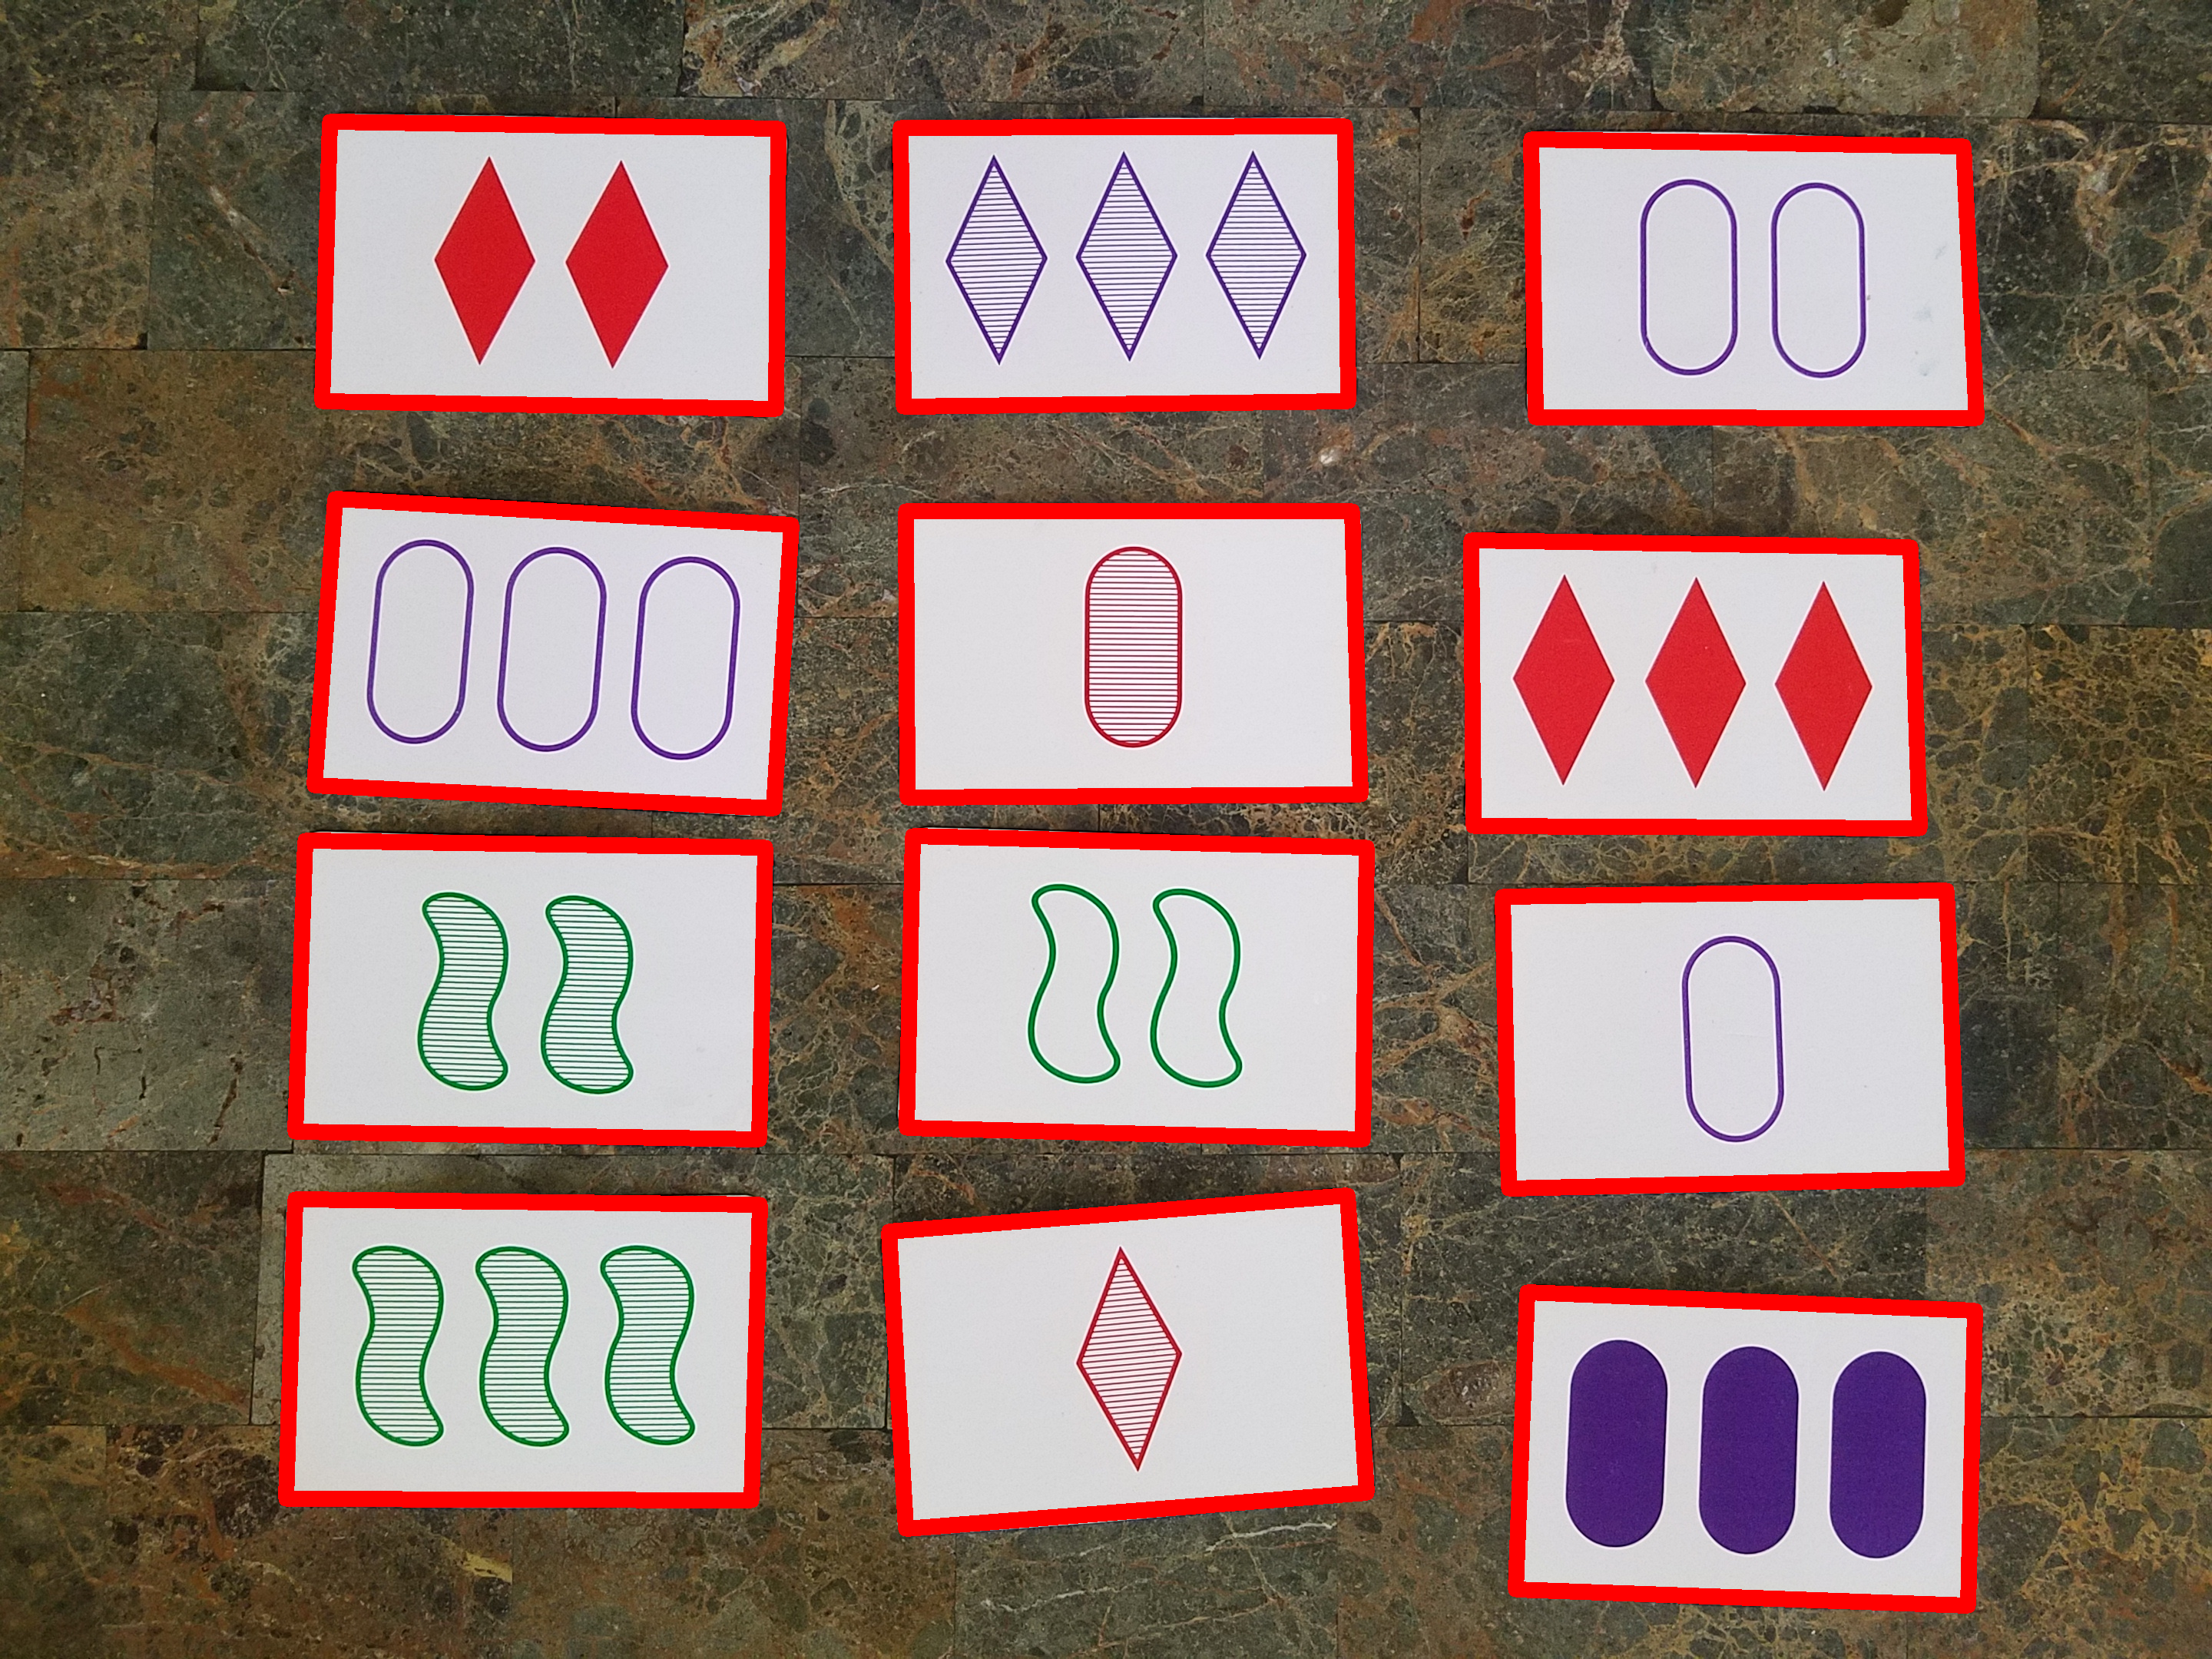
Have you ever played SET? SET is a game in which players race to identify patterns of three cards — or SETs — within twelve unique cards in play at a given time. Each SET card has four properties: shape, shade/fill, color, and count. Below is an example twelve-card layout with some card descriptions.
您玩过SET吗? SET是一种游戏,玩家在指定的时间竞相识别出十二张唯一的纸牌中的三张纸牌(或SET)的模式。 每个SET卡都有四个属性:形状,阴影/填充,颜色和计数。 以下是带有某些卡说明的示例十二卡布局。
Notice that each of the card’s four properties can be expressed by one of three variations. These four properties and their variations are summarized in the table below.
请注意,卡的四个属性中的每一个都可以用三个变体之一来表示。 下表总结了这四个属性及其变化。
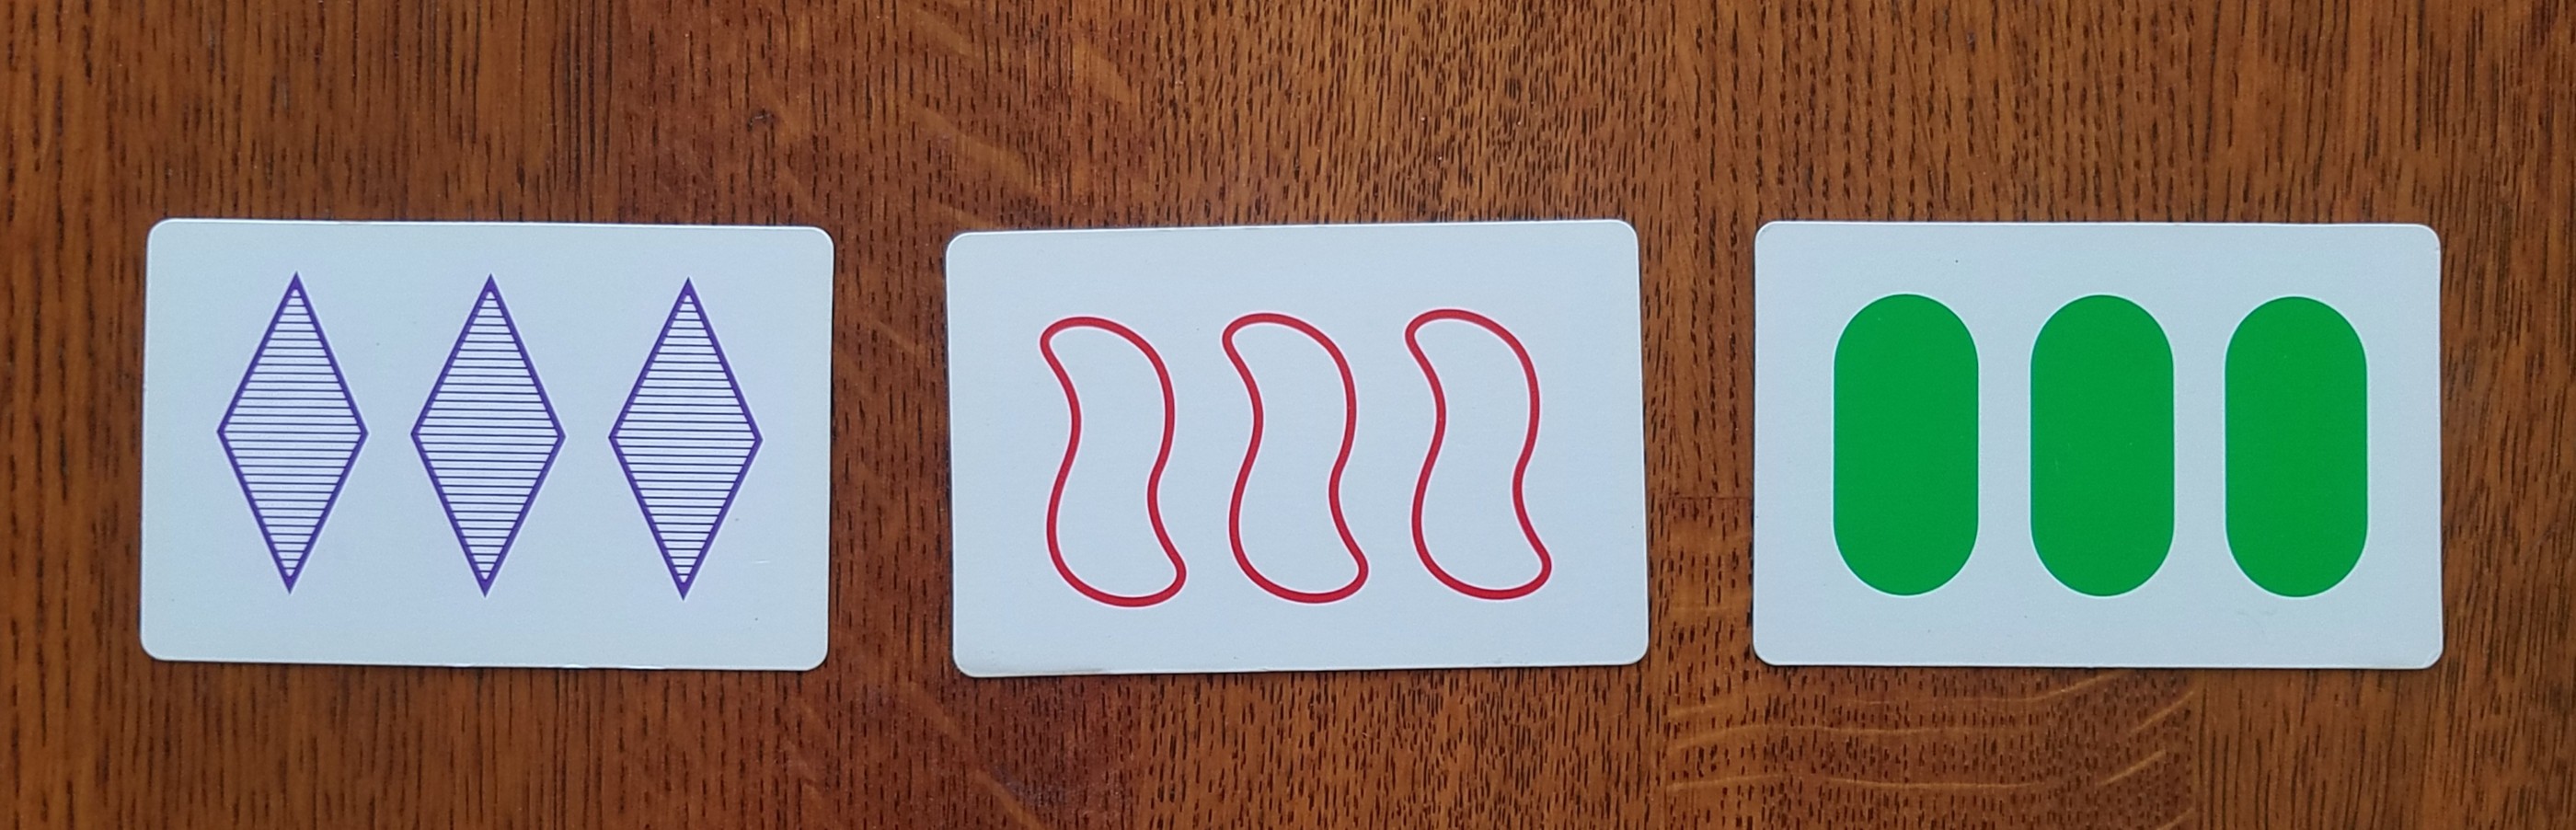
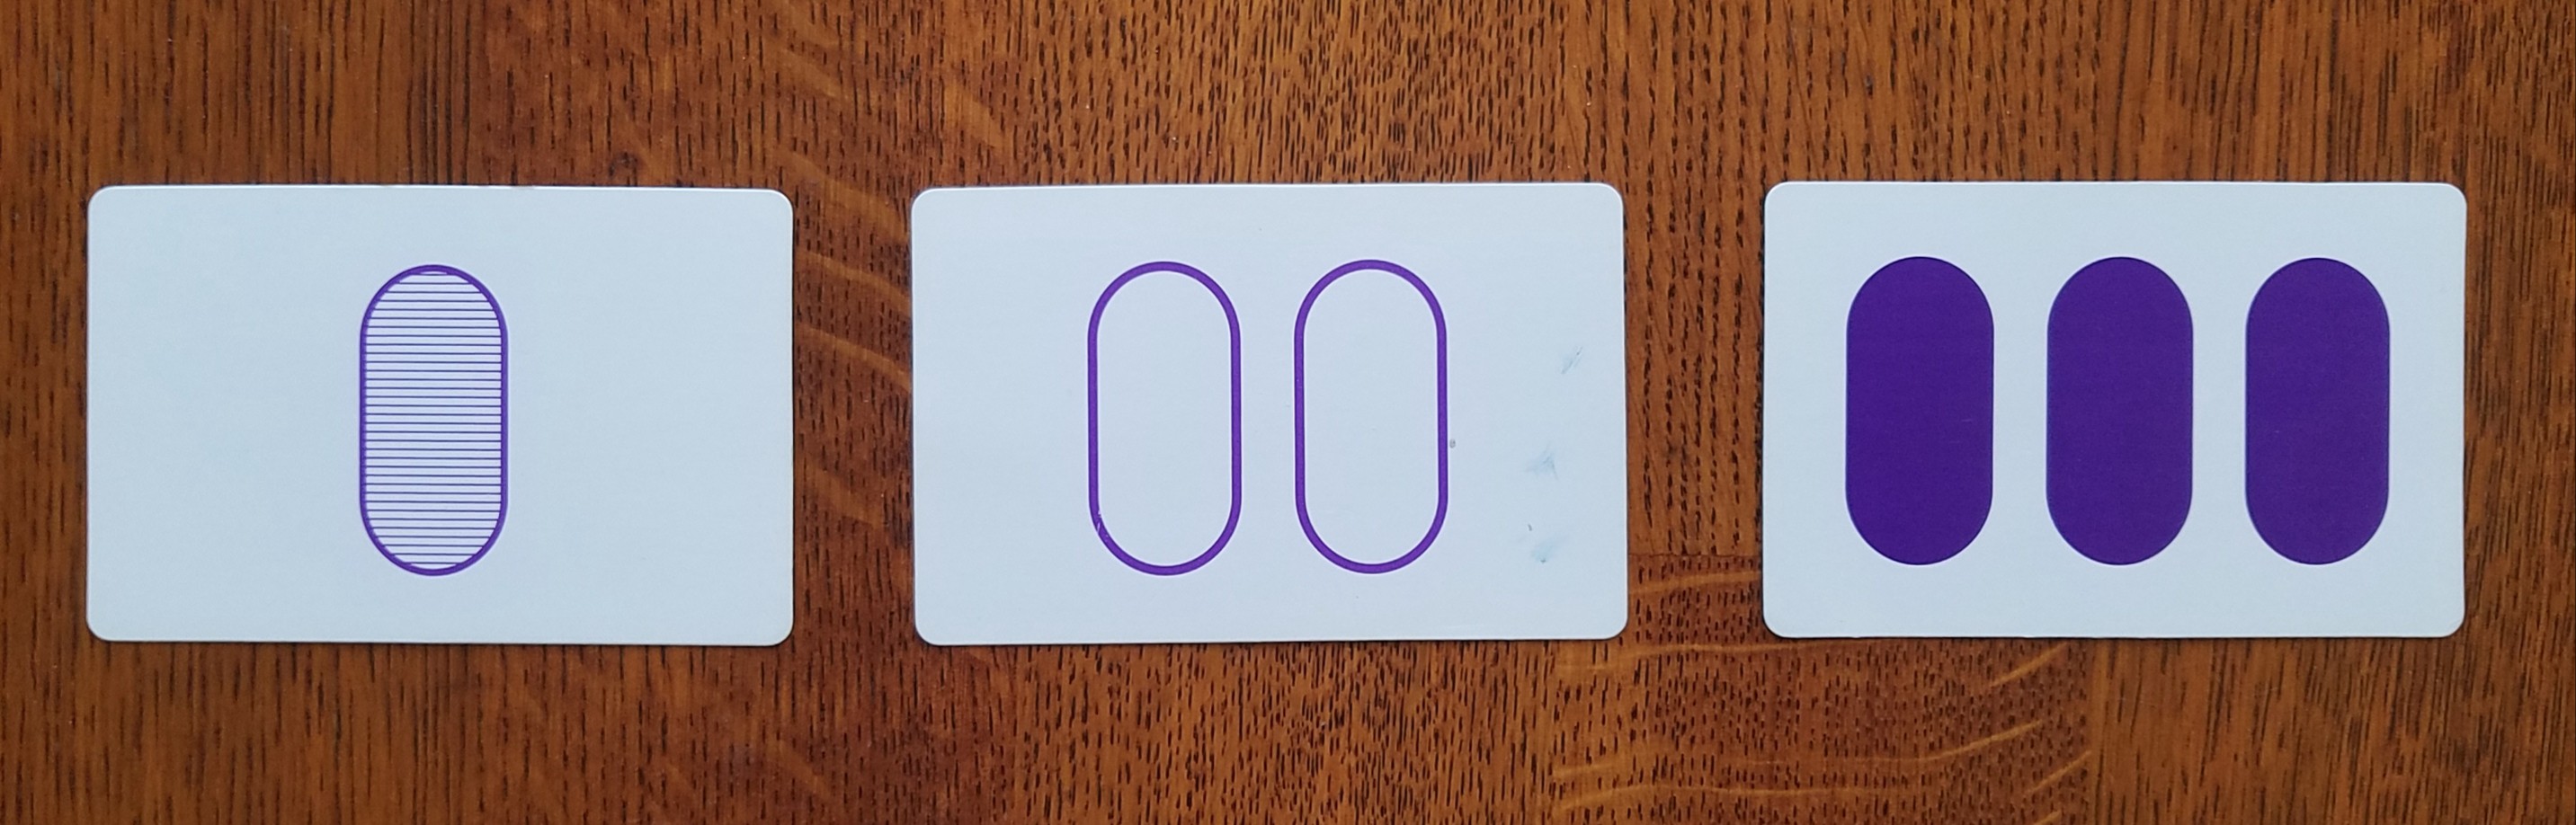
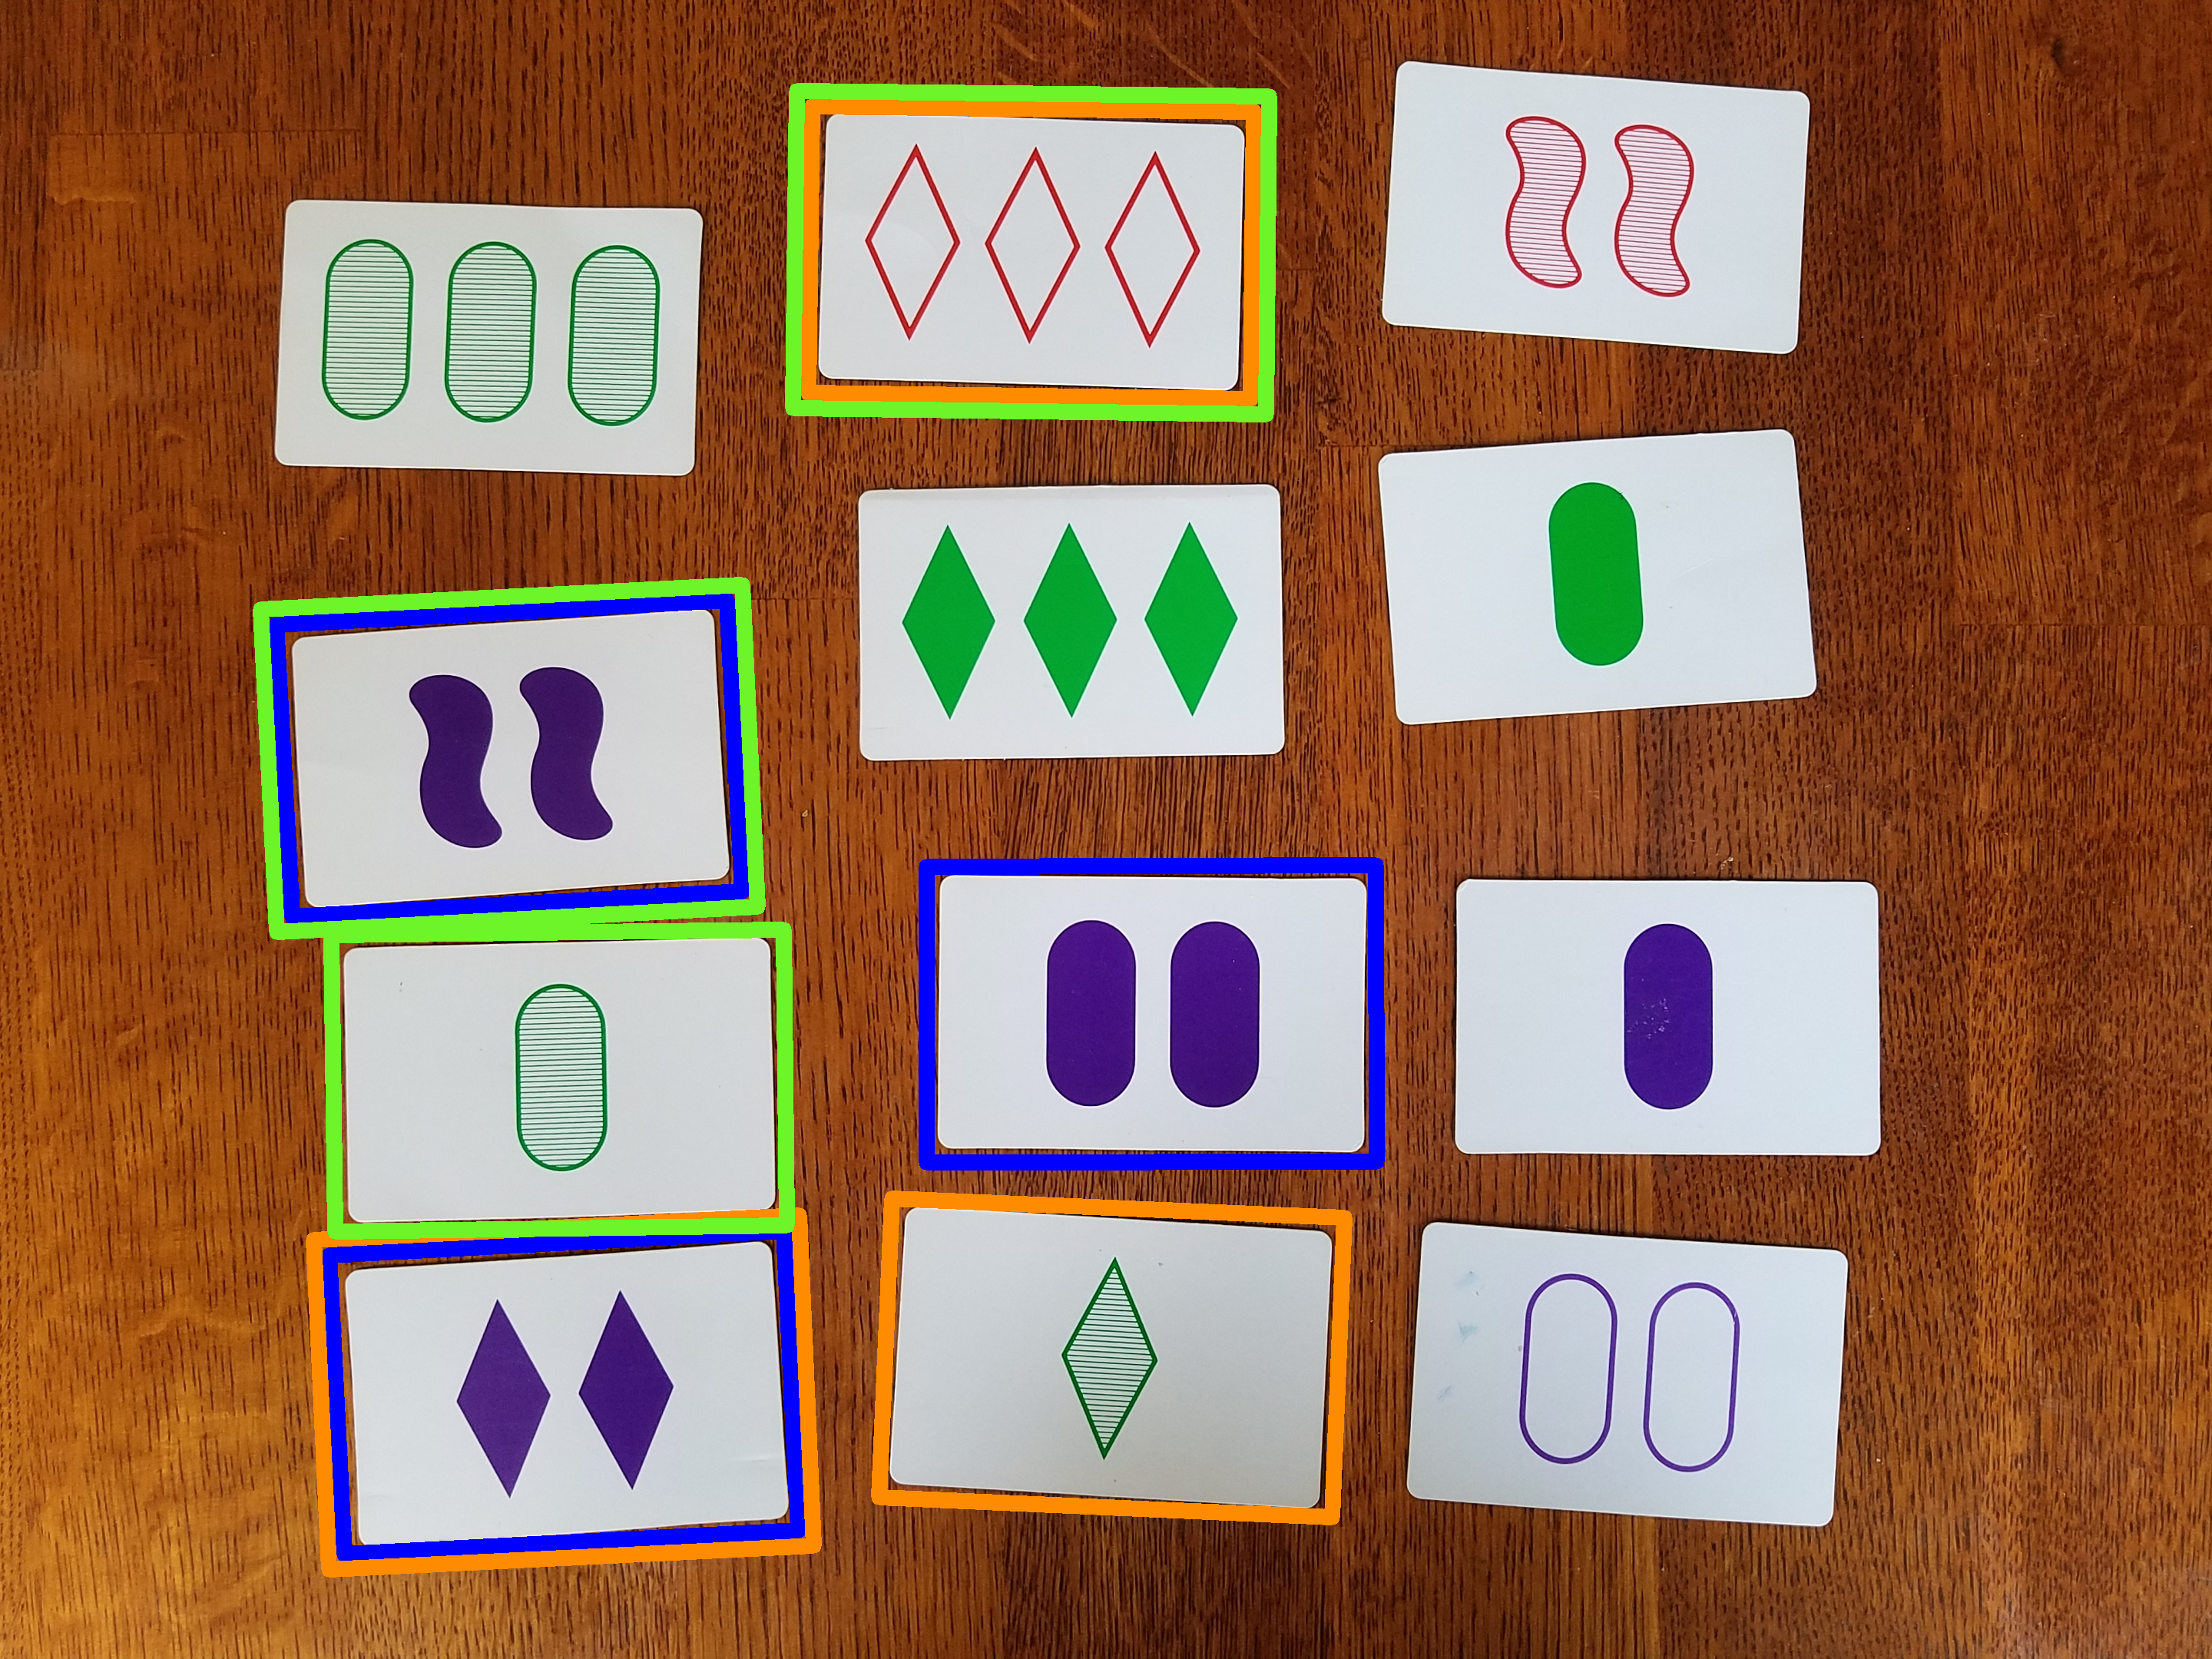
Because no two cards are repeated, a SET deck contains 3⁴ = 81 cards (3 variations per property, 4 properties). A valid SET is constituted by three cards that, for each of the four properties, either all share the same variation or all have different variations. You can find the complete rules online. To visually demonstrate, here are three example valid SETs:
因为没有重复两张牌,所以SET牌组包含3 = 81张牌(每个属性3个变体 , 4个属性 )。 一个有效的SET由三张卡片组成,对于这四个属性中的每一个,它们要么共享相同的变体,要么都具有不同的变体。 您可以在线找到完整的规则。 为了直观地演示,这是三个示例有效的SET:

With some time to spare between the end of my summer internship and the beginning of the semester, I built a SET solver: a computer program that took an image of SET cards and returned all valid SETs. I used OpenCV —an open source computer vision library — and Python. To familiarize myself, I skimmed the library’s documentation and watched a tutorial series. In addition, I read blog posts and GitHub repositories for some similar projects.¹ I then broke the project down into four tasks:
在暑期实习结束和学期开始之间有一些时间,我建立了一个SET解算器:一个计算机程序,该程序获取SET卡的图像并返回所有有效的SET。 我使用了OpenCV(一种开源计算机视觉库)和Python。 为了使自己熟悉,我浏览了图书馆的文档并观看了一系列教程 。 此外,我阅读了一些类似项目的博客文章和GitHub存储库。¹然后我将该项目分解为四个任务:
Locating cards within an input image (CardExtractor.py)
在输入图像中定位卡片(CardExtractor.py)
Identifying each card’s unique properties (Card.py)
识别每张卡的唯一属性(Card.py)
Evaluating the identified cards for SETs (SetEvaluator.py)
评估已识别的SET卡(SetEvaluator.py)
Displaying SETs to the user (set_utils.display_sets)
向用户显示SET(set_utils.display_sets)
I created a dedicated class for each of first three tasks, which you can see in my type-hinted main method below.
我为前三个任务中的每一个创建了一个专用类,您可以在下面的带类型提示的main方法中看到该类。
All of the project’s code is publicly available on GitHub. Let’s jump in!
该项目的所有代码均可在GitHub上公开获得。 让我们跳进去吧!
在输入图像中定位卡 (Locating Cards in Input Image)
1.图像预处理 (1. Image Preprocessing)
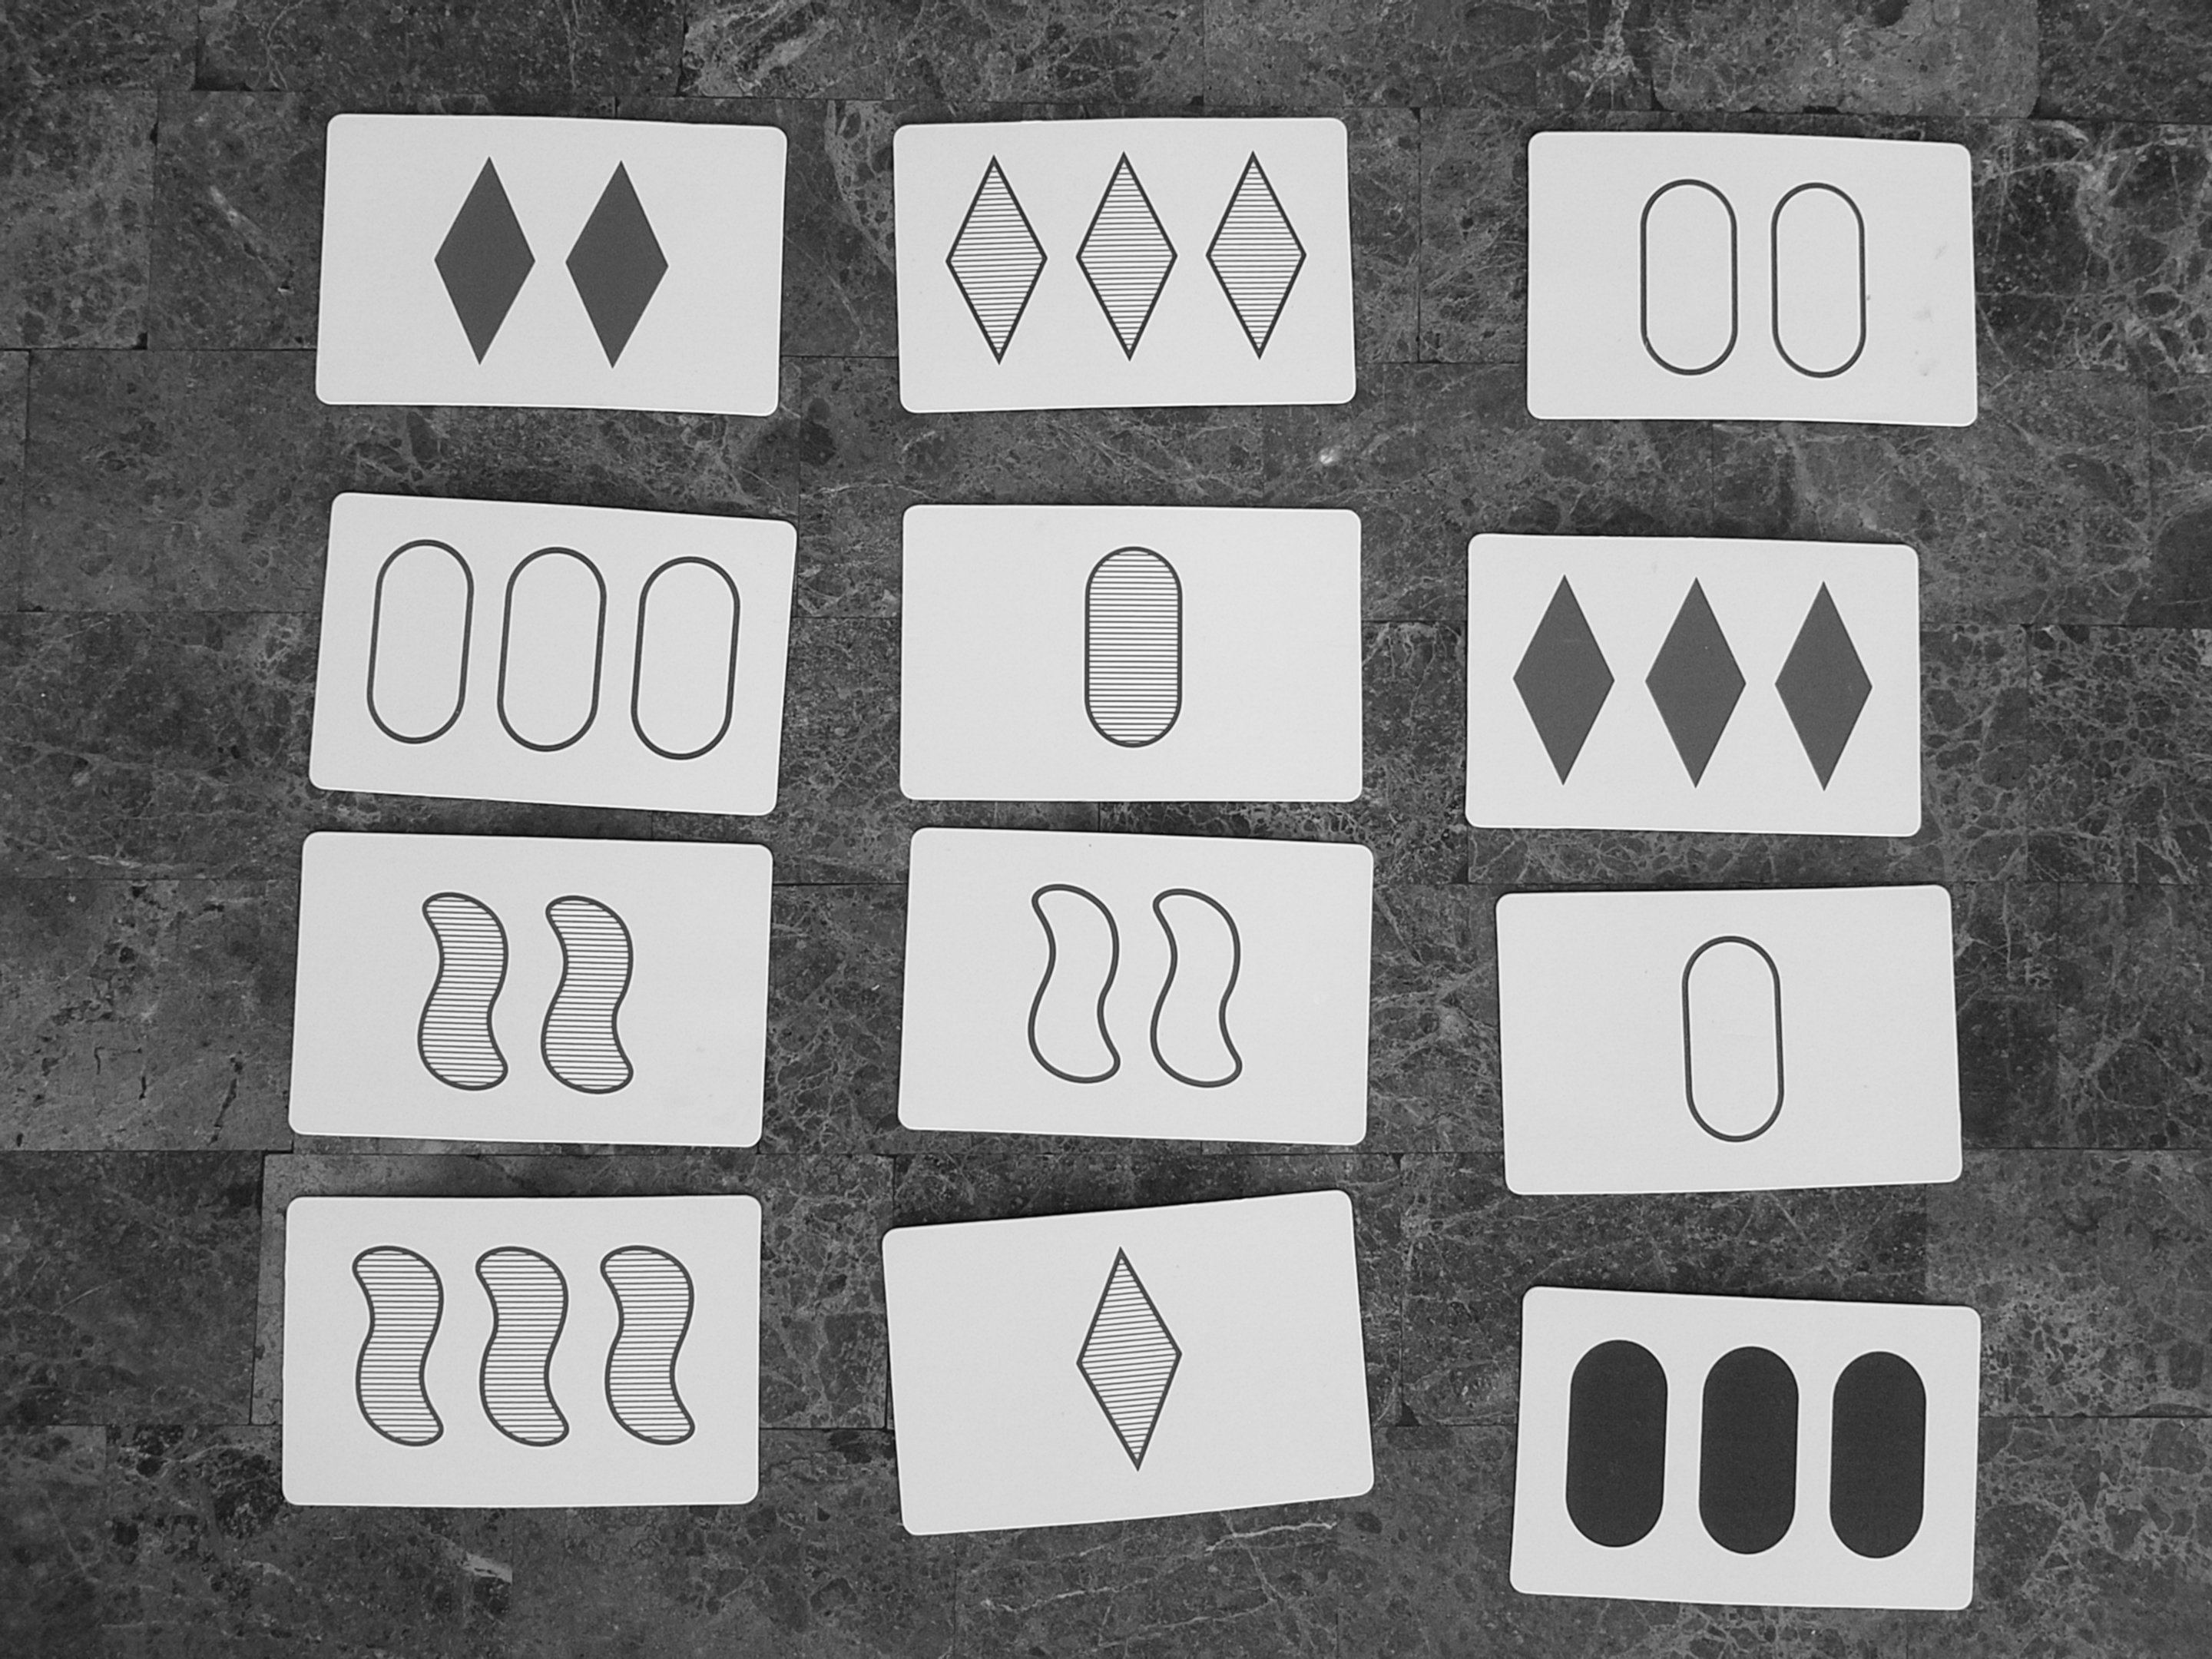
After importing OpenCV and Numpy (an open source array and matrix manipulation library), the first step in locating cards was to apply image preprocessing techniques to accentuate the boundaries of the card. Specifically, this approach involved converting the image to greyscale, applying a Gaussian blur, and thresholding the image. Briefly:
导入OpenCV和Numpy (开放源代码数组和矩阵处理库)之后,定位卡的第一步是应用图像预处理技术来强调卡的边界。 具体而言,此方法涉及将图像转换为灰度 ,应用高斯模糊并为图像设置阈值 。 简要地:
Conversion to greyscale removes an image’s coloration by only retaining each pixel’s intensity or luminance (a weighted sum of the RGB color channels).
转换为灰度可通过仅保留每个像素的强度或亮度 (RGB色彩通道的加权总和)来消除图像的色彩。
Applying a Gaussian Blur to an image transforms the intensity value of each pixel to a weighted average of that pixel’s neighborhood. Weights are determined by a Gaussian distribution centered at the current pixel. This removes noise and ‘smooths’ the image. After experimentation, I decided on a Gaussian kernel size of (3,3). Wikipedia has a great explanation of how this works here.
对图像应用高斯模糊会将每个像素的强度值转换为该像素邻域的加权平均值。 权重由以当前像素为中心的高斯分布确定。 这样可以消除噪点并“平滑”图像。 经过实验后,我决定将高斯核的大小设为(3,3)。 维基百科是如何工作的一个很好的解释在这里 。
Thresholding converts a greyscale image to a binary image — a new matrix in which each pixel has one of two values (typically black or white). To do this, a constant value threshold is used to segment the pixels. Because I anticipated input images with varying lighting conditions, I used the cv2.THRESH_OTSU flag to estimate the optimal threshold constant at runtime. You can find a cool explanation of how Otsu’s method works here.
阈值处理将灰度图像转换为二进制图像—一种新的矩阵,其中每个像素具有两个值(通常为黑色或白色)之一。 为此,使用恒定值阈值分割像素。 因为我预期输入图像的光照条件会有所变化,所以我使用cv2.THRESH_OTSU标志来估计运行时的最佳阈值常数。 您可以在此处找到有关Otsu方法工作方式的出色解释。
OpenCV makes these three steps a piece of cake:
OpenCV使这三个步骤变得轻松:

2.查找卡片轮廓 (2. Finding Card Contours)
Next, I used OpenCV’s findContours() and approxPolyDP() methods to locate the cards. Leveraging the image’s binary property, the findContours() method finds curves “joining all the continuous points (along the boundary) having the same color or intensity.”² The first step is to use the following function call on the preprocessed image:
接下来,我使用OpenCVfindContours()和roxPolyDP()方法来定位卡。 利用图像的二进制属性, findContours()方法可以找到“连接具有相同颜色或强度的所有连续点(沿边界)的曲线” 。²第一步是对预处理后的图像使用以下函数调用:
contours, hierarchy = cv2.findContours(processed_image, cv2.RETR_TREE, cv2.CHAIN_APPROX_SIMPLE)The cv2.RETR_TREE flag retrieves all found contours as well as a hierarchy describing the level at which a given contour is nested or embedded within other contour(s). The cv2.CHAIN_APPROX_SIMPLE flag compresses contour information by only encoding contour endpoints. After doing some error checking to exclude non-cards, I used the approxPolyDP() method to estimate a polygonal curve using contour endpoints. Here are some identified card contours overlaid on top of an original image.
cv2.RETR_TREE标志检索所有找到的轮廓以及描述将给定轮廓嵌套或嵌入到其他轮廓中的级别的层次结构。 cv2.CHAIN_APPROX_SIMPLE标志仅通过编码轮廓端点来压缩轮廓信息。 在进行了一些错误检查以排除非卡之后,我使用了roxonPolyDP ()方法使用轮廓端点来估计多边形曲线。 这是一些识别出的卡片轮廓,它们重叠在原始图像上。
3.重构卡图像 (3. Refactor Card Images)
With contours identified, the card’s boundaries must be refactored to standardize the angle and orientation of the card in the original image. This can be done with an Affine warp transform, a type of geometric transformation that preserves collinear points and parallelism between lines on the image. You can see the below code snippet in action with the example image.
确定轮廓后,必须重构卡的边界以标准化卡在原始图像中的角度和方向。 这可以通过仿射扭曲变形来完成, 仿射扭曲变形是一种几何变形,可以保留共线点和图像上线条之间的平行度。 您可以在示例图像中看到下面的代码片段。

I then passed each refactored card image and its coordinates as parameters into the Card class constructor. Here is an abridged version of the constructor:
然后,我将每个重构的卡图像及其坐标作为参数传递给Card类构造函数。 这是构造函数的简化版本:
识别卡属性 (Identifying Card Properties)
As a preliminary step, a static method named process_card applied the same preprocessing techniques described above — as well as binary dilation and erosion—to the refactored card image. A brief explanation and example:
作为第一步,一种名为process_card的静态方法将与上述相同的预处理技术(以及二进制扩展和腐蚀)应用于重构后的卡图像。 简要说明和示例:
Dilation is an operation in which the value of a pixel P becomes the value of the maximum pixel in pixel P’s “neighborhood.” Erosion is the opposite: the value of a pixel P becomes value of the minimum pixel in pixel P’s “neighborhood.”³
扩张是其中像素P的值变为像素P的“邻居”中最大像素的值的操作。 侵蚀是相反的:像素P的值变成像素P“邻居”中最小像素的值。³
- The size and shape of that neighborhood — or the ‘kernel’ — can be passed as an input in OpenCV (the default is a 3x3 square matrix). 可以将邻域的大小和形状(或“内核”)作为输入传递给OpenCV(默认值为3x3正方形矩阵)。
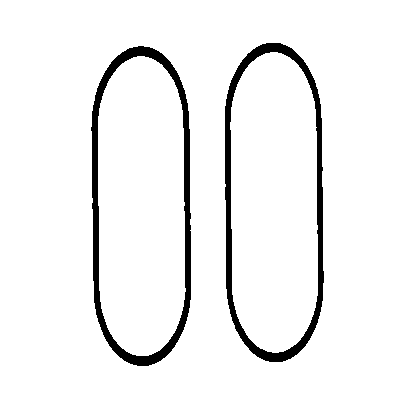
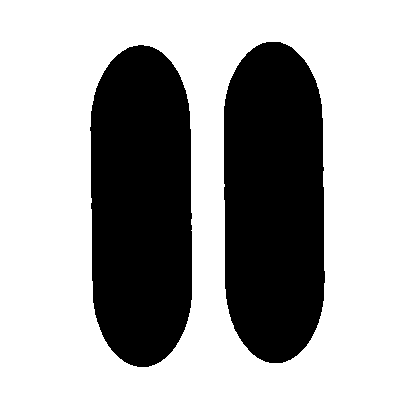
For binary images, the composition of erosion and dilation (also called Opening and Closing) are used to remove noise by eliminating any pixels that fall outside the “reach” of relevant pixels. Check this out in a contrived example I made below.
对于二值图像,通过消除掉落在相关像素“到达”范围之外的任何像素,使用腐蚀和膨胀的成分(也称为“ 打开和关闭” )来消除噪声。 在下面我做的一个人为的例子中检查一下。
#Close card image (dilate then erode)
dilated_card = cv2.dilate(binary_card, kernel=(x,x), iterations=y)
eroded_card = cv2.erode(dilated_card, kernel=(x,x), iterations=y)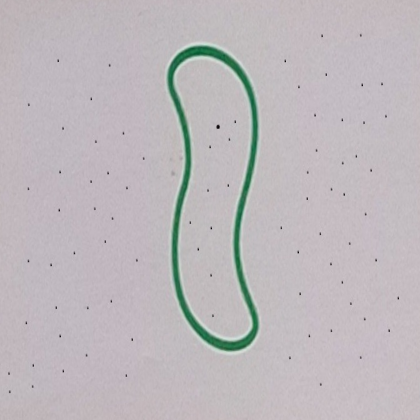


I took the resulting image and used different approaches to extract each property — shape, shade, color, and count — from the processed card. I used the code from @piratefsh’s set-solver repo on Github to identify card color and shade, and devised my own approaches for shape and count. See the GitHub for the implementation.
我拍摄了生成的图像,并使用了不同的方法从处理后的卡片中提取每个属性-形状,阴影,颜色和数量。 我使用了Github上@piratefsh的set-solver存储库中的代码来识别卡的颜色和阴影,并设计了自己的形状和计数方法。 有关实现,请参见GitHub。
形状 (Shape)
- To identify the shape of the symbol shown on a card, I used the area of the card’s largest contour. This approach assumes that the largest contour is a symbol on the card — an assumption that, barring extreme lighting, is almost always correct. 为了确定卡片上显示的符号的形状,我使用了卡片最大轮廓的面积。 这种方法假设最大轮廓是卡上的符号-除非极端照明,否则几乎总是正确的假设。
阴影 (Shade)
- The approach to identifying the shade or ‘fill’ of a card used the pixel density inside the card’s largest contour. 识别卡的阴影或“填充”的方法使用了卡最大轮廓内的像素密度。
颜色 (Color)
- The approach to identifying a card’s color involved evaluating the values of the three color channels (RGB) and comparing their ratios. 识别卡颜色的方法包括评估三个颜色通道(RGB)的值并比较它们的比率。
计数 (Count)
To identify the number of symbols on a card, I began by finding the four largest contours. Although count never exceeds three in practice, I chose four and then did error checks to exclude non-symbols. After filling in contours using cv2.drawContours to avoid double counting, I checked the value of the contour area as well the hierarchy (to ensure the contour wasn’t embedded within another contour).
为了确定卡上的符号数量,我首先找到了四个最大的轮廓。 尽管实际上计数从未超过3个,但我选择了4个,然后进行了错误检查以排除非符号。 为了避免重复计算,使用cv2.drawContours填充了轮廓后,我检查了轮廓区域的值以及层次结构(以确保轮廓未嵌入其他轮廓中)。
Aside: an alternative approach to identifying card properties might be to apply a supervised ML classification model to card images. Based on some quick research, it looks like this could be done with with Scikit’s SVM or KNN and the Keras ImageDataGenerator to augment the dataset.
另外:识别卡片属性的另一种方法可能是将监督的ML分类模型应用于卡片图像。 根据一些快速研究,似乎可以使用Scikit的 SVM 或KNN和 Keras ImageDataGenerator 来完成以增强数据集。
Each variation was then encoded as an integer, such that any card could be represented by an array of four integers. For instance, a purple card with two empty diamond symbols could be represented as [1,1,3,2]. The table below shows the property encoding key.
然后将每个变体编码为整数,以便任何卡都可以由四个整数组成的数组表示。 例如,带有两个空菱形符号的紫色卡可以表示为[1,1,3,2]。 下表显示了属性编码键。
With cards now represented as arrays, let’s evaluate for SETs!
现在将卡表示为数组,让我们评估一下SET!
评估SET (Evaluating for SETs)
To check for sets within the identified cards, an array of Card objects was passed to the SetEvaluator class.
为了检查已识别卡片中的集合,将卡片对象数组传递给SetEvaluator类。
方法1:所有可能的组合 (Approach 1: All Possible Combinations)
There are at least two approaches to evaluating array representations of cards for valid SETs. The first approach requires evaluating all possible three-card combinations. When twelve cards are displayed, for example, there are ₁₂C₃ =(12!)/(9!)(3!) = 660 possible combinations of three cards. Using Python’s itertools module, these can be computed as follows:
至少有两种方法可以评估有效SET的卡的阵列表示形式。 第一种方法要求评估所有可能的三张牌组合。 例如,当显示十二张牌时,₁C = 3(12!)/(9!)(3!)= 660种可能的组合。 使用Python的itertools模块 ,可以如下计算:
import itertools
SET_combinations = list(combinations(cards: List[Card], 3))
Remember that for each property, the three cards in a SET must either share or differ in their variations. If three card-arrays are stacked atop each other, all values in a given column/property must therefore show the all the same value or all different values.
请记住,对于每个属性,SET中的三张卡必须共享或不同 。 如果将三个卡阵列彼此堆叠,则给定列/属性中的所有值必须显示全部相同的值或全部不同的值。
This characteristic can be checked by summing all the values in that column. If all three cards have the same value for that property, the resulting sum is by definition divisible by three. Similarly, if all three values differ (i.e. equal a permutation of 1,2, and 3) then the resulting sum of six is also divisible by three. No other sum of those values is divisible by three without a remainder. Check out the example below!
可以通过累加该列中的所有值来检查此特性。 如果所有三张卡的该属性均具有相同的值,则根据定义,所得的总和可被三除。 类似地,如果所有三个值都不同(即等于1,2和3的排列),则所得的总和6也可以被3整除。 这些值的其他总和不能被三除而没有余数。 看看下面的例子!
I applied this method to all 660 combinations, saved the valid ones, and voila — we have our SETs! Here’s a code snippet that demonstrates this approach naively (without returning False early when possible):
我将这种方法应用于所有660个组合,保存了有效的组合,瞧-我们有SET! 这是一个天真地演示此方法的代码片段(在可能的情况下不尽早返回False):
But there’s a better approach…
但是有更好的方法……
方法2:验证SET键 (Approach 2: Verifying a SET Key)
Note that for any two cards in the deck, there is one card (and only one card) that completes the SET. Let’s call this third card the SET Key. A more efficient alternative to Approach 1 involves iteratively choosing two cards, calculating their SET Key, and checking whether that Key appears in the remaining cards. Checking membership for a Set() structure in Python has an average time complexity of O(1).
请注意,对于牌组中的任意两张牌,只有一张牌( 只有一张牌)可以完成设置。 我们将此第三张卡称为SET Key 。 方法1的一种更有效的替代方法是反复选择两张卡,计算它们的SET密钥,然后检查该密钥是否出现在其余卡中。 在Python中检查Set()结构的成员资格的平均时间复杂度为O (1) 。
This reduces the algorithm’s time complexity to O(n²), as it lessens the number of combinations that need to be evaluated. Given the fact that only small n inputs were expected (there is a 96.77% chance of a SET with 12 cards in play, a 99.96% chance 15 cards, and a 99.9996% chance with 16 cards⁴), efficiency wasn’t top of mind. Using the first approach, I timed the program on my mid-tier laptop and found that it ran in an average of 1.156 seconds (with rendering the final image) and 1.089 seconds (without rendering) on my test inputs. In one case, the program identified seven separate sets in 1.146 seconds. If human performance is a benchmark, then seven sets in just over a second is fast enough for me!
这减少了算法的时间复杂度至O( n²),因为它减少了需要评估的组合数量。 考虑到只有少量n次输入的事实(在游戏中有12张卡的SET机会为96.77%,有15张卡的机率为99.96%,有16张卡的机率为99.9996%),效率并不是最重要的。 使用第一种方法,我为中型笔记本电脑上的程序计时,发现在我的测试输入上,该程序平均运行1.156秒(渲染最终图像)和1.089秒(不渲染)。 在一种情况下,程序在1.146秒内识别出七个独立的集合。 如果以人类的表现为基准,那么对我而言,仅需一秒钟就能完成七套游戏!
向用户显示SETS (Displaying SETS to the user)
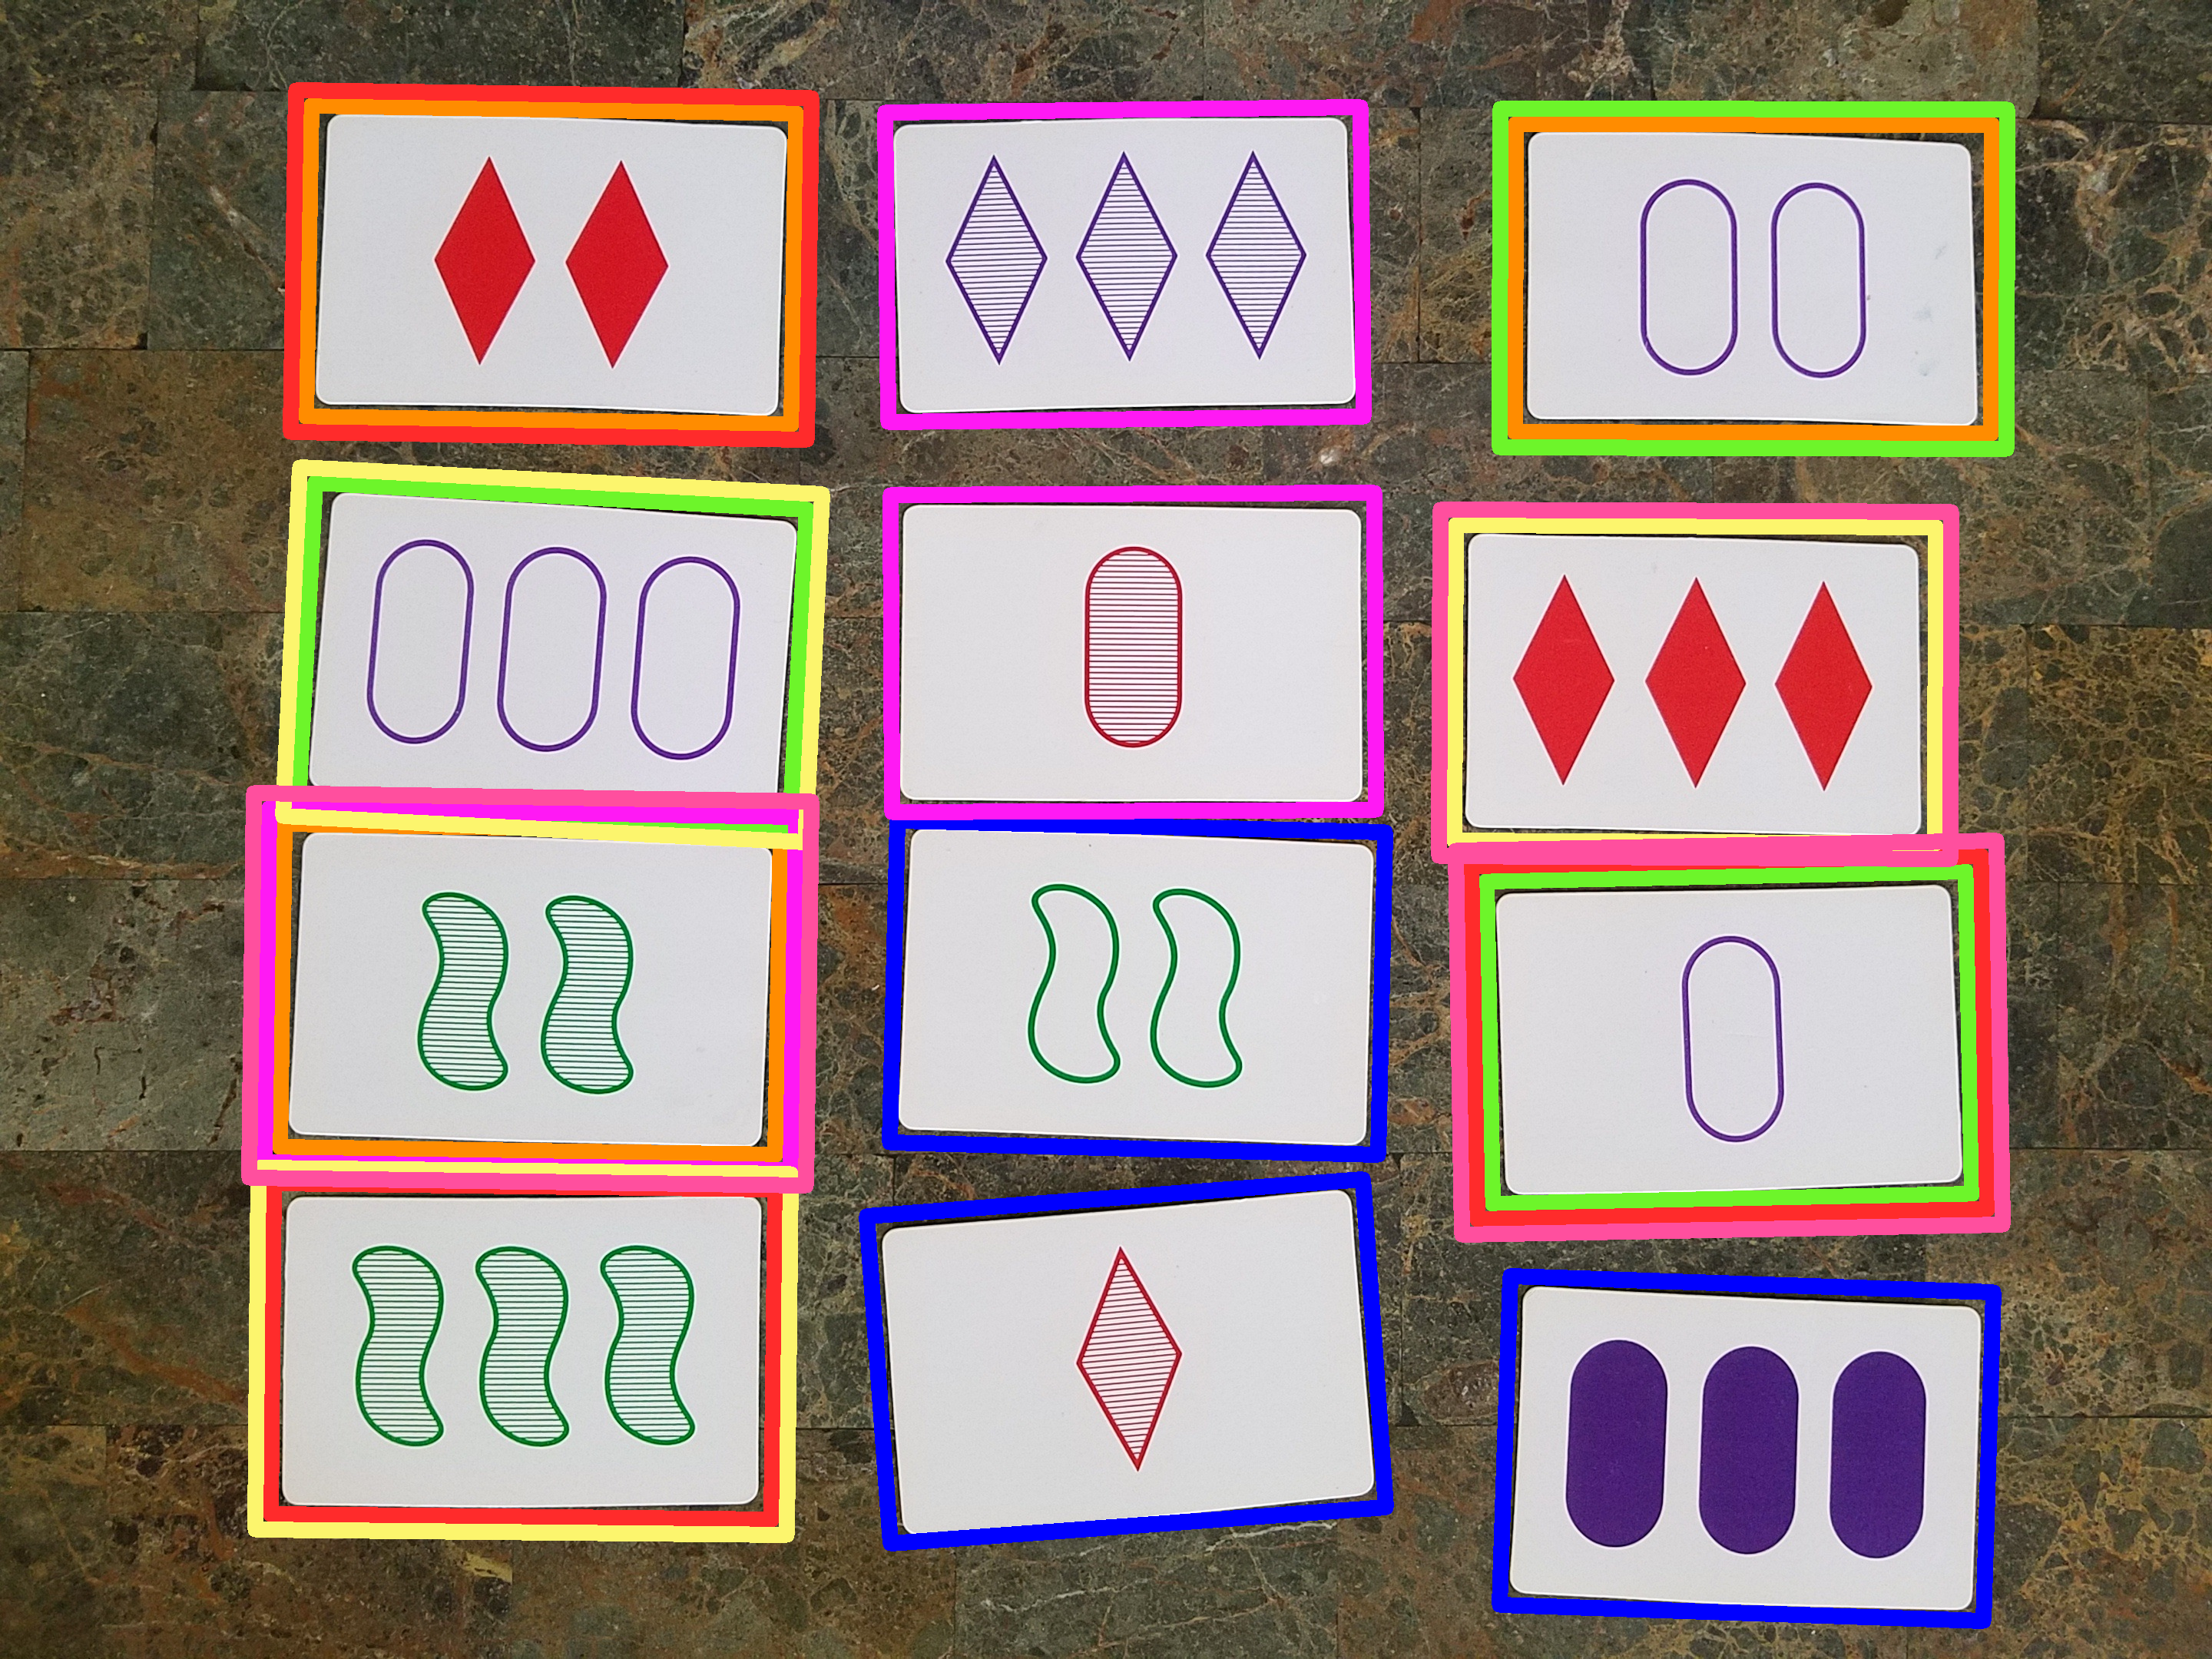
Finally, I followed the lead of piratefsh and Nicolas Hahn in displaying SETs to users by circling the respective SET’s cards with a unique color on the original image. I stored a list of each card’s original coordinates as an instance variable, which I used to draw colored contours.
最后,我跟随piratefsh和Nicolas Hahn的领导,通过在原始图像上用独特的颜色画圈各个SET的卡片,向用户显示SET。 我将每个卡的原始坐标列表存储为实例变量,该变量用于绘制彩色轮廓。
Cards that belonged to multiple SETs required multiple outlines. To avoid drawing contours on top of each other, the expanded_coordinates() method iteratively expanded a card’s contours depending on how many SETs the card appeared in. Here is the result in action using cv2.imshow():
属于多个SET的卡需要多个轮廓。 为了避免彼此绘制轮廓, expanded_coordinates()方法根据出现在卡中的SET数量来迭代扩展卡的轮廓。这是使用cv2.imshow()的结果:

And that’s it — a SET solver using Python and OpenCV! This project was a great introduction to OpenCV and computer vision fundamentals. In particular, I learned about:
就是这样-使用Python和OpenCVSET求解器! 该项目是对OpenCV和计算机视觉基础的很好的介绍。 我特别了解到:
- Image processing, noise-reduction, and standardization techniques like Gaussian blurring, affine transformations, and morphological operations. 图像处理,降噪和标准化技术,例如高斯模糊,仿射变换和形态运算。
- Otsu’s method for automatic binary thresholding. Otsu的自动二进制阈值化方法。
- Contour and Canny edge detection. 轮廓和Canny边缘检测。
- The OpenCV library and some of its uses. OpenCV库及其某些用途。
I look forward to the next project, and please reach out with any feedback or ideas!
我期待着下一个项目,请提供任何反馈或想法!
Until next time,
直到下一次,
— Coby
—科比
引文与资源 (Citations and Resources)
Piratefsh’s set-solver on Github was particularly informative. After finding that her approach to color identification very accurate, I ended up simply copying the method. Arnab Nandi’s card game identification project was also a useful starting point, and Nicolas Hahn’s set-solver also proved useful. Thank you Sherr, Arnab, and Nicolas, if you are reading this!
Piratefsh在Github上的set-solver特别有用。 在发现她的颜色识别方法非常准确之后,我最终简单地复制了该方法。 Arnab Nandi的纸牌游戏识别项目也是一个有用的起点,而Nicolas Hahn的集合求解器也被证明是有用的。 如果您正在阅读本文,则谢谢Sherr,Arnab和Nicolas!
Here’s a basic explanation of contours and how they work in OpenCV. I initially implement the program with Canny Edge Detection, but subsequently removed it because it did not improve card identification accuracy for test cases.
这是轮廓及其在OpenCV中的工作原理的基本说明。 我最初使用Canny Edge Detection实施该程序,但后来删除了该程序,因为它不能提高测试用例的卡识别准确性。
You can find a more detailed description of morphological transformations on the OpenCV site here.
你可以找到形态转换对OpenCV网站更详细的描述在这里 。
Some interesting probabilities related to the game SET.
与游戏SET有关的一些有趣概率 。
翻译自: https://medium.com/@simlercoby/building-a-set-solver-using-python-and-opencv-4413389e7fdd


 895
895


 被折叠的 条评论
为什么被折叠?
被折叠的 条评论
为什么被折叠?
 到【灌水乐园】发言


