


pytorch深度学习
PyTorch has sort of became one of the de facto standards for creating Neural Networks now, and I love its interface. Yet, it is somehow a little difficult for beginners to get a hold of.
PyTorch已经成为现在创建神经网络的事实上的标准之一,我喜欢它的界面。 但是,对于初学者来说,要获得它有些困难。
I remember picking PyTorch up only after some extensive experimentation a couple of years back. To tell you the truth, it took me a lot of time to pick it up but am I glad that I moved from Keras to PyTorch. With its high customizability and pythonic syntax, PyTorch is just a joy to work with, and I would recommend it to anyone who wants to do some heavy lifting with Deep Learning.
我记得几年前经过一些广泛的实验之后才选择PyTorch。 实话实说,我花了很多时间才捡起来,但我很高兴我从Keras搬到PyTorch 。 凭借其高度可定制性和python语法, PyTorch 可以与他人一起工作,这是我的荣幸,我将其推荐给任何希望通过深度学习进行繁重工作的人。
So, in this PyTorch guide, I will try to ease some of the pain with PyTorch for starters and go through some of the most important classes and modules that you will require while creating any Neural Network with Pytorch.
因此,在本PyTorch指南中, 我将尝试减轻PyTorch对于初学者的痛苦,并介绍在使用Pytorch创建任何神经网络时需要的一些最重要的类和模块。
But, that is not to say that this is aimed at beginners only as I will also talk about the high customizability PyTorch provides and will talk about custom Layers, Datasets, Dataloaders, and Loss functions.
但是,这并不是说它仅针对初学者,因为我还将谈论 PyTorch提供 的 高可定制性,并谈论自定义的Layers,Datasets,Dataloaders和Loss函数 。
So let’s get some coffee ☕ ️and start it up.
因此,让我们喝点咖啡☕️并开始吧。
Here is a Table of Contents if you want to look at a particular section.
如果要查看特定的部分,请参见目录 。
· Tensors ∘ 1. Create a Tensor ∘ 2. Tensor Operations· The nn.Module· A word about Layers· Datasets and DataLoaders ∘ Understanding Custom Datasets ∘ Understanding Custom DataLoaders· Training a Neural Network· Loss functions ∘ Custom Loss Function· Optimizers· Using GPU/Multiple GPUs· Conclusion
· 张量 ∘1 .创建张量 ∘2 .张量操作 · nn.Module · 关于层的一句话 · 数据集和DataLoader∘ 了解自定义数据集 ∘ 了解自定义DataLoader · 训练神经网络 · 损失函数 ∘ 自定义损失函数 · 优化器 · 使用GPU /多个GPU · 结论
张量 (Tensors)
Tensors are the basic building blocks in PyTorch and put very simply, they are NumPy arrays but on GPU. In this part, I will list down some of the most used operations we can use while working with Tensors. This is by no means an exhaustive list of operations you can do with Tensors, but it is helpful to understand what tensors are before going towards the more exciting parts.
张量是PyTorch的基本构建块,简单地说,它们是NumPy数组,但在GPU上。 在这一部分中,我将列出一些在使用Tensors时可以使用的最常用的操作。 这绝不是张量可以执行的详尽操作列表,但是在进行更令人兴奋的部分之前了解张量是有帮助的。
1.创建张量 (1. Create a Tensor)
We can create a PyTorch tensor in multiple ways. This includes converting to tensor from a NumPy array. Below is just a small gist with some examples to start with, but you can do a whole lot of more things with tensors just like you can do with NumPy arrays.
我们可以通过多种方式创建PyTorch张量。 这包括从NumPy数组转换为张量。 下面只是一个要点,下面是一些示例,但是您可以像使用NumPy数组一样使用张量来做更多的事情 。
# Using torch.Tensor
t = torch.Tensor([[1,2,3],[3,4,5]])
print(f"Created Tensor Using torch.Tensor:\n{t}")


# Using torch.randn
t = torch.randn(3, 5)
print(f"Created Tensor Using torch.randn:\n{t}")


# using torch.[ones|zeros](*size)
t = torch.ones(3, 5)
print(f"Created Tensor Using torch.ones:\n{t}")
t = torch.zeros(3, 5)
print(f"Created Tensor Using torch.zeros:\n{t}")


# using torch.randint - a tensor of size 4,5 with entries between 0 and 10(excluded)
t = torch.randint(low = 0,high = 10,size = (4,5))
print(f"Created Tensor Using torch.randint:\n{t}")


# Using from_numpy to convert from Numpy Array to Tensor
a = np.array([[1,2,3],[3,4,5]])
t = torch.from_numpy(a)
print(f"Convert to Tensor From Numpy Array:\n{t}")


# Using .numpy() to convert from Tensor to Numpy array
t = t.numpy()
print(f"Convert to Numpy Array From Tensor:\n{t}")
2.张量操作 (2. Tensor Operations)
Again, there are a lot of operations you can do on these tensors. The full list of functions can be found here.
同样,您可以对这些张量执行很多操作。 功能的完整列表可以在此处找到。
A = torch.randn(3,4)
W = torch.randn(4,2)
# Multiply Matrix A and W
t = A.mm(W)
print(f"Created Tensor t by Multiplying A and W:\n{t}")
# Transpose Tensor t
t = t.t()
print(f"Transpose of Tensor t:\n{t}")
# Square each element of t
t = t**2
print(f"Square each element of Tensor t:\n{t}")
# return the size of a tensor
print(f"Size of Tensor t using .size():\n{t.size()}")
Note: What are PyTorch Variables? In the previous versions of Pytorch, Tensor and Variables used to be different and provided different functionality, but now the Variable API is deprecated, and all methods for variables work with Tensors. So, if you don’t know about them, it’s fine as they re not needed, and if you know them, you can forget about them.
注意:什么是PyTorch变量? 在以前的Pytorch版本中,Tensor和Variables曾经是不同的,并且提供了不同的功能,但是现在不赞成使用 Variable API,并且所有用于Tensors的变量方法都可以使用。 因此,如果您不了解它们,那很好,因为它们不是必需的,如果您了解它们,则可以将它们忘记。
nn。模块 (The nn.Module)
Here comes the fun part as we are now going to talk about some of the most used constructs in Pytorch while creating deep learning projects. nn.Module lets you create your Deep Learning models as a class. You can inherit from nn.Moduleto define any model as a class. Every model class necessarily contains an __init__ procedure block and a block for the forward pass.
这是有趣的部分,因为我们现在将在创建深度学习项目时谈论Pytorch中一些最常用的构造。 nn.Module可让您作为类创建深度学习模型。 您可以从nn.Module继承以将任何模型定义为类。 每个模型类都必须包含一个__init__过程块和一个用于forward传递的块。
In the
__init__part, the user can define all the layers the network is going to have but doesn't yet define how those layers would be connected to each other.在
__init__部分中,用户可以定义网络将要具有的所有层,但尚未定义这些层如何相互连接。In the
forwardpass block, the user defines how data flows from one layer to another inside the network.在前
forward传递块中,用户定义数据如何在网络内部从一层流到另一层。
So, put simply, any network we define will look like:
简而言之,我们定义的任何网络都将如下所示:
class myNeuralNet(nn.Module):
    def __init__(self):
        super().__init__()
        # Define all Layers Here
        self.lin1 = nn.Linear(784, 30)
        self.lin2 = nn.Linear(30, 10)
    def forward(self, x):
        # Connect the layer Outputs here to define the forward pass
        x = self.lin1(x)
        x = self.lin2(x)
        return x
Here we have defined a very simple Network that takes an input of size 784 and passes it through two linear layers in a sequential manner. But the thing to note is that we can define any sort of calculation while defining the forward pass, and that makes PyTorch highly customizable for research purposes. For example, in our crazy experimentation mode, we might have used the below network where we arbitrarily attach our layers. Here we send back the output from the second linear layer back again to the first one after adding the input to it(skip connection) back again(I honestly don’t know what that will do).
在这里,我们定义了一个非常简单的网络,该网络接受大小为784的输入,并以顺序方式将其通过两个线性层。 但是要注意的是,我们可以在定义前向通过时定义任何类型的计算,这使得PyTorch高度可定制以用于研究目的。 例如,在疯狂的实验模式下,我们可能使用了以下网络,在该网络上我们任意附加了图层。 在这里,我们在将输入再次添加回第二个线性层(跳过连接)之后,将输出从第二个线性层再次发送回第一个线性层(老实说,我不知道该怎么做)。
class myCrazyNeuralNet(nn.Module):
    def __init__(self):
        super().__init__()
        # Define all Layers Here
        self.lin1 = nn.Linear(784, 30)
        self.lin2 = nn.Linear(30, 784)
        self.lin3 = nn.Linear(30, 10)

    def forward(self, x):
        # Connect the layer Outputs here to define the forward pass
        x_lin1 = self.lin1(x)
        x_lin2 = x + self.lin2(x_lin1)
        x_lin2 = self.lin1(x_lin2)
        x = self.lin3(x_lin2)
        return x
We can also check if the neural network forward pass works. I usually do that by first creating some random input and just passing that through the network I have created.
我们还可以检查神经网络正向传递是否起作用。 通常,我首先创建一些随机输入,然后将其通过我创建的网络进行传递。
x = torch.randn((100,784))
model = myCrazyNeuralNet()
model(x).size()
--------------------------
torch.Size([100, 10])
关于图层的一句话 (A word about Layers)
Pytorch is pretty powerful, and you can actually create any new experimental layer by yourself using nn.Module. For example, rather than using the predefined Linear Layer nn.Linear from Pytorch above, we could have created our custom linear layer.
Pytorch非常强大,您实际上可以使用nn.Module自己创建任何新的实验层。 例如,而不是使用预定义的线性层nn.Linear从Pytorch上述情况,我们可能已经创建了我们的自定义线性层 。
class myCustomLinearLayer(nn.Module):
    def __init__(self,in_size,out_size):
        super().__init__()
        self.weights = nn.Parameter(torch.randn(in_size, out_size))
        self.bias = nn.Parameter(torch.zeros(out_size))
    def forward(self, x):
        return x.mm(self.weights) + self.bias
You can see how we wrap our weights tensor in nn.Parameter. This is done to make the tensor to be considered as a model parameter. From PyTorch docs:
您可以看到我们如何在nn.Parameter.包装权重张量nn.Parameter. 这样做是为了将张量视为模型参数。 来自PyTorch docs :
Parameters are
Tensorsubclasses, that have a very special property when used withModule- when they’re assigned as Module attributes they are automatically added to the list of its parameters, and will appear inparameters()iterator参数是
Tensor子类,与Module使用时具有非常特殊的属性-当将它们分配为Module属性时,它们会自动添加到其参数列表中,并将出现在parameters()迭代器中
As you will later see, the model.parameters() iterator will be an input to the optimizer. But more on that later.
稍后您将看到, model.parameters()迭代器将成为优化器的输入。 但是稍后会更多。
Right now, we can now use this custom layer in any PyTorch network, just like any other layer.
现在,我们现在可以在任何PyTorch网络中使用此自定义层,就像其他任何层一样。
class myCustomNeuralNet(nn.Module):
    def __init__(self):
        super().__init__()
        # Define all Layers Here
        self.lin1 = myCustomLinearLayer(784,10)

    def forward(self, x):
        # Connect the layer Outputs here to define the forward pass
        x = self.lin1(x)
        return x
x = torch.randn((100,784))
model = myCustomNeuralNet()
model(x).size()
------------------------------------------
torch.Size([100, 10])
But then again, Pytorch would not be so widely used if it didn’t provide a lot of ready to made layers used very frequently in wide varieties of Neural Network architectures. Some examples are:nn.Linear, nn.Conv2d, nn.MaxPool2d, nn.ReLU, nn.BatchNorm2d, nn.Dropout, nn.Embedding, nn.GRU/nn.LSTM, nn.Softmax, nn.LogSoftmax, nn.MultiheadAttention, nn.TransformerEncoder, nn.TransformerDecoder
但是话又说回来,如果Pytorch没有提供很多现成的层,而这些层在各种神经网络体系结构中非常频繁地使用,则Pytorch不会被广泛使用。 一些示例是: nn.Linear , nn.Conv2d , nn.MaxPool2d , nn.ReLU , nn.BatchNorm2d , nn.Dropout , nn.Embedding , nn.GRU / nn.LSTM , nn.Softmax , nn.LogSoftmax , nn.MultiheadAttention , nn.TransformerEncoder , nn.TransformerDecoder
I have linked all the layers to their source where you could read all about them, but to show how I usually try to understand a layer and read the docs, I would try to look at a very simple convolutional layer here.
我已经将所有层链接到它们的源代码,您可以在其中阅读所有有关它们的信息,但是为了显示我通常如何尝试理解层并阅读文档,我将尝试在这里查看一个非常简单的卷积层。
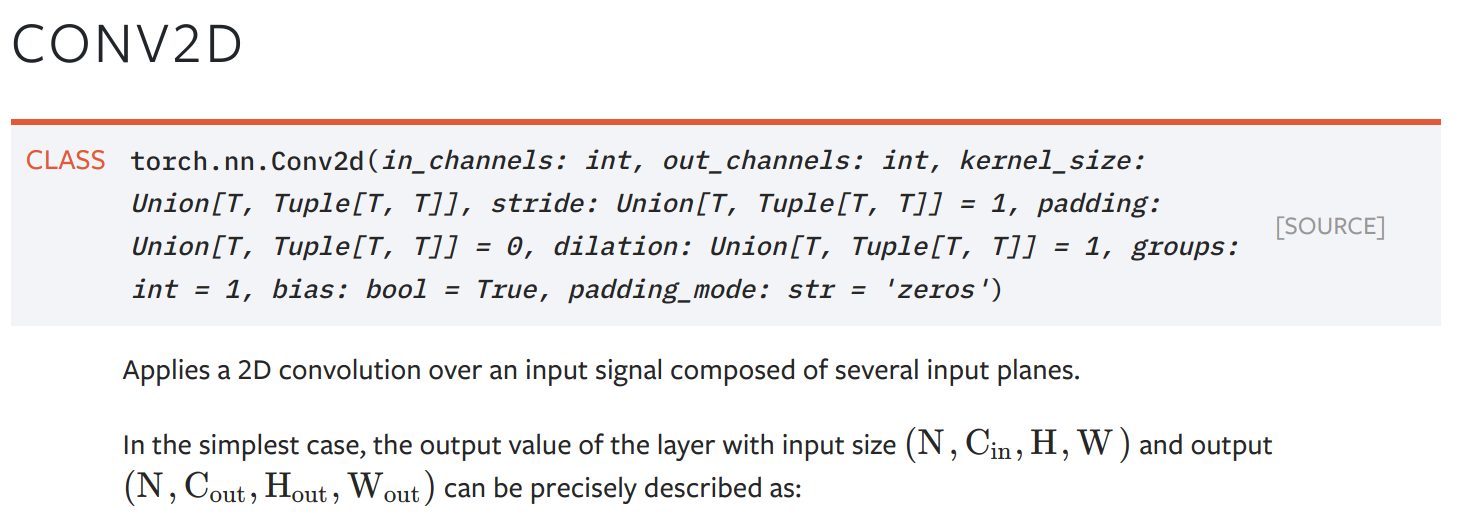
So, a Conv2d Layer needs as input an Image of height H and width W, with Cin channels. Now, for the first layer in a convnet, the number of in_channels would be 3(RGB), and the number of out_channels can be defined by the user. The kernel_size mostly used is 3x3, and the stride normally used is 1.
因此,Conv2d图层需要使用Cin通道输入高度为H且宽度为W的图像。 现在,对于在convnet第一层的数目in_channels将是3(RGB),和数量out_channels可以由用户来定义。 最常用的kernel_size为3x3,通常使用的stride为1。
To check a new layer which I don’t know much about, I usually try to see the input as well as output for the layer like below where I would first initialize the layer:
为了检查一个我不太了解的新层,我通常尝试查看该层的输入和输出,如下所示,在该层我首先初始化该层:
conv_layer = nn.Conv2d(in_channels = 3, out_channels = 64, kernel_size = (3,3), stride = 1, padding=1)And then pass some random input through it. Here 100 is the batch size.
然后通过它传递一些随机输入。 此处的批量大小为100。
x = torch.randn((100,3,24,24))
conv_layer(x).size()
--------------------------------
torch.Size([100, 64, 24, 24])
So, we get the output from the convolution operation as required, and I have sufficient information on how to use this layer in any Neural Network I design.
因此,我们根据需要从卷积运算中获得了输出,并且我掌握了有关如何在我设计的任何神经网络中使用此层的足够信息。
数据集和数据加载器 (Datasets and DataLoaders)
How would we pass data to our Neural nets while training or while testing? We can definitely pass tensors as we have done above, but Pytorch also provides us with pre-built Datasets to make it easier for us to pass data to our neural nets. You can check out the complete list of datasets provided at torchvision.datasets and torchtext.datasets. But, to give a concrete example for datasets, let’s say we had to pass images to an Image Neural net using a folder which has images in this structure:
在训练或测试时,我们如何将数据传递到神经网络? 我们绝对可以像上面一样传递张量,但是Pytorch还为我们提供了预先构建的数据集,以使我们更轻松地将数据传递到神经网络。 您可以检出torchvision.datasets和torchtext.datasets提供的数据集的完整列表。 但是,为了给出数据集的具体示例,假设我们必须使用具有以下结构的文件夹的图像将图像传递到Image Neural网络:
data
    train
        sailboat
        kayak
        .
        .
We can use torchvision.datasets.ImageFolder dataset to get an example image like below:
我们可以使用torchvision.datasets.ImageFolder数据集来获取如下示例图像:
from torchvision import transforms
from torchvision.datasets import ImageFolder
traindir = "data/train/"
t = transforms.Compose([
        transforms.Resize(size=256),
    transforms.CenterCrop(size=224),
        transforms.ToTensor()])
train_dataset = ImageFolder(root=traindir,transform=t)
print("Num Images in Dataset:", len(train_dataset))
print("Example Image and Label:", train_dataset[2])
This dataset has 847 images, and we can get an image and its label using an index. Now we can pass images one by one to any image neural network using a for loop:
该数据集包含847张图像,我们可以使用索引获取图像及其标签。 现在我们可以使用for循环将图像一张一张地传递到任何图像神经网络:
for i in range(0,len(train_dataset)):
    image ,label = train_dataset[i]
    pred = model(image)
But that is not optimal. We want to do batching. We can actually write some more code to append images and labels in a batch and then pass it to the Neural network. But Pytorch provides us with a utility iterator torch.utils.data.DataLoader to do precisely that. Now we can simply wrap our train_dataset in the Dataloader, and we will get batches instead of individual examples.
但这不是最佳选择。 我们要进行批处理。 实际上,我们可以编写更多代码来批量添加图像和标签,然后将其传递给神经网络。 但是Pytorch为我们提供了一个实用程序迭代器torch.utils.data.DataLoader来做到这一点。 现在,我们可以简单地将train_dataset包装在Dataloader中,然后将获得批处理而不是单个示例。
train_dataloader = DataLoader(train_dataset,batch_size = 64, shuffle=True, num_workers=10)We can simply iterate with batches using:
我们可以使用以下命令简单地迭代批处理:
for image_batch, label_batch in train_dataloader:
    print(image_batch.size(),label_batch.size())
    break
------------------------------------------------------------------
torch.Size([64, 3, 224, 224]) torch.Size([64])
So actually, the whole process of using datasets and Dataloaders becomes:
因此,实际上,使用数据集和数据加载器的整个过程变为:
t = transforms.Compose([
        transforms.Resize(size=256),
    transforms.CenterCrop(size=224),
        transforms.ToTensor()])


train_dataset = torchvision.datasets.ImageFolder(root=traindir,transform=t)
train_dataloader = DataLoader(train_dataset,batch_size = 64, shuffle=True, num_workers=10)


for image_batch, label_batch in train_dataloader:
    pred = myImageNeuralNet(image_batch)
You can look at this particular example in action in my previous blogpost on Image classification using Deep Learning here.
你可以看一下这个特殊的例子在行动在我以前的博文上使用Deep学习图像分类在这里 。
This is great, and Pytorch does provide a lot of functionality out of the box. But the main power of Pytorch comes with its immense customization. We can also create our own custom datasets if the datasets provided by PyTorch don’t fit our use case.
这很棒,而且Pytorch确实提供了许多现成的功能。 但是Pytorch的主要功能来自其巨大的自定义功能。 如果PyTorch提供的数据集不适合我们的用例,我们也可以创建自己的自定义数据集。
了解自定义数据集 (Understanding Custom Datasets)
To write our custom datasets, we can make use of the abstract class torch.utils.data.Dataset provided by Pytorch. We need to inherit this Dataset class and need to define two methods to create a custom Dataset.
要编写我们的自定义数据集,我们可以利用torch.utils.data.Dataset提供的抽象类torch.utils.data.Dataset。 我们需要继承此Dataset类,并需要定义两个方法来创建自定义Dataset。
__len__: a function that returns the size of the dataset. This one is pretty simple to write in most cases.__len__:返回数据集大小的函数。 在大多数情况下,编写此代码非常简单。__getitem__: a function that takes as input an indexiand returns the sample at indexi.__getitem__:此函数将索引i作为输入并返回索引i处的样本。
For example, we can create a simple custom dataset that returns an image and a label from a folder. See that most of the tasks are happening in __init__ part where we use glob.glob to get image names and do some general preprocessing.
例如,我们可以创建一个简单的自定义数据集,该数据集从文件夹返回图像和标签。 看到大多数任务都发生在__init__部分,在这里我们使用glob.glob获取图像名称并进行一些常规预处理。
from glob import glob
from PIL import Image
from torch.utils.data import Dataset


class customImageFolderDataset(Dataset):
    """Custom Image Loader dataset."""
    def __init__(self, root, transform=None):
        """
        Args:
            root (string): Path to the images organized in a particular folder structure.
            transform: Any Pytorch transform to be applied
        """
        # Get all image paths from a directory
        self.image_paths = glob(f"{root}/*/*")
        # Get the labels from the image paths
        self.labels = [x.split("/")[-2] for x in self.image_paths]
        # Create a dictionary mapping each label to a index from 0 to len(classes).
        self.label_to_idx = {x:i for i,x in enumerate(set(self.labels))}
        self.transform = transform

    def __len__(self):
        # return length of dataset
        return len(self.image_paths)

    def __getitem__(self, idx):
        # open and send one image and label
        img_name = self.image_paths[idx]
        label = self.labels[idx]
        image = Image.open(img_name)
        if self.transform:
            image = self.transform(image)
        return image,self.label_to_idx[label]
Also, note that we open our images one at a time in the __getitem__ method and not while initializing. This is not done in __init__ because we don't want to load all our images in the memory and just need to load the required ones.
另外,请注意,我们使用__getitem__方法一次打开一个图像,而不是在初始化时打开。 这不是在__init__完成的,因为我们不想将所有图像加载到内存中,而只需要加载所需的图像。
We can now use this dataset with the utility Dataloader just like before. It works just like the previous dataset provided by PyTorch but without some utility functions.
现在,我们可以像以前一样使用实用程序Dataloader来使用此数据集。 它的工作方式与PyTorch提供的先前数据集相似,但没有一些实用程序功能。
t = transforms.Compose([
        transforms.Resize(size=256),
    transforms.CenterCrop(size=224),
        transforms.ToTensor()])


train_dataset = customImageFolderDataset(root=traindir,transform=t)
train_dataloader = DataLoader(train_dataset,batch_size = 64, shuffle=True, num_workers=10)


for image_batch, label_batch in train_dataloader:
    pred = myImageNeuralNet(image_batch)
了解自定义DataLoader (Understanding Custom DataLoaders)
This particular section is a little advanced and can be skipped going through this post as it will not be needed in a lot of situations. But I am adding it for completeness here.
这个特定的部分有些高级,可以跳过这篇文章,因为在很多情况下都不需要它。 但是我为了完整起见在这里添加它。
So let’s say you are looking to provide batches to a network that processes text input, and the network could take sequences with any sequence size as long as the size remains constant in the batch. For example, we can have a BiLSTM network that can process sequences of any length. It’s alright if you don’t understand the layers used in it right now; just know that it can process sequences with variable sizes.
因此,假设您要向处理文本输入的网络提供批次,并且网络可以采用任意序列大小的序列,只要批次中的大小保持不变即可。 例如,我们可以拥有一个BiLSTM网络,该网络可以处理任何长度的序列。 如果您现在不了解其中使用的层,那就没关系了。 只是知道它可以处理可变大小的序列。
class BiLSTM(nn.Module):
    def __init__(self):
        super().__init__()
        self.hidden_size = 64
        drp = 0.1
        max_features, embed_size = 10000,300
        self.embedding = nn.Embedding(max_features, embed_size)
        self.lstm = nn.LSTM(embed_size, self.hidden_size, bidirectional=True, batch_first=True)
        self.linear = nn.Linear(self.hidden_size*4 , 64)
        self.relu = nn.ReLU()
        self.dropout = nn.Dropout(drp)
        self.out = nn.Linear(64, 1)


    def forward(self, x):
        h_embedding = self.embedding(x)
        h_embedding = torch.squeeze(torch.unsqueeze(h_embedding, 0))

        h_lstm, _ = self.lstm(h_embedding)
        avg_pool = torch.mean(h_lstm, 1)
        max_pool, _ = torch.max(h_lstm, 1)
        conc = torch.cat(( avg_pool, max_pool), 1)
        conc = self.relu(self.linear(conc))
        conc = self.dropout(conc)
        out = self.out(conc)
        return out
This network expects its input to be of shape (batch_size, seq_length) and works with any seq_length. We can check this by passing our model two random batches with different sequence lengths(10 and 25).
该网络期望其输入具有形状( batch_size , seq_length )并可以与任何seq_length 。 我们可以通过将两个具有不同序列长度(10和25)的随机批次传递给模型来进行检查。
model = BiLSTM()
input_batch_1 = torch.randint(low = 0,high = 10000, size = (100,10))
input_batch_2 = torch.randint(low = 0,high = 10000, size = (100,25))
print(model(input_batch_1).size())
print(model(input_batch_2).size())
------------------------------------------------------------------
torch.Size([100, 1])
torch.Size([100, 1])
Now, we want to provide tight batches to this model, such that each batch has the same sequence length based on the max sequence length in the batch to minimize padding. This has an added benefit of making the neural net run faster. It was, in fact, one of the methods used in the winning submission of the Quora Insincere challenge in Kaggle, where running time was of utmost importance.
现在,我们要为该模型提供紧密的批次,以便每个批次都基于批次中的最大序列长度具有相同的序列长度,以最大程度地减少填充。 这具有使神经网络运行更快的附加好处。 实际上,这是在Kaggle赢得Quora Insincere挑战赛的获奖方法中使用的方法之一,在其中,运行时间至关重要。
So, how do we do this? Let’s write a very simple custom dataset class first.
那么,我们该怎么做呢? 首先让我们编写一个非常简单的自定义数据集类。
class CustomTextDataset(Dataset):
    '''
    Simple Dataset initializes with X and y vectors
    We start by sorting our X and y vectors by sequence lengths
    '''
    def __init__(self,X,y=None):
        self.data = list(zip(X,y))
        # Sort by length of first element in tuple
        self.data = sorted(self.data, key=lambda x: len(x[0]))

    def __len__(self):
        return len(self.data)


    def __getitem__(self, idx):
        return self.data[idx]
Also, let’s generate some random data which we will use with this custom Dataset.
另外,让我们生成一些随机数据,将其与此自定义数据集一起使用。
import numpy as np
train_data_size = 1024
sizes = np.random.randint(low=50,high=300,size=(train_data_size,))
X = [np.random.randint(0,10000, (sizes[i])) for i in range(train_data_size)]
y = np.random.rand(train_data_size).round()
#checking one example in dataset
print((X[0],y[0]))
We can use the custom dataset now using:
现在,我们可以使用以下自定义数据集:
train_dataset = CustomTextDataset(X,y)If we now try to use the Dataloader on this dataset with batch_size>1, we will get an error. Why is that?
如果现在尝试在batch_size > 1的此数据集上使用数据batch_size ,则会收到错误消息。 这是为什么?
train_dataloader = DataLoader(train_dataset,batch_size = 64, shuffle=False, num_workers=10)
for xb,yb in train_dataloader:
    print(xb.size(),yb.size())
This happens because the sequences have different lengths, and our data loader expects our sequences of the same length. Remember that in the previous image example, we resized all images to size 224 using the transforms, so we didn’t face this error.
发生这种情况是因为序列的长度不同,并且我们的数据加载器期望序列的长度相同。 请记住,在前面的图像示例中,我们使用了变换将所有图像的大小调整为224,因此我们没有遇到这个错误。
So, how do we iterate through this dataset so that each batch has sequences with the same length, but different batches may have different sequence lengths?
那么,如何遍历此数据集,以使每个批次具有相同长度的序列,但不同批次可能具有不同的序列长度?
We can use collate_fn parameter in the DataLoader that lets us define how to stack sequences in a particular batch. To use this, we need to define a function that takes as input a batch and returns (x_batch, y_batch ) with padded sequence lengths based on max_sequence_length in the batch. The functions I have used in the below function are simple NumPy operations. Also, the function is properly commented so you can understand what is happening.
我们可以在DataLoader中使用collate_fn参数,该参数使我们可以定义如何在特定批次中堆叠序列。 要使用这一点,我们需要定义一个函数,它作为输入分批和返回( x_batch , y_batch基于填充序列的长度) max_sequence_length在批处理。 我在以下函数中使用的函数是简单的NumPy操作。 另外,该函数已正确注释,因此您可以了解发生了什么。
def collate_text(batch):
    # get text sequences in batch
    data = [item[0] for item in batch]
    # get labels in batch
    target = [item[1] for item in batch]
    # get max_seq_length in batch
    max_seq_len = max([len(x) for x in data])
    # pad text sequences based on max_seq_len
    data = [np.pad(p, (0, max_seq_len - len(p)), 'constant') for p in data]
    # convert data and target to tensor
    data = torch.LongTensor(data)
    target = torch.LongTensor(target)
    return [data, target]
We can now use this collate_fn with our Dataloader as:
现在,我们可以将此collate_fn与Dataloader一起使用:
train_dataloader = DataLoader(train_dataset,batch_size = 64, shuffle=False, num_workers=10,collate_fn = collate_text)for xb,yb in train_dataloader:
    print(xb.size(),yb.size())
It will work this time as we have provided a custom collate_fn. And see that the batches have different sequence lengths now. Thus we would be able to train our BiLSTM using variable input sizes just like we wanted.
由于我们提供了自定义的collate_fn.因此这次将可以使用collate_fn. 并且看到批次现在具有不同的序列长度。 因此,我们将能够根据需要使用可变的输入大小来训练BiLSTM。
训练神经网络 (Training a Neural Network)
We know how to create a neural network using nn.Module. But how to train it? Any neural network that has to be trained will have a training loop that will look something similar to below:
我们知道如何使用nn.Module.创建神经网络nn.Module. 但是如何训练呢? 任何需要训练的神经网络都会有一个训练循环,看起来类似于以下内容:
num_epochs = 5
for epoch in range(num_epochs):
    # Set model to train mode
    model.train()
    for x_batch,y_batch in train_dataloader:
        # Clear gradients
        optimizer.zero_grad()
        # Forward pass - Predicted outputs
        pred = model(x_batch)
        # Find Loss and backpropagation of gradients
        loss = loss_criterion(pred, y_batch)
        loss.backward()
        # Update the parameters
        optimizer.step()
    model.eval()
    for x_batch,y_batch in valid_dataloader:
        pred = model(x_batch)
        val_loss = loss_criterion(pred, y_batch)
In the above code, we are running five epochs and in each epoch:
在上面的代码中,我们正在运行五个时期,每个时期:
- We iterate through the dataset using a data loader. 我们使用数据加载器遍历数据集。
In each iteration, we do a forward pass using
model(x_batch)在每次迭代中,我们使用
model(x_batch)进行前向传递We calculate the Loss using a
loss_criterion我们使用
loss_criterion计算损失We back-propagate that loss using
loss.backward()call. We don't have to worry about the calculation of the gradients at all, as this simple call does it all for us.我们使用
loss.backward()调用反向传播该损失。 我们完全不必担心梯度的计算,因为这个简单的调用可以为我们完成所有工作。Take an optimizer step to change the weights in the whole network using
optimizer.step(). This is where weights of the network get modified using the gradients calculated inloss.backward()call.采取优化程序步骤,使用
optimizer.step()更改整个网络的权重。 这是使用loss.backward()调用中计算出的梯度来修改网络权重的地方。We go through the validation data loader to check the validation score/metrics. Before doing validation, we set the model to eval mode using
model.eval().Please note we don't back-propagate losses in eval mode.我们通过验证数据加载器检查验证得分/指标。 在进行验证之前,我们使用
model.eval().将模型设置为评估模式model.eval().请注意,在评估模式下,我们不会反向传播损失。
Till now, we have talked about how to use nn.Module to create networks and how to use Custom Datasets and Dataloaders with Pytorch. So let's talk about the various options available for Loss Functions and Optimizers.
到目前为止,我们已经讨论了如何使用nn.Module创建网络以及如何在nn.Module中使用自定义数据集和数据加载器。 因此,让我们谈谈损失函数和优化器的各种可用选项。
损失函数 (Loss functions)
Pytorch provides us with a variety of loss functions for our most common tasks, like Classification and Regression. Some most used examples are nn.CrossEntropyLoss , nn.NLLLoss , nn.KLDivLoss and nn.MSELoss. You can read the documentation of each loss function, but to explain how to use these loss functions, I will go through the example of nn.NLLLoss
Pytorch为我们提供了最常见任务(例如分类和回归)的各种损失函数 。 一些最常用的示例是nn.CrossEntropyLoss , nn.NLLLoss , nn.KLDivLoss和nn.MSELoss . 您可以阅读每个损失函数的文档,但是为了解释如何使用这些损失函数,我将以nn.NLLLoss

The documentation for NLLLoss is pretty succinct. As in, this loss function is used for Multiclass classification, and based on the documentation:
NLLLoss的文档非常简洁。 如图所示,此损失函数用于多类分类,并且基于文档:
the input expected needs to be of size (
batch_sizexNum_Classes) — These are the predictions from the Neural Network we have created.输入的期望大小必须为(
batch_sizexNum_Classes)—这些是我们创建的神经网络的预测。We need to have the log-probabilities of each class in the input — To get log-probabilities from a Neural Network, we can add a
LogSoftmaxLayer as the last layer of our network.我们需要在输入中包含每个类的对数概率—为了从神经网络获取对数概率,我们可以添加
LogSoftmax层作为网络的最后一层。- The target needs to be a tensor of classes with class numbers in the range(0, C-1) where C is the number of classes. 目标必须是类的张量,其类编号在(0,C-1)范围内,其中C是类的数量。
So, we can try to use this Loss function for a simple classification network. Please note the LogSoftmax layer after the final linear layer. If you don't want to use this LogSoftmax layer, you could have just used nn.CrossEntropyLoss
因此,我们可以尝试将此Loss函数用于简单的分类网络。 请注意最终线性层之后的LogSoftmax层。 如果您不想使用此LogSoftmax图层,则可以使用nn.CrossEntropyLoss
class myClassificationNet(nn.Module):
    def __init__(self):
        super().__init__()
        # Define all Layers Here
        self.lin = nn.Linear(784, 10)
        self.logsoftmax = nn.LogSoftmax(dim=1)
    def forward(self, x):
        # Connect the layer Outputs here to define the forward pass
        x = self.lin(x)
        x = self.logsoftmax(x)
        return x
Let’s define a random input to pass to our network to test it:
让我们定义一个随机输入以传递到我们的网络以对其进行测试:
# some random input:X = torch.randn(100,784)
y = torch.randint(low = 0,high = 10,size = (100,))
And pass it through the model to get predictions:
并将其传递给模型以获得预测:
model = myClassificationNet()
preds = model(X)
We can now get the loss as:
现在,我们可以得出以下损失:
criterion = nn.NLLLoss()
loss = criterion(preds,y)
loss
------------------------------------------
tensor(2.4852, grad_fn=<NllLossBackward>)
自定义损失功能 (Custom Loss Function)
Defining your custom loss functions is again a piece of cake, and you should be okay as long as you use tensor operations in your loss function. For example, here is the customMseLoss
定义自定义损失函数仍然是小菜一碟,只要您在损失函数中使用张量运算就可以了。 例如,这是customMseLoss
def customMseLoss(output,target):
    loss = torch.mean((output - target)**2)     return loss
You can use this custom loss just like before. But note that we don’t instantiate the loss using criterion this time as we have defined it as a function.
您可以像以前一样使用此自定义损失。 但是请注意,由于这次我们将其定义为函数,因此我们并未使用准则实例化损失。
output = model(x)
loss = customMseLoss(output, target)
loss.backward()
If we wanted, we could have also written it as a class using nn.Module , and then we would have been able to use it as an object. Here is an NLLLoss custom example:
如果需要,我们还可以使用nn.Module将其编写为类,然后将其用作对象。 这是一个NLLLoss自定义示例:
class CustomNLLLoss(nn.Module):
    def __init__(self):
        super().__init__()
    def forward(self, x, y):
        # x should be output from LogSoftmax Layer
        log_prob = -1.0 * x
        # Get log_prob based on y class_index as loss=-mean(ylogp)
        loss = log_prob.gather(1, y.unsqueeze(1))
        loss = loss.mean()
        return loss
criterion = CustomNLLLoss()
loss = criterion(preds,y)
优化器 (Optimizers)
Once we get gradients using the loss.backward() call, we need to take an optimizer step to change the weights in the whole network. Pytorch provides a variety of different ready to use optimizers using the torch.optim module. For example: torch.optim.Adadelta , torch.optim.Adagrad , torch.optim.RMSprop and the most widely used torch.optim.Adam.
一旦使用loss.backward()调用获得了渐变,就需要采取优化程序步骤来更改整个网络的权重。 Pytorch使用torch.optim模块提供了各种不同的即用型优化器。 例如: torch.optim.Adadelta , torch.optim.Adagrad , torch.optim.RMSprop和使用最广泛的torch.optim.Adam .
To use the most used Adam optimizer from PyTorch, we can simply instantiate it with:
要使用PyTorch中最常用的Adam优化器,我们可以使用以下方法实例化它:
optimizer = And then use optimizer.zero_grad() and optimizer.step() while training the model.
然后使用optimizer . zero_grad() 训练模型时, optimizer . zero_grad()和optimizer.step() 。
I am not discussing how to write custom optimizers as it is an infrequent use case, but if you want to have more optimizers, do check out the pytorch-optimizer library, which provides a lot of other optimizers used in research papers. Also, if you anyhow want to create your own optimizers, you can take inspiration using the source code of implemented optimizers in PyTorch or pytorch-optimizers.
我不是在讨论如何编写自定义优化器,因为这是一个不经常使用的案例,但是如果您想拥有更多的优化器,请查看pytorch-optimizer库,该库提供了研究论文中使用的许多其他优化器。 另外,如果您想创建自己的优化器,则可以使用PyTorch或pytorch-optimizers中已实现的优化器的源代码来激发灵感。

使用GPU /多个GPU (Using GPU/Multiple GPUs)
Till now, whatever we have done is on the CPU. If you want to use a GPU, you can put your model to GPU using model.to('cuda'). Or if you want to use multiple GPUs, you can use nn.DataParallel. Here is a utility function that checks the number of GPUs in the machine and sets up parallel training automatically using DataParallel if needed.
到现在为止,我们所做的一切都在CPU上。 如果要使用GPU,可以使用model.to('cuda')将模型放入GPU。 或者,如果您想使用多个GPU,则可以使用nn.DataParallel 。 这是一个实用程序功能,可检查计算机中GPU的数量,并在需要时使用DataParallel自动设置并行训练。
# Whether to train on a gpu
train_on_gpu = torch.cuda.is_available()
print(f'Train on gpu: {train_on_gpu}')# Number of gpus
if train_on_gpu:
    gpu_count = torch.cuda.device_count()
    print(f'{gpu_count} gpus detected.')
    if gpu_count > 1:
        multi_gpu = True
    else:
        multi_gpu = False
if train_on_gpu:
    model = model.to('cuda')
if multi_gpu:
    model = nn.DataParallel(model)
The only thing that we will need to change is that we will load our data to GPU while training if we have GPUs. It’s as simple as adding a few lines of code to our training loop.
我们唯一需要更改的是,如果有GPU,我们将在训练时将数据加载到GPU。 这就像在我们的训练循环中添加几行代码一样简单。
num_epochs = 5
for epoch in range(num_epochs):
    model.train()
    for x_batch,y_batch in train_dataloader:
        if train_on_gpu:
            x_batch,y_batch = x_batch.cuda(), y_batch.cuda()
        optimizer.zero_grad()
        pred = model(x_batch)
        loss = loss_criterion(pred, y_batch)
        loss.backward()
        optimizer.step()
    model.eval()
    for x_batch,y_batch in valid_dataloader:
        if train_on_gpu:
            x_batch,y_batch = x_batch.cuda(), y_batch.cuda()
        pred = model(x_batch)
        val_loss = loss_criterion(pred, y_batch)
结论 (Conclusion)
Pytorch provides a lot of customizability with minimal code. While at first, it might be hard to understand how the whole ecosystem is structured with classes, in the end, it is simple Python. In this post, I have tried to break down most of the parts you might need while using Pytorch, and I hope it makes a little more sense for you after reading this.
Pytorch用最少的代码提供了很多可定制性。 刚开始时,可能很难理解整个生态系统是如何用类构造的,最后,它是简单的Python。 在本文中,我尝试分解了使用Pytorch时可能需要的大部分部件,希望阅读后对您来说更有意义。
You can find the code for this post here on my GitHub repo, where I keep codes for all my blogs.
您可以在我的GitHub存储库中找到此文章的代码,我在其中保存所有博客的代码。
If you want to learn more about Pytorch using a course based structure, take a look at the Deep Neural Networks with PyTorch course by IBM on Coursera. Also, if you want to know more about Deep Learning, I would like to recommend this excellent course on Deep Learning in Computer Vision in the Advanced machine learning specialization.
如果要使用基于课程的结构来了解有关Pytorch的更多信息,请查看Coursera上的IBM的PyTorch深度神经网络课程。 另外,如果您想了解有关深度学习的更多信息,我想向您推荐这本关于高级机器学习专业的 计算机视觉深度学习的优秀课程。
Thanks for the read. I am going to be writing more beginner-friendly posts in the future too. Follow me up at Medium or Subscribe to my blog to be informed about them. As always, I welcome feedback and constructive criticism and can be reached on Twitter @mlwhiz
感谢您的阅读。 我将来也会写更多对初学者友好的文章。 在Medium上关注我,或订阅我的博客以了解有关它们的信息。 与往常一样,我欢迎您提供反馈和建设性的批评,可以在Twitter @mlwhiz上与他们联系
Also, a small disclaimer — There might be some affiliate links in this post to relevant resources, as sharing knowledge is never a bad idea.
另外,这是一个小的免责声明-由于共享知识从来都不是一个坏主意,因此本文中可能会有一些与相关资源相关的会员链接。
pytorch深度学习


 227
227

 被折叠的 条评论
为什么被折叠?
被折叠的 条评论
为什么被折叠?
 到【灌水乐园】发言


