


Adobe AfterEffects is a powerful tool by which you can achieve Visual Effects(VFX) and video creation. Sure, it is a skill that one master over time but it always looked pretty intimidating at the start. This guide is strictly targetted towards those of you who want to take a swing at how to face this software or even better yet, try out film making. This article covers the very fundamentals and tools to get you started on your next video project.
Adobe AfterEffects是一个功能强大的工具,通过它可以实现视觉效果(VFX)和视频创建。 当然,随着时间的流逝,一位大师掌握了这项技能,但是一开始它总是看上去很吓人。 本指南严格针对那些想要摇摆一下如何面对该软件甚至更好地尝试电影制作的人。 本文介绍了帮助您开始下一个视频项目的基本原理和工具。
开始使用 (Get Started)
I’m going ahead with a hunch that you have already installed AfterEffects on your machine, had a look at it, felt intimidated by the plethora of features it had, and closed the window, never to look back it again. (Believe me, I had that phase too).
我的预感是,您已经在计算机上安装了AfterEffects,对其进行了查看,并被它具有的众多功能所吓倒,并关闭了窗口,从此再也不回头了。 (相信我,我也有那个阶段) 。

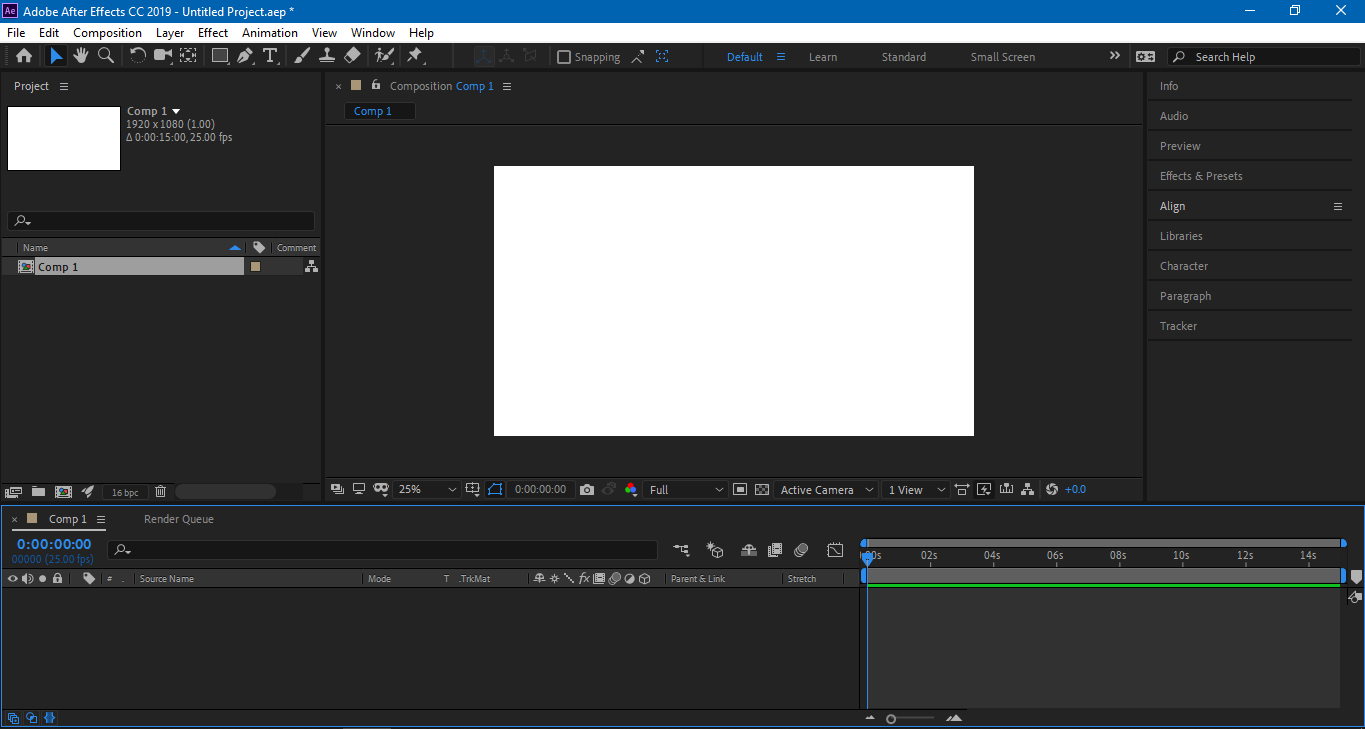
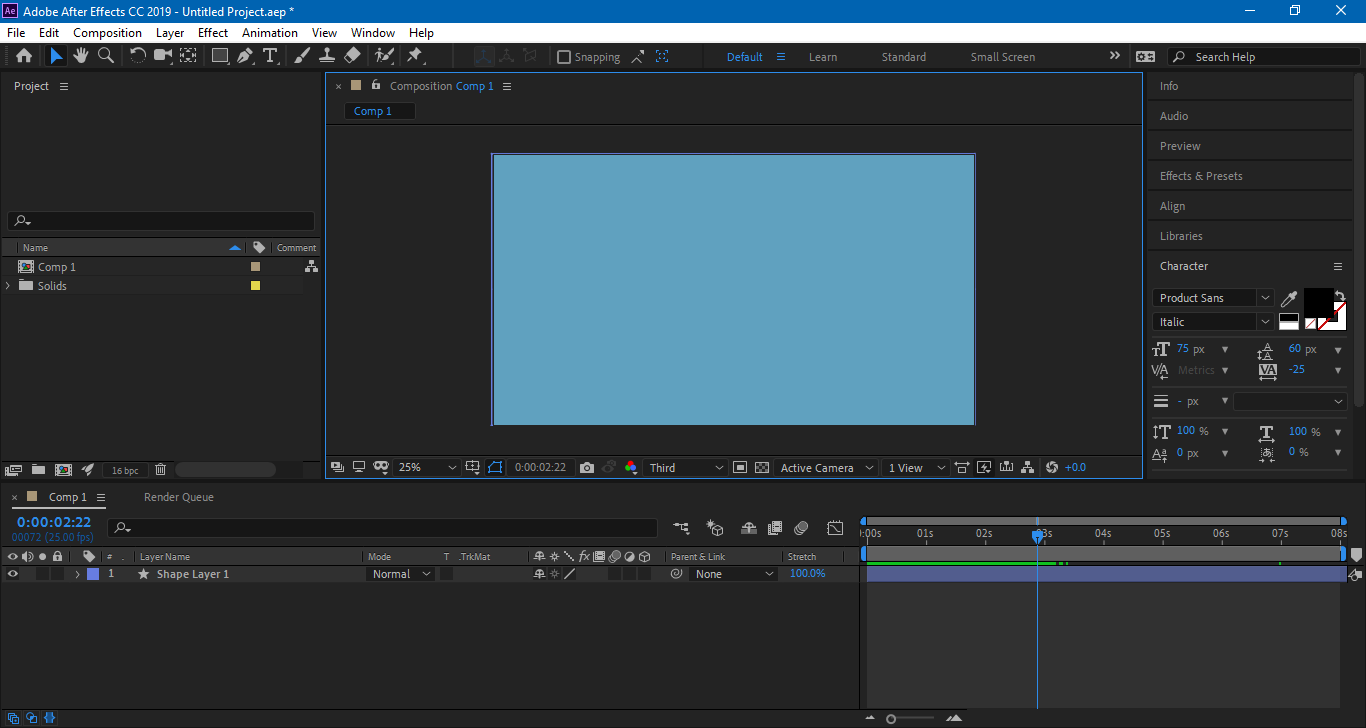
To an absolute newcomer, you would seem to be lost at this interface. But fret not, we’ll take it nice and easy. You’re greeted with two options at the start, New Composition — if you want to make something from scratch and New Composition from Footage — if you have existing video footage to work around with. I’ll be going ahead with New Composition for the purpose of this article.
对于一个绝对的新手来说,您似乎在这个界面上迷路了。 但是不用担心,我们会轻松自如的。 开始时,您会遇到两个选择:“ 新构图” (如果您想从头开始制作某些东西)和“素材”中的“新构图” (如果您要使用现有的视频素材)。 就本文而言,我将继续进行“新合成”。
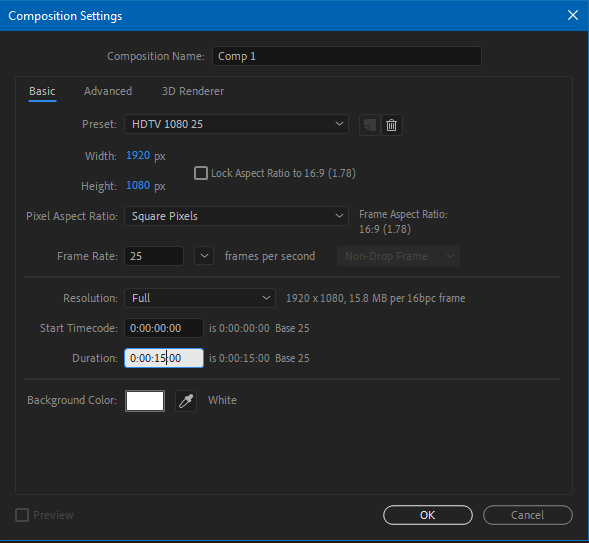
In this window, you get to set some underlying rules for the video you will be making. The aspect ratio, frame rates, duration of your video, default background to name a few. I am going with an aspect ratio of 1920x1080, frame rate as 25, and keep the background white, with a duration of 4 seconds. (The time is denoted as hour: minute: seconds: frames).
在此窗口中,您可以为要制作的视频设置一些基本规则。 宽高比,帧频,视频时长,默认背景等等。 我使用的宽高比为1920x1080,帧频为25,并保持背景为白色,持续时间为4秒。 (时间表示为小时:分钟:秒:帧) 。
You can change these settings later in the process by going to Composition>Composition Settings or Ctrl/Cmd +K anywhere on the interface.
您可以在此过程的后面更改这些设置,方法是转到界面上的任意位置,进入“ 合成”>“合成设置”或Ctrl / Cmd + K。
优化 (Optimization)
Adobe AfterEffects is a resource-hungry application. It will eat away your RAM, Battery, and sometimes your soul. Here are some configurations that best help out with the overall experience of AfterEffects.
Adobe AfterEffects是一个需要大量资源的应用程序。 它会消耗掉您的RAM,电池,有时甚至是您的灵魂。 以下是一些最佳的配置,可帮助您全面了解AfterEffects。
Increase the RAM allotted. Edit>Preferences>Memory and change it according to the hardware present.
增加分配的RAM。 编辑>首选项>内存,然后根据当前硬件进行更改。
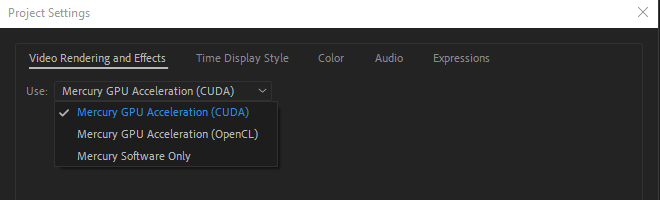
Allot your GPU for rendering. File>Project Settings or Ctrl/Cmd+Alt+Shift+K. The dialogue box gives you an option to render it on your GPU or to let the software handle it. It is best to let the GPU handle this task.
分配GPU进行渲染。 文件>项目设置或Ctrl / Cmd + Alt + Shift + K。 对话框为您提供了将其渲染到GPU上或让软件进行处理的选项。 最好让GPU处理此任务。
3. Have your machine plugged into power. This should go without saying if you’re using your laptop.
3. 将机器接通电源。 这应该不用说是否正在使用笔记本电脑。
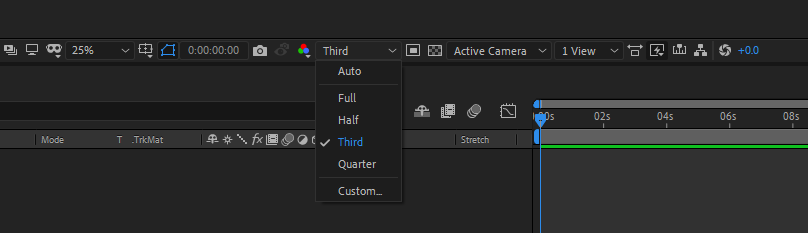
4. Change your render resolution. On your composition panel, you have the option to change the resolution of your real-time playback engine. Keeping it to Full resolution would give the highest quality but it takes a hit on the time it takes to render. Keeping it to Quarter would mean faster playback with a trade-off on quality. This setting no way would influence the end result, but just makes it easier to preview your work in real-time. Find the right balance of speed and quality you’d prefer or go nuts on the Custom (not recommended if you don't know what you’re getting into). I usually go with Third of the resolution.
4. 更改渲染分辨率。 在合成面板上,您可以选择更改实时播放引擎的分辨率。 保持全分辨率将提供最高的质量,但会影响渲染时间。 将其保持在“ Quarter”(四分之一)位置将意味着更快的播放速度和质量的折衷。 此设置不会影响最终结果,而只是使实时预览工作变得更加容易。 在所需的速度和质量之间找到合适的平衡,或者在Custom上稍作改动(如果您不了解所学知识,不建议这样做) 。 我通常选择第三项决议。
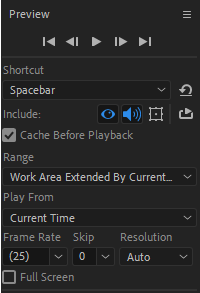
5. Preview Settings. If you’re on the Default workspace view (which I prefer, due to how neatly the options are organized that said you can switch to your convenience ranging from Learn view, Standard view, or even make your custom workspace view), under the Preview tab, ensure the Cache before Playback tickbox is marked. This ensures that the real-time preview won’t start unless each frame is cached thereby enabling a smoother playback experience. If it is not marked, you’ll be prone to find stutters in the playback. On that note, change the Frame Rate to 25 (or however you set in the Composition Settings but make sure these match). This would ensure that the playback engine would preview it as you would see in the final output.
5. 预览设置 。 如果您在“默认”工作区视图中(我更喜欢,由于选项的组织方式整齐,您可以从“学习”视图,“标准”视图甚至是自定义工作区视图切换到便利位置) ,在“预览”下标签,请确保已选中“ 播放前缓存”复选框。 这样可以确保除非开始缓存每一帧,否则实时预览将不会开始,从而使播放体验更加流畅。 如果未标记,则很容易在播放过程中发现卡顿现象。 请注意,将帧频更改为25 (或在“构图设置”中进行设置,但要确保它们匹配)。 这将确保回放引擎能够像在最终输出中看到的那样预览它。
获取Schwifty (Get Schwifty)
Finally, with all those details and introduction out of the way, let’s get our hands dirty by making a simple video.
最后,通过所有这些细节和介绍,让我们通过制作一个简单的视频来弄脏我们的手。
I. Click on the Rectangle button from the workspace panel or Q from anywhere on the interface (Cycling through Q, you will see different shapes such as Ellipse, Polygon, etc), click on the top-left corner and drag it out till you reach the bottom-right corner, basically filling up the canvas.
I.在工作区面板上单击“ 矩形”按钮,或者在界面上的任何位置单击“ Q ” (循环遍历Q,您将看到不同的形状,例如“椭圆”,“多边形”等) ,单击左上角并将其拖出直到到达右下角,基本上填满了画布。
II. On pressing V, you switch back to the Selection Tool with which you can scale and drag the shape. Use this tool to adjust the shape onto the canvas. Notice the timeline, you now have a new layer named Shape Layer 1(you can rename it by pressing Return after clicking on the layer). Scrubbing your timeline cursor along the length of the layer won’t have any difference as this shape layer is extended over the entire timeline. However, by trimming the layer to say 3 seconds ( you can do this by dragging the end of the layer from the timeline), you can see that the shape disappears after the 3-second mark.
二 。 按下V时 ,您将切换回选择工具,使用它可以缩放和拖动形状。 使用此工具可以在画布上调整形状。 注意时间线,您现在有了一个名为Shape Layer 1的新图层(可以 在单击图层后 按 Return 键 来重命名 ) 。 沿着图层的长度擦洗时间线光标不会有任何区别,因为此形状图层会扩展到整个时间线。 但是,通过将图层修剪为3秒(您可以通过从时间线拖动图层的末尾来完成此操作) ,可以看到形状在3秒标记后消失了。
Timeline Cursor is this thin little blue line that previews the frame of that instance onto the composition window. This will help in scrubbing through your timeline, enable precision editing and setting of Keyframes.
时间轴光标是这个 细小的蓝线将实例的框架预览到合成窗口上。 这将有助于清理时间轴,实现精确的编辑和关键帧的设置。
But let us keep it for the entire 4 seconds for the purpose of this tutorial. On scrubbing, you also see a green bar filling up as you move the timeline cursor. Those are the frames caching up for playback. Those regions with the green bar over it ensures that during preview, there won’t be any stutter as those frames are already processed by the playback engine.
但就本教程而言,让我们将其保留整个4秒钟。 进行擦洗时,您还会在移动时间轴光标时看到绿色的条形填充。 这些是正在缓存以进行播放的帧。 那些上面带有绿色条的区域可确保在预览期间不会出现任何卡顿现象,因为这些帧已由播放引擎处理。
III. Now let us add some life to this shape layer. I would want it to sweep in from the left, stay on the screen for a few seconds, then have it exit to the right. This is where Keyframes take the spotlight.
三, 现在让我们为该形状层添加一些生命。 我希望它从左侧扫入,在屏幕上停留几秒钟,然后从右侧退出。 这就是关键帧成为焦点的地方。
Keyframes are markers in time that allow you to tell After Effects where you want to change the value for a layer or effect property such as position, opacity, scale, rotation, amount, particle count, color, etc. By setting these ‘markers’ and changing the values you create animation.
关键帧是时间上的标记,可让您告诉After Effects在哪里要更改图层或效果属性的值,例如位置,不透明度,比例,旋转,数量,粒子数量,颜色等。通过设置这些“标记”并更改您创建动画的值。
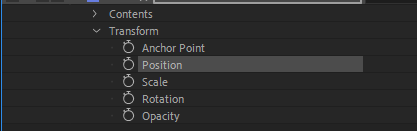
Move your timeline cursor to the start of the video and click on the arrow found to the left of the layer name. You will find Contents and Transforms branches under it, (All the options with regards to a layer in AfterEffects follow a tree structure) and under Transform, you’ll find settings such as Opacity, Scale, Position, etc. Varying these parameters with the help of Keyframes helps create life to your layers.
将时间轴光标移动到视频的开头,然后单击图层名称左侧的箭头。 您将在其下找到Contents和Transforms分支(AfterEffects中与图层有关的所有选项均遵循树结构),并在Transform下找到诸如Opacity,Scale,Position等设置。关键帧的帮助有助于为图层创造生命。
Now, I want this rectangle to slide in from the left side of the screen. I change the x-axis value of the Position (or press P after you click on the layer) from whatever it is to whatever it is minus 1920, the length of our screen. You can just add -1920 to the existing value and the software will take care of the arithmetic.
现在,我希望该矩形从屏幕左侧滑入。 我改变位置的X轴值(或按 P 键 单击图层后)从不管它是什么它是减去1920年,我们的屏幕的长度。 您只需在现有值上加上-1920即可,该软件将负责算术运算。
Position:(x,y) = Position:(x-1920,y)
位置:(x,y)=位置:(x-1920,y)
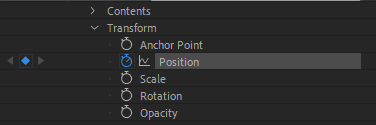
Your shape layer has left the screen and lies at the edge of it. Now we can reel it in. But first, let's place a keyframe there. You can do this by clicking on the stopwatch icon next to the attribute you want to have the change, in this case, Position. You’ll even see a marker on the timeline indicating your Keyframe.
您的形状层已离开屏幕,并位于屏幕边缘。 现在我们可以将其收卷。但是首先,让我们在其中放置一个关键帧。 您可以通过单击要更改的属性(在本例中为Position)旁边的秒表图标来执行此操作。 您甚至会在时间轴上看到一个标记,指示您的关键帧。
Move your timeline cursor to the 1-second mark and change your Position.
将时间轴光标移到1秒标记处,然后更改您的Position 。
Position:(x,y)=Position:(x+1920,y)
位置:(x,y)=位置:(x + 1920,y)
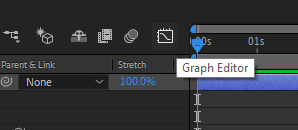
Once you do so, you can see the shape has filled the screen and the software is intelligent enough to see that there has been a change in the layer and automatically adds in a Keyframe at the position of your cursor. Play the preview from the start of the timeline (press Space to start/stop). You’ve now created your very first animation. But it looks too mechanical. There’s no soul to the reeling in. Just linear. You can even see the speed of your layer from the Graph Editor. (Make sure to have selected the attribute in this case Position, whose Speed v Time plot you want to see).
完成此操作后,您将看到形状已填满屏幕,并且该软件足够智能,可以看到图层已发生更改,并自动在光标位置添加了关键帧。 从时间轴的开头播放预览(按 空格 键开始/停止)。 现在,您已经创建了第一个动画。 但是它看起来太机械了。 毫无灵魂可言。只是线性。 您甚至可以从“ 图形编辑器”中查看图层的速度。 (在这种情况下 , 请确保已选择属性 Position ,要查看其速度v时间图)。
However, you can improve upon this. By switching out from the Graph Editor, right-click on the first Keyframe, Keyframe Assistant>Easy Ease Out, and likewise, for the second one, Keyframe Assistant>Easy Ease In. Look at the Graph Editor, you can see the speed of your layer now plotted as a parabola. Preview to experience the difference. Much better.
但是,您可以对此进行改进。 通过从“ 图形编辑器”中退出,右键单击第一个关键帧,即“ 关键帧助手”>“轻松输入” ,同样,对于第二个关键帧,请右击“关键帧助手>轻松输入” 。 看一下Graph Editor ,您可以看到现在绘制为抛物线的图层速度。 预览以体验不同之处。 好多了。
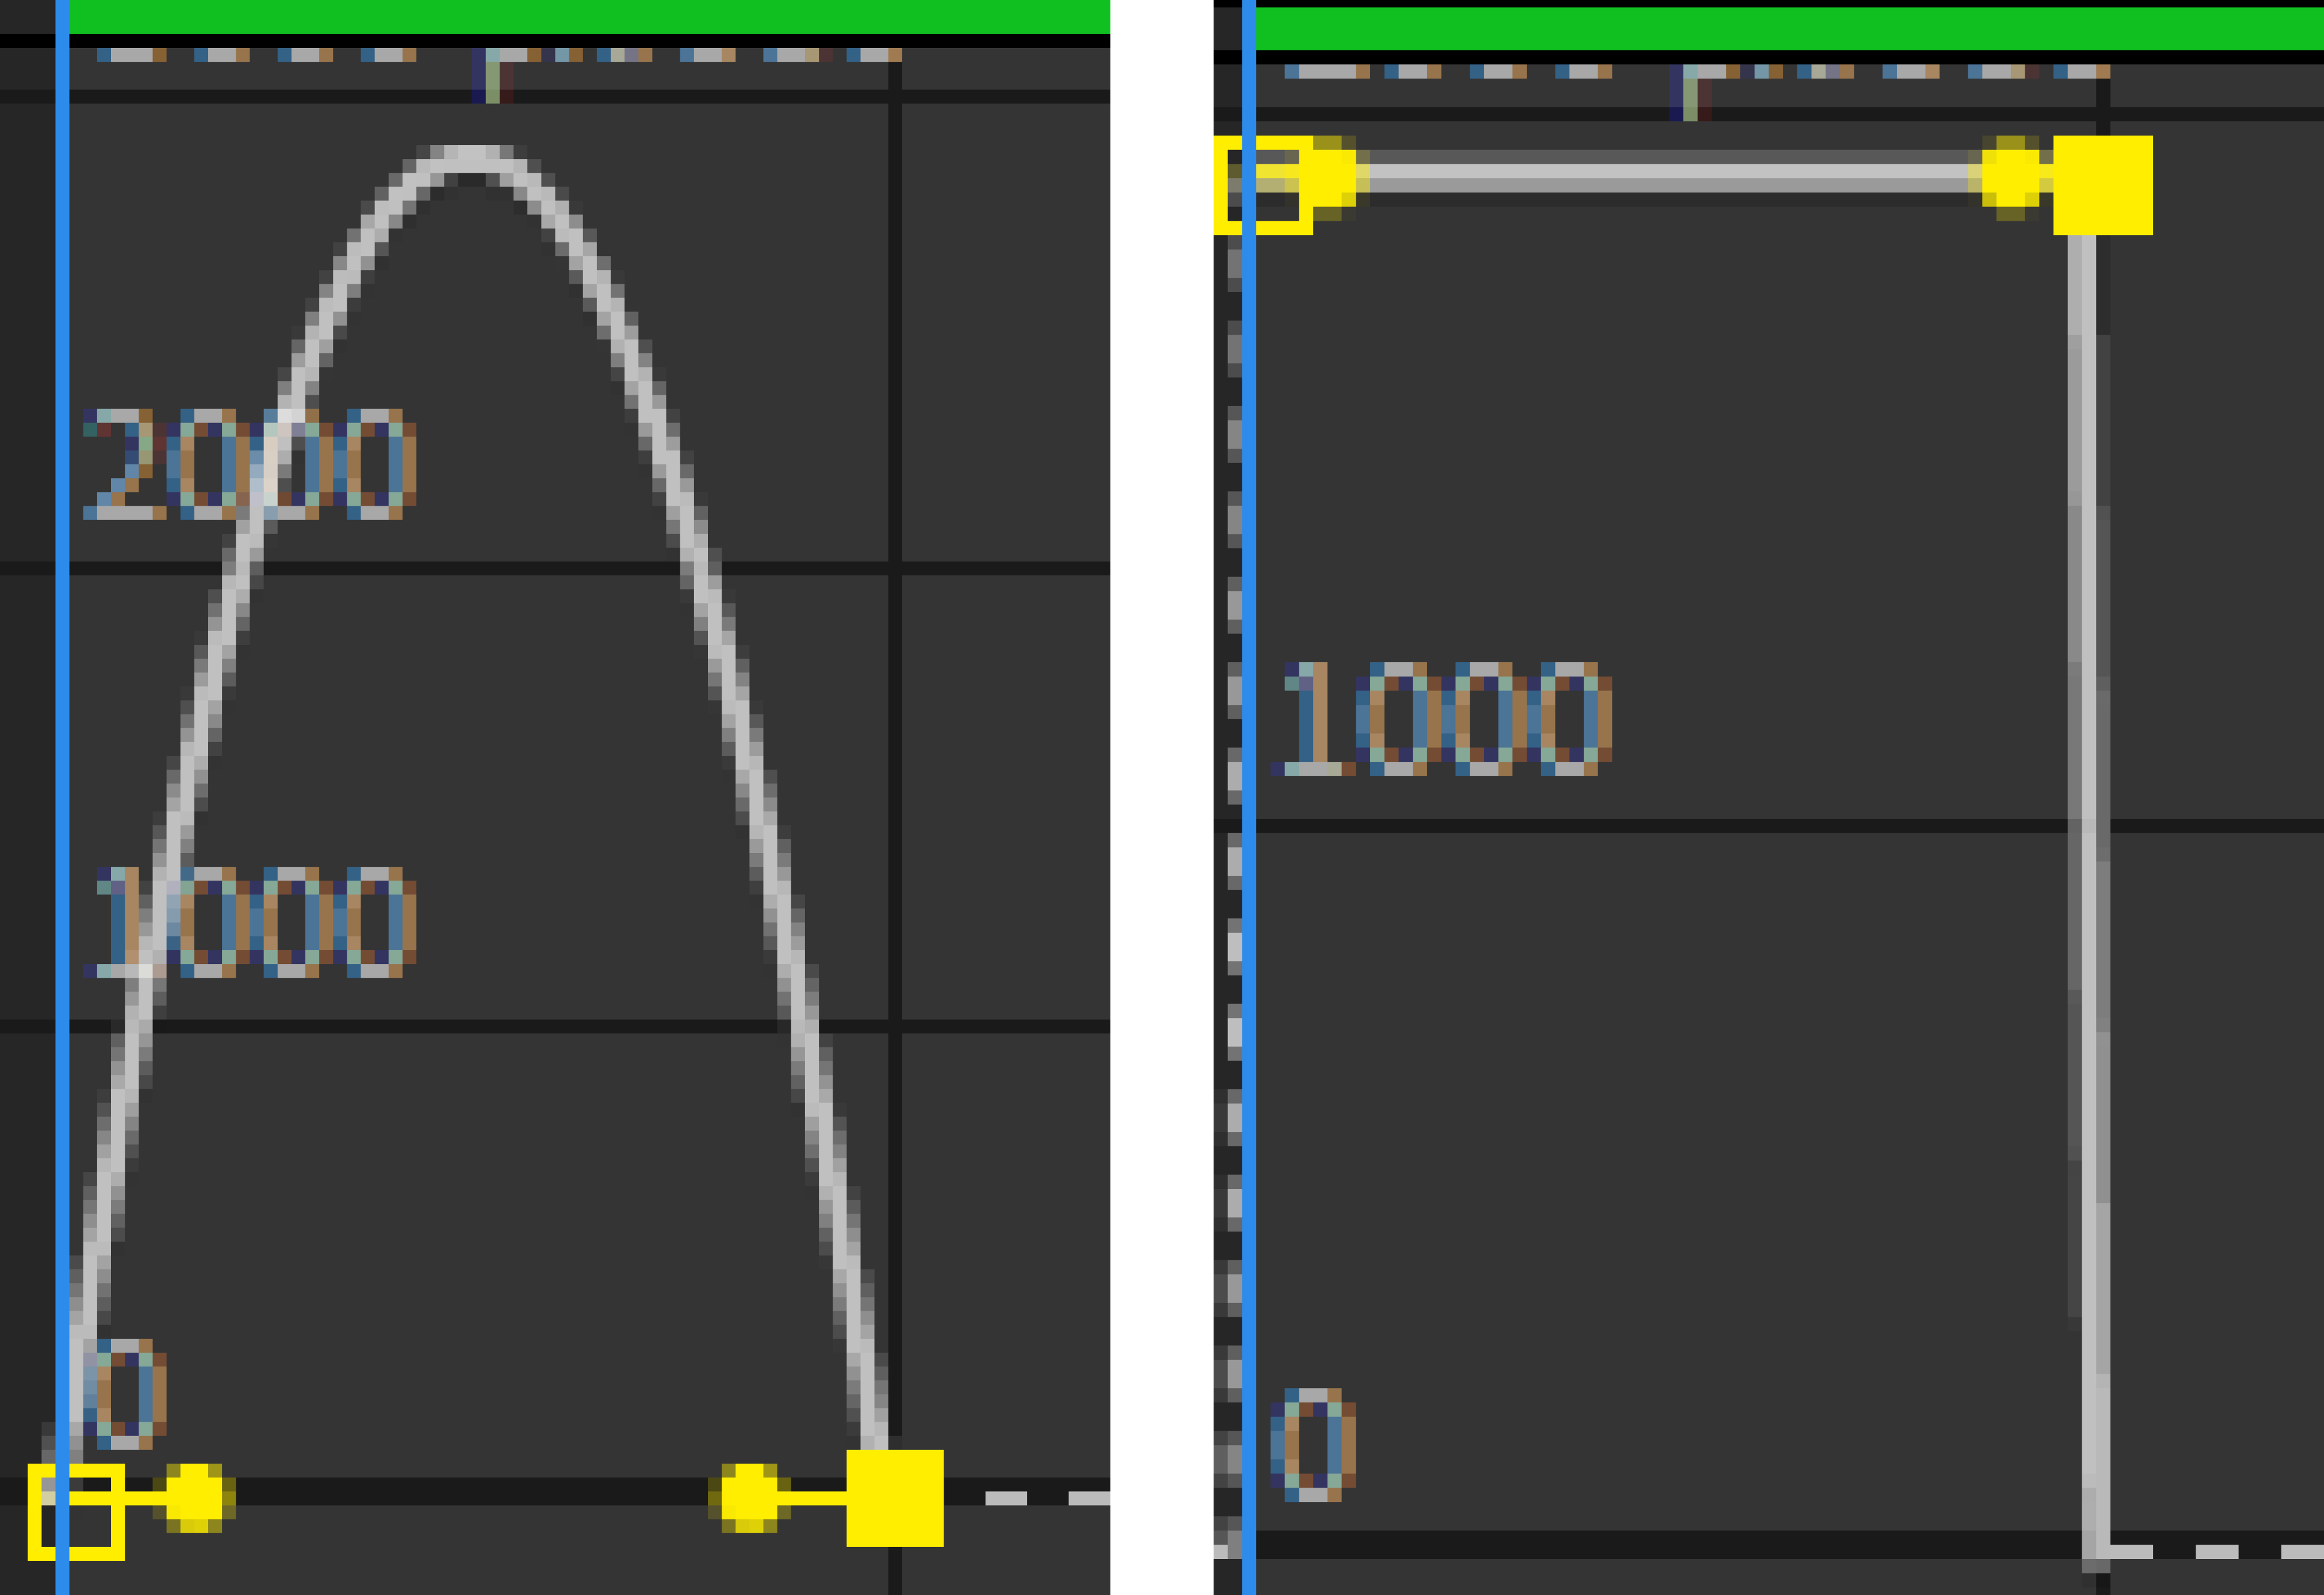
You can customize the plot with the help of the handles (the yellow circles). It follows the principle of Bezier Curves. Again not recommended if you don’t know what you’re getting into. But feel free to play around with it to get the gist of it.
您可以在手柄(黄色圆圈)的帮助下自定义绘图。 它遵循贝塞尔曲线的原理。 如果您不了解所学内容,则不建议再次使用。 但是,请随意使用它以获取要点。
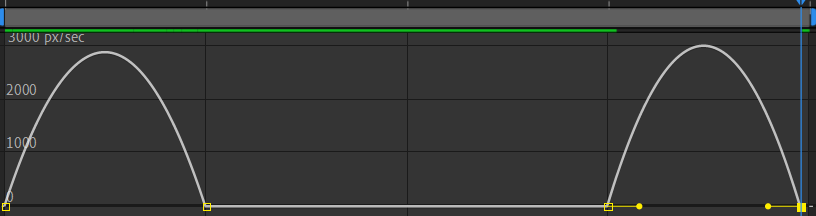
Now we have reeled the shape into the screen, now I have to make it stay for 2 seconds then make it exit from the 3 seconds onwards. For that, we’ll keep a Keyframe on the Position attribute at 3s, move the cursor to 4s, change the x value. Make it the Keyframes Easy Ease Out/In, same way we did it for the previous Keyframes. Preview to see your work.
现在我们将形状放到屏幕上,现在我必须让它停留2秒,然后使其从3秒开始退出。 为此,我们将在“位置”属性上的“关键帧”保持3s,将光标移至4s,更改x值。 使其与以前的关键帧一样轻松地制作/删除关键帧。 预览以查看您的工作。
Position:(x,y)=Position:(x+1920,y)
位置:(x,y)=位置:(x + 1920,y)
IV. Now we have a basic idea of how Keyframes and Cursor work in AfterEffects. Let us take a step back and understand the UI elements you will see above the timeline.
IV。 现在,我们有了一个基本概念,了解关键帧和光标在AfterEffects中如何工作。 让我们退后一步,了解您将在时间轴上方看到的UI元素。

In this picture, the purple layer represents the shape layer we already have. That aside we can see 2 grey bars on its top with blue ends — one a thicker bar and another thin one. Both are UI elements that improve your overall workflow while making an AfterEffects project.
在这张照片中,紫色层代表我们已经拥有的形状层。 除了那边,我们可以看到其顶部有2个带有蓝色末端的灰色条-一个是较粗的条,而另一个是细的条。 这两个都是UI元素,可在制作AfterEffects项目时改善整体工作流程。
The topmost one (the thinner of the two), controls time-scaling. You can zoom in or out of your timeline with respect to time/frame. You can also find a bar on the bottom of your timeline panel which has the same functionality.
最上面的一个(两者中的较薄者)控制时间缩放 。 您可以根据时间/帧放大或缩小时间线。 您还可以在时间轴面板的底部找到一个具有相同功能的栏。
The thicker bar is the work area of your composition. By default, it covers the entire time which you have set for this video. But say if you need to trim the composition to a specific part of the video, drag the handles of that bar to the desired region, Composition>Trim Comp to Work Area or Ctrl/Cmd + Shift + X. You can also drag the handles of the bar to the desired region to preview only that time section.
较粗的条是合成的工作区域 。 默认情况下,它涵盖了您为此视频设置的全部时间。 但是说,如果您需要将合成修剪到视频的特定部分,请将该栏的手柄拖动到所需的区域,即“ 合成>修剪合成到工作区” 或Ctrl / Cmd + Shift +X。您也可以拖动手柄将条形图移到所需区域以仅预览该时间段。
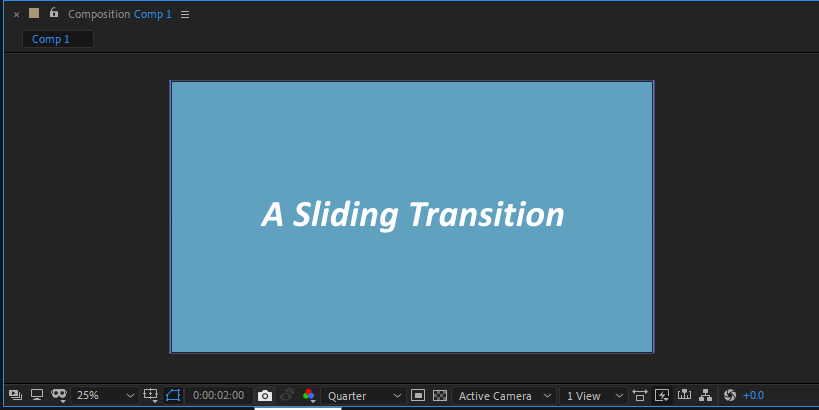
V. We have animated a reel-in, reel-out of a shape layer. It has absolutely no use as of right now. It conveys nothing. I am gonna add some text to it by clicking on the Text Icon or Press Ctrl/Cmd + T to get the Text option(Cycling through, you can get Horizontal and Vertical Text).
V.我们对形状图层的卷入,卷出进行了动画处理。 到目前为止,它绝对没有用。 它什么也没传达。 我要通过单击“ 文本”图标或向其中添加一些文本,或者按Ctrl / Cmd + T以获取“文本”选项(循环遍历,您可以获取水平和垂直文本)。
I have put the text “A Slide Transition” and aligned it center to the composition. ( If you’re in Default View, you can find multiple options to align under the Align tab).
我将文本“ A Slide Transition”放到了合成的中心。 (如果您处于“默认视图”中,则可以在“ 对齐” 选项卡 下找到多个 对齐 选项)。
You can see that the text is just there, lifeless, no soul, or whatnot. You can make it to possess any kind of animation because well, creative license. But for the sake of this tutorial, I’m going to have the text layer the same animation as that of the shape layer. Meaning, the text will behave just like the shape layer that we already animated. For that, in the text layer in your timeline panel, you’ll see a Parent & Link tab. Click on it and while holding Shift, choose your Shape Layer as your parent. Preview to see your text having the same effects that of your shape.
您会看到文本就在那里,死气沉沉,没有灵魂,或什么都没有。 您可以使其拥有任何形式的动画,因为它具有创造力。 但是,出于本教程的考虑,我将使文本层与形状层具有相同的动画。 意思是,文本的行为就像我们已经设置动画的形状层一样。 为此,在时间轴面板的文本层中,您将看到“ 父级和链接”选项卡。 单击它并按住Shift键 ,然后选择“形状层”作为父级。 预览以查看文本具有与形状相同的效果。
All the properties of the Parent are transferred to the layer to which it has been linked to.
父级的所有属性都将传输到其链接到的层。
VI. Now that we have a small video at hand, let us export it so as to view the final output. File>Export>Add to Render Queue and select the path for your file from Output to. Click Render and wait for it to completely export your video project. Once exported, have a look at the size of your file.
VI。 现在我们手头有一个小视频,让我们导出它以查看最终输出。 “文件”>“导出”>“添加到渲染队列”,然后从“ 输出到”中选择文件的路径。 单击“ 渲染”,然后等待它完全导出您的视频项目。 导出后,请查看文件的大小。
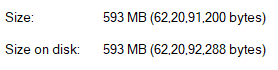
This has been the worst trade deal in the history of trade deals. As I mentioned, AfterEffects is very resource-heavy and it will haunt you, even after your project is done. Therefore, when you do have to send your video to your friends and family, this enormous file won’t make it. Allow me to introduce you to another software named Handbrake which will solve this bottleneck.
这是贸易历史上最糟糕的贸易协议。 如前所述,AfterEffects占用大量资源,即使您的项目完成后,它也会困扰您。 因此,当您必须将视频发送给您的朋友和家人时,这个庞大的文件将无法实现。 请允许我向您介绍另一个名为Handbrake的软件,它将解决此瓶颈。

As the name suggests, it is a transcoding tool but it can be used as an encoder as well. What, You’ve never heard of these terms before? Long story short, it allows you to convert from one video codec to another. Encoding is when the source file is uncompressed and transcoding when the source file is compressed. Our 4-second 600MB video is clearly uncompressed and unencoded so we use this tool to achieve the same. Download Handbrake from the link above, and choose your file exported from AfterEffects. Choose the path for your file and click on Start Encode. Once it is done with the process, check the file size.
顾名思义,它是一种代码转换工具,但也可以用作编码器。 什么,您以前从未听说过这些术语? 长话短说,它允许您从一种视频编解码器转换为另一种。 编码是指源文件被解压缩时,而源文件被压缩时进行转码。 我们的4秒600MB视频显然未压缩和未编码,因此我们使用此工具来实现相同的效果。 从上面的链接下载Handbrake,然后选择从AfterEffects导出的文件。 选择文件的路径,然后单击“ 开始编码”。 完成此过程后,请检查文件大小。
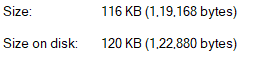
600MB dropped it down to 120kB. That’s .02% of its original size. Pretty convenient I would say. Now nothing is stopping you from share this video of yours to your friends and family via Whatsapp or any other means.
600MB将其降至120kB。 那是原始大小的.02%。 我会说很方便。 现在,没有什么阻止您通过Whatsapp或任何其他方式与朋友和家人分享您的视频。
重要要点 (Key Takeaways)
You now have a gist on a few of the basic tools in AfterEffects work. As you have experienced, It isn't very hard to get over the hurdle and intimidation this software throws at you initially.
现在,您将了解AfterEffects工作中的一些基本工具。 正如您所经历的,克服此软件最初给您带来的障碍和恐吓并不难。
Why I made a tutorial on a simple transition like so is keeping the very beginners in mind and by no means is this a complete tutorial but a first step if you may. It is safe to say that it would require separate blogs for each of the tools in AfterEffects because each of them is vast although not too difficult to master.
我为什么要像这样的简单过渡制作教程,但要牢记初学者,这绝不是完整的教程,而是您可以迈出的第一步。 可以肯定地说,AfterEffects中的每个工具都需要单独的博客,因为每个工具都很庞大,尽管掌握起来并不困难。
Resources such as YouTube are a great way to visualize your learning. You can also download pre-made templates and work on those to suit your needs. You can find them at https://shareae.com/after-effects-project/
YouTube之类的资源是可视化您的学习的好方法。 您还可以下载预制模板并根据需要进行处理。 您可以在https://shareae.com/after-effects-project/找到它们
To conclude, Adobe AfterEffects is a creator’s tool meaning you have to have the patience and creativity to explore each of its features and tools to make the best out of it.
总而言之,Adobe AfterEffects是创作者的工具,这意味着您必须有耐心和创造力才能探索其每个功能和工具,以充分利用其功能。
翻译自: https://uxdesign.cc/a-beginners-guide-adobe-aftereffects-5874688ce287


 1万+
1万+

 被折叠的 条评论
为什么被折叠?
被折叠的 条评论
为什么被折叠?
 到【灌水乐园】发言


