


ios swift 聊天
In this tutorial, we’ll build encrypted chat on iOS using Swift. We’ll combine Stream Chat and Virgil Security. Both Stream Chat and Virgil make it easy to create a solution with high security with all the features you expect. These two services allow developers to integrate chat that is zero-knowledge. The application embeds Virgil Security’s E3Kit with Stream Chat’s Swift components.
在本教程中,我们将使用Swift在iOS上构建加密聊天。 我们将结合Stream Chat和Virgil Security 。 Stream Chat和Virgil都可以轻松创建具有您期望的所有功能的高安全性解决方案。 这两项服务允许开发人员集成零知识的聊天。 该应用程序将Virgil Security的E3Kit嵌入到Stream Chat的Swift组件中。
Note: All source code for this application is available on GitHub.
注意 :此应用程序的所有源代码都可以在 GitHub上获得 。
什么是端到端加密? (What is end-to-end encryption?)
End-to-end encryption means that two people can have trade messages via the internet without anyone else being able to read them, even if the transmission or storage is compromised. To do this, the app encrypts the message before it leaves a user’s device, and only the intended recipient can decrypt the message.
端到端加密意味着两个人可以通过互联网获得交易信息,而其他人都无法阅读,即使传输或存储受到损害。 为此,应用程序会在消息离开用户设备之前对其进行加密,并且只有目标收件人才能解密消息。
Virgil Security is a vendor that allows us to create end-to-end encryption via public/private key technology. Virgil provides a platform that allows us to create, store, and offer robust end-to-end encryption securely.
Virgil Security是一家供应商,允许我们通过公用/专用密钥技术创建端到端加密。 Virgil提供了一个平台,使我们能够安全地创建,存储和提供强大的端到端加密。
During this tutorial, we will create a Stream Chat app that uses Virgil’s encryption to prevent anyone except the intended parties from reading messages. No one in your company, nor any cloud provider you use, can read these messages. Even if a malicious person gained access to the database containing them, all they would see is encrypted text, called ciphertext.
在本教程中,我们将创建一个使用Virgil加密的Stream Chat应用程序,以防止除目标用户之外的任何人阅读消息。 您公司中的任何人,或者您使用的任何云提供商,都无法阅读这些消息。 即使恶意人员获得了包含它们的数据库的访问权限,他们所看到的只是加密的文本,称为密文。
构建一个加密的聊天应用程序 (Building an Encrypted Chat Application)
To build this application, we’ll mostly rely on a few libraries from Stream Chat and Virgil (please check out the dependencies in the source to see what versions). Our final product will encrypt text on the device before sending a message. Decryption and verification will both happen in the receiver’s device. Stream’s Chat API will only see ciphertext, ensuring our user’s data is never seen by anyone else, including you.
要构建此应用程序,我们将主要依靠Stream Chat和Virgil的一些库(请检查源代码中的依赖项以查看哪个版本)。 我们的最终产品将在发送消息之前对设备上的文本进行加密。 解密和验证都将在接收方的设备中进行。 Stream的Chat API仅能看到密文,确保包括您在内的其他任何人都不会看到我们的用户数据。
To accomplish this, the app performs the following process:
为此,该应用程序执行以下过程:
- A user authenticates with your backend. 用户向您的后端进行身份验证。
The iOS app requests a Stream auth token and API key from the
backend. The Swift app creates a Stream Chat Client for that user.iOS应用程序从
backend请求流身份验证令牌和API密钥。 Swift应用程序为该用户创建一个Stream Chat Client 。The mobile app requests a Virgil auth token from the
backendand registers with Virgil, which generates their private and public key. The app stores the private key locally, and the public key in Virgil Cloud.该移动应用程序从
backend请求Virgil身份验证令牌,并向Virgil注册,后者生成其私钥和公钥。 该应用程序将私钥存储在本地,并将公钥存储在Virgil Cloud中。Once the user decides who they want to chat with, the app creates and joins a Stream Chat Channel.
一旦用户决定要与谁聊天,该应用就会创建并加入流聊天频道 。
- The app asks Virgil’s API, via E3Kit, for the receiver’s public key. 该应用程序通过E3Kit向Virgil的API询问接收者的公共密钥。
- The user types a message and encrypts it with the receiver’s public key using E3Kit, then sends it to Stream. After that, Stream Chat relays the message to the receiver. Stream only receives ciphertext, meaning they will never see the original message. 用户键入一条消息,并使用E3Kit使用接收者的公共密钥对其进行加密,然后将其发送到Stream。 在那之后,Stream Chat将消息中继到接收者。 流仅接收密文,这意味着它们将永远不会看到原始消息。
- When the message is received, the app decrypts and verifies it is using E3Kit and passes it along to Stream Chat’s iOS components for display. 收到消息后,该应用程序将使用E3Kit对其进行解密和验证,并将其传递给Stream Chat的iOS组件进行显示。
While this looks complicated, Stream and Virgil do most of the work for us. We’ll use Stream’s out-of-the-box UI components to render the chat UI and Virgil to do all of the cryptography and key management. We simply combine these services.
尽管这看起来很复杂,但Stream和Virgil为我们完成了大部分工作。 我们将使用Stream的即用型UI组件来呈现聊天UI,而Virgil则用于完成所有加密和密钥管理。 我们只是将这些服务结合在一起。
The code is split between the iOS frontend contained in the ios directory, and the Express (Node.js) backend is found in the backend directory. See the README.md in each directory to see installing and running instructions. If you'd like to follow along with running code, make sure you get both the backend and ios running before continuing.
代码在ios目录中包含的iOS前端和在backend目录中找到Express(Node.js)后端之间进行了拆分。 请参阅每个目录中的README.md以查看安装和运行说明。 如果您想跟随运行的代码,请确保在继续运行之前先运行backend和ios 。
Let’s walk through and look at the critical code needed for each step.
让我们逐步了解每个步骤所需的关键代码。
先决条件 (Prerequisites)
Basic knowledge of iOS (Swift) and Node.js is expected. This code is intended to run locally on your machine.
期望具备iOS(Swift)和Node.js的基本知识。 该代码旨在在您的计算机上本地运行。
You will need an account with Stream and Virgil. Once you’ve created your accounts, you can place your credentials in backend/.env if you'd like to run the code. You can use backend/.env.example as a reference for the required credentials. Please see the README in the backend directory for more information.
您将需要具有Stream和Virgil的帐户。 创建帐户后,如果您想运行代码,则可以将凭据放在backend/.env 。 您可以将backend/.env.example用作所需凭据的参考。 有关更多信息,请参见backend目录中的自述文件。
步骤0。设置后端 (Step 0. Set up the Backend)
For our Swift app to securely interact with Stream and Virgil, the backend provides four endpoints:
为了使我们的Swift应用能够与Stream和Virgil安全地进行交互, backend提供了四个端点:
POST /v1/authenticate: This endpoint generates an auth token that allows the iOS application to communicate with the other endpoints. To keep things simple, this endpoint enables the client to be any user. The frontend tells the backend who it wants to authenticate as. In your application, this should be replaced with real authentication appropriate for your app.POST /v1/authenticate:此端点生成一个auth令牌,该令牌允许iOS应用程序与其他端点进行通信。 为简单起见,此端点使客户端可以成为任何用户。 前端告诉后端它想作为谁进行身份验证。 在您的应用程序中,应将其替换为适合您的应用程序的真实身份验证。POST /v1/stream-credentials: This returns the data required for the iOS app to establish a session with Stream. In order return this info we need to tell Stream this user exists and ask them to create a valid auth token:POST /v1/stream-credentials:这将返回iOS应用程序与Stream建立会话所需的数据。 为了返回此信息,我们需要告诉Stream该用户存在,并要求他们创建有效的身份验证令牌:
The response payload has this shape:
响应有效负载具有以下形状:
apiKeyis the Stream account identifier for your Stream instance. It is needed to identify what account your frontend is trying to connect with.apiKey是您的Stream实例的Stream帐户标识符。 需要确定您的前端试图连接哪个帐户。tokenJWT token to authorize the frontend with Stream.tokenJWT令牌,用于使用Stream授权前端。user: This object contains the data that the frontend needs to connect and render the user's view.user:此对象包含前端连接和呈现用户视图所需的数据。
In this case, the frontend only needs the auth token.
在这种情况下,前端只需要auth令牌。
步骤1.用户通过后端进行身份验证 (Step 1. User Authenticates With Backend)
The first step is to authenticate a user and get our Stream and Virgil credentials. To keep thing simple, we have an insecure form that allows you to log in as anyone:
第一步是对用户进行身份验证,并获取我们的Stream和Virgil凭据。 为简单起见,我们有一个不安全的表格,允许您以任何人的身份登录:
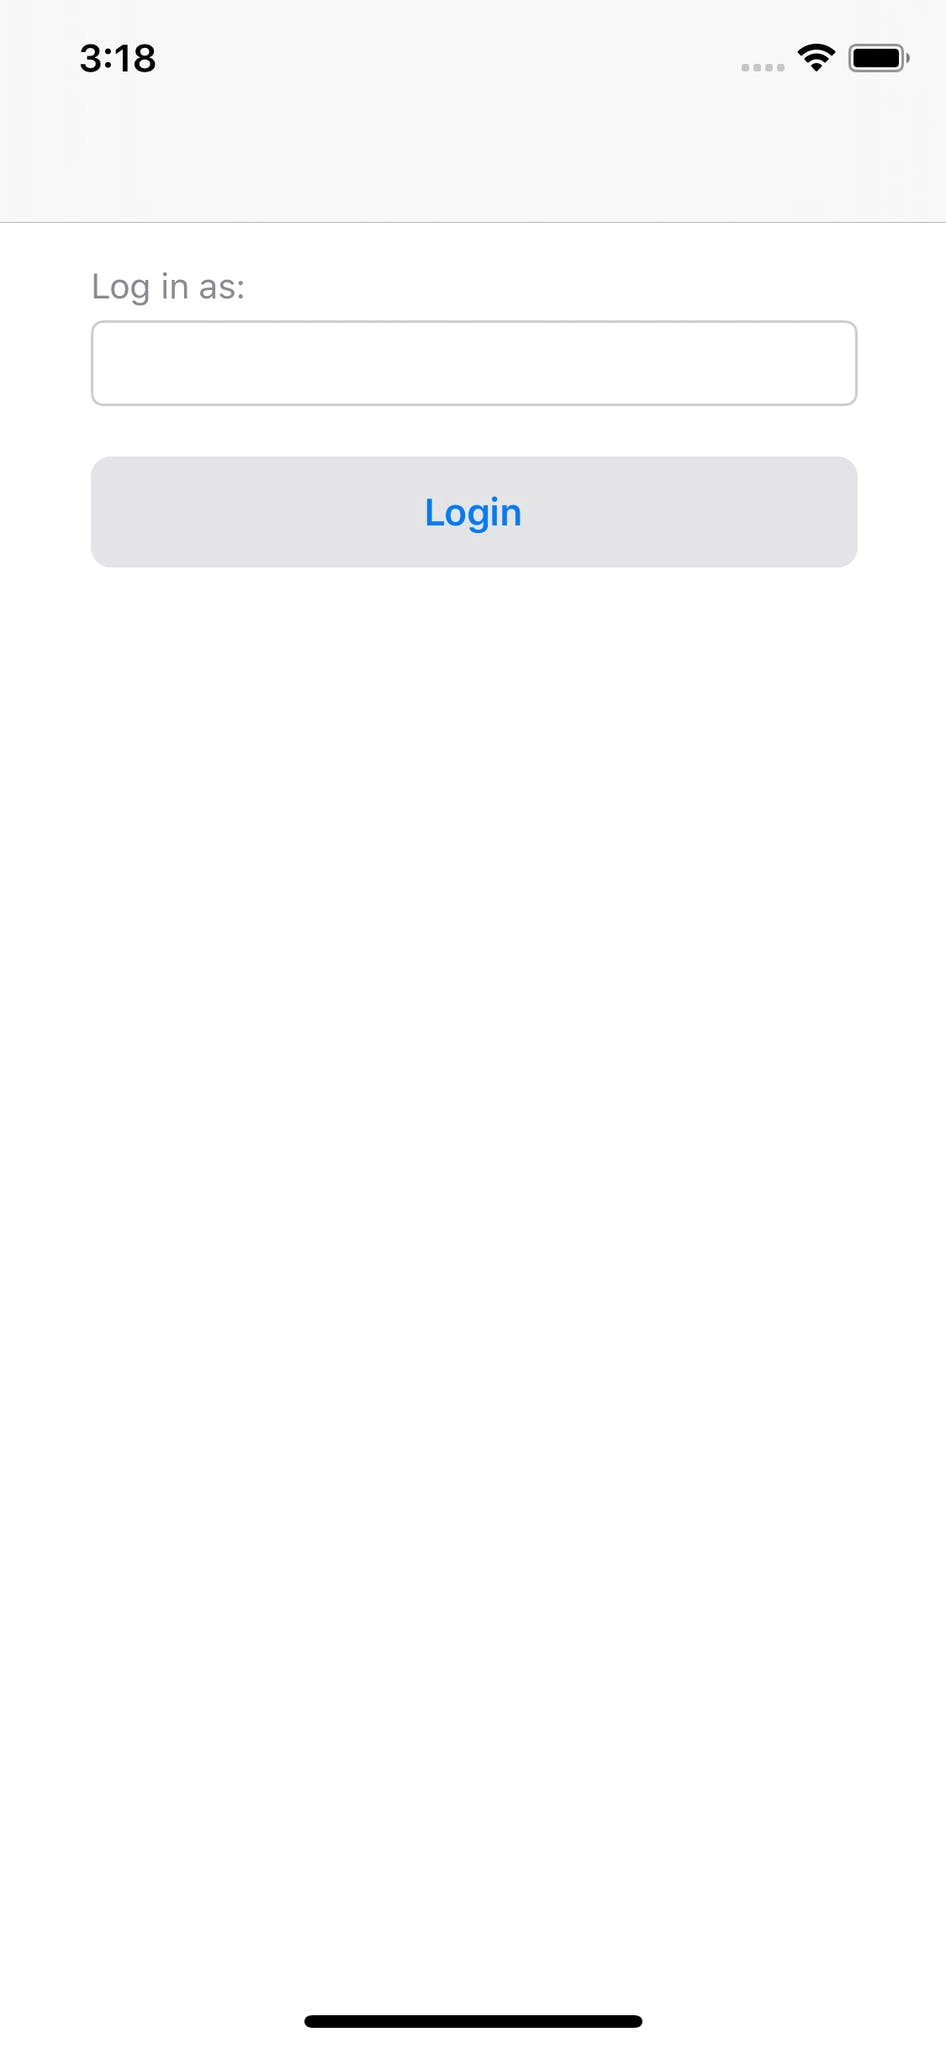
This is a simple form that takes any arbitrary name, effectively allowing us to log in as anyone (please use an appropriate authentication method for your application). First, let’s add to Main.storyboard. We add a "Login View Controller" scene that's backed by a custom controller LoginViewController (to be defined). This controller is embedded in a Navigation Controller. Your storyboard should look something like this:
这是一种简单的形式,可以使用任意名称,有效地允许我们以任何人身份登录(请为您的应用程序使用适当的身份验证方法)。 首先,让我们添加到Main.storyboard 。 我们添加一个“ Login View Controller”场景,该场景由自定义控制器LoginViewController (待定义)支持。 该控制器嵌入在导航控制器中。 您的情节提要应如下所示:
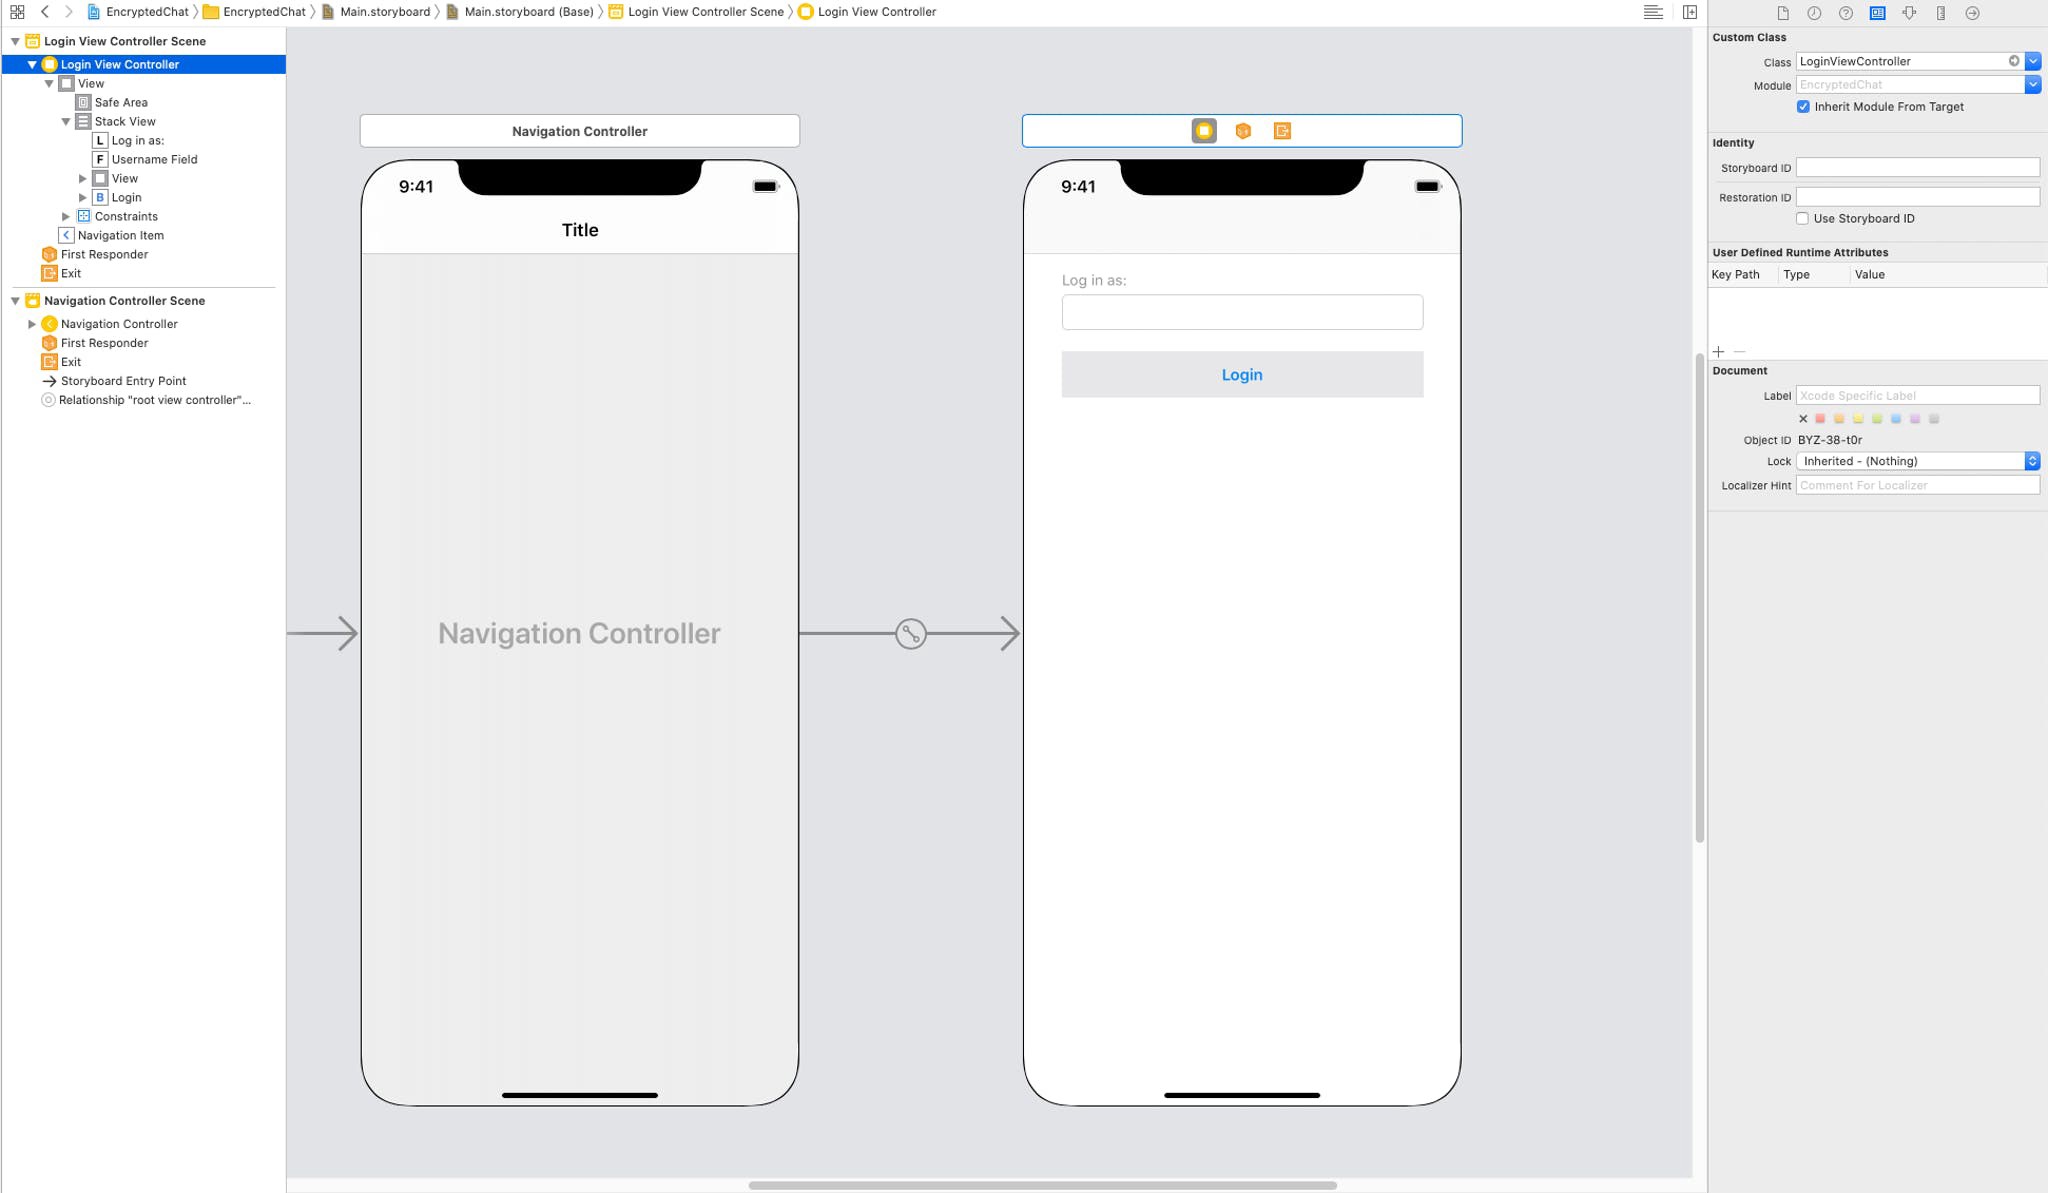
The form is a simple Stack View with a username field and a submit button. Let's look at our custom LoginViewController:
表单是一个简单的Stack View ,带有username段和提交按钮。 让我们看看我们的自定义LoginViewController :
The usernameField is bound to the storyboard's Username Field, and the login method is bound to the Login button. When a user clicks login, we check if there's a username and if so, we log in via Account.shared.login. Account is a shared object that will store our credentials for future backend interactions. Once the user logs in, we initiate the UsersSegue, which boots our next scene. We'll see how this is done in a second, but first, let's see how the Account object logs in.
usernameField绑定到情节提要的Username Field ,而login方法绑定到Login按钮。 当用户单击登录名时,我们检查是否Account.shared.login户名,如果存在,则通过Account.shared.login登录。 Account是一个共享对象,将存储我们的凭据以供将来进行后端交互。 用户登录后,我们将启动UsersSegue ,它将引导下一个场景。 我们将在一秒钟内了解如何完成此操作,但首先,让我们了解Account对象如何登录。
Here’s how we define Account:
这是我们定义Account :
First, we set up our shared object that will store our login state in the authToken and userId properties. Note, apiRoot is the IP address where our backend is running. Please follow the instructions in the backend to run it. Our login method uses Alamofire ( AF) to make a post request to our backend with the user to log in. Upon success, we store the authToken and userId, and then we call setupStream.
首先,我们设置共享对象,该对象将登录状态存储在authToken和userId属性中。 注意, apiRoot是后端运行的IP地址。 请按照backend的说明进行操作。 我们的login方法使用Alamofire( AF )向用户后端发送post请求,以便用户登录。成功后,我们存储authToken和userId ,然后调用setupStream 。
The method setupStream initializes our Stream Chat client. Here's the implementation:
setupStream方法初始化我们的Stream Chat客户端。 这是实现:
We call to the backend with our credentials from login. We get back a token, which is a Stream Chat token. This token allows our mobile application to communicate directly with Stream without going through our backend. We also get an apiKey, which identifies the Stream account we're using. We need this data to initialize our Stream Client instance and set the user. Last, we initialize Virgil via setupVirgil:
我们使用login的凭据调用backend 。 我们取回一个token ,这是一个流聊天令牌。 该令牌使我们的移动应用程序无需通过backend即可直接与Stream通信。 我们还获得了一个apiKey ,它标识了我们正在使用的Stream帐户。 我们需要这些数据来初始化我们的Stream Client实例并设置用户。 最后,我们通过setupVirgil初始化Virgil:
This method requests our Virgil credentials and configures a VirgilClient class we defined, which wraps Virgil's E3Kit library. Once that's done, we call the completion to indicate success and allow the application to move on.
此方法请求我们的Virgil凭据,并配置一个我们定义的VirgilClient类,该类包装了Virgil的E3Kit库。 完成后,我们将调用completion以指示成功并允许应用程序继续运行。
Let’s see what the beginning of our VirgilClient implementation looks like:
让我们看看我们的VirgilClient实现的开始是什么样的:
VirgilClient is a singleton that is set up via configure. We take the identity (which is our username) and token, and then we generate a tokenCallback. The EThree client uses this callback to get a new JWT token. In our case, we've kept it simple by just returning the same token, but in a real application, you'd likely want to replace this with the rest call to the backend.
VirgilClient是通过configure设置的单例。 我们获取identity (这是我们的用户名)和令牌,然后生成一个tokenCallback 。 EThree客户端使用此回调来获取新的JWT令牌。 在我们的例子中,我们通过返回相同的令牌使它保持简单,但是在实际的应用程序中,您可能希望将其替换为对后端的rest调用。
We use this token callback and identity to initialize eThree. We then use this instance to register the user.
我们使用此令牌回调和标识来初始化eThree 。 然后,我们使用该实例注册用户。
Now we’re set up to start chatting.
现在,我们开始聊天。
步骤2:列出使用者 (Step 2: Listing Users)
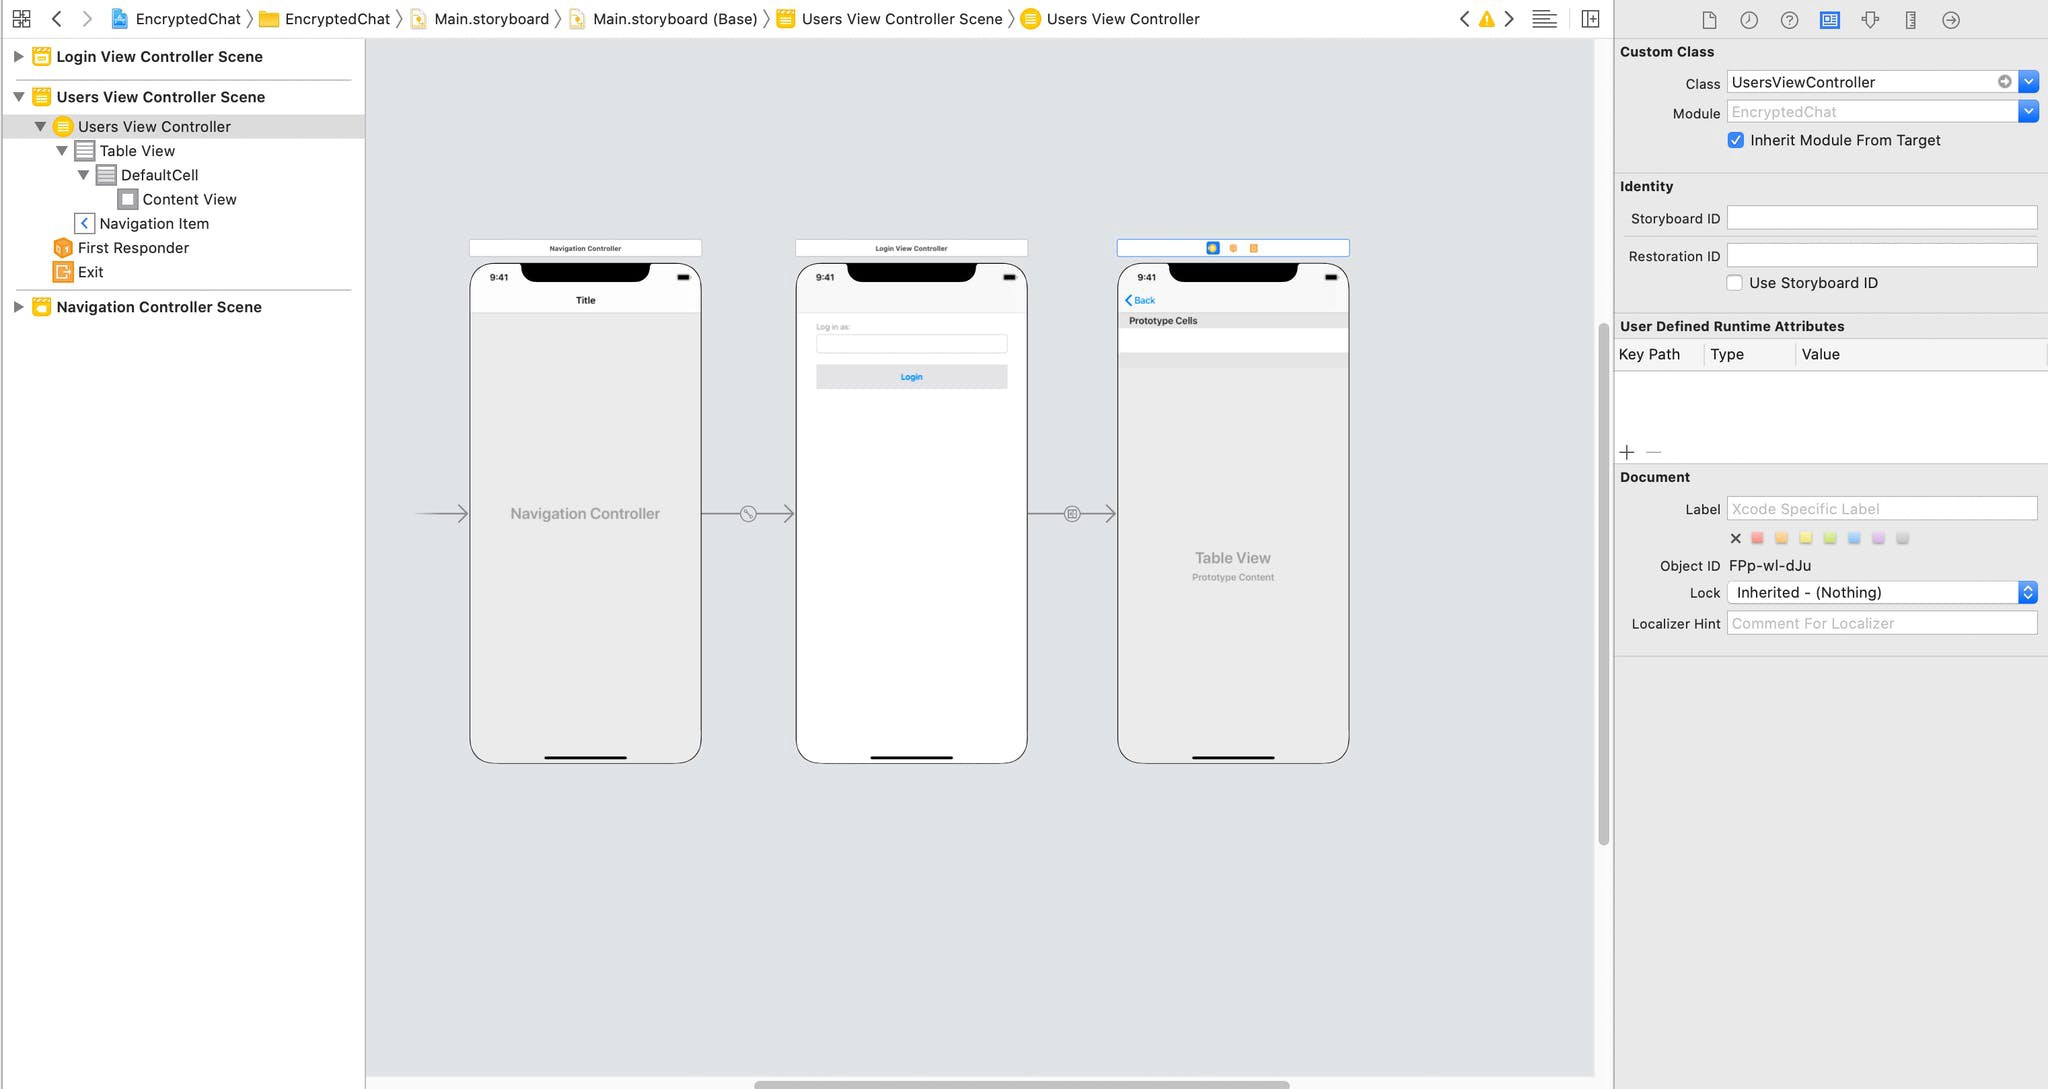
Next, we’ll create a view to list users. In the Main.storyboard we add a UITableView and back it by our custom UsersViewController:
接下来,我们将创建一个视图以列出用户。 在Main.storyboard我们添加一个UITableView并由我们的自定义UsersViewController支持它:
And here are the first few lines of UsersViewController:
这是UsersViewController的前几行:
First, we fetch the users when the view loads. We do this via the Account instance configured during login. This action simply hits the /v1/users endpoint. Refer to the source if you're curious. We store the users in a users property and reload the table view.
首先,我们在加载视图时获取用户。 我们通过登录期间配置的Account实例来执行此操作。 此操作仅命中/v1/users端点。 如果您有好奇心,请参阅源。 我们将用户存储在users属性中,然后重新加载表视图。
Let’s see how we configure the table cells:
让我们看看如何配置表格单元:
To render the table correctly we indicate the number of rows via users.count and set the text of the cell to the user at that index. With this list of users, we can set up a click action on a user's row to start a private 1-on-1 chat with them.
为了正确呈现表,我们通过users.count指示行数,并将该单元格的文本设置为该索引处的用户。 通过此用户列表,我们可以在用户行上设置点击操作,以与他们进行私人的一对一聊天。
步骤3:启动加密的聊天频道 (Step 3: Starting an Encrypted Chat Channel)
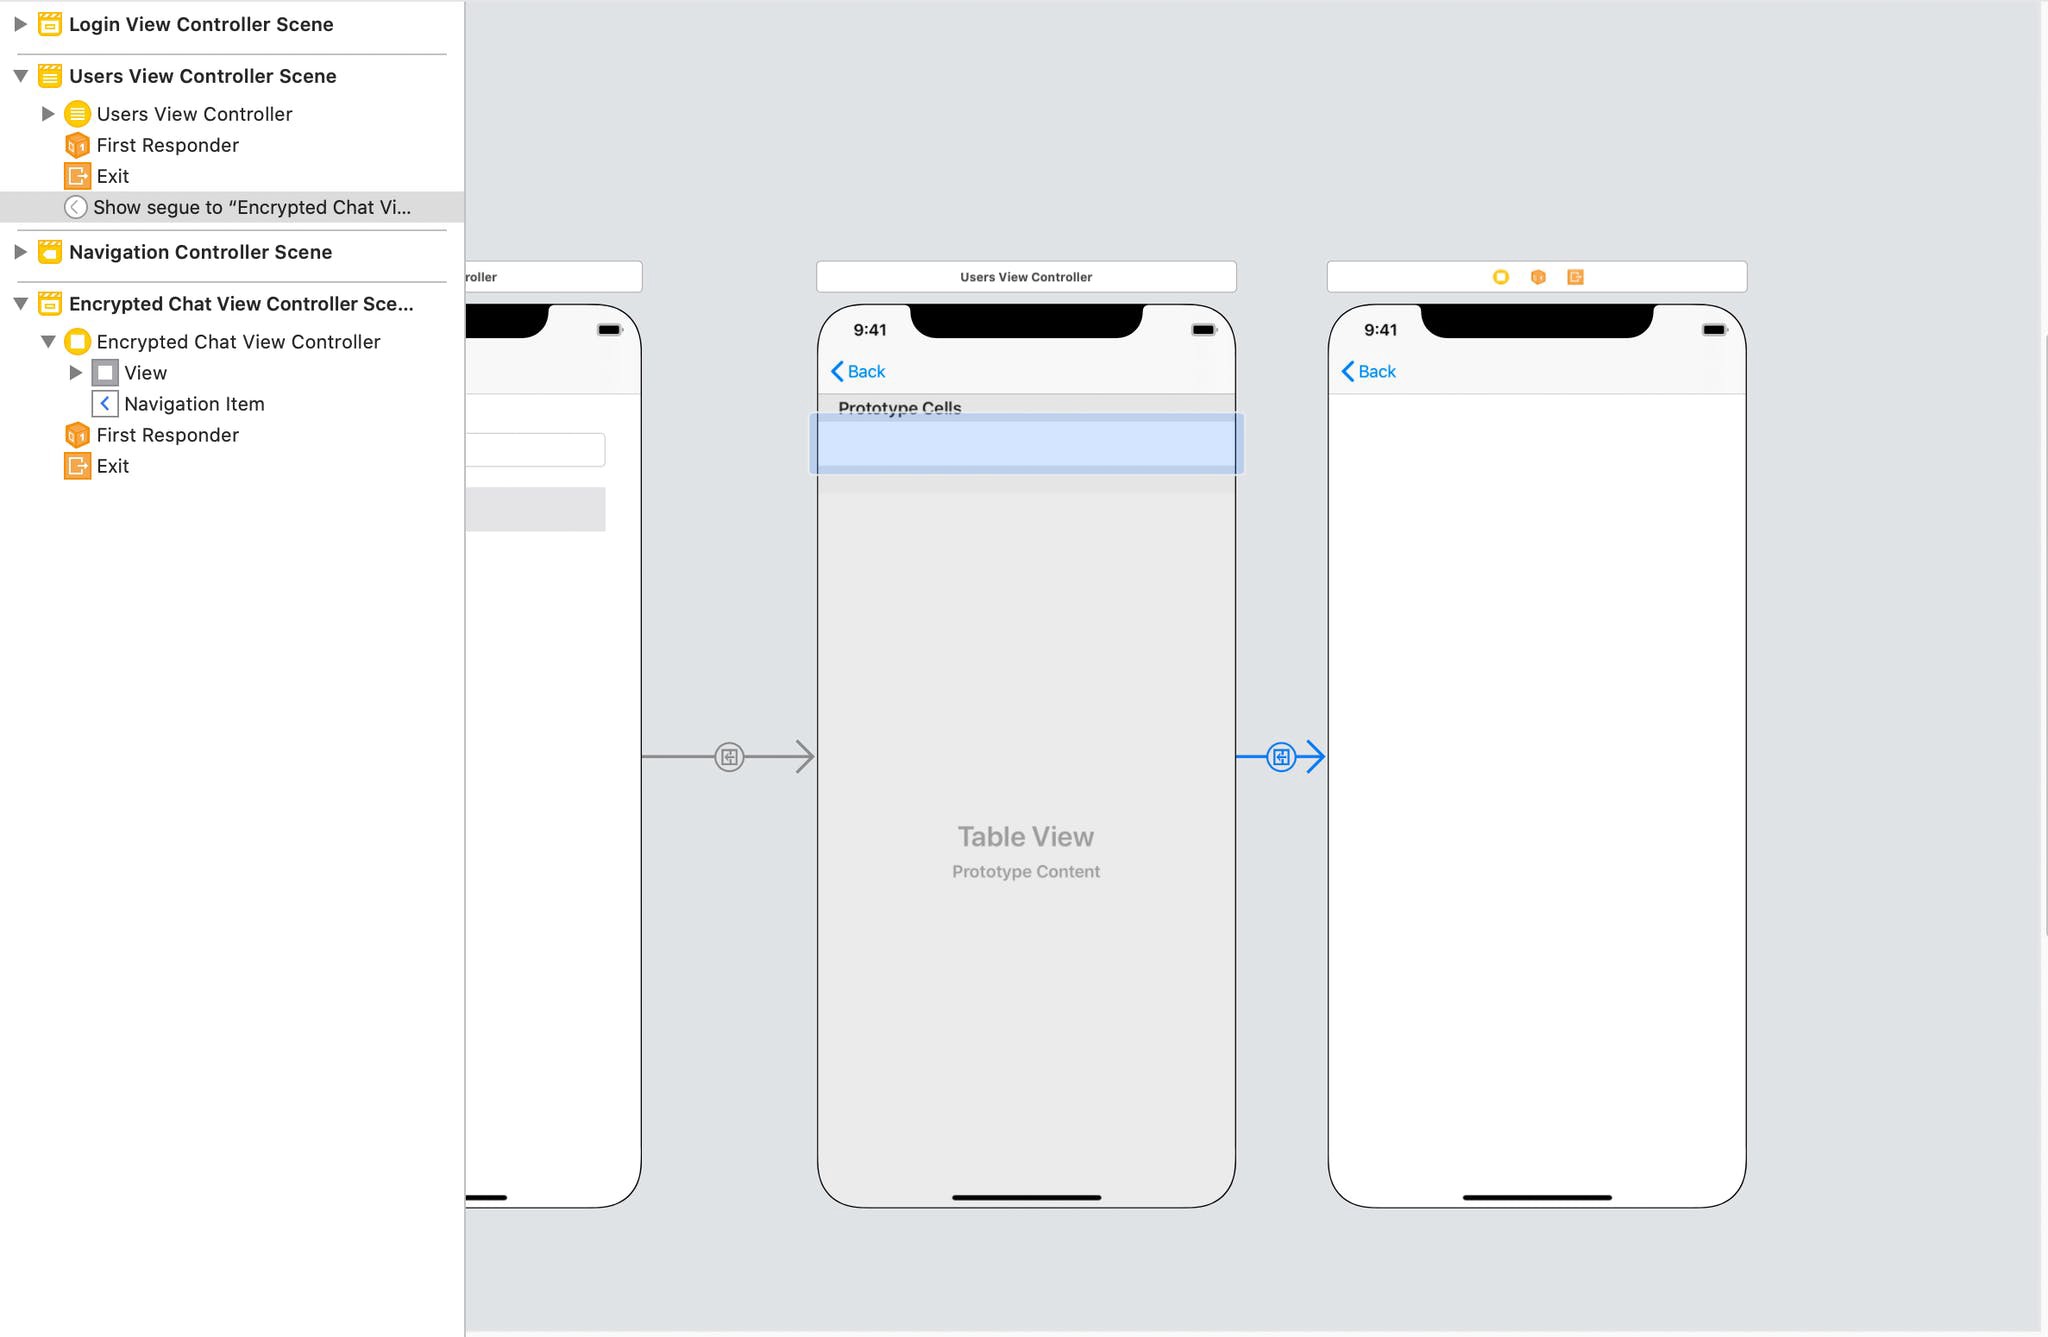
First, add a new blank view to Main.storyboard backed by a new custom class EncryptedChatViewController (we'll see its implementation in a minute):
首先,在Main.storyboard添加一个新的空白视图, Main.storyboard视图以新的自定义类EncryptedChatViewController为后盾(我们将在稍后看到其实现):
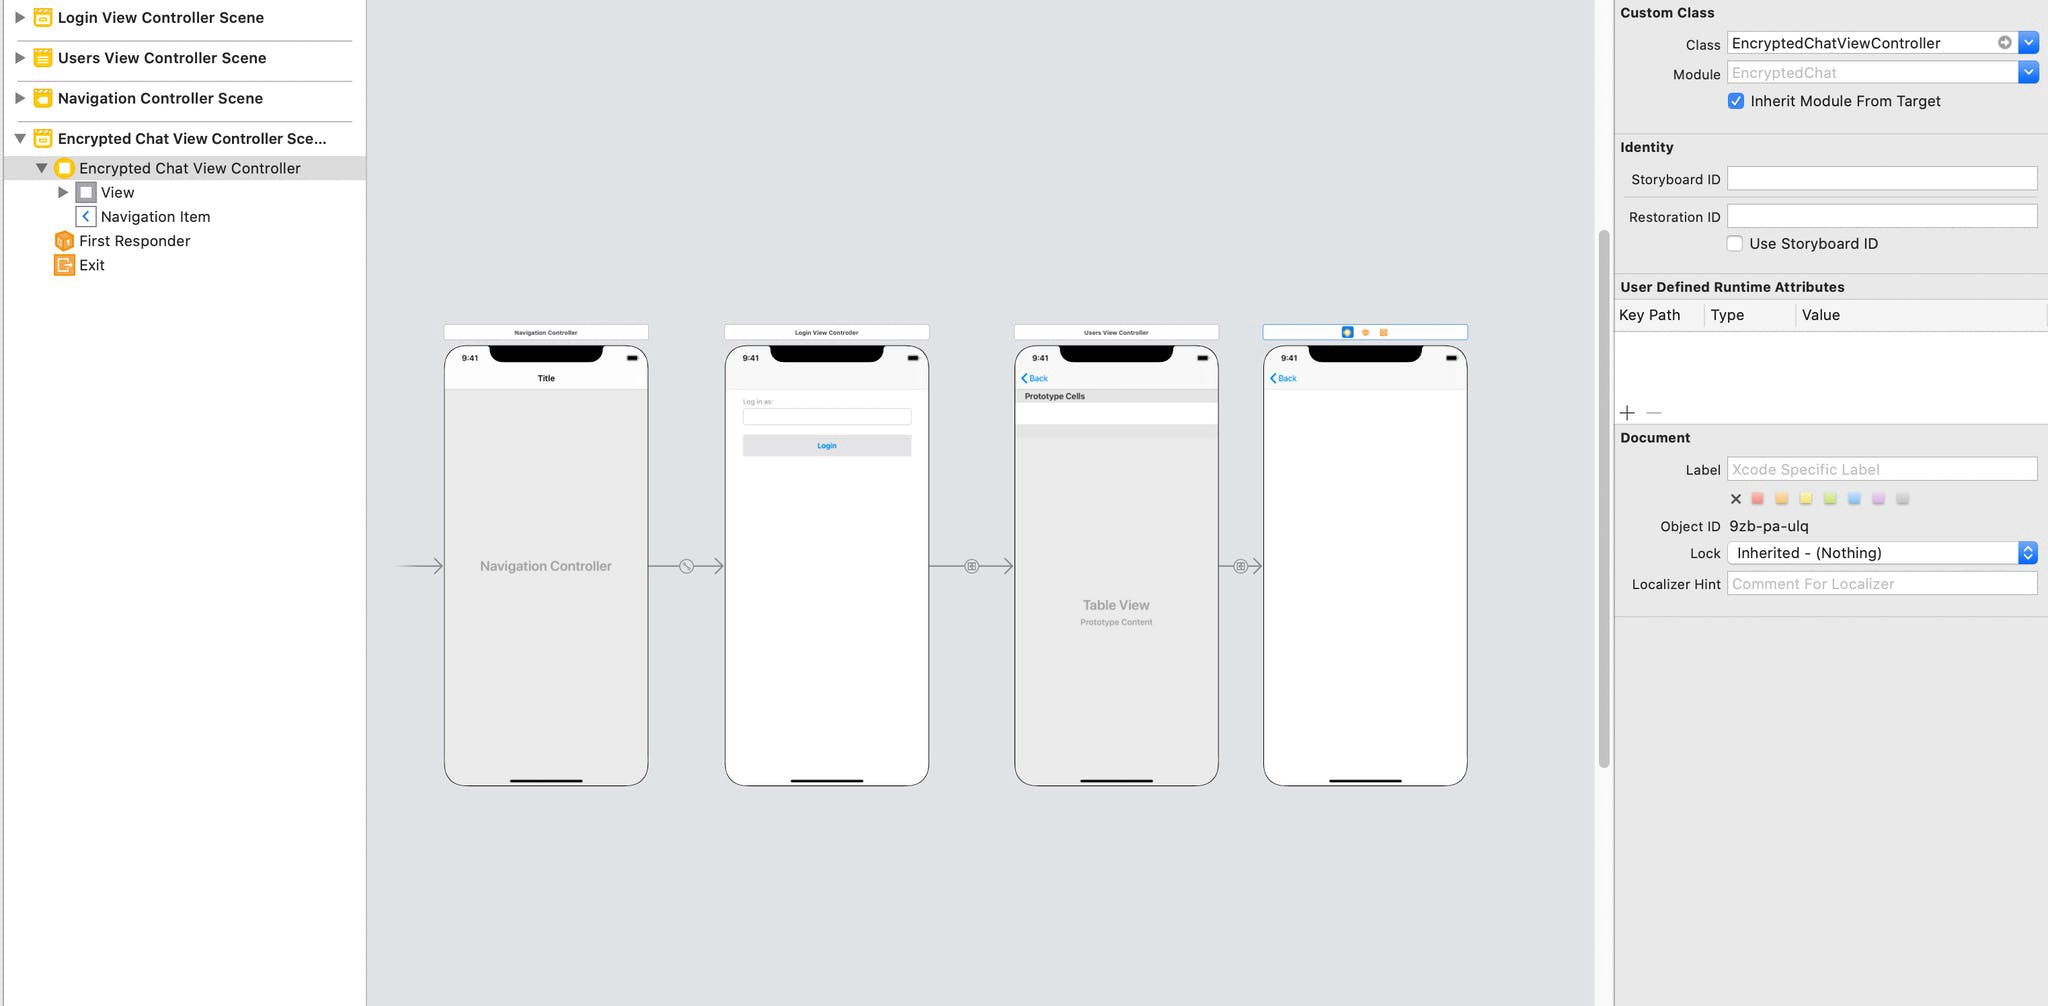
Add a segue between from the user’s table row to show the new controller:
在用户表行之间添加一个序列,以显示新控制器:
With that setup, we can hook into the segue via the UITableViewController's prepare method:
通过该设置,我们可以通过UITableViewController的prepare方法来挂接到segue:
Before transitioning to the new view, we need to set the view controller up. We generate a unique channel id using the user ids. We initialize a ChannelPresenter from the Stream library, set the type to messaging, and restrict the users. We grab the view controller from the segue and back it with the ChannelPresenter. This will tell the controller which channel to use. We also tell it what users are communicating.
在过渡到新视图之前,我们需要设置视图控制器。 我们使用用户ID生成唯一的渠道ID。 我们从Stream库初始化ChannelPresenter ,将类型设置为消息传递,并限制用户。 我们从segue中获取视图控制器,并使用ChannelPresenter其返回。 这将告诉控制器使用哪个通道。 我们还告诉它用户正在交流什么。
Let’s see how the controller creates this view:
让我们看看控制器如何创建此视图:
Luckily, Stream comes with excellent UI components out of the box. We’ll simply inherit from ChatViewController to do the hard work of displaying a chat. The presenter we set up tells the Stream UI component how to render. All we need to do now is hook into the message lifecycle to encrypt and decrypt messages on the fly.
幸运的是,Stream自带了出色的UI组件。 我们将简单地继承自ChatViewController来完成显示聊天的艰苦工作。 我们设置的演示者告诉Stream UI组件如何渲染。 现在我们需要做的就是进入消息生命周期,以动态地加密和解密消息。
步骤4:发送加密的消息 (Step 4: Sending an Encrypted Message)
Now we’re ready to send our first encrypted message. Since we’re using Stream’s built-in UI, all we need to do is hook into the message sending cycle. We’ll do this via the messagePreparationCallback on the ChannelPresenter:
现在,我们准备发送我们的第一条加密消息。 由于我们正在使用Stream的内置UI,因此我们要做的就是挂入消息发送周期。 我们将通过ChannelPresenter上的messagePreparationCallback进行此操作:
Upon loading the view, we set up the callback, which is a hook provided by Stream, to make any modifications we’d like to the message before sending it over the wire. Since we want to encrypt the message fully, we grab it and modify the text with the VirgilClient object.
加载视图后,我们设置了回调(这是Stream提供的一个挂钩),以便在通过网络发送消息之前对消息进行任何修改。 由于我们希望对消息进行完全加密,因此可以抓取消息并使用VirgilClient对象修改文本。
For this to work, we need to look up the public key of the other user. Since this action requires a call to the Virgil API, it’s asynchronous. We don’t want to do this during message preparation, so we do it ahead of time via VirgilClient.shared.prepareUser(otherUser!). Let's see how that method is implemented:
为此,我们需要查找其他用户的公钥。 由于此操作需要调用Virgil API,因此它是异步的。 我们不想在消息准备期间执行此操作,因此我们会提前通过VirgilClient.shared.prepareUser(otherUser!) 。 让我们看看该方法是如何实现的:
This is relatively simple with Virgil’s E3Kit. We find the user’s Card which stores all of the information we need to encrypt and decrypt messages. We'll use this Card in the encrypt method during message preparation:
使用Virgil的E3Kit相对简单。 我们找到了用户Card ,其中存储了加密和解密消息所需的所有信息。 在邮件准备期间,我们将在encrypt方法中使用此Card :
Once again, this is made easy by Virgil. We simply pass the text and the correct user card to authEncrypt, and we're done! Our message is now ciphertext ready to go over the wire. Stream's library will take care of the rest.
再次,维吉尔使这变得容易。 我们只需将文本和正确的用户卡传递给authEncrypt ,我们就完成了! 现在,我们的消息已成为密文,随时可以通过网络发送。 Stream的图书馆将负责其余的工作。
步骤5:解密邮件 (Step #5: Decrypting a Message)
Since we’re using the ChatViewController to render the view, we only need to hook into the cell rendering. We need to decrypt the message text and pass it along. We override the messageCell method:
由于我们使用的是ChatViewController来渲染视图,因此我们只需要挂接到单元格渲染即可。 我们需要解密消息文本并将其传递。 我们重写messageCell方法:
We make a copy of the message and set the message’s text to the decrypted value. In this case, we need to know if it’s our message or theirs. First, we’ll look at how to decrypt ours:
我们将复制消息并将消息的文本设置为解密值。 在这种情况下,我们需要知道这是我们的信息还是他们的信息。 首先,我们来看看如何解密我们的:
Since the message was encrypted initially on the device, we have everything we need. We simply ask Virgil E3Kit to decrypt it via authDecrypt. Decrypting the other user's messages is a bit more work:
由于消息最初是在设备上加密的,因此我们拥有了所需的一切。 我们只要求Virgil E3Kit通过authDecrypt将其解密。 解密其他用户的消息需要做更多的工作:
In this case, we use the same method, but we pass the user card that we retrieved earlier, which verifies the message’s authenticity. Now we can see our full chat:
在这种情况下,我们使用相同的方法,但是会传递之前检索到的用户卡,以验证消息的真实性。 现在我们可以看到完整的聊天记录:
And that’s all. We now have an application that uses end-to-end encryption to protect a user’s conversation. Happy coding.
就这样。 现在,我们有了一个使用端到端加密来保护用户对话的应用程序。 快乐的编码。
翻译自: https://medium.com/swlh/encrypted-chat-on-ios-swift-593131b40658
ios swift 聊天


 1万+
1万+

 被折叠的 条评论
为什么被折叠?
被折叠的 条评论
为什么被折叠?
 到【灌水乐园】发言


