


apache spark
Apache Spark is one of the most popular platforms for distributed data processing and analysis. Although it is associated with a server farm, Hadoop and cloud technologies, you can successfully launch it on your machine. In this entry you will learn several ways to configure the Apache Spark development environment.
Apache Spark是用于分布式数据处理和分析的最受欢迎的平台之一。 尽管它与服务器场,Hadoop和云技术相关联,但是您可以在计算机上成功启动它。 在本条目中,您将学习配置Apache Spark开发环境的几种方法。
Assumptions
假设条件
The base system in this case is Ubuntu Desktop 20.04 LTS.
在这种情况下,基本系统是Ubuntu Desktop 20.04 LTS。
火花壳 (spark-shell)
The first way is to run Spark in the terminal. Let’s start by downloading Apache Spark. You can download it here. After downloading, we have to unpack the package with tar.
第一种方法是在终端中运行Spark。 让我们从下载Apache Spark开始。 你可以在这里下载。 下载后,我们必须用tar解压缩软件包。
wget ftp://ftp.task.gda.pl/pub/www/apache/dist/spark/spark-3.0.0/spark-3.0.0-bin-hadoop3.2.tgz
tar zxvf spark-3.0.0-bin-hadoop3.2.tgz
Apache Spark is written in Scala, which means that we need a Java Virtual Machine (JVM). For Spark 3.0 it will be Java 11.
Apache Spark用Scala编写,这意味着我们需要一个Java虚拟机(JVM)。 对于Spark 3.0,它将是Java 11。
sudoNow all you have to do is go into the bin directory and run spark-shell
现在您要做的就是进入bin目录并运行spark-shell

If you need a library (e.g. you want to download data from MySQL, do something about it and save it elsewhere), you can attach the jars manually ( — jars) or download them from the maven repository ( — packages).
如果您需要一个库(例如,您想从MySQL下载数据,执行一些操作并将其保存在其他位置),则可以手动附加jar(— jar)或从maven存储库(—软件包)下载它们。
./spark-shellpyspark (pyspark)
In spark-shell we write in Scala, if you prefer Python, your choice will be PySpark.
在Spark Shell中,我们用Scala编写,如果您喜欢Python,则选择PySpark。
There is no Python in the system, so we’ll do a trick. We will install pip3, and the Python will be installed as a dependency 🙂.
系统中没有Python,因此我们将做一个技巧。 我们将安装pip3,Python将作为依赖项安装。
sudoBut it turns out that it’s not enough. Pyspark doesn’t find the variable python.
但是事实证明,这还不够。 Pyspark找不到变量python。
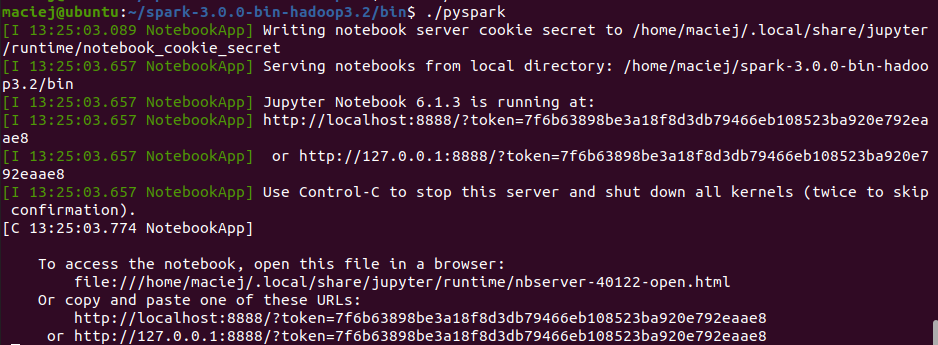
maciej@ubuntu:~/spark-3.0.0-bin-hadoop3.2/bin$ ./pyspark
env: ‘python’: No such file or directory
We need to indicate the Python version using an environmental variable.
我们需要使用环境变量来指示Python版本。
exportNow the pyspark starts in the terminal.
现在,pyspark在终端中启动。

Jupyter Notebook中的pyspark (pyspark in Jupyter Notebook)
Most people using Python, more than a terminal, prefer notebooks. The most popular is Jupyter Notebook. Let’s install it. We’ll use a pip3 and then add the /.local/bin folder to the path.
大多数使用Python而不是终端的人都喜欢笔记本。 最受欢迎的是Jupyter Notebook。 让我们安装它。 我们将使用pip3,然后将/.local/bin文件夹添加到路径。
pip3 install notebook
export PATH=$PATH:~/.local/bin
When you add the following environmental variables…
当您添加以下环境变量时...
export PYSPARK_DRIVER_PYTHON="jupyter"
export PYSPARK_DRIVER_PYTHON_OPTS="notebook"
…Jupyter Notebook will automatically launch together with the pyspark.
…Jupyter Notebook将与pyspark一起自动启动。
If you need to add a library, use the environment variable below.
如果需要添加库,请使用下面的环境变量。
exportJupter Notebook中的spylon(scala) (spylon (scala) in Jupter Notebook)
However, if you prefer to use Scala, there is an option with spylon kernel. The installation is as follows:
但是,如果您更喜欢使用Scala,则可以使用spylon内核。 安装如下:
pip3 install spylon-kernel
python3 -m spylon_kernel install --user
Then set the environment variable SPARK_HOME.
然后设置环境变量SPARK_HOME。
exportNow we have access to the spylon-kernel in the jupiter notebook.
现在,我们可以访问木星笔记本中的spylon内核。


If you need specific packages or configuration, use %%init_spark
如果需要特定的程序包或配置,请使用%% init_spark

IntelliJ IDEA中的项目 (Project in IntelliJ IDEA)
You’ll need the Scala plugin.
您将需要Scala插件。

We are creating a new Scala -> sbt project.
我们正在创建一个新的Scala-> sbt项目。

We choose Scala 2.12 and JDK. I’ve chosen Amazon Corretto 11.
我们选择Scala 2.12和JDK。 我选择了Amazon Corretto 11。

Let’s add the necessary packages to the build.sbt file.
让我们将必要的软件包添加到build.sbt文件中。
libraryDependencies ++= Seq(
  "org.apache.spark" %% "spark-core" % "3.0.0",
  "org.apache.spark" %% "spark-sql" % "3.0.0"
)
After loading the changes by sbt we can start writing applications in the Spark. Create an object in src/main/scala path and start coding 😎.
通过sbt加载更改后,我们可以开始在Spark中编写应用程序。 在src / main / scala路径中创建一个对象,然后开始编码😎。
import org.apache.spark.sql._

object MyAwesomeApp {
  def main(args: Array[String]) {

    val spark = SparkSession
      .builder
      .appName("MyAwesomeApp")
      .master("local[*]")
      .getOrCreate()

    import spark.implicits._

    val df = Seq(
      ("x", 4),
      ("y", 2),
      ("z", 5)
    ).toDF("some_id", "some_int")

    df.show()
  }
}
翻译自: https://itnext.io/how-to-set-up-local-apache-spark-environment-5-ways-62910fa0e8ad
apache spark


 546
546

 被折叠的 条评论
为什么被折叠?
被折叠的 条评论
为什么被折叠?
 到【灌水乐园】发言


