


android入门
Text, probably the most basic element you get to work with on Android, and sometimes we have to format certain parts of our text. Formatting helps place emphasis on text, indicating that the formatted parts of text mean more when compared to plain parts. Formatting options include underline, bold, italics, strikethrough and many more. Android provides a number of options to its’ developers when it comes to formatting text. A direct approach is by using HTML markup to define sections of our text to be formatted, tags like the <u> — underline, <b> — bold and <i> — italics do just that. Android properly helps us convert the markup provided into nicely formatted text.
T外部,可能你工作与Android,有时候我们必须格式化我们的文本的某些部分的最基本元素。 格式设置有助于重点放在文本上,这表明与普通部分相比,文本的格式化部分的意义更大。 格式选项包括下划线,粗体,斜体,删除线等。 在设置文本格式时,Android为开发人员提供了许多选项。 一种直接方法是使用HTML标记来定义要格式化的文本部分,而<u> -下划线, <b> -粗体和<i> -斜体之类的标签就是这样做的。 Android可以正确地帮助我们将提供的标记转换为格式正确的文本。
使用XML (Using XML)
<resources>
   <string name=”formatted_text”>This text is <b>bold<b> and this is       <u>underlined</u>
   </string>
</resources>
或代码 (Or Code)
val text = "This text is <b>bold<b> and this is <u>underlined</u>" myTextView.text = Html.fromHtml(text, HTML.FROM_HTML_MODE_LEGACY)我们有一个很棒的格式化选项,不是吗? 但这还不是格式化的全部。 (We have an awesome option for formatting, don’t we? but that’s not all there is to formatting.)
Formatting is the arrangement of a material in a particular layout, shape, size and general makeup — Merriam-Webster
格式化是指材料按照特定的布局,形状,大小和一般组成的排列方式– Merriam-Webster
Formatting goes beyond boldening or underlining text, we have a pool of design possibilities we can replicate. For example, we might want to set the colour of a fraction of our text differently or its size or its background, whatever. These designs are achievable using spannables without having to worry about too much.
格式不仅限于加粗或加下划线的文本,还有许多可以复制的设计可能性。 例如,我们可能想以不同的方式设置文本的一部分的颜色,大小或背景(无论如何)。 使用跨度可以实现这些设计,而不必担心太多。
我们的第一个跨度 (Our First Spannable)
To get started, create a new android studio project with your preferred project name and add this to the activity_main.xml. In the code below, we have a parent LinearLayout and five textviews. Android treats spannables like basic text so we can easily set the formatted text to the textviews, hence the usage of textviews.
首先,使用您喜欢的项目名称创建一个新的android studio项目,并将其添加到activity_main.xml 。 在下面的代码中,我们有一个父级LinearLayout和五个textview。 Android将跨越式对象视为基本文本,因此我们可以轻松地将格式化后的文本设置为textview,从而使用textview。
<?xml version="1.0" encoding="utf-8"?>
<LinearLayout xmlns:android="http://schemas.android.com/apk/res/android"
    xmlns:app="http://schemas.android.com/apk/res-auto"
    xmlns:tools="http://schemas.android.com/tools"
    android:layout_width="match_parent"
    android:layout_height="match_parent"
    android:padding="16dp"
    android:orientation="vertical"
    tools:context=".MainActivity">


    <TextView
        android:layout_width="match_parent"
        android:layout_height="wrap_content"
	android:id="@+id/bold_text"
        tools:text="Hey there!"
	android:textColor="@android:color/black"
	android:textSize="28sp" />


    <TextView
	android:layout_width="match_parent"
	android:layout_height="wrap_content"
	android:id="@+id/foreground_text"
        tools:text="Hey there!"
	android:textColor="@android:color/black"
	android:textSize="28sp" />


    <TextView
	android:layout_width="match_parent"
	android:layout_height="wrap_content"
	android:id="@+id/foreground_and_background_text"
	android:textColor="@android:color/black"
        tools:text="Hey there!"
	android:textSize="28sp" />


    <TextView
	android:layout_width="match_parent"
	android:layout_height="wrap_content"
	android:id="@+id/sizing_text"
        tools:text="Hey there!"
	android:textColor="@android:color/black"
	android:textSize="28sp" />


    <TextView
	android:layout_width="match_parent"
	android:layout_height="wrap_content"
	android:id="@+id/sizing_bigger_text"
        tools:text="Hey there!"
	android:textColor="@android:color/black"
	android:textSize="28sp" />


     <TextView
	  android:layout_width="match_parent"
	  android:layout_height="wrap_content"
	  android:id="@+id/builder_text"
          tools:text="Hey there!"
	  android:textColor="@android:color/black"
	  android:textSize="28sp" />


</LinearLayout>
In the layout above, we created five TextViews to hold differently formatted text, we’d go through them one after the other, starting with the bold format. But before that, let’s take a moment to understand the general structure of how spannables are set up and how the formatting takes place.
在上面的布局中,我们创建了五个TextView来容纳格式不同的文本,我们将依次从黑体开始对其进行遍历。 但是在此之前,让我们花一点时间来了解如何设置跨度以及格式化如何进行的一般结构。
跨度如何设置? (How are spannables set up?)
When it comes to using Spannables, we can create them in three ways. By using any of the SpannedString, SpannableString and the SpannableStringBuilder classes. Each of these classes has features that differentiate them, the differences are outlined below.
在使用Spannables时 ,我们可以通过三种方式创建它们。 通过使用SpannedString , SpannableString和SpannableStringBuilder类中的任何一个。 这些类别中的每一个都具有使它们与众不同的功能,以下概述了这些差异。
SpannedString — This class does not allow modifications to the text set into the Spannable. No modifications to the text and no modifications to the design (the spans). In other words, it’s immutable.
SpannedString — 此类不允许修改Spannable中的文本集。 无需修改文本,也无需修改设计(跨度)。 换句话说,它是不可变的。
SpannableString — This class allows for modifications of the design/styles added to the text, but no direct modification of the text used by the Spannable.
SpannableString — 此类允许修改添加到文本的设计/样式,但不能直接修改Spannable使用的文本。
SpannableStringBuilder — This class allows for modifications to the text itself and its designs.
SpannableStringBuilder — 此类允许修改文本本身及其设计。
The key takeaway here can be summarised as such:
这里的关键要点可以总结为:
Use SpannedString when you want to set the text and design once without any further modifications, SpannableString when you won’t be making any changes to the text but to the design and SpannableStringBuilder when you’d be making changes to both the underlying text and the design.
如果您想一次设置文本并进行设计而不进行任何进一步的修改,请使用SpannedString;如果您不想对文本进行任何更改,而对设计进行任何更改,请使用SpannableString;而当对基础文本和文本进行更改时,请使用SpannableStringBuilder。设计。
可扩展格式 (Format For Spannables)
Now that we have a clear view of the types of spans we can use, let’s dig deeper into their general structure. Spannables you’d use in the future generally come in this fashion:
现在,我们对可以使用的跨度类型有了清晰的了解,让我们更深入地研究其一般结构。 您将来使用的Spanable通常以这种方式出现:
spannableObject.setSpan(Object what, int startIndex, int endIndex, int flags)Our spannable object provides a setSpan method we can use to apply different span styles to sections of our text. It takes in four arguments, let’s dive in!
我们的spannable对象提供了setSpan方法,可用于将不同的span样式应用于文本的各个部分。 它包含四个参数,让我们深入探讨!
what — This refers to the actual span style we would be applying, think of it as an object that instructs our spannable to apply a certain style to the text.
什么 - 这是指我们将要应用的实际跨度样式,将其视为指示我们的跨度将某种样式应用于文本的对象。
startIndex — Remember our spannables deal with text? Right. The startIndex parameter denotes the index where the text to be formatted begins. Say the text to be formatted is thyself in steady thyself, we could deduce that the startIndex for this text is 7.
startIndex — 还记得我们的spannable处理文本吗? 对。 startIndex参数表示要格式化的文本开始的索引。 说要格式化的文本是 你自己 在 你自己稳定 ,我们可以推断出的startIndex此文为7。
endIndex — This does pretty much the opposite of what the startIndex does, it denotes the index of the character that ends the text to be formatted. Using our example from our startIndex explanation, our endIndex is the index of the letter f in thyself, so that would make it 13.
endIndex — 与startIndex的功能几乎相反,它表示结束要格式化的文本的字符的索引。 使用startIndex解释中的示例,endIndex是字母 f 在您 自己中 的索引 ,因此将其 设为 13。
flags — This indicates how the text provided to the spannables should be treated, we have various values that can be assigned to this parameter position, examples are SPAN_EXCLUSIVE_EXCLUSIVE, SPAN_EXCLUSIVE_INCLUSIVE, SPAN_INCLUSIVE_INCLUSIVE and many more. A detailed explanation is provided below.
标志 - 这表明如何提供给spannables文本应及时治疗,我们有可分配给该参数位置上的各种值,例子是 SPAN_EXCLUSIVE_EXCLUSIVE,SPAN_EXCLUSIVE_INCLUSIVE,SPAN_INCLUSIVE_INCLUSIVE 等等。 下面提供了详细说明。
可扩展标志 (Spannable Flags)
As explained above, spannable flags indicate how the Spanning process should treat the text to be spanned. Some of the flags we can use are explained below.
如上所述,spannable标志指示的跨越过程中应如何对待文本被跨越。 我们将在下面说明一些可以使用的标志。
SPAN_INCLUSIVE_INCLUSIVE: This allows new text to be added to both the starting and end points of the text.
SPAN_INCLUSIVE_INCLUSIVE: 这允许将新文本添加到文本的起点和终点。
SPAN_INCLUSIVE_EXCLUSIVE: This allows new text to be added to the starting point, but not to the end.
SPAN_INCLUSIVE_EXCLUSIVE: 这允许将新文本添加到起点,但不能添加到结尾。
SPAN_EXCLUSIVE_INCLUSIVE: This does not allow text to be added to the starting point, but the end.
SPAN_EXCLUSIVE_INCLUSIVE: 这不允许将文本添加到起点,但要添加到终点。
SPAN_EXCLUSIVE_EXCLUSIVE: This does not allow text to be added to the start and end points of the text.
SPAN_EXCLUSIVE_EXCLUSIVE: 这不允许将文本添加到文本的起点和终点。
You can read about other span flags here, since we have covered the general structure of applying spans, and dug deep into it’s required parameters, this seems like a good time to write our first span.
您可以在此处了解其他span标志,因为我们已经介绍了应用span的一般结构,并深入研究了其必需的参数,这似乎是编写第一个span的好时机。
大胆的跨度 (The Bold Span)
Let’s start by retrieving a reference to a TextView in our layout, and then setting up a function to apply the spanning. We do that by writing:
让我们首先在布局中检索对TextView的引用,然后设置一个函数来应用跨接。 我们通过写:
class MainActivity : AppCompatActivity {


	private lateinit var boldTextView: TextView


	override fun onCreate(savedInstanceState: Bundle) {
		boldTextView = findViewById(R.id.bold_text_view)
		setBoldSpan()
	}


	private fun setBoldSpan() {
	}


}
This serves as a good starting point for us, and we can now get right to formatting.
这对我们来说是一个很好的起点,现在我们可以正确进行格式化了。
private fun setBoldSpan() {
  val text = "This is a bold text"
  val spannedText = "bold"
  val boldSpannableText = SpannableString(text)


  val startIndex = boldSpannableText.indexOf("bold") // get the startindex of the text to be spanned
  val amountOfCharacters = 4 // 4 letters of the bold text


  boldSpannableText.setSpan(
      StyleSpan(Typeface.BOLD), startIndex, startIndex + amountOfCharacters, Spannable.SPAN_EXCLUSIVE_EXCLUSIVE
  )
  boldTextView.text = boldSpannableText
}
We start by creating a string variable to hold the whole text to be set in the TextView, since we would not be formatting all of the text, we also need to get the exact text to be formatted, in this case a variable with the string “bold”. We’ve got that on check, now we have to construct the actual SpannableString object, we do this by invoking the SpannableString constructor and passing the whole text as an argument. This tells the SpannableString object that this is text we would be applying formatting options to.
我们首先创建一个字符串变量来保存要在TextView设置的整个文本,因为我们不会格式化所有文本,因此我们还需要获取要格式化的确切文本,在这种情况下,需要使用字符串变量“胆大”。 我们已经检查了一下,现在我们必须构造实际的SpannableString对象,方法是调用SpannableString构造函数,然后将整个文本作为参数传递。 这告诉SpannableString对象这是文本,我们将对其应用格式设置选项。
Looking back at our setSpan method, we need to pass in the start and end indexes of the text to be formatted, we want to format the text “bold”, so we have to get the startIndex of that text, we do that, and assign it’s value to the startIndex variable, we do something similar to the endIndex, this would be startIndex added to the amount of characters of the text to be formatted — 4. After this, we SET THE SPAN!
回顾我们的setSpan方法,我们需要传入要格式化的文本的开始索引和结束索引,我们要格式化文本“ bold”,因此我们必须获取该文本的startIndex ,然后执行此操作,然后将其值分配给startIndex变量,我们执行类似于endIndex ,这将是startIndex添加到要格式化的文本的字符数中-4。然后,设置跨度!
To apply style spans to text, we use the StyleSpan constructor. We want to apply the bold effect right?, so we employ the Typeface.BOLD effect. By doing this, we apply the bold effect to the spanned text. Other formatting options that can be added are Typeface.ITALICS and Typeface.BOLD_ITALICS. We pass in the start and end index together with the appropriate flag, and we set the text in the TextView to the created spannable. We then come up with this!
要将样式范围应用于文本,我们使用StyleSpan构造函数。 我们要应用粗体效果吗?,因此我们使用Typeface.BOLD效果。 通过这样做,我们将粗体效果应用到了跨文本。 可以添加的其他格式设置选项是Typeface.ITALICS和Typeface.BOLD_ITALICS 。 我们将开始索引和结束索引以及适当的标志一起传递,并将TextView的文本设置为创建的spannable。 然后我们提出这个!

前景跨度 (The Foreground Span)
We follow the same approach as before in getting a reference to the TextView and creating a method to setup the foreground span effect.
在获取对TextView的引用并创建用于设置前景跨度效果的方法时,我们采用与以前相同的方法。
class MainActivity : AppCompatActivity {


	private lateinit var foregroundTextView: TextView


	override fun onCreate(savedInstanceState: Bundle) {
		foregroundTextView = findViewById(R.id.foreground_text_view)
		setForegroundSpan()
	}


	private fun setForegroundSpan() {
	}


}
Let’s apply the span, yeah!
让我们应用跨度,是的!
private fun setForegroundSpan() {


  val text = "A part of this text would be set to color red"
  val foregroundSpannableText = SpannableString(text)


  var startIndex = foregroundSpannableText.indexOf("part of this text")
  var amountOfCharacters = "part of this text".length


  foregroundSpannableText.setSpan(
	ForegroundColorSpan(Color.RED), startIndex, startIndex + amountOfCharacters, Spannable.SPAN_EXCLUSIVE_EXCLUSIVE
  )


  startIndex = foregroundSpannableText.indexOf("red")
  amountOfCharacters = 3 // length of "red"


  foregroundSpannableText.setSpan(
      ForegroundColorSpan(Color.RED), startIndex, startIndex  + amountOfCharacters, Spannable.SPAN_EXCLUSIVE_EXCLUSIVE
  )
  foregroundText.text = foregroundSpannableText


}
In this example, we would be applying the foreground effect to two parts of our text. We start again by getting the whole text and saving it in a variable, with this variable, we in turn create our SpannableString object. The first part of the text to be formatted has the content “part of this text”. We get the startIndex and the amount of characters of this text. Back in our setSpan method, we use the ForegroundColorSpan object to apply a color, we pass in Color.RED, we then configure the start and end index. and the first red color effect gets applied. Check it out before we move to the next.
在此示例中,我们将前景效果应用于文本的两个部分。 我们首先获取整个文本并将其保存在变量中,然后使用此变量创建SpannableString对象。 要格式化的文本的第一部分的内容为“此文本的一部分”。 我们获得了startIndex和此文本的字符数。 回到setSpan方法中,我们使用ForegroundColorSpan对象应用颜色,然后传入Color.RED ,然后配置开始索引和结束索引。 然后应用第一个红色效果。 在移至下一个之前,请先检查一下。

看起来不错吧? (Looks good right?)
For this next example, we follow a similar pattern, all we need to do is to re-initialize the values of startIndex and amountOfCharacters so we deduce a new start and end index for the text this time. With this we apply text formatting to two different sections of our text.
对于下一个示例,我们遵循类似的模式,我们所要做的就是重新初始化startIndex和amountOfCharacters的值,因此amountOfCharacters我们为文本推导新的开始索引和结束索引。 这样,我们将文本格式应用于文本的两个不同部分。
startIndex = foregroundSpannableText.indexOf("red")  amountOfCharacters = 3 // length of "red"   foregroundSpannableText.setSpan(        ForegroundColorSpan(Color.RED), startIndex, startIndex + amountOfCharacters, Spannable.SPAN_EXCLUSIVE_EXCLUSIVE)
foregroundText.text = foregroundSpannableText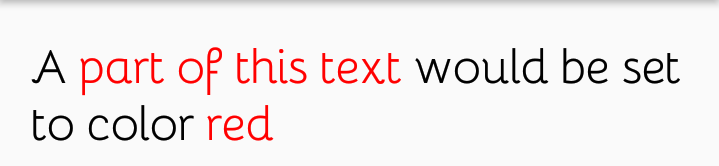
前景和背景跨度 (Foreground and Background Spans)
We’ve covered foreground color spans, let’s look into applying background effect, but with a little twist. We’d be applying both foreground and background spans on the same piece of text, simulating a highlight. Let’s give it a try! We start by getting a reference to the textview and setting up it’s function.
我们已经介绍了前景色的跨度,让我们看一下应用背景效果,但要稍加改动。 我们将在同一段文本上同时应用前景和背景跨度,以模拟突出显示。 试一试吧! 我们首先获得对textview的引用并设置它的功能。
class MainActivity : AppCompatActivity() {


	private lateinit foregroundBackgroundText: TextView

	override fun onCreated(savedInstanceState: Bundle) {
		foregroundBackgroundText = findViewById(R.id.foreground_and_background_text)
		setForegroundAndBackground()
	}


	private fun setForegroundAndBackground() {
	}

}
Now that’s all set up, let’s apply the actual spans!
现在就完成了,让我们应用实际的跨度!
private fun setForegroundAndBackground() {
  val text = "Simulating highlighted text"
  val fgBgSpannableText = SpannableString(text)


  val startIndex = fgBgSpannableText.indexOf("highlighted")
  val amountOfCharacters = "highlighted".length


  fgBgSpannableText.setSpan(
      BackgroundColorSpan(Color.YELLOW), startIndex, startIndex + amountOfCharacters, Spannable.SPAN_EXCLUSIVE_EXCLUSIVE
  )
  fgBgSpannableText.setSpan(
      ForegroundColorSpan(Color.BLUE), startIndex, startIndex + amountOfCharacters, Spannable.SPAN_EXCLUSIVE_EXCLUSIVE
  )
  foregroundBackgroundText.text = fgBgSpannableText
}
The process of applying a background color span to our text is similar to the foreground color and we come up with this effect.
将背景颜色范围应用于文本的过程与前景色相似,我们想到了这种效果。

调整跨度 (Sizing Spans)
We can also format the size of text different from the rest using size spans. These allow us to change the size of part of our text by applying certain metric values. Generally, when formatting the size of text, there are two approaches — AbsoluteSizeSpan and RelativeSizeSpan.
我们还可以使用大小范围来设置与其他文本格式不同的文本大小。 这些允许我们通过应用某些度量值来更改文本部分的大小。 通常,在格式化文本大小时,有两种方法AbsoluteSizeSpan和RelativeSizeSpan 。
AbsoluteSizeSpan — This size span gives an absolute size to the area to be formatted, it’s value is direct and not in relation to other text. For example, if our main text has a size of 20dp and we apply a size of 10dp to the text to be formatted, the formatted text appears smaller.
AbsoluteSizeSpan —此大小范围为要格式化的区域提供了绝对大小,它的值是直接的,与其他文本无关。 例如,如果我们的主要文本的大小为20dp,并且将10dp的大小应用于要格式化的文本,则格式化后的文本会显得更小。
RelativeSizeSpan — This is different from the AbsoluteSizeSpan because it sizes the formatted text based on the original size of the main text. It’s more like a scaling approach, it takes in a value to scale the formatted text by depending on the main text. If provided with a scale value of 1.5f, the formatted text’s size if 1.5x the main text.
RelativeSizeSpan —与AbsoluteSizeSpan不同,因为它会根据主要文本的原始大小来调整格式化文本的大小。 它更像是一种缩放方法,它采用一个值来根据主要文本来缩放格式化的文本。 如果提供的缩放比例值为1.5f,则格式化文本的大小是主文本的1.5倍。
Let’s try both of them out.
让我们尝试一下。
绝对尺码 (Absolute Sizing)
As explained above, using absolute sizing gives a size independent of the parent’s size. Let’s give it a shot! We start by retrieving a reference to the sizing textview as usual, and provide a definition for the function meant to do the actual formatting.
如上所述,使用绝对大小调整后的大小将独立于父项的大小。 让我们试一试! 首先,像往常一样检索对调整大小的textview的引用,并为要进行实际格式化的功能提供定义。
class MainActivity : AppCompatActivity() {


	private lateinit sizingText: TextView


	override fun onCreated(savedInstanceState: Bundle) {
		sizingText = findViewById(R.id.sizing_text)
		setSizingText()
	}


	private fun setSizingText() {
	}

}
And now, we format!
现在,我们格式化!
private fun setSizingText() {
    val text = "This text is smaller than the rest"
    val sizingSpannableText = SpannableString(text)


    val startIndex = text.indexOf("smaller")
    val amountOfCharacters = "smaller".length


    sizingSpannableText.setSpan(
        AbsoluteSizeSpan(20), startIndex, startIndex + amountOfCharacters, Spannable.SPAN_EXCLUSIVE_EXCLUSIVE
    )
    sizingText.text = sizingSpannableText
}
At this point, we should be familiar with the general approach to applying spans, and for this use-case, we pass in 20 as the absolute font size for the text “smaller”, and this effect is applied.
在这一点上,我们应该熟悉应用跨度的一般方法,在此用例中,我们传入20作为“较小”文本的绝对字体大小,并应用此效果。

相对尺码 (Relative Sizing)
Relative sizing entails calculating the font size of the formatted text in relation to its’ parent. It’s safe to say that the original font size of the parent text is scaled by the value provided. Let’s dive in!
相对大小需要计算格式文本相对于其父级的字体大小。 可以肯定地说,父文本的原始字体大小由提供的值缩放。 让我们潜入吧!
We start by getting a reference to the sizingBiggerText textview.
我们首先获得对sizingBiggerText文本视图的引用。
class MainActivity : AppCompatActivity() {


	private lateinit sizingBiggerText: TextView

	override fun onCreated(savedInstanceState: Bundle) {
		sizingBiggerText = findViewById(R.id.sizing_bigger_text)
		setSizingBiggerText()
	}


	private fun setSizingBiggerText() {
	}

}
Off to formatting!
关闭格式化!
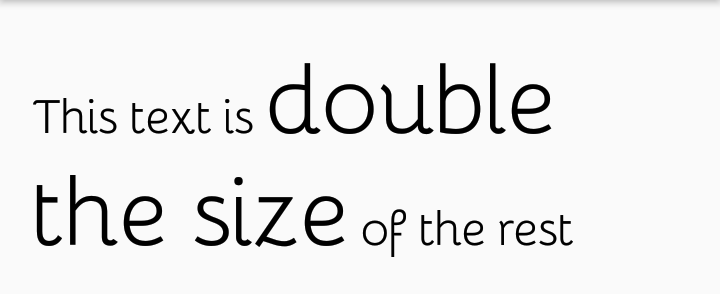
private fun setSizingBiggerText() {
	  val text = "This text is double the size of the rest"
	  val sizingSpannableText = SpannableString(text)

	  val startIndex = text.indexOf("double the size")
	  val amountOfCharacters = "double the size".length

	  sizingSpannableText.setSpan(
	      RelativeSizeSpan(2f), startIndex, startIndex + amountOfCharacters, Spannable.SPAN_EXCLUSIVE_EXCLUSIVE
	  )
	  sizingBiggerText.text = sizingSpannableText
}
In this example, we use the RelativeSizeSpan constructor, we pass in a float value (2f). This instructs the spanning process to size the formatted text to be double the size of the parent text. The outcome of this process can be found below….
在此示例中,我们使用RelativeSizeSpan构造函数,我们传入一个float值(2f)。 这指示跨接过程将格式化文本的大小调整为父文本大小的两倍。 该过程的结果可以在下面找到。
插曲 (Interlude)
We’ve applied lots of span effects and it’s thrilling to be able to come up with such minimalistic designs with little or no effort. I stated at the start of this article that we have a handful of methods of applying span effects. We’ve only gone through the use of SpannableString, next we’re going check out the SpannableStringBuilder and how it helps us apply spans to text while joining chunks of text as we go on.
我们已经应用了很多跨度效果,并且能够不费吹灰之力就能想到这样的简约设计,这是令人兴奋的。 我在本文开头指出,我们有几种应用跨度效果的方法。 我们只使用了SpannableString ,接下来我们将检查SpannableStringBuilder以及它如何帮助我们在将文本连接到一起时将SpannableStringBuilder应用于文本。
SpannableStringBuilder (SpannableStringBuilder)
With the SpannableStringBuilder, we do not have to set all the text at once, we can set text when we want and format later. We can also append chunks of text later on in our program, and apply formatting options to them. In this example, we would be using the bold, underline and the strikethrough effect on different sections in the same parent text. We start by getting the reference to the text and set up the method for formatting.
使用SpannableStringBuilder ,我们不必一次设置所有文本,我们可以在需要时设置文本,以后再设置格式。 我们也可以稍后在程序中附加大块文本,并对其应用格式设置选项。 在此示例中,我们将在同一父文本的不同部分上使用粗体,下划线和删除线效果。 我们首先获得对文本的引用,然后设置格式化方法。
class MainActivity : AppCompatActivity() {


	private lateinit builderText: TextView

	override fun onCreated(savedInstanceState: Bundle) {
		builderText = findViewById(R.id.builder_text)
		setStrikethroughBoldUnderlineText()
	}


	private fun setStrikethroughBoldUnderlineText() {
	}

}
then we format!
然后我们格式化!
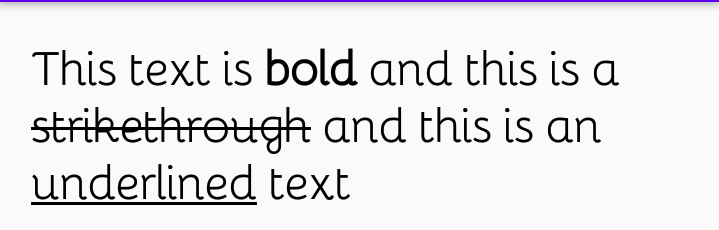
private fun setStrikethroughBoldUnderlineText() {


  val boldText = "This text is bold"
  val boldStrUnderlineSpannable = SpannableStringBuilder(boldText)


  var startIndex = boldText.indexOf("bold")
  var amountOfCharacters = "bold".length


  boldStrUnderlineSpannable.setSpan(
      StyleSpan(Typeface.BOLD), startIndex, startIndex + amountOfCharacters, Spannable.SPAN_EXCLUSIVE_EXCLUSIVE
  )


  val strikethroughText = " and this is a strikethrough"
  boldStrUnderlineSpannable.append(strikethroughText)


  startIndex = boldStrUnderlineSpannable.indexOf("strikethrough")
  amountOfCharacters = "strikethrough".length


  boldStrUnderlineSpannable.setSpan(
    StrikethroughSpan(), startIndex, startIndex + amountOfCharacters, Spannable.SPAN_EXCLUSIVE_EXCLUSIVE
  )


  val underlineText = " and this is an underlined text"
  boldStrUnderlineSpannable.append(underlineText)


  startIndex = boldStrUnderlineSpannable.indexOf("underlined")
  amountOfCharacters = "underlined".length


  boldStrUnderlineSpannable.setSpan(
      UnderlineSpan(), startIndex, startIndex + amountOfCharacters, Spannable.SPAN_EXCLUSIVE_EXCLUSIVE
  )


  builderText.text = boldStrUnderlineSpannable


}
Whoa!, this might seem ambiguous at first, but it is quite easy to wrap your head around. As usual, we deduce the start index and amount of characters for the string “bold”, after applying the bold effect, we append new text to the end of the spannable object. We calculate the start index and the amount of characters of the text to be formatted again, we apply the strikethrough span using the StrikethroughSpan constructor. We add the text to be underlined to the end of the spannable object. We set the span by applying the UnderlineSpan constructor and finally we set the spannable text to the text present in the texview. The final result is as such:
哇!乍一看似乎有点模棱两可,但是把头缠起来很容易。 像往常一样,我们推断出字符串“ bold”的起始索引和字符数,在应用了粗体效果之后,我们将新文本附加到可扩展对象的末尾。 我们计算开始索引和要再次设置格式的文本的字符数,我们使用StrikethroughSpan构造函数应用删除线间距。 我们将要加下划线的文本添加到可扩展对象的末尾。 我们通过应用UnderlineSpan构造函数设置跨度,最后将跨度文本设置为texview中存在的文本。 最终结果如下:
下一步是什么? (What’s Next?)
We’ve learnt how to apply spans to text and make our designs and text stand out. You can try applying other kinds of spans to our text to make it more attractive. If you have any question(s), kindly drop a comment below this article or reach out to me on Twitter, I’d be willing to provide help or attention in any way possible.
我们已经学习了如何将跨度应用于文本,并使我们的设计和文本脱颖而出。 您可以尝试将其他类型的跨度应用于文本,以使其更具吸引力。 如果您有任何疑问,请在本文下方发表评论,或在Twitter上与我联系 ,我们将竭尽所能提供帮助或关注。
Thanks for reading!, and happy formatting!.
感谢您的阅读!以及格式愉快!
翻译自: https://medium.com/android-dev-hacks/getting-started-with-spannables-on-android-46a051d484ec
android入门


 614
614


 被折叠的 条评论
为什么被折叠?
被折叠的 条评论
为什么被折叠?
 到【灌水乐园】发言


