


计算机视觉(Computer Vision)
Computer vision is all abuzz now. People everywhere are working on some form of deep-learning-based computer vision projects. But before the advent of Deep Learning, image processing techniques were employed to manipulate and transform images in order to obtain insights that would help us achieve the task at hand. Today, let’s see how we can implement a simple yet helpful technique known as Perspective Projection to warp an image.
现在,计算机视觉一片混乱。 各地的人们都在从事某种形式的基于深度学习的计算机视觉项目。 但是在深度学习问世之前,图像处理技术已被用来处理和转换图像,以获得有助于我们完成手头任务的见解。 今天,让我们看看如何实现一种称为透视投影的简单而有用的技术来扭曲图像。
But wait! What does warping an image mean? I could explain it with a lot of fancy words and technical jargon. But then, it will be easy to just show the end results so that you can learn by seeing. You are reading a Computer Vision article anyway :)
可是等等! 扭曲图像是什么意思? 我可以用很多花哨的词和技术术语来解释它。 但是,仅显示最终结果将很容易,以便您可以通过观察来学习。 无论如何,您正在阅读计算机视觉文章:)
So basically, you take an image and shear it to make it fit into a canvas of any desired shape. Note that the other way round is also possible. Now that, that’s out of the way, let’s take a look at how we can implement this using OpenCV and our trustworthy friend — Python(❤).
因此,基本上,您需要拍摄图像并对其进行剪切以使其适合任何所需形状的画布。 注意,相反的方法也是可行的。 现在,这已经不成问题了,让我们看一下如何使用OpenCV和值得信赖的朋友Python(❤)来实现它。
For you people who just want the code, no worries, I got you guys covered :P Here is the link to my GitHub repository.
对于只需要代码的人,不用担心,我让你们覆盖了:P这是指向我的GitHub存储库的链接。
Before we get into the main parts of the code, we must first import the necessary libraries.
在进入代码的主要部分之前,我们必须首先导入必要的库。
import cv2
import numpy as np
Now, let’s read in the base image and the subject image as follows.
现在,让我们按如下方式读取基本图像和主题图像。
base_image = cv2.imread('base_img.jpg')
base_image_copy = base_image.copy()
subject_image = cv2.imread('subject.jpg')
Initialize an array to store the coordinates of the 4 corners within which we want to overlay our subject image. We can choose these 4 points manually using the setMouseCallback() function as shown down below.
初始化一个数组,以存储要覆盖主题图像的4个角的坐标。 我们可以使用setMouseCallback()函数手动选择这4个点,如下所示。
def click_event(event, x, y, flags, params):
if event == cv2.EVENT_LBUTTONDOWN:
cv2.circle(base_image_copy, (x, y), 4, (0, 0, 255), -1)
points.append([x, y])
if len(points) <= 4:
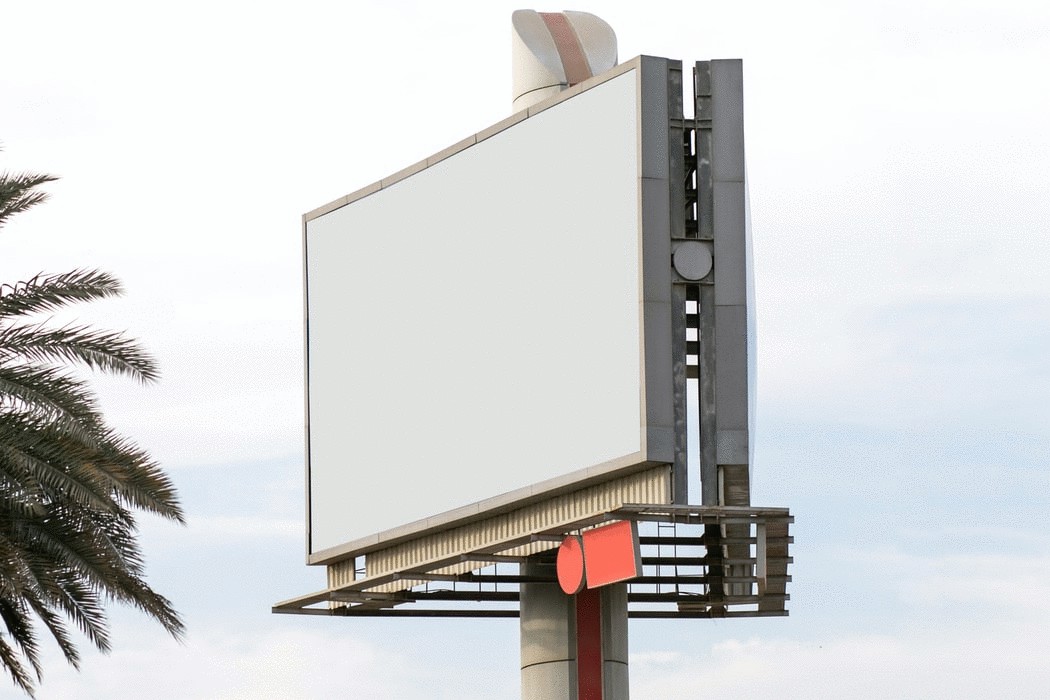
cv2.imshow('image', base_image_copy)points = []base_image = cv2.imread('base_img.jpg')
base_image_copy = base_image.copy()
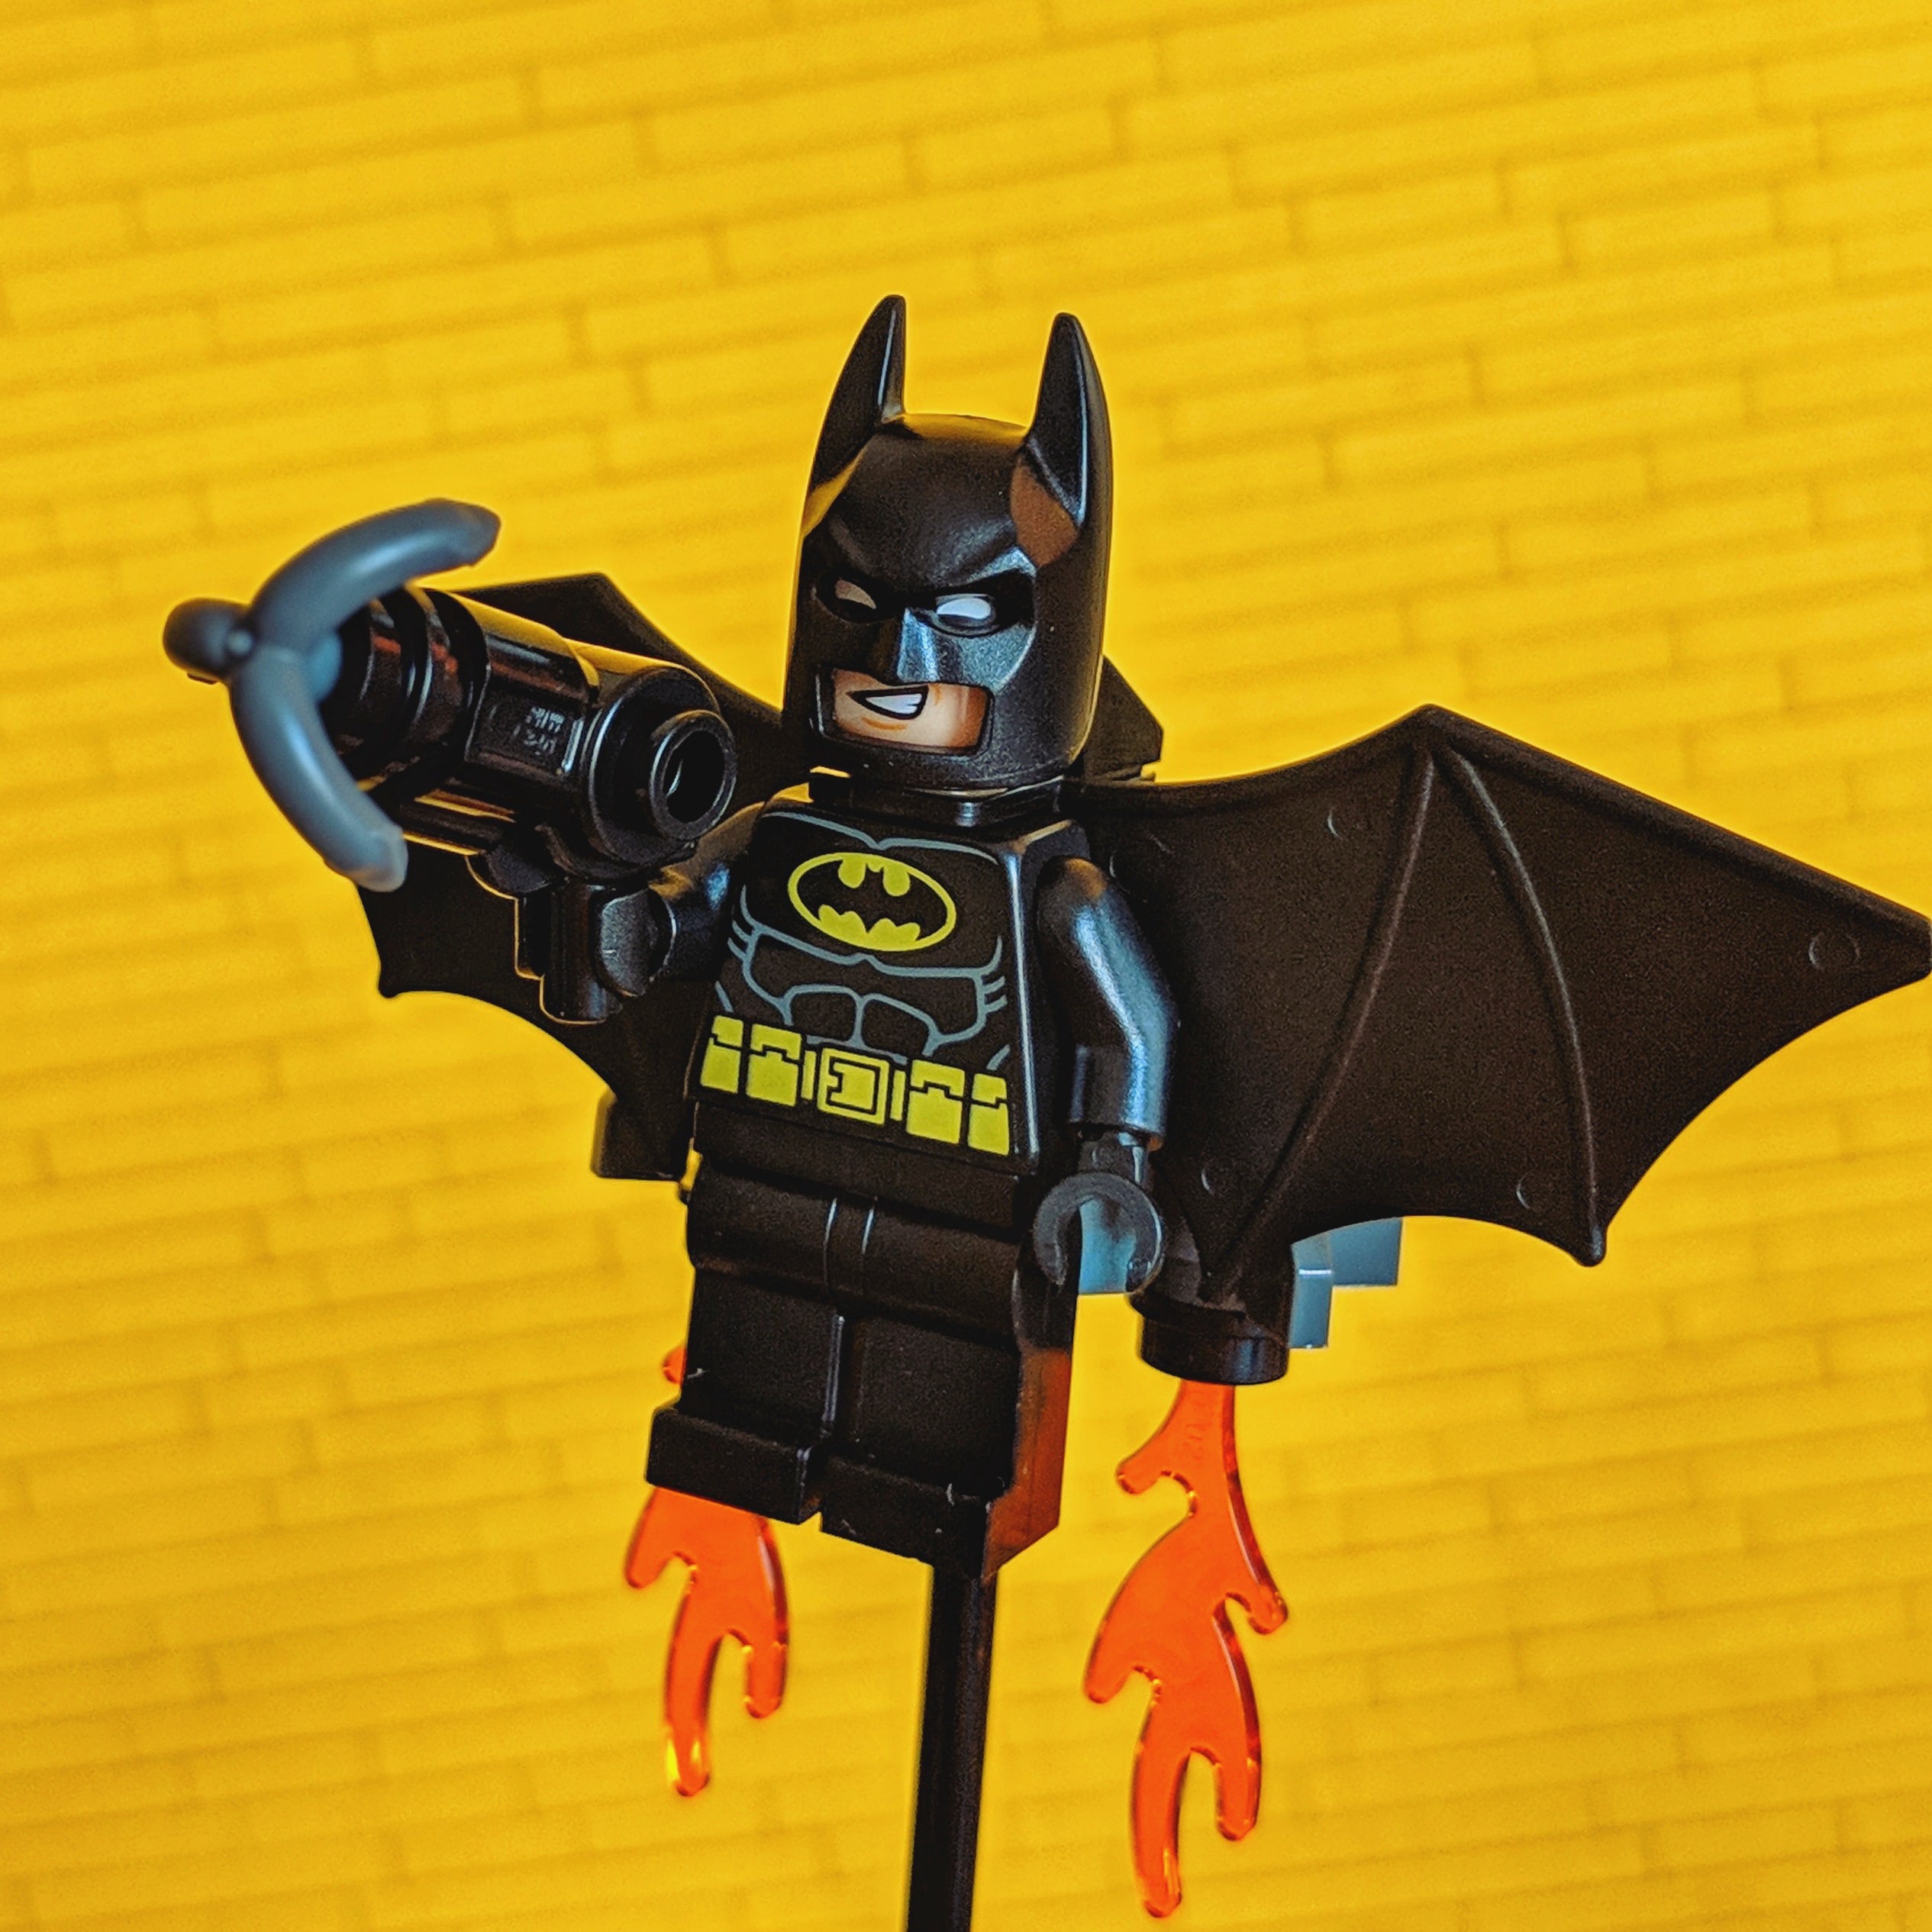
subject_image = cv2.imread('subject.jpg')
cv2.imshow('image', base_image_copy)
cv2.setMouseCallback('image', click_event)
cv2.waitKey(0)
cv2.destroyAllWindows()In the code snippet given above, we define a function called click_event() and pass it as an argument to the setMouseCallback() function. With this method, we’ll first display the base image. We can then manually choose four points within the image to set as our target. Our subject image would be warped onto this target. The coordinates are recorded when the left mouse button is pressed. These are stored in the points array we initialized earlier. The selected points are highlighted as red dots, as shown below.
在上面给出的代码段中,我们定义了一个名为click_event()的函数,并将其作为参数传递给setMouseCallback()函数。 使用这种方法,我们将首先显示基本图像。 然后,我们可以手动选择图像中的四个点作为目标。 我们的主题图像将扭曲到该目标上。 按下鼠标左键时会记录坐标。 这些存储在我们之前初始化的points数组中。 选定的点以红色点突出显示,如下所示。
As we know, each one of us might choose 4 points in any random order. There is hence a need to maintain a constant ordering among the chosen points. I chose to order the points in a clockwise manner, i.e, from top-left to top-right to bottom-right to bottom-left. This is achieved by the sort_pts() method shown below. We use the fact that the sum of the x- and y-coordinates are minimum at the top-left corner and maximum at the bottom-right corner. Similarly, the difference between them is minimum at the top-right corner and maximum at the bottom-left corner. Take a moment to verify that it’s true by yourself. Keep in mind that for images, the origin is at the top-left corner of the image.
众所周知,我们每个人都可以以任意顺序选择4个点。 因此,需要在所选点之间保持恒定的顺序。 我选择按顺时针方向对点进行排序,即从左上到右上,从右下到左下。 这是通过下面显示的sort_pts()方法实现的。 我们使用以下事实:x坐标和y坐标的总和在左上角最小,在右下角最大。 同样,它们之间的差异在右上角最小,而在左下角最大。 花一点时间自己核实一下。 请记住,对于图像,原点位于图像的左上角。
def sort_pts(points):
    sorted_pts = np.zeros((4, 2), dtype="float32")
    s = np.sum(points, axis=1)
    sorted_pts[0] = points[np.argmin(s)]
    sorted_pts[2] = points[np.argmax(s)]

    diff = np.diff(points, axis=1)
    sorted_pts[1] = points[np.argmin(diff)]
    sorted_pts[3] = points[np.argmax(diff)]

    return sorted_ptssorted_pts = sort_pts(points)
After sorting the points, let's use them to calculate the transformation matrix. We create a numpy array called “pts1” which holds the coordinates of the 4 corners of the subject image. Similarly, we create a list called “pts2” which holds the sorted points. The order of the coordinates of “pts1” should match that of “pts2”.
对点进行排序后,让我们使用它们来计算转换矩阵。 我们创建一个名为“ pts1 ”的numpy数组,该数组保存对象图像的四个角的坐标。 同样,我们创建一个名为“ pts2 ”的列表,其中包含已排序的点。 的“PTS1”坐标的顺序应该与“PTS2”的。
h_base, w_base, c_base = base_image.shape
h_subject, w_subject = subject_image.shape[:2]

pts1 = np.float32([[0, 0], [w_subject, 0], [w_subject, h_subject],                     [0, h_subject]])pts2 = np.float32(sorted_pts)
We now obtain the transformation matrix that is required to warp the subject image. This is obtained using the function, cv2.getPerspectiveTransform(). Since we want to transform the subject image in such a way that it fits the box we chose in the base image, the “src” should be “pts1 ”and the “dst” should be “pts2”. The size of the generated image can be specified as a tuple. We make sure the resultant image has the dimensions of the base image. Using the generated matrix we can warp the image using cv2.warpPerspective() method as shown in the given snippet.
现在,我们获得了扭曲对象图像所需的变换矩阵。 这是使用函数cv2.getPerspectiveTransform()获得的。 由于我们要以适合我们在基础图像中选择的框的方式变换主题图像,因此“ src ”应为“ pts1 ”,“ dst ”应为“ pts2 ”。 生成的图像的大小可以指定为元组。 我们确保生成的图像具有基本图像的尺寸。 使用生成的矩阵,我们可以使用cv2.warpPerspective()方法扭曲图像,如给定的片段所示。
transformation_matrix = cv2.getPerspectiveTransform(pts1, pts2)
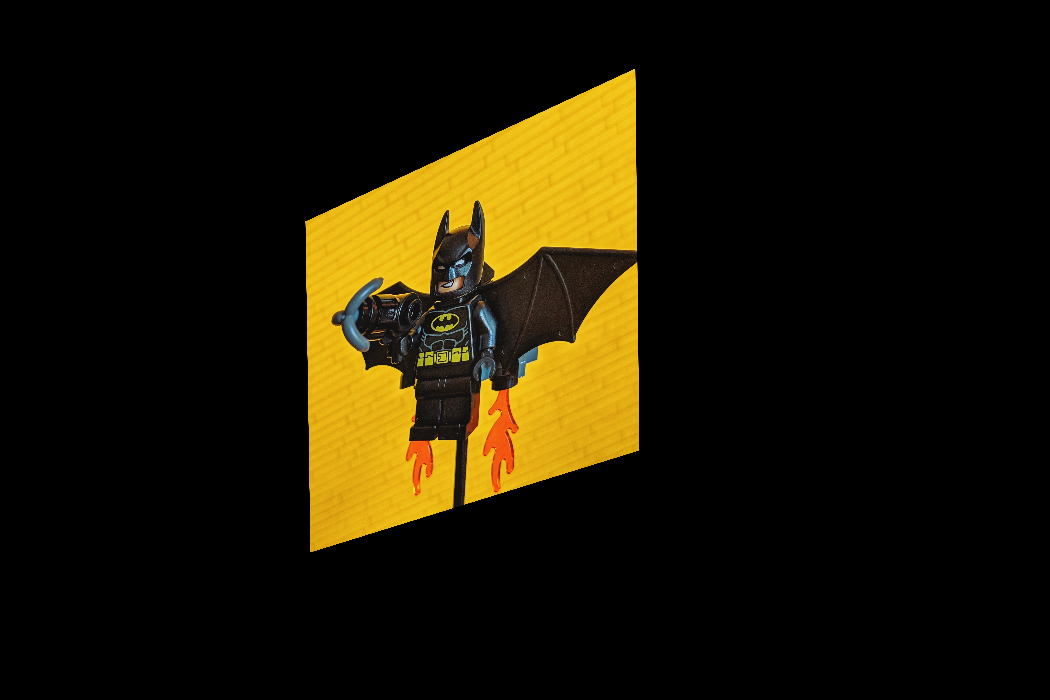
warped_img = cv2.warpPerspective(subject_image, transformation_matrix, (w_base, h_base))cv2.imshow('Warped Image', warped_img)The warped image would look like this:-
变形的图像看起来像这样:
The next step is to create a mask for which we create a blank image with the shape of the base image.
下一步是创建一个蒙版,为此我们将创建一个具有基本图像形状的空白图像。
mask = np.zeros(base_image.shape, dtype=np.uint8)
Onto this blank mask we draw a polygon with corners given by the “sorted_pts” and fill it with white color using the cv2.fillConvexPoly() method. The resultant mask would look like this.
在此空白蒙版上,我们绘制一个具有由“ sorted_pts ”指定的角的多边形,并使用cv2.fillConvexPoly()方法将其填充为白色。 生成的蒙版将如下所示。
roi_corners = np.int32(sorted_pts)

cv2.fillConvexPoly(mask, roi_corners, (255, 255, 255))
Now we invert the mask colors using the cv2.bitwise_not() method.
现在,我们使用cv2.bitwise_not()方法反转蒙版颜色。
mask = cv2.bitwise_not(mask)
Now we take the mask and base image and perform bitwise-AND operation using the cv2.bitwise_and() method.
现在,我们获取遮罩和基本图像,并使用cv2.bitwise_and()方法执行按位与运算。
masked_image = cv2.bitwise_and(base_image, mask)This would give us an image as shown below. You can see that the area onto which the subject image is to be placed alone, is black.
这将为我们提供如下图所示的图像。 您可以看到要单独放置对象图像的区域是黑色的。

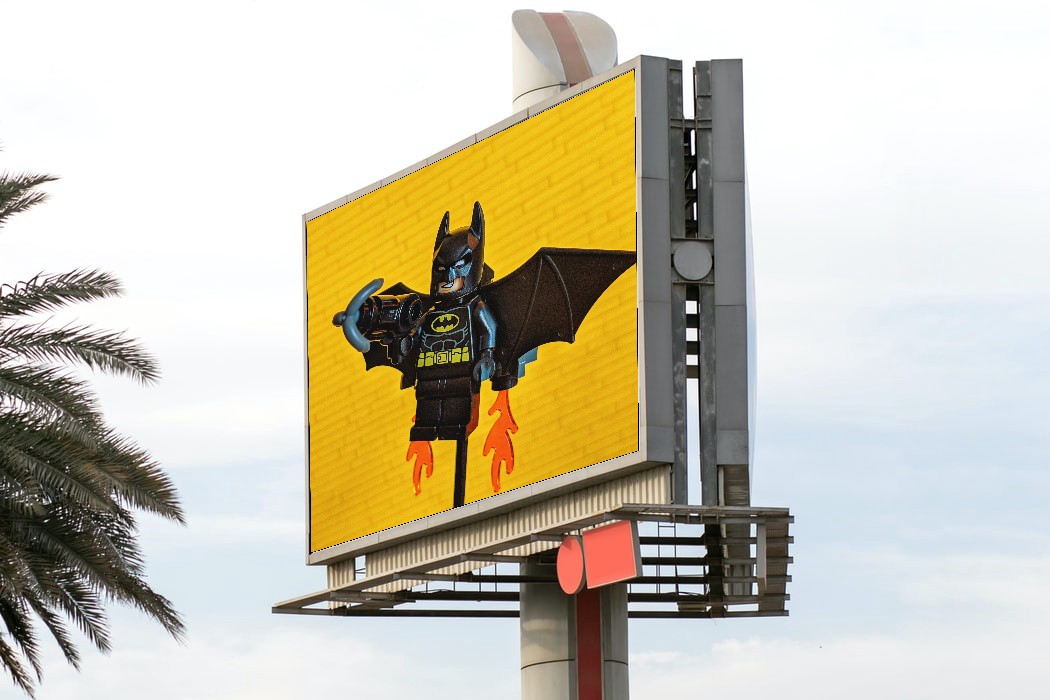
The final step would be to take the warped image and the masked image and perform bitwise-OR operation using the cv2.bitwise_or() method. This would generate the fused image we set out to accomplish.
最后一步是获取变形图像和蒙版图像,并使用cv2.bitwise_or()方法执行按位或运算。 这将生成我们打算完成的融合图像。
output = cv2.bitwise_or(warped_img, masked_image)
cv2.imshow('Fused Image', output)
cv2.imwrite('Final_Output.png', output)
cv2.waitKey(0)
cv2.destroyAllWindows()
We have done it! We have successfully overlaid one image onto another.
我们做到了! 我们已经成功地将一个图像覆盖到另一个图像上。
This is a very simple use case of perspective transformation. You can use this for generating a bird’s eye view of an area when you are tracking the movement of objects/persons in the frame. The only limit is your imagination.
这是透视转换的非常简单的用例。 在跟踪框架中物体/人的运动时,可以使用它生成区域的鸟瞰图。 你的想象力是唯一的限制。
The entire code for this article could be found in my GitHub repository through this link.
通过此链接可以在我的GitHub存储库中找到本文的完整代码。
~~ SowmiyaNarayanan G
~~ SowmiyaNarayanan G
PS:-
PS:-
Feel free to reach out to me if you have any doubts, I am happy to help. My doors are always open to constructive criticism, and hence don’t hesitate to let me know what you think of my work. You can also connect with me on LinkedIn.
如有任何疑问,请随时与我联系,我们很乐意为您提供帮助。 我的大门总是对建设性的批评敞开大门,因此请让我知道您对我的工作有何看法。 您也可以在LinkedIn上与我联系。
Mind Bytes:-
介意字节:-
“Everything you can imagine is real”― Pablo Picasso
“您可以想象的一切都是真实的” ―毕加索(Pablo Picasso)
翻译自: https://medium.com/@gsnWrites/what-is-perspective-warping-opencv-and-python-750e7a13d386


 1667
1667

 被折叠的 条评论
为什么被折叠?
被折叠的 条评论
为什么被折叠?
 到【灌水乐园】发言


