


爬网工具
重点 (Top highlight)
One of the most useful automation projects that a novice programmer can undertake is to build a web scraper app. An important use case of web scraping can be to extract relevant data from a website and store it for later use. For example, we can retrieve the titles of the posts on the Reddit website and display them on our page without printing out the body of the title. Another example can be to extract only the names of the commentators on a Twitter post without seeing the content of their comment.
新手程序员可以执行的最有用的自动化项目之一就是构建Web刮板应用程序。 网络抓取的一个重要用例可以是从网站中提取相关数据并将其存储以备后用。 例如,我们可以在Reddit网站上检索帖子的标题并将其显示在我们的页面上,而无需打印出标题正文。 另一个示例可以是仅提取Twitter帖子上评论者的姓名而看不到他们评论的内容。
In this project, we will be building a web scraper for two types of websites:
在此项目中,我们将为两种类型的网站构建一个Web抓取工具:
- Static Websites. 静态网站。
- Dynamic Websites 动态网站
Let’s first get started by installing the required modules.
让我们首先开始安装所需的模块。
入门 (Getting Started)
安装所需的模块 (Installing Required Modules)
We need to install the following modules:
我们需要安装以下模块:
node-fetch: For getting data from a static website.node-fetch:用于从静态网站获取数据。cheerio: For extracting the text in the HTML code of the page.cheerio:用于提取页面HTML代码中的文本。puppeteer: For extracting data from a dynamic website.puppeteer:用于从动态网站提取数据。node-mailer: For sending email messages to the user.node-mailer:用于向用户发送电子邮件。nodemon: This module will re-run the code every time it detects changes in your code file. This way, you don’t have to runnodewhenever you change your code. Thus,nodemonis incredibly useful in saving time. We will save this as adev-dependencynodemon:nodemon该模块检测到代码文件中的更改时,它将重新运行代码。 这样,您无需在每次更改代码时都运行node。 因此,nodemon在节省时间方面非常有用。 我们将其保存为dev-dependencydotenv: For environment variables. We will store confidential data (our user email and password) here.dotenv:用于环境变量。 我们将在此处存储机密数据(我们的用户电子邮件和密码)。
To install all of these modules, run the following command in your project directory.
要安装所有这些模块,请在项目目录中运行以下命令。
npm i node-fetch puppeteer node-mailer cheerio
npm i --save-dev nodemon
创建电子邮件帐户 (Creation Of Email Account)
As the app will be sending emails to the user, we also need to create a separate email account. In this post, I’ll be using the Gmail client.
由于该应用将向用户发送电子邮件,因此我们还需要创建一个单独的电子邮件帐户。 在本文中,我将使用Gmail客户端。
These are the steps you need to take:
这些是您需要采取的步骤:
Navigate to the Gmail Website, and create a new account.
导航到Gmail网站 ,然后创建一个新帐户。
Enable Less Secure App Access. This is crucial to allow a third-party app to send emails from your email account.
启用不太安全的应用程序访问 。 这对于允许第三方应用程序从您的电子邮件帐户发送电子邮件至关重要。
Since we cannot store our new Gmail credentials in our code, we need a place to store our new email address and password where it is not possible. One way is environment variables.
由于我们无法在代码中存储新的Gmail凭据,因此我们需要在无法存储新电子邮件地址和密码的地方存储。 一种方法是环境变量。
环境变量 (Environment Variables)
When you’re done with the above steps, run the following terminal command:
完成上述步骤后,请运行以下终端命令:
touch .envNow navigate to the .env file we have just recently created and write the following code:
现在导航到我们最近创建的.env文件,并编写以下代码:

In this case, replace myemailaddress with your newly created email address and mypassword with your password.
在这种情况下,请将myemailaddress替换为新创建的电子邮件地址,并将mypassword替换为密码。
You’re now done with the first part! Let’s now move on to scraping data on a static website.
现在您已经完成了第一部分! 现在,让我们继续在静态网站上抓取数据。
静态网站上的网页抓取 (Web Scraping On Static Websites)
In this portion of the post, we want our app to perform the following actions.
在帖子的这一部分中,我们希望我们的应用执行以下操作。
Navigate to the CNN Lite Website.
导航到CNN Lite网站 。
- Store all of the titles of the headlines in an array. 将所有标题的标题存储在一个数组中。
- Find out whether the latest element of the array, (that is, the most recent news) has the word ‘Trump’ in it. 找出数组的最新元素(即最新消息)中是否包含单词“ Trump”。
- If it does fulfill the above condition, then send an email to the user that CNN has published a news report involving Donald Trump. 如果确实满足上述条件,则向用户发送电子邮件,告知CNN已发布涉及Donald Trump的新闻报道。
All of the above-mentioned tasks will occur every five minutes. This can be done with the
setIntervalmethod.所有上述任务将每五分钟发生一次。 这可以通过
setInterval方法来完成。
Now that we have laid out the ground rules, let’s start by writing actual code.
现在我们已经制定了基本规则,让我们从编写实际代码开始。
Create a file, called App.js , and start by importing the libraries and declaring some variables.
创建一个名为App.js的文件,然后从导入库并声明一些变量开始。
导入库和声明变量: (Importing Of Libraries and Declaring Variables:)
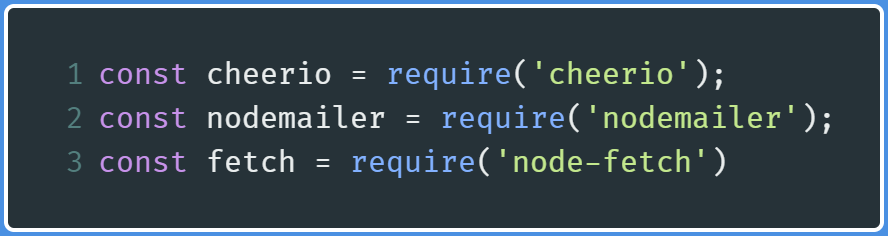
Let’s start by importing cheerio , nodemailer , and node-fetch like so:
让我们首先导入cheerio , nodemailer和node-fetch如下所示:
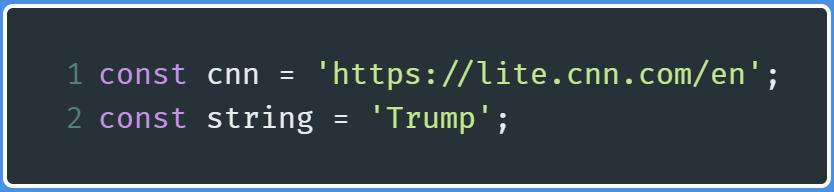
Now let’s declare some variables that will hold the URL of the website, and our designated keyword that will be used to find whether the latest headline contains this keyword.
现在,让我们声明一些变量,这些变量将保存网站的URL,以及我们指定的关键字,该变量将用于查找最新标题是否包含此关键字。
Now let’s move on to actually fetching data from the CNN Website.
现在,让我们继续实际从CNN网站获取数据。
取得资料 (Fetching Data)
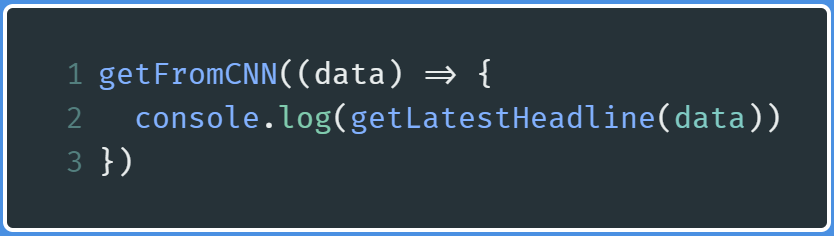
After the above steps, create a new function called getFromCNN , and write the following code in it:
完成上述步骤之后,创建一个名为getFromCNN的新函数,并在其中编写以下代码:
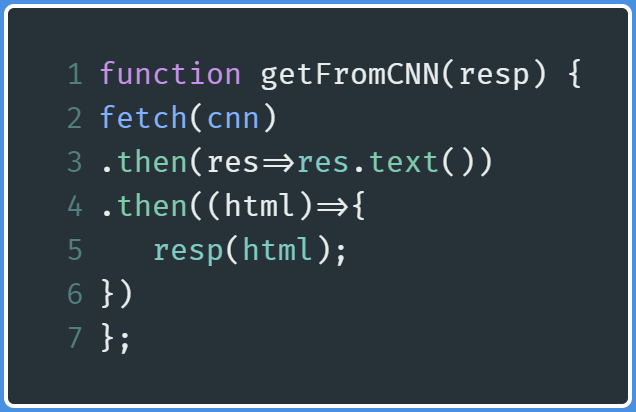
line 2: Perform afetchfunction to get data from the CNN website.line 2:执行fetch功能以从CNN网站获取数据。line 3: Convert that returned data into simple HTML.line 3:将返回的数据转换为简单HTML。lines 4 and 5: Use that returned data and then send that data to a callback function calledresp.lines 4 and 5:使用返回的数据,然后将数据发送到名为resp的回调函数。Later on, we will use that
稍后,我们将使用
respfunction to extract the required data from the HTML data that we have just been provided.resp函数从刚刚提供HTML数据中提取所需的数据。
We have now fetched data, let’s now create a function to extract the data.
现在,我们已经获取了数据,现在让我们创建一个提取数据的函数。
提取并打印数据 (Extracting And Printing Out The Data)
Before moving on, we first need to select the HTML element that contains the required data. Log on to the CNN Lite Website.
在继续之前,我们首先需要选择包含所需数据HTML元素。 登录到CNN Lite网站 。
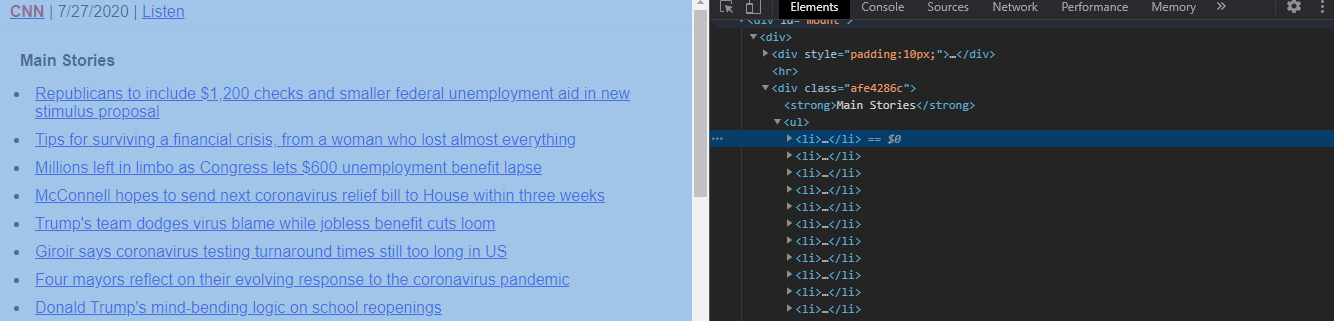
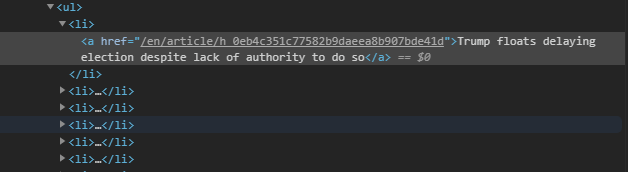
The headlines are located as a list element, that is, they are located in li elements. These li elements are children elements of a parent ul element.
标题位于列表元素中,也就是说,它们位于li元素中。 这些li元素是父ul元素的子元素。
Thus to select these headlines, we’ll specify the parent ul element, and then select the child li element. Along with this, each li element has a parent a element, which contains the link to the article.
因此,要选择这些标题,我们将指定父ul元素,然后选择子li元素。 与此一起,每个li元素都有一个父元素a ,该元素包含指向文章的链接。
In shorter words, we’ll select the text of the headline from the li element, and the link to the news article from the href attribute from the a tag.
简而言之,我们将从li元素中选择标题文本,并从a标签的href属性中选择新闻文章的链接。
Now that we have specified our elements, let’s move on to writing code.
现在我们已经指定了元素,让我们继续编写代码。
Within App.js , now create a new function called getLatestHeadline , and define it like so:
现在在App.js ,创建一个名为getLatestHeadline的新函数,并按以下方式对其进行定义:
Line 2: Load the HTML data into thecheerioinstance. This means that we will now be selecting the required tags from the HTML that is returned from thefetchmethod we defined earlier in thegetFromCNNmethod.Line 2:将HTML数据加载到cheerio实例中。 这意味着我们现在将从HTML中选择所需的标签,该HTML是从我们之前在getFromCNN方法中定义的fetch方法返回的。Line 3: Define theTitlesarray. This array will store all of our headline titles.Line 3:定义Titles数组。 该数组将存储我们所有的标题标题。Line 4–5: First, select theulelement and then its childlielement. Eachlielement’s text and the link from theatag is stored as an object in theTitlesarray.Line 4–5:首先,选择ul元素,然后选择其子li元素。 每个li元素的文本和来自a标记的链接都作为对象存储在Titles数组中。Line 8: Return the latest element from the array.Line 8:返回数组中的最新元素。
We’re almost done! Let’s now print out the data.
我们快完成了! 现在让我们打印出数据。
After ending the function, write the following code:
结束函数后,编写以下代码:
Line 1: Running thegetFromCNNfunction and providing the HTML data(thedatavariable) in the callback arguments.Line 1:运行getFromCNN函数并在回调参数中提供HTML数据(data变量)。Line 2: Execute thegetLatestHeadlinefunction and passing in thedataas an argument so that the function can process the input and then produce the relevant output.Line 2:执行getLatestHeadline函数并将data作为参数传入,以便该函数可以处理输入,然后生成相关的输出。
In the end, run the code using the terminal command:
最后,使用terminal命令运行代码:
This will be the output:
这将是输出:

We have finally printed out our latest news article! We now want to verify whether our news article contains our keyword. In this case, it’s ‘Trump’.
我们终于打印出了我们的最新新闻文章! 现在,我们要验证新闻文章是否包含关键字。 在这种情况下,它是“特朗普”。
验证标题是否包含关键字 (Verifying If Title Contains The Keyword)
Where we have invoked the getFromCNN function, modify that block of code like so:
在我们调用getFromCNN函数的地方,修改该代码块,如下所示:

We extract just the title property from the latestHeadline object. We then apply the String method, includes to check whether the headline includes the word ‘Trump’. If it does, then output a relevant message.
我们latestHeadline对象中提取title属性。 然后,我们应用String方法, includes检查标题是否包含单词“ Trump”。 如果是,则输出相关消息。
Run the code and you will get the following output:
运行代码,您将获得以下输出:

As you can see, we did not encounter an output. This is because the title did not contain the word ‘Trump’.
如您所见,我们没有遇到输出。 这是因为标题不包含“特朗普”一词。
As a test, let’s modify our keyword just to verify if our code is running. In this circumstance, it is the word ‘president’.
作为测试,让我们修改关键字只是为了验证我们的代码是否正在运行。 在这种情况下,它是“总统”一词。
This will be the output:
这将是输出:

This means that our code works properly!
这意味着我们的代码可以正常工作!
But since we need our code to be always running, we need to fetch data from the CNN website with a fixed interval.
但是由于我们需要代码始终运行,因此我们需要以固定的间隔从CNN网站获取数据。
间隔获取 (Fetching In Intervals)
Where we have invoked our getFromCNN method, modify your code like so:
在我们调用getFromCNN方法的地方,像这样修改您的代码:
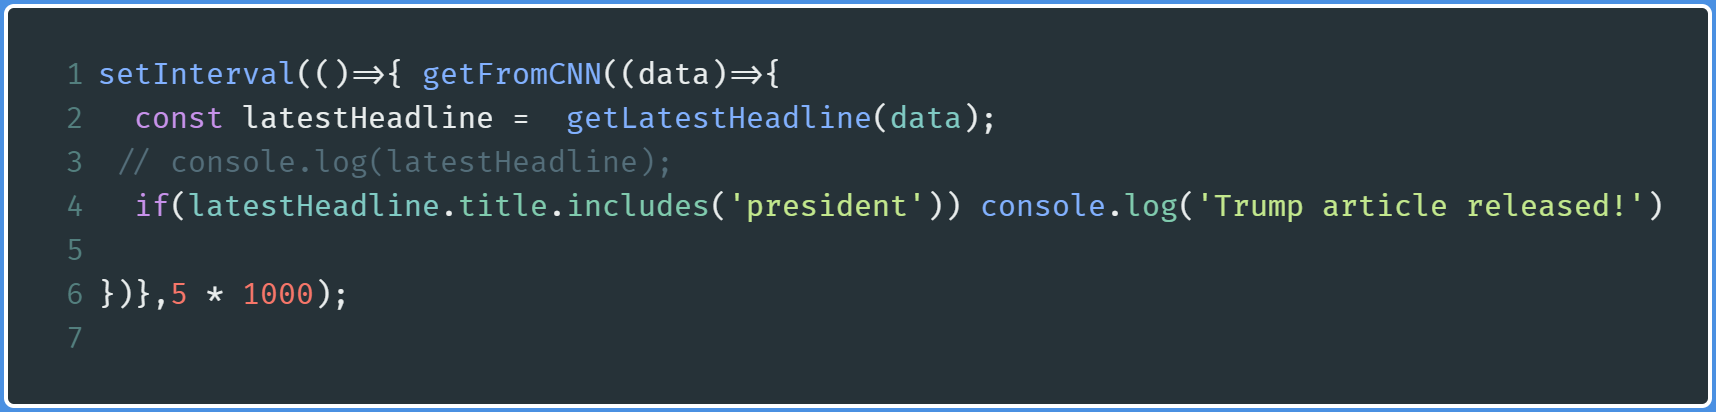
Here, we have wrapped our function in a setInterval method. This now indicates that the getFromCNN method will run every five seconds.
在这里,我们将函数包装在setInterval方法中。 现在,这表明getFromCNN方法将每五秒钟运行一次。
This will be the output:
这将是输出:
Our code works as expected, however, there's one catch.
我们的代码按预期工作,但是有一个问题。
If our news headline fulfills our required condition, it will output the success message not once, but every five seconds.
如果我们的新闻标题满足我们的要求条件,它将每隔五秒输出一次成功消息。
Here is a possible workaround:
这是一个可能的解决方法:
Invoke the
getFromCNNmethod. The output returned from this method will be saved in a variable calledpreviousHeadline.调用
getFromCNN方法。 从此方法返回的输出将保存在一个名为previousHeadline的变量中。Ten seconds later, invoke this method again. The output returned here will be saved in a variable called
newestHeadline. We will use thesetTimeoutmethod to perform this endeavor.十秒钟后,再次调用此方法。 此处返回的输出将保存在名为
newestHeadline的变量中。 我们将使用setTimeout方法执行此操作。If
newestHeadlineis equal tooldHeadline, this means that a new article was published.如果
newestHeadline等于oldHeadline,则意味着已发布新文章。If the above condition was fulfilled, check whether our
newestHeadlinecontains the keyword. If it was, a success message should be printed out.如果满足上述条件,请检查我们的
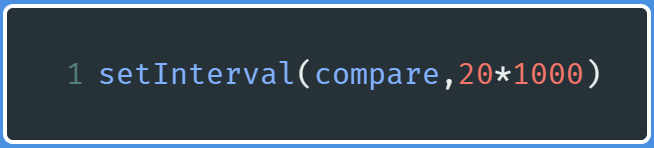
newestHeadline是否包含关键字。 如果是这样,应该打印一条成功消息。All of this should occur in an interval of twenty seconds. We will use
setIntervalto perform this endeavor.所有这些间隔应在二十秒内发生。 我们将使用
setInterval来执行此操作。
Now that we have laid out the ground rules, let’s demonstrate this through code.
现在我们已经制定了基本规则,让我们通过代码进行演示。
Create a function called compare , and write the following code:
创建一个名为compare的函数,并编写以下代码:
Line 3: The output returned bygetLatestHeadlineis saved in a variable calledpreviousHeadlineLine 3:getLatestHeadline返回的输出保存在名为previousHeadline的变量中Line 4: Wrapping around our secondgetFromCNNfunction in asetTimeoutmethod. According toLine 15, it will run after ten seconds.Line 4:在setTimeout方法中包装第二个getFromCNN函数。 根据Line 15,它将在十秒钟后运行。Line 5: Run thegetFromCNNmethod again.Line 5:再次运行getFromCNN方法。Line 6: The output returned bygetLatestHeadlineis saved in a variable callednewestHeadline.Line 6:getLatestHeadline返回的输出保存在名为newestHeadline.的变量中newestHeadline.Line 7–10: First, check if these two variables match. If they don’t, then further check ifnewestHeadlinecontains the word ‘Trump’ in it. If it does, then display a relevant success message.Line 7–10:首先,检查这两个变量是否匹配。 如果不是,则进一步检查newestHeadline中是否包含单词“ Trump”。 如果是这样,则显示相关的成功消息。
Finally, let’s run this in an interval like so:
最后,让我们以如下间隔运行:
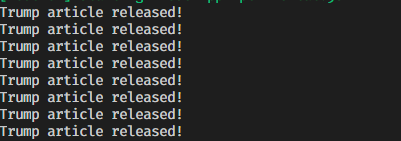
Since none of our upcoming headlines have our keyword in the title, there was no relevant output. However, if there was, we would get our relevant success message.
由于我们即将发布的头条新闻中的标题都没有关键字,因此没有相关输出。 但是,如果有的话,我们将获得相关的成功信息。
We’re done!
大功告成!
In the end, this is how our code would look like:
最后,这就是我们的代码的样子:
That’s it! We’re done. Let’s move on to sending emails.
而已! 大功告成 让我们继续发送电子邮件。
通过nodemailer发送电子邮件 (Sending Emails Through nodemailer)
Provided that you have created a separate Gmail account and then enabled Less Secure Apps setting(refer to the Getting Started section of this post), we are now able to send emails with nodemailer .
前提是您已经创建了一个单独的Gmail帐户,然后启用了“不太安全的应用程序”设置(请参阅本文的“ 入门”部分),我们现在可以使用nodemailer发送电子邮件。
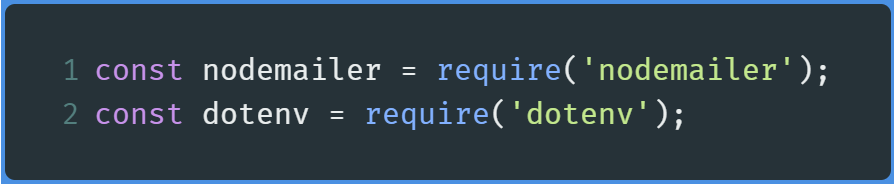
First, create another module called MailSender.js . There, start by importing nodemailer , and dotenv
首先,创建另一个名为MailSender.js模块。 在那里,首先导入nodemailer和dotenv
Now, run the config command from dotenv like so:
现在,从dotenv运行config命令, dotenv所示:

We are now able to access the environment variables we created in the .env file that we created earlier.
现在,我们可以访问在之前创建的.env文件中创建的环境变量。
Now, create a reusable transporter object like so:
现在,创建一个可重用的传输器对象,如下所示:
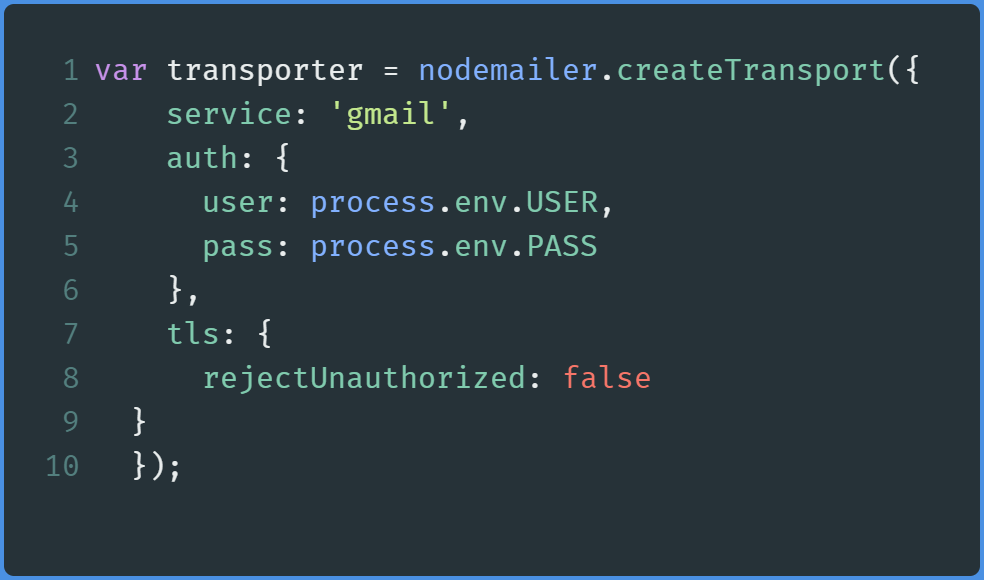
Lines 2–6: Specifying what service to use, and our email address(user) and password(pass).Lines 2–6:指定要使用的服务,以及我们的电子邮件地址(user)和密码(pass)。
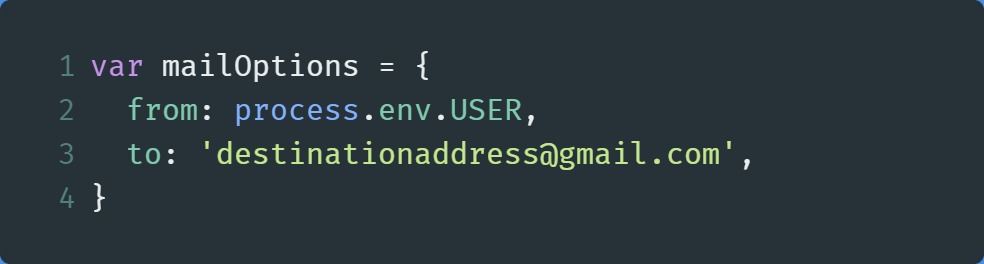
Before sending emails, let’s specify our mail options. Here, we will tell nodemailer the recipients. As an example, let’s send our mail to the email address of destinationaddress@gmail.com
在发送电子邮件之前,让我们指定我们的邮件选项。 在这里,我们将告诉nodemailer收件人。 例如,我们将邮件发送到destinationaddress@gmail.com的电子邮件地址
In the end, create a function called sendMail , and write the following code:
最后,创建一个名为sendMail的函数,并编写以下代码:
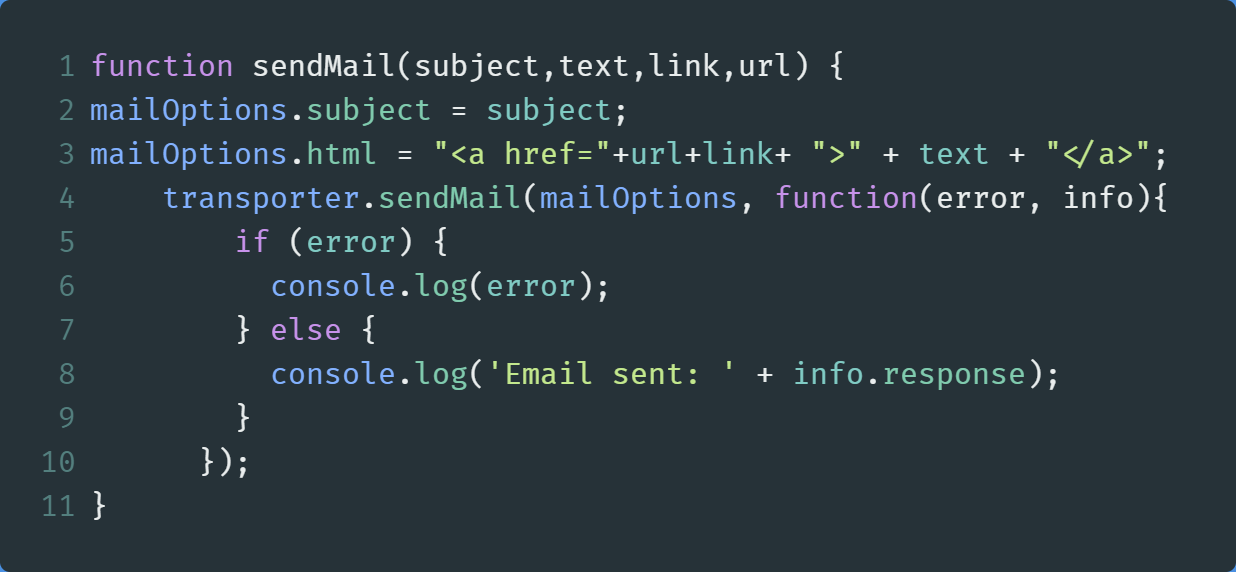
Lines 2–3: Specify our subject and the text of our email. Here, we are sending HTML as we can directly provide the link to the news article through anatag.Lines 2–3:指定我们的主题和电子邮件文本。 在这里,我们要发送HTML,因为我们可以直接通过提供链接到新闻文章a标签。Line 4: Finally, send our email and specifying our options(mailOptions) as the first parameter. If we encounter an error, then we will log it out. Otherwise, we print out a success message along with the information about the email.Line 4:最后,发送电子邮件并指定我们的options(mailOptions)作为第一个参数。 如果遇到错误,则将其注销。 否则,我们将打印成功消息以及有关电子邮件的信息。
In the end, export it like so:
最后,将其导出为:

In the end, your code will look like this:
最后,您的代码将如下所示:
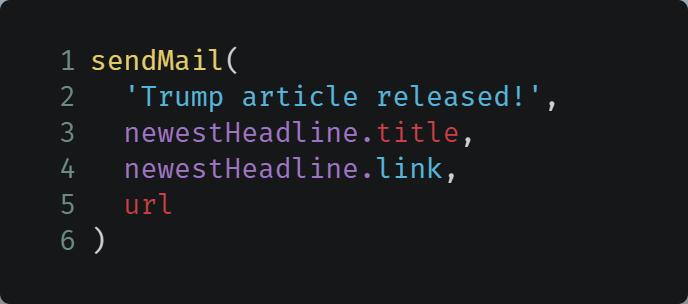
Just for testing purposes, create any other file, and then write the following code:
仅出于测试目的,创建任何其他文件,然后编写以下代码:

After running the code, you’ll receive a message in your inbox:
运行代码后,您会在收件箱中收到一条消息:

Clicking on this link redirects us to Facebook. We’ve now verified that this code works!
单击此链接将我们重定向到Facebook。 现在,我们已验证该代码有效!
Go to App.js , and find the following piece of code in compare :
转到App.js ,并在compare找到以下代码:

Here, add the following lines of code just before the closing of this if statement:
在此,在此if语句结束之前添加以下代码行:
On this note, we are finally done with scraping static websites! Let’s move on to scraping dynamic websites.
在此说明上,我们终于完成了对静态网站的抓取! 让我们继续抓取动态网站。
In the end, this is how App.js looks like:
最后,这是App.js样子:
搜寻动态网站 (Scraping Dynamic Websites)
In this project, we’ll scrape data from YouTube. More specifically, we’ll extract from Dude Perfect’s YouTube channel. This is what we want to do:
在此项目中,我们将从YouTube抓取数据。 更具体地说,我们将从Dude Perfect的YouTube频道中摘录。 这就是我们要做的:
- Navigate to the YouTube Channel. 导航到YouTube频道。
Extract the latest title from the Videos section.
从“ 视频”部分提取最新标题。
- If the next/upcoming video contains the words ‘Trick Shots’, then send an email to the user. 如果下一个/即将上映的视频包含单词“ Trick Shots”,则向用户发送电子邮件。
- All of this should happen continuously. In other words, the function that fetches the data should run again as soon as it ends. 所有这些都应该持续发生。 换句话说,获取数据的函数应在结束后立即再次运行。
Now that we have laid out the ground rules, it’s time to demonstrate all of this through code.
现在我们已经制定了基本规则,是时候通过代码演示所有这些了。
Create a file called AppDynamic.js , and then follow the steps below.
创建一个名为AppDynamic.js的文件,然后执行以下步骤。
库导入和变量声明 (Importing Of Libraries And Declaration Of Variables)
node-fetch does not work with dynamic websites nicely, which is why we’ll use puppeteer for this section.
node-fetch不适用于动态网站,这就是为什么我们在本节中将使用puppeteer 。
Within AppDynamic.js , first, start out by importing cheerio , puppeteer , and nodemailer .
在AppDynamic.js ,首先,通过导入开始了cheerio , puppeteer ,和nodemailer 。

In this code, we have just imported our required modules and declared our required variables, for example, the URL and our keyword.
在此代码中,我们刚刚导入了所需的模块并声明了所需的变量,例如URL和我们的关键字。
从YouTube提取HTML数据 (Fetching HTML Data From YouTube)
This step will be similar to that of our static website scraping project.
此步骤将类似于我们的静态网站抓取项目。
Within AppDynamic.js , create a new function called fetchFromYouTube , and write the following code:
在AppDynamic.js ,创建一个名为fetchFromYouTube的新函数,并编写以下代码:
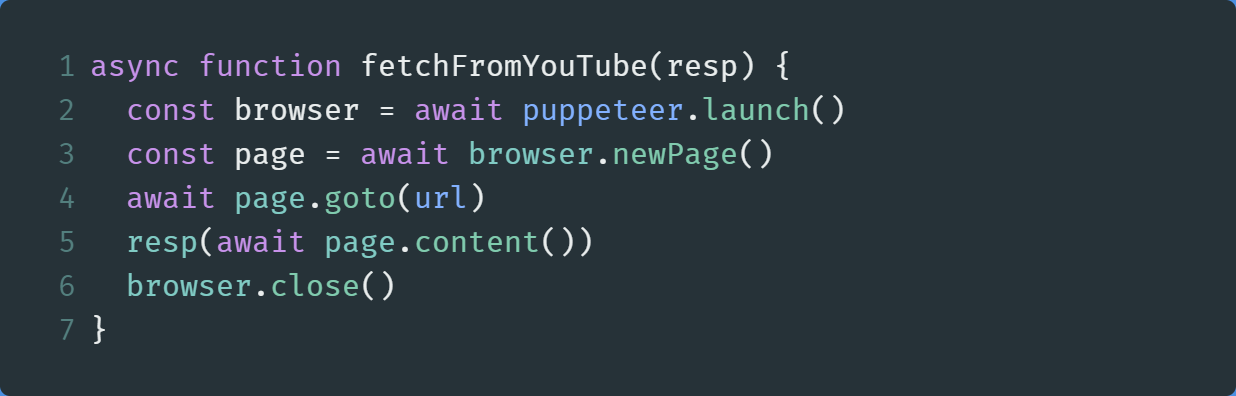
Like our static website project, the explanation of the code is similar as well. We have just navigated to the YouTube page and then stored the data in a callback function. Later on, we will close the puppeteer instance to prevent memory leaks.
就像我们的静态网站项目一样,代码的解释也是如此。 我们刚刚导航到YouTube页面,然后将数据存储在回调函数中。 稍后,我们将关闭puppeteer实例以防止内存泄漏。
For more information, you can go to Puppeteer’s website and get further documentation.
有关更多信息,您可以访问Puppeteer的网站并获取更多文档。
Let’s now move on to extracting the data.
现在让我们继续提取数据。
提取并打印数据 (Extracting And Printing Out Data)
Before moving on, we first need to discuss what HTML elements we need to get our data from.
在继续之前,我们首先需要讨论从中获取数据所需HTML元素。
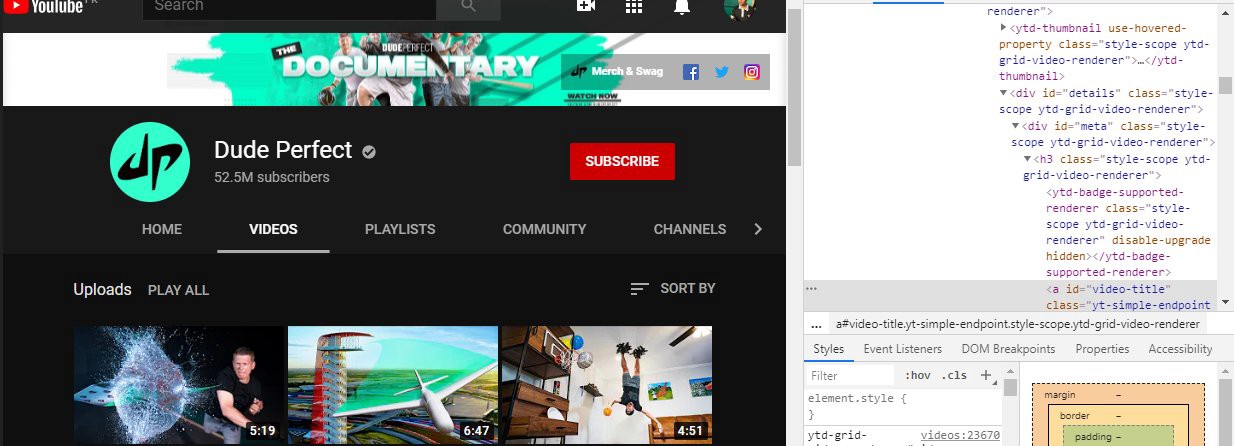
Here, we can see that the titles are located in a div element of id details. Within that, there is a div of id meta . Going deeper, we find this div to be a parent of an h3 element. Finally, we find the a tag that contains the text of the video titles.
在这里,我们可以看到标题位于id details的div元素中。 在其中,有一个id meta的div 。 更深入地讲,我们发现该div是h3元素的父级。 最后,我们找到a标签,其中包含视频标题的文本。
Now that we have found out the location of our data, let’s retrieve it through code.
现在我们已经找到了数据的位置,让我们通过代码来检索它。
Create a function called getLatestTitle , and write the following code in it:
创建一个名为getLatestTitle的函数,并在其中编写以下代码:
Line 2: Load all of the HTML data into thecheerioinstance.Line 2:将所有HTML数据加载到cheerio实例中。Line 3: ThisVideoTitlesarray will store the title and the links to the video.Line 3:此VideoTitles数组将存储标题和视频链接。Lines 4–8: Use standard JQuery selectors to specify our location of the data.Lines 4–8:使用标准的JQuery选择器指定数据的位置。Lines 9–10: Titles and links from all of the elements that match our selectors will be stored in theVideoTitlesarray.Lines 9–10:与选择器匹配的所有元素的标题和链接将存储在VideoTitles数组中。
In the end, let’s test it out.
最后,让我们对其进行测试。
Write the following code in your file just after the declaration of getLatestTitle :
在声明getLatestTitle之后,在文件中编写以下代码:

At the time of this writing, this will be the output of the code:
在撰写本文时,这将是代码的输出:

Let’s now move on to comparing our latest title with our keyword.
现在,让我们继续比较一下我们最新的标题和我们的关键字。
与关键字比较 (Comparing With Keywords)
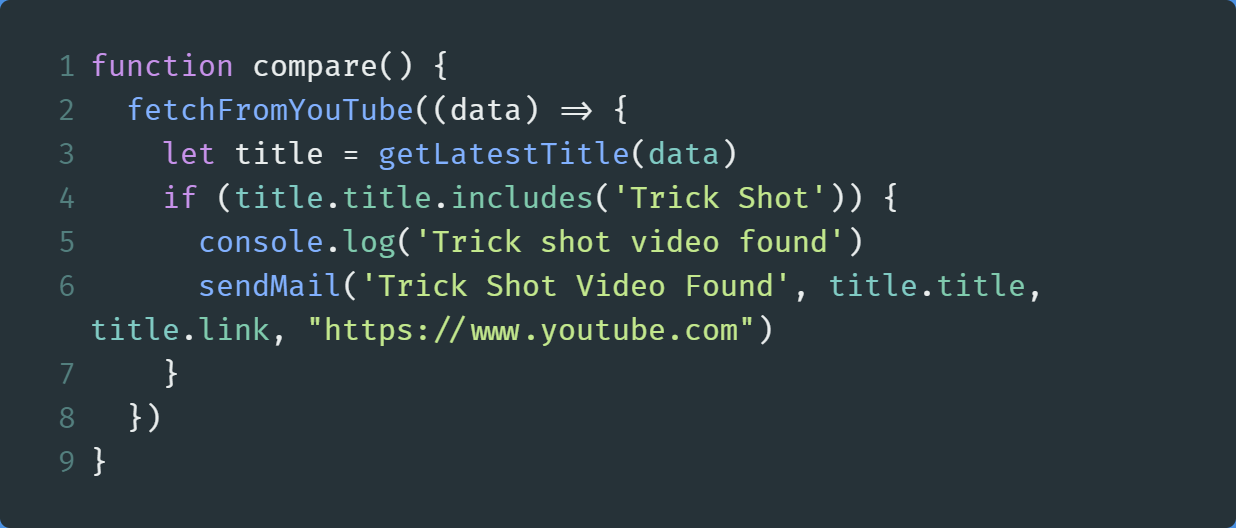
Create a function called compare , and write the following code in it:
创建一个名为compare的函数,并在其中编写以下代码:
In the end, execute this function.
最后,执行此功能。
This will be the output:
这将是输出:

Additionally, you’ll receive the appropriate message in your inbox:
此外,您还会在收件箱中收到相应的消息:

As this script will be always running, modify the compare function like so:
由于此脚本将始终运行,因此请修改compare函数,如下所示:
Line 4: Run thefetchFromYouTubefunction once. The output is saved to a variable calledpreviousTitleLine 4:运行一次fetchFromYouTube函数。 输出保存到一个名为previousTitle的变量中Lines 5–6: After the firstfetchFromYouTubefunction, run the second one immediately.Lines 5–6:在第一个fetchFromYouTube函数之后,立即运行第二个。Lines 7–11: The output from the secondfetchFromYouTubefunction is saved in thelatestTitlevariable. Now run a check whether a new video was published after the commencement of this program. If it does, then check if the latest video contains our keyword. If it does, then send an emailLines 7–11:第二个fetchFromYouTube函数的输出保存在latestTitle变量中。 现在,运行该程序开始后,检查是否发布了新视频。 如果是这样,请检查最新视频是否包含我们的关键字。 如果是这样,请发送电子邮件Line 16: Run thecomparemethod once again. This ensures that the program keeps on running without any delay.Line 16:再次运行compare方法。 这样可以确保程序继续运行而没有任何延迟。
When you run the code, this program will repeatedly check for newest videos on the channel and runs the check again and again.
当您运行代码时,该程序将反复检查频道中的最新视频,并一次又一次地运行检查。
We are finally done with our web scraper project!
我们的网络刮板项目终于完成了!
However, there are several ways where you can change the code of this project and make it more useful for you.
但是,有几种方法可以更改此项目的代码并使之对您更有用。
该应用程序如何对您有用 (How This App Can Be Useful To You)
仅使用特定天才获得Reddit帖子 (Get Reddit Posts Only With A Specific Flair)
You can go to the Positive News subreddit and only get emails for posts that have a specific flair,for example, the Animals flair.
您可以转到“ 正面新闻”子目录 ,仅获取具有特定风格(例如, 动物风格)的帖子的电子邮件。
仅在特定时间运行程序 (Only Run The Program At Specific Times)
What if you want emails for Trump related news articles from CNN only at 9AM? That is possible through the cron module! Alternatively, if you use Linux or MacOS, you can use a task scheduler(Cron Jobs) to run the script at specific times.
如果您只想在上午9点收到来自CNN的特朗普相关新闻文章的电子邮件怎么办? 通过cron模块可以实现! 或者,如果您使用Linux或MacOS,则可以使用任务计划程序(Cron Jobs)在特定时间运行脚本。
获取Unsplash的每日照片 (Get Unsplash’s Photo Of the Day)
Unsplash does not provide the Photo of the Day image through its official API. But now, you can use a web scraper to fetch the image instead!
Unsplash不会通过其官方API提供“每日照片”图像。 但是现在,您可以使用网络刮板来获取图像!
回顾 (Recap)
搜寻静态网站 (Scraping on Static Website)
搜寻动态网站 (Scraping On Dynamic Website)
发送邮件 (Sending Mails)
相关链接和进一步阅读 (Relevant Links And Further Reading)
Note: In those resources, for static websites, they use a module called request-promise and request. As of the time of writing, request-promise is deprecated so it is highly discouraged to use this module. Therefore, you can use axios or node-fetch which are great modules that would do the job.
注意 :在这些资源中,对于静态网站,它们使用称为request-promise和request的模块。 在撰写本文时,不赞成使用request-promise ,因此强烈建议不要使用此模块。 因此,您可以使用axios或node-fetch这是可以完成工作的出色模块。
结论 (Conclusion)
If you found the above projects complicated, then you should try to deconstruct the code and research to find out which function does what job. Just don’t give up!
如果您发现上述项目很复杂,则应尝试对代码进行解构并进行研究,以找出哪个功能可以发挥作用。 只是不要放弃!
Thank you for reading, and have a great day!
感谢您的阅读,并祝您愉快!
Previous Post: React’s Context API Explained
上一篇文章: React的Context API解释了
翻译自: https://codeburst.io/simple-web-scraping-project-with-node-js-b2a1710b4b37
爬网工具


 1089
1089

 被折叠的 条评论
为什么被折叠?
被折叠的 条评论
为什么被折叠?
 到【灌水乐园】发言


