


instagram加速器
A weekend pytorch project to recreate the iconic filters from the a app.
一个周末pytorch项目,用于从应用程序重新创建图标过滤器。
Willow. Perpetua. Lo-Fi. Cream. Toaster. Whimsical names designed to evoke emotion. Dramatic effects of desaturation and wild swings of hue. I’m talking about Instagram filters and their near ubiquitous use on the app. It’s not just for show either — usage of a filter correlates to more views. It’s no wonder that the app places them in the forefront before every post, encouraging a soft glow or a retro faded photograph to be added for engagement. Can we recreate the effects outside of the app? Yes! This article explores how I did that to create a python module named instafilter.
会 Perpetua。 Lo-Fi。 奶油。 烤面包机。 异想天开的名字旨在唤起人们的情感。 脱饱和和色调的剧烈波动的戏剧性影响。 我说的是Instagram过滤器及其在应用程序中的普遍使用。 这也不只是为了展示-过滤器的使用会关联更多视图 。 毫无疑问,该应用程序将它们放置在每个帖子之前的最前列,鼓励添加柔和的光辉或复古的褪色照片以吸引人们的注意力。 我们可以在应用程序外部重新创建效果吗? 是! 本文探讨了如何创建一个名为instafilter的python模块。
其他名字的玫瑰 (A rose by any other name)
What does a filter look like? Let’s take a look at a few examples:
过滤器是什么样的? 让我们看几个例子:
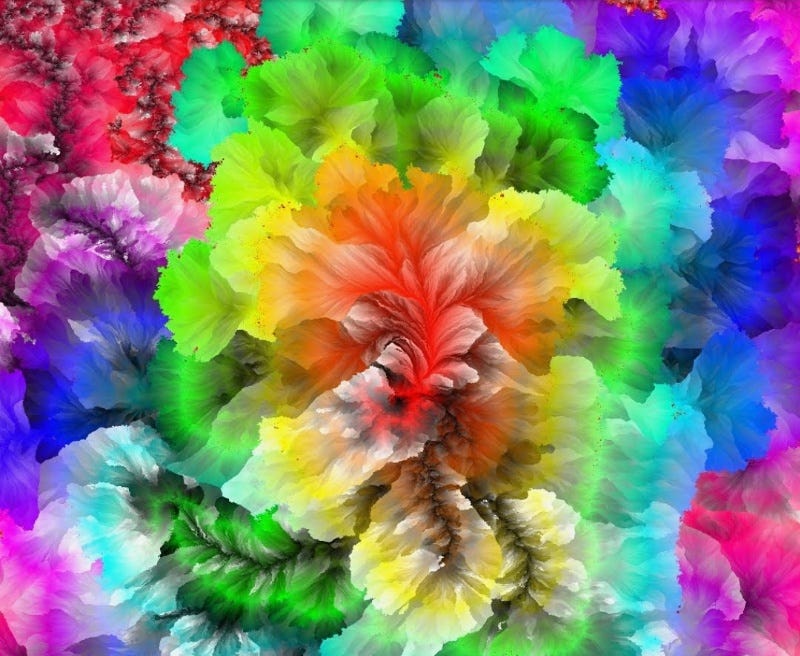
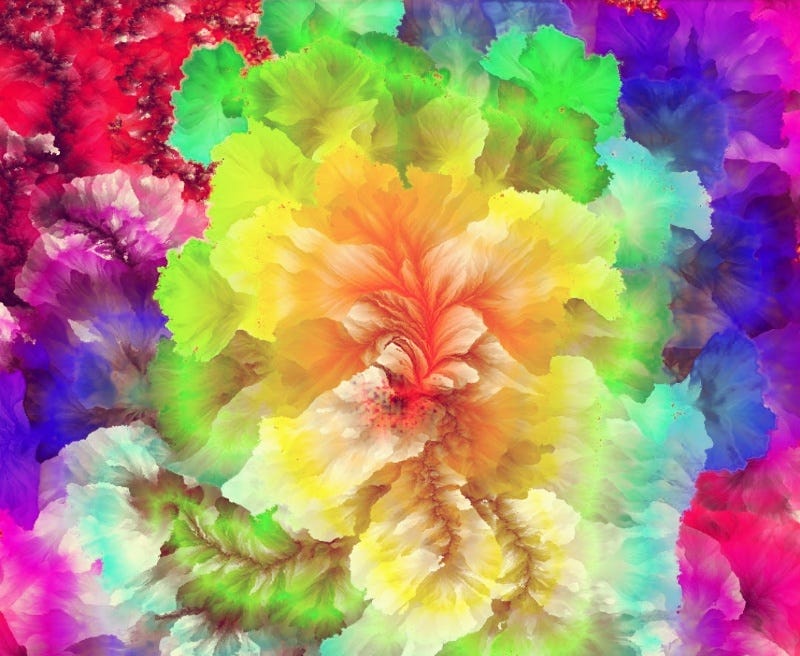
In the upper right, we see a colorful rose and the result of three separate filters. Each one of them dramatically modifies the coloring, brightness, and saturation. One way we could learn a filter is through a 3D LUT (Look Up Table), that is to explicitly write down how every RGB pixel transforms. While that would work, using the full 8-bit space for each color channel, it requires 3*(2⁸)³ = 50,331,648 bits to store the whole table for every filter! If we quantize the LUT by only taking some of the of mappings and interpolating between them, the resulting image often has undesired banding issues due to quantization. Instead, let’s learn a transform. In a transform, the goal is to learn a function that takes in a pixel’s color and maps it to another color. It pays off too, the resulting models instafilter uses are only 9K bits, which is only about 300 32-bit numbers! To get started, we need to build a training set and a model.
在右上方,我们看到了五颜六色的玫瑰和三个独立滤镜的结果。 它们中的每一个都极大地改变了色彩,亮度和饱和度。 我们学习过滤器的一种方法是通过3D LUT (查找表),即明确写下每个RGB像素如何转换。 尽管这可行,但为每个颜色通道使用完整的8位空间,则需要3 *(2⁸)³= 50,331,648位才能为每个滤镜存储整个表! 如果我们仅通过获取一些映射并在它们之间进行插值来量化LUT,则由于量化,生成的图像通常会出现不希望的条纹问题。 相反,让我们学习一个转换。 在转换中,目标是学习一种接受像素颜色并将其映射到另一种颜色的函数。 它也有回报,instafilter使用的结果模型只有9K位,这仅是300个32位数字! 首先,我们需要构建训练集和模型。
建立训练集 (Building a training set)
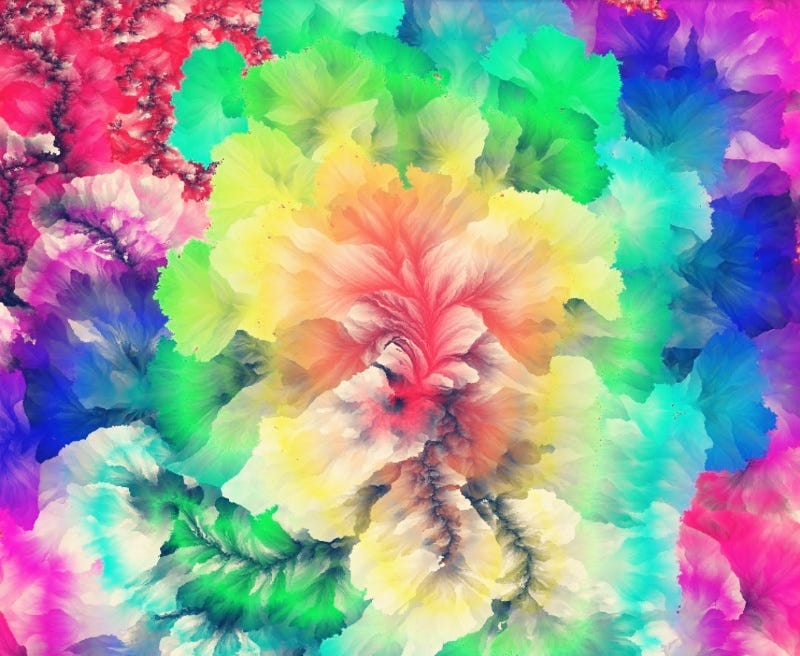
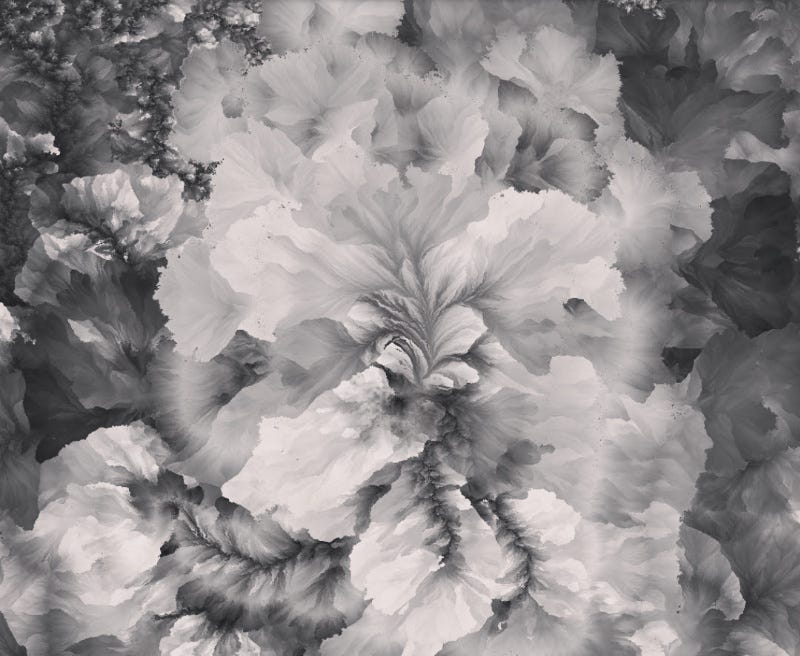
To build the training set, I took the “Untouched” image as a reference photo. This comes from a project from József Fejes whose goal was to create an image with every possible RGB color represented. In theory, we could use a boring grid of pixels, this colorful rose allows us to visualize the results. Using the high resolution photo, I ran it through each filter on Instagram and saved the result. The result isn’t perfect however, since Instagram downsamples the image and saves it as a JPEG. In practice however, the resulting difference is small enough that the end result looks as good as the app.
为了建立训练集,我将“未触动”图像作为参考照片。 这是来自从项目的József费耶什,其目标是与每一个可能的RGB颜色表示创建一个图像。 从理论上讲,我们可以使用无聊的像素网格,这种彩色玫瑰使我们可以可视化结果。 使用高分辨率照片,我将其运行在Instagram上的每个滤镜中,并保存了结果。 但是结果并不完美,因为Instagram对图像进行了下采样并将其另存为JPEG。 但是,实际上,结果差异很小,以至于最终结果看起来与应用程序一样好。
My first thought for the training set was to train a transform:
对于训练集,我的第一个想法是训练一个转换:
f(R, G, B) -> (R’, G’, B’)
f(R,G,B)->(R',G',B')
that is, given the Red, Green, and Blue color channels, learn a function that would map them to the new RGB colors. This didn’t work as well as I wanted, so I had to help out the network. Although the network trained with just RGB, it had to be much larger than I would have wanted to converge. Instead I used
也就是说,给定红色,绿色和蓝色通道,可以学习将它们映射到新的RGB颜色的功能。 这没有我想要的那么好,所以我不得不帮助网络。 尽管网络仅使用RGB进行训练,但它必须比我想要融合的要大得多。 相反,我用
f(R, G, B, L, S) -> (R’, G’, B’)
f(R,G,B,L,S)->(R',G',B')
where L and S are the lightness and saturation. It’s simple to calculate these values from the RGB but it helped the network tremendously by doing some of the work upfront. This is the art of machine learning; I could see that Instagram filters modify lightness and saturation so I fed them into the input features. By giving it some additional information the network did not have to waste capacity learning those features itself.
其中L和S是亮度和饱和度。 从RGB计算这些值很简单,但是通过做一些前期工作极大地帮助了网络。 这是机器学习的艺术。 我可以看到Instagram滤镜修改了亮度和饱和度,因此我将它们输入到输入功能中。 通过为其提供一些附加信息,网络不必浪费自身学习这些功能的能力。
训练网络 (Training the network)
The model itself is really simple, a 4 layer fully — connected neural network:
该模型本身非常简单,是一个四层全连接神经网络:
This was my first time really using pytorch and I enjoyed how natural it seemd. It was really freeing to observe the variables and interact with them like regular python objects. If you’ve only ever used tensorflow, give it a try for your next project. To train the model, I borrowed ideas from fast.ai and used one-cycle with a learning rate finder. If you’re interested, you can see the training code directly.
这是我第一次真正使用pytorch,我喜欢它看起来多么自然。 观察变量并像普通的python对象一样与它们进行交互真的很自由。 如果您只使用过tensorflow,请尝试下一个项目。 为了训练模型,我借鉴了fast.ai的想法,并使用一个周期的学习率查找器。 如果您有兴趣,可以直接查看培训代码 。
Training took about 3 minutes per model and I reached a mean average loss of about 0.2. It’s not perfect, mostly due to the imperfections of my training set, but it doesn’t need to be. As far as I can tell, the output is indistinguishable from the real filters.
每个模型的培训时间约为3分钟,而我的平均平均损失约为0.2。 它不是完美的,主要是由于我的训练集的不完善,但这不是必须的。 据我所知,输出与真实过滤器是无法区分的。
使用instafilter (Using instafilter)
It’s easy to use the python module yourself! First install it with pip
自己轻松使用python模块! 首先用pip安装它
pip install instafilterand now you can use it in your own code like this:
现在您可以在自己的代码中使用它,如下所示:
from instafilter import Instafilter
model = Instafilter("Lo-fi")
new_image = model("myimage.jpg")
# To save the image, use cv2
import cv2
cv2.imwrite("modified_image.jpg", new_image)
I’ll close with a few more examples:
我将以其他一些示例结束:


That’s it! Let me know if you like this or have any comments on the twitter thread.
而已! 让我知道您是否喜欢此消息或对twitter线程有任何评论。
翻译自: https://medium.com/@travis.hoppe/instagram-filters-in-python-acc1ee7e67bc
instagram加速器


 860
860

 被折叠的 条评论
为什么被折叠?
被折叠的 条评论
为什么被折叠?
 到【灌水乐园】发言


