


aws lambda
AWS Lambda is a versatile serverless tool. With Lambda, you can run virtually anything you like - just write the code and upload it to Lambda. You’ll be charged for every 100ms you use, so you only pay for the compute time you consume.
AWS Lambda是一种通用的无服务器工具。 使用Lambda,您几乎可以运行任何喜欢的东西-只需编写代码并将其上传到Lambda。 您需要为使用的每100ms付费,因此您只需为您消耗的计算时间付费。
Lambda supports Python, which is a great option if you’ve got experience using it. However, one of the downsides to Lambda is that by default you won't be able to import your trusted packages, like Pandas.
Lambda支持Python,如果您有使用Python的经验,这是一个不错的选择。 但是,Lambda的缺点之一是,默认情况下,您将无法导入受信任的程序包,例如Pandas。
I’m going to show you the easiest way of importing any package you need for your Lambda function. I’ll be using Pandas as an example, but the same method can be used for other packages.
我将向您展示导入Lambda函数所需的任何包的最简单方法。 我将以Pandas为例,但其他包装也可以使用相同的方法。
步骤1:在AWS中启动Cloud9 Linux实例 (Step 1: Start a Cloud9 Linux instance in AWS)
- Search for Cloud9 in the AWS Services 在AWS服务中搜索Cloud9
- Click ‘Create Environment’ 点击“创建环境”
- Name your environment whatever you like (e.g. python_package_test) and click next step 随意命名您的环境(例如python_package_test),然后单击下一步
- Keep the environment default settings (Create a new EC2 instance for environment; t2.micro ; Amazon Linux etc..) and click next step 保留环境默认设置(为环境创建新的EC2实例; t2.micro; Amazon Linux等。),然后单击下一步
- Click ‘Create Environment’ and you’re ready to go 点击“创建环境”,就可以开始了

步骤2:建立Pandas Lambda图层 (Step 2: Creating your Pandas Lambda layer)
Type the following code line by line into the terminal at the bottom. The pip install pandas command can be replaced with a package of your choosing. You can also install more than 1 package*.
在底部的终端中逐行键入以下代码。 pip install pandas命令可以替换为您选择的软件包。 您还可以安装多个软件包*。
mkdir folder
cd folder
virtualenv v-env
source ./v-env/bin/activate
pip install pandas
deactivate- Then type the following code line by line to create your layer 然后逐行键入以下代码以创建您的图层
mkdir python
cd python
cp -r ../v-env/lib64/python3.6/dist-packages/* .
cd ..
zip -r panda_layer.zip python
aws lambda publish-layer-version --layer-name pandas --zip-file fileb://panda_layer.zip --compatible-runtimes python3.6
步骤3:将Pandas图层添加到Lamda函数中 (Step 3: Adding the Pandas layer to your Lamda function)
- Go to the AWS Lambda service and click ‘Create Function’ 转到AWS Lambda服务,然后单击“创建功能”
- Name your function, set the runtime to ‘Python 3.6’, and click ‘Create Function’ 命名您的函数,将运行时设置为“ Python 3.6”,然后单击“创建函数”
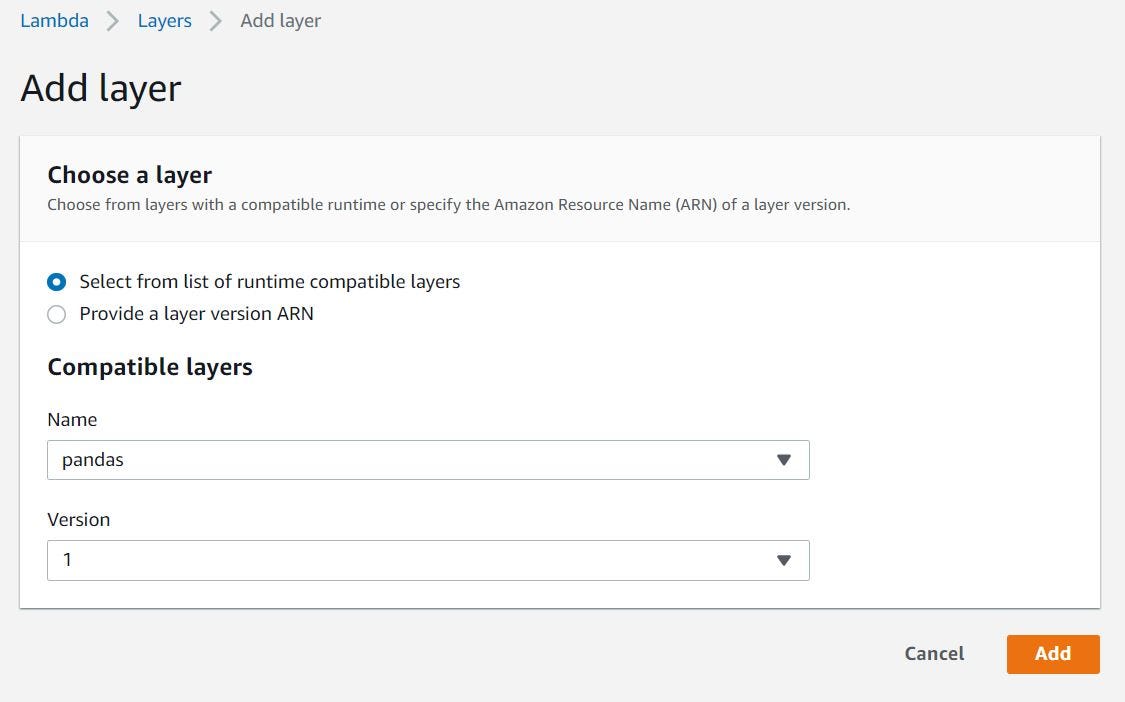
- Click on ‘Layers’ in the function designer, then click ‘add a layer’ 在函数设计器中单击“层”,然后单击“添加层”
- On the name dropdown, you should see your Pandas layer. Click ‘Add’. 在名称下拉列表中,您应该看到“熊猫”图层。 点击“添加”。
Let’s test this has worked with the following script. Note, I’m also able to import numpy as it is a dependency for the Pandas package:
让我们测试一下以下脚本是否可以正常工作。 注意,我也可以导入numpy,因为它是Pandas包的依赖项:
import numpy as np
import pandas as pddef lambda_handler(event, context):
    df2 = pd.DataFrame(np.array([[1, 2, 3], [4, 5, 6], [7, 8, 9]]),columns=[‘a’, ‘b’, ‘c’])
    number = np.pi
    print(df2)
    print(number)
It worked! We can see the pandas DataFrame output and the digits of pi, proof numpy and pandas have successfully imported.
有效! 我们可以看到pandas DataFrame输出以及pi,证明numpy和pandas的数字已成功导入。
*Limitations: A Lambda function can use up to 5 layers at a time, however, the total unzipped size of the function and all layers can’t exceed 250 MB.
*限制:Lambda函数一次最多可以使用5个层,但是,该函数的总解压缩大小以及所有层的总大小不能超过250 MB。
翻译自: https://towardsdatascience.com/python-packages-in-aws-lambda-made-easy-8fbc78520e30
aws lambda


 1744
1744

 被折叠的 条评论
为什么被折叠?
被折叠的 条评论
为什么被折叠?
 到【灌水乐园】发言


