


 本文介绍了如何利用Windows 10的WSL(Windows Subsystem for Linux)来设置Golang开发环境,适合希望在Windows平台上进行Go语言开发的用户。
windows10 wsl
Windows 10 now supports Windows Subsystem for Linux and it let you run GNU/Linux environment on top of the Windows system.
Windows 10现在支持Linux的Windows子系统,它使您可以在Windows系统之上运行GNU / Linux环境。
I am going to walk through the minimum setup for Golang development with Windows 10 + WSL.
我将逐步介绍使用Windows 10 + WSL开发Golang的最低设置。
The setups are:
设置为:
- Installing WSL 安装WSL
- Installing Ubuntu for the WSL 为WSL安装Ubuntu
- Installing Docker 安装Docker
- Installing VS Code 安装VS代码
- Installing Golang in WSL 在WSL中安装Golang
Before you start, check your windows version with Windows Key + R and then type winver.
在开始之前,请使用Windows Key + R检查Windows版本,然后键入winver 。
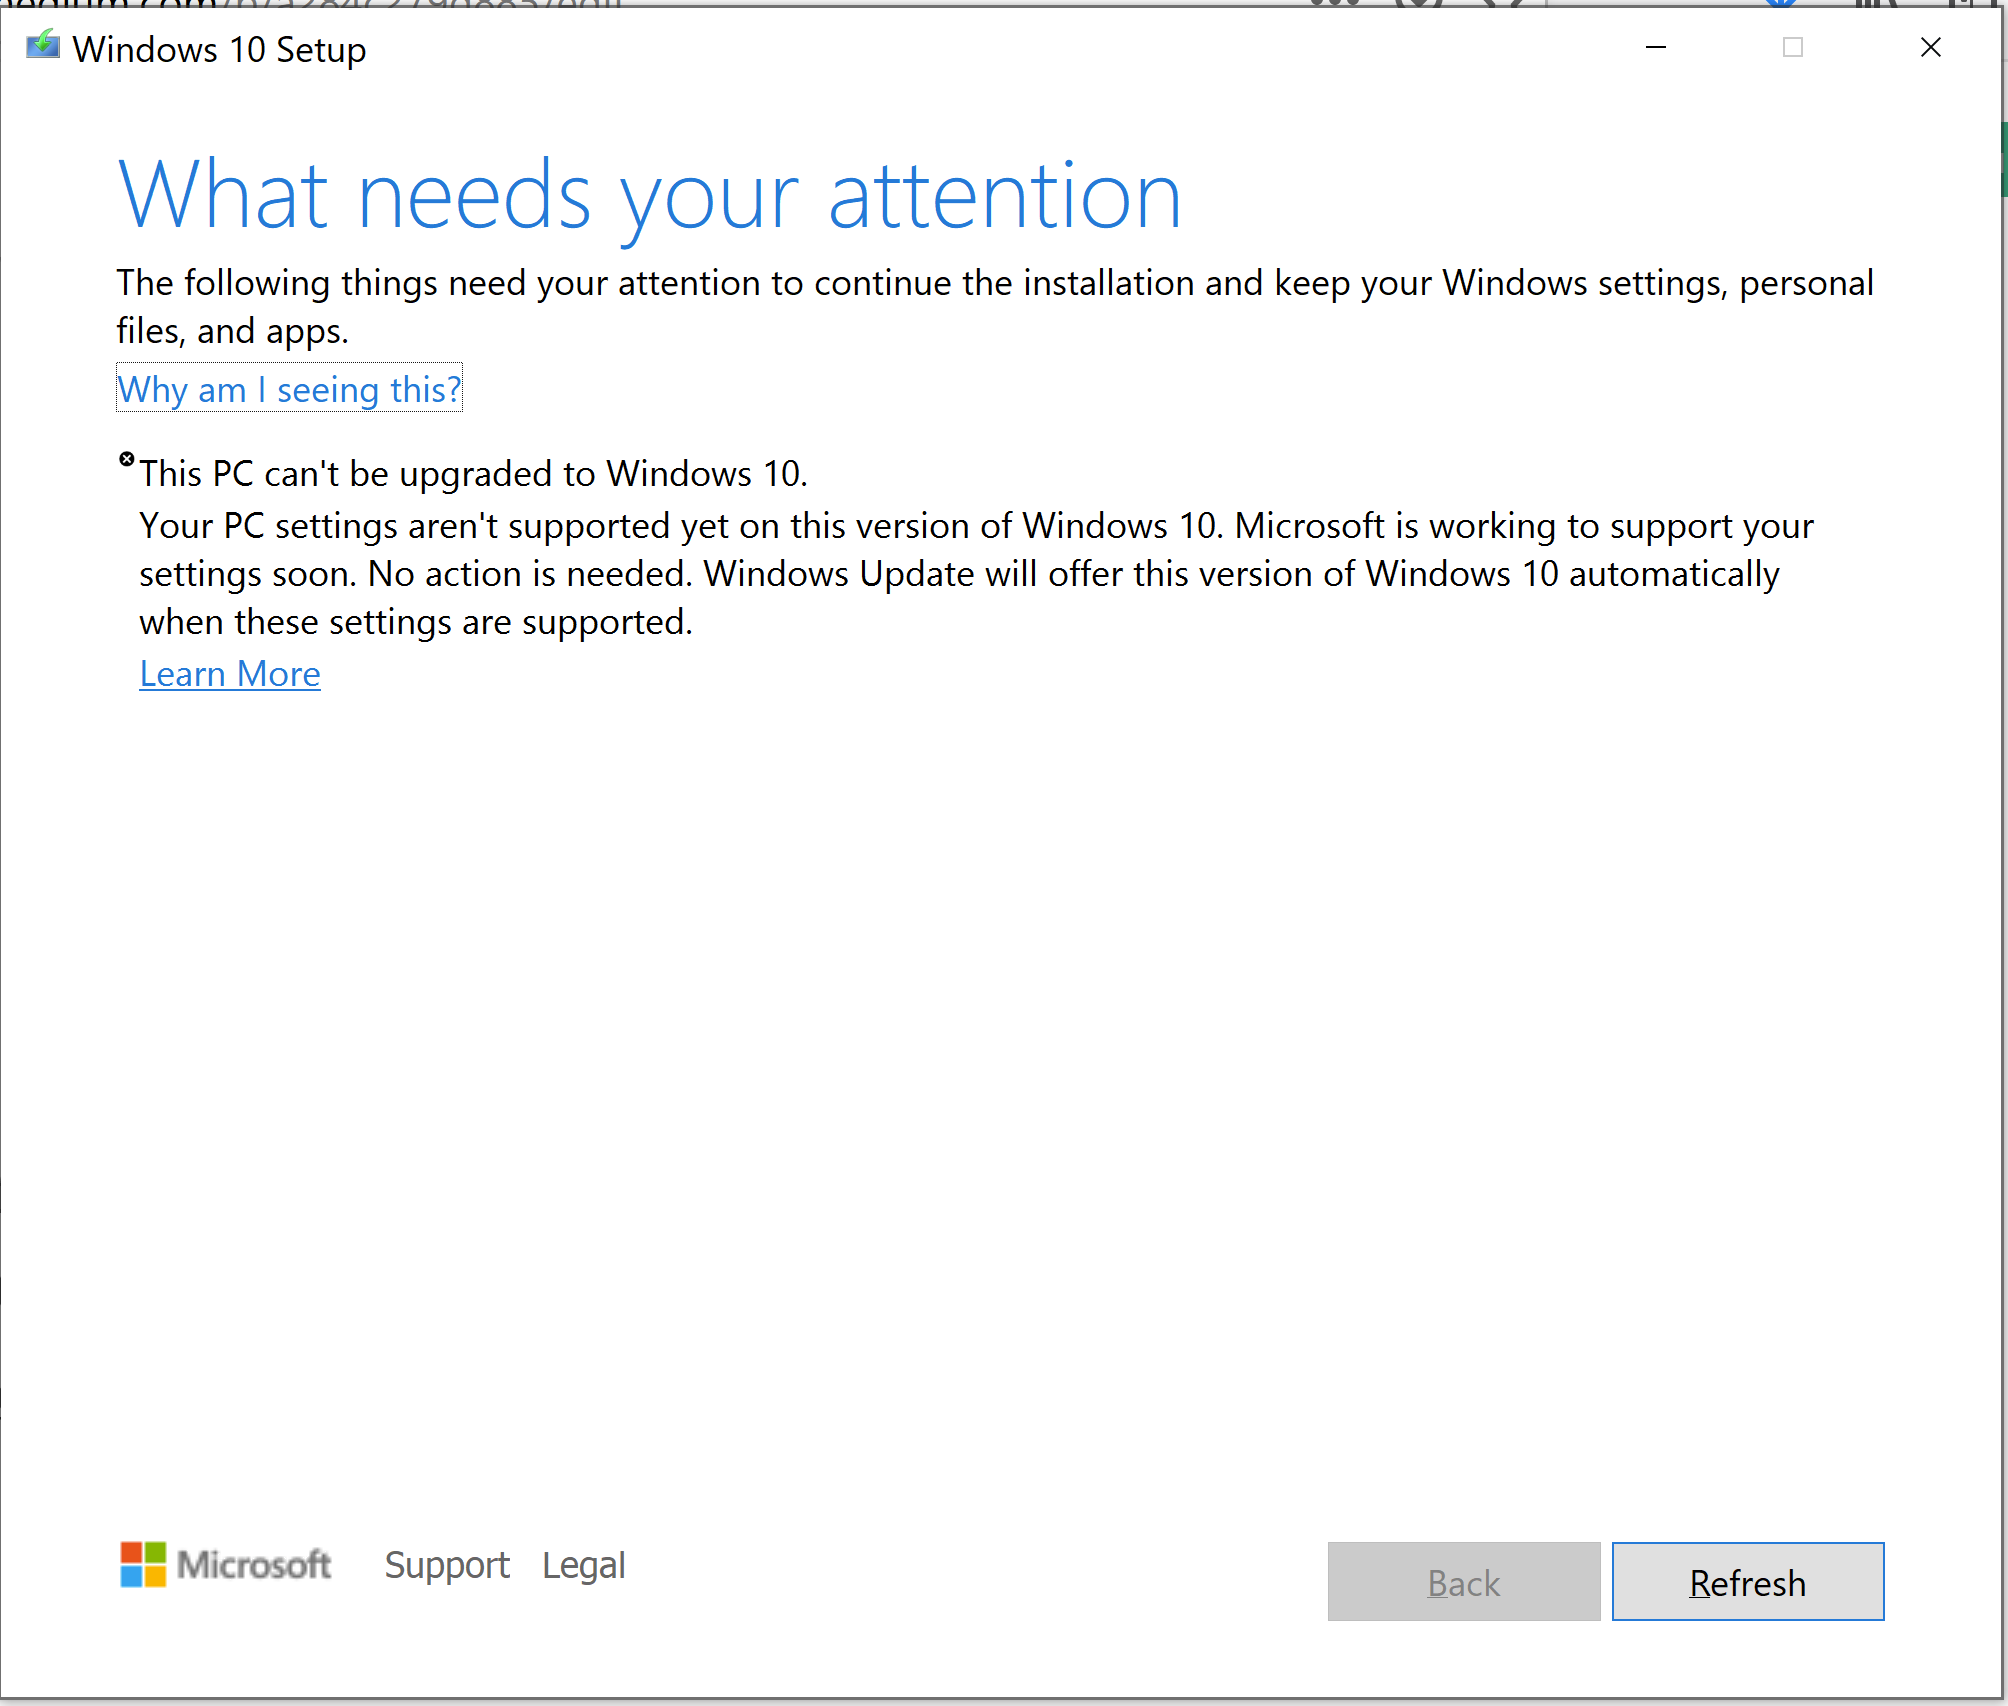
In case you have Windows version older than version 2004 you can’t install WSL 2, but you still able to install WSL 1. You need to update your Windows 10 to version 2004 Build 19041 in order to install WSL 2. To update it, you can update from your Windows setting or use the Windows update assistant.
如果您使用的Windows版本早于2004版,则无法安装WSL 2,但仍可以安装WSL1。您需要将Windows 10更新到2004 Build 19041版本才能安装WSL2。要进行更新,您可以从Windows设置进行更新,也可以使用Windows更新助手 。
In case you saw this following screen from update assistant, that is fine and you can keep installing WSL and using Linux environment on your Windows.
如果您从更新助手中看到以下屏幕,那很好,您可以继续在Windows上安装WSL并使用Linux环境。
In my case, it is not an issue with WSL 1 for my development enviroment. For full comparison between WSL and WSL 2 you can check it here.
就我而言,对于我的开发环境,WSL 1并不是问题。 要在WSL和WSL 2之间进行全面比较,可以在此处进行检查。
安装WSL (Installing WSL)
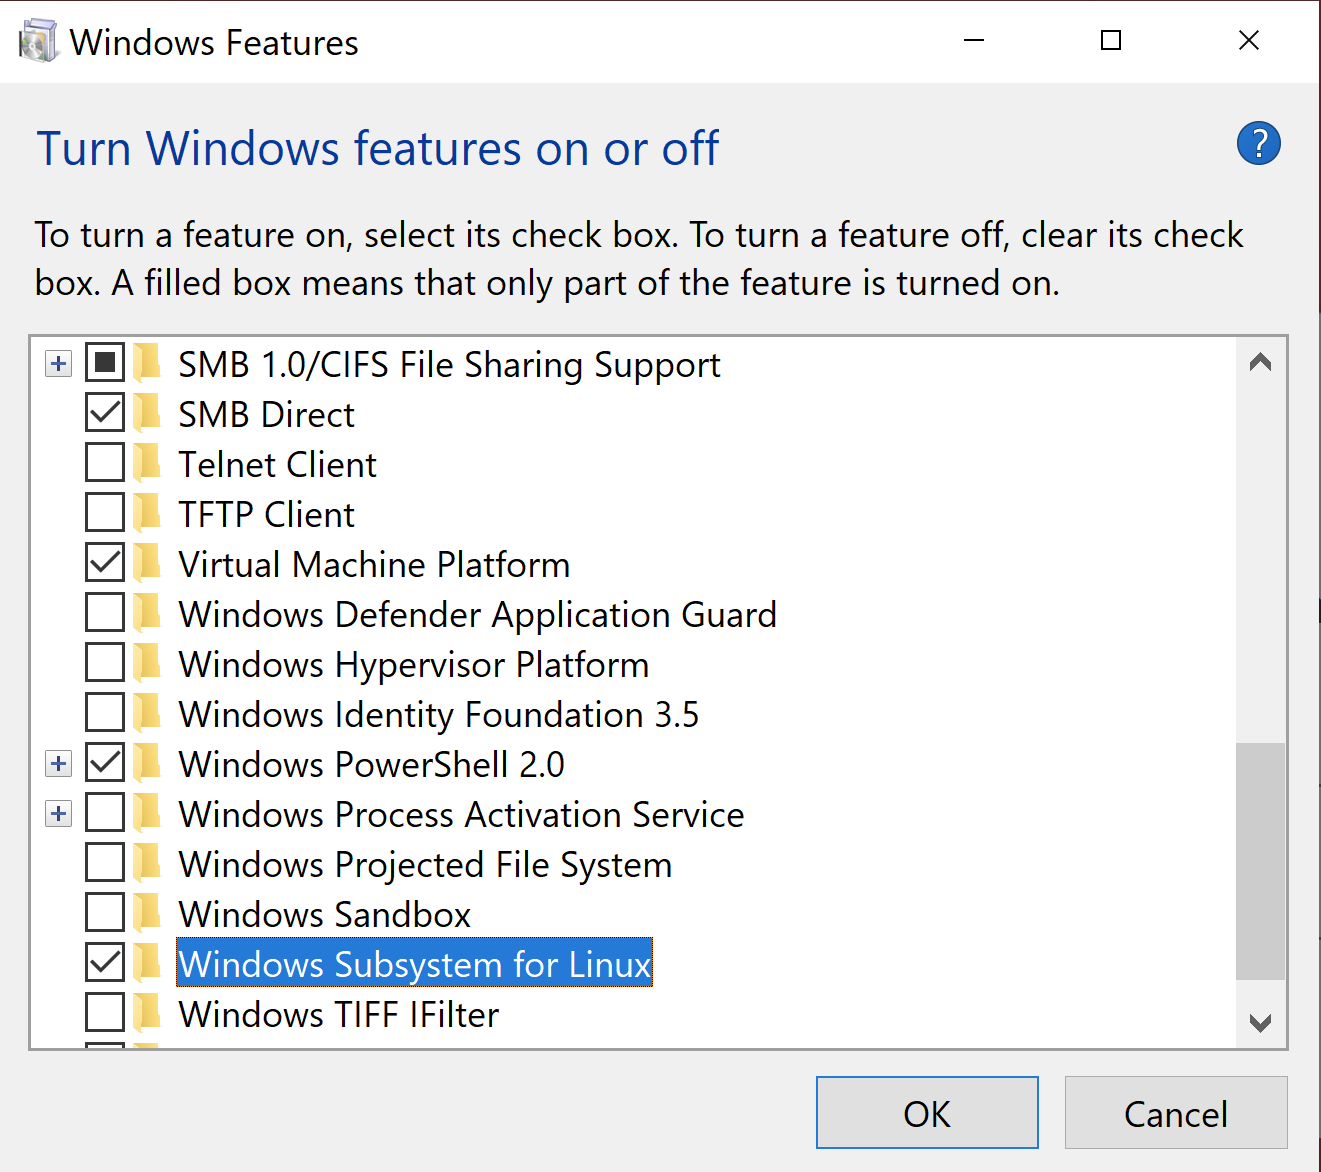
To install WSL, you need to enabling “Windows Subsystem for Linux” optional feature. There are two ways to doing it.
要安装WSL,您需要启用“ Linux的Windows子系统”可选功能。 有两种方法可以做到这一点。
First way, open PowerShell as Administrator and run:
第一种方法,以管理员身份打开PowerShell并运行:
dism.exe /online /enable-feature /featurename:Microsoft-Windows-Subsystem-Linux /all /norestartSecond way, goes to Turn Windows features on or off setting and check Virtual Machine Platform and Windows subsystem for Linux
第二种方法,转到“ Turn Windows features on or off设置,并检查Windows subsystem for Linux Virtual Machine Platform和Windows subsystem for Linux
安装适用于WSL的Ubuntu (Installing Ubuntu for WSL)
Installing Ubuntu is pretty simple in Windows 10. You can go to Windows Store and search ubuntu then click “Get”, it will install it on your WSL directly.
在Windows 10中安装Ubuntu非常简单。您可以转到Windows应用商店并搜索ubuntu然后单击“获取”,它将直接将其安装在WSL上。
Once the installation is done, try to press Windows Key and type “Ubuntu”, then open the Ubuntu application listed there, you should be redirected to a linux terminal and your linux system already up and running.
安装完成后,尝试按Windows键并键入“ Ubuntu”,然后打开此处列出的Ubuntu应用程序,应将您重定向到linux终端,并且您的linux系统已经启动并正在运行。
在WSL中安装Golang (Install Golang in WSL)
In this example, we are going to install Go 1.14.4 version, in case you want to install the newer version, the steps should be identical you just need to replace the download link from Go official site. Open your WSL terminal and run these commands:
在此示例中,我们将安装Go 1.14.4版本,如果要安装较新的版本,步骤应该相同,只需要替换Go官方网站上的下载链接即可。 打开您的WSL终端并运行以下命令:
# Download the Golang source into ~/Download folder
wget -P ~/Download https://golang.org/dl/go1.14.4.linux-amd64.tar.gz                       # Extract the source code
sudo tar -C /usr/local/ -xzf ~/Download/go1.14.4.linux-amd64.tar.gz
To verify your installation you can type go version and it should show the go version installed on WSL.
要验证您的安装,您可以键入go version ,它应该显示WSL上已安装的go版本。
安装VS代码 (Installing VS Code)
For working with VS Code, you should install it on your Windows side, not in the WSL. Go to VS Code site and download the Windows installer. Then open the downloaded .exe file and finish the installation.
要使用VS Code,您应该将其安装在Windows上,而不是WSL中。 转到VS Code站点并下载Windows安装程序。 然后打开下载的.exe文件并完成安装。
When prompted to Select Additional Tasks during installation, be sure to check the Add to PATH option so you can easily open a folder in WSL by typing code command on the working directory.
当系统提示您在安装过程中选择其他任务时,请确保选中添加到路径选项,以便您可以通过在工作目录上键入code命令轻松地在WSL中打开一个文件夹。
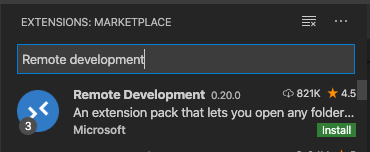
After the installation is finish, install the “Remote Development Extension Pack” to your VS Code. You can install it from here, or you can search it on the VS Code extension market place.
安装完成后,将“远程开发扩展包”安装到VS Code。 您可以从此处安装它,也可以在VS Code扩展市场上进行搜索。
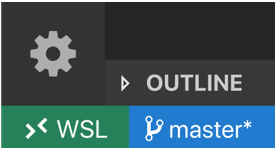
After restarting you VS Code, you should see WSL on the bottom left corner of your VS Code. And now you are able to use your VS Code normally.
重新启动VS Code后,您应该在VS Code的左下角看到WSL。 现在,您可以正常使用VS代码了。
在WSL中安装Docker (Installing Docker in WSL)
This step might not required if you are not using docker for your development. In case you need it you can run these following command from your WSL. (in my case, I am installing Ubuntu 20.04 in my WSL)
如果您不使用docker进行开发,则可能不需要此步骤。 如果需要,可以从WSL运行以下以下命令。 (就我而言,我正在WSL中安装Ubuntu 20.04)
# download .deb package for docker
wget -P ~/Download https://download.docker.com/linux/ubuntu/dists/focal/pool/stable/amd64/docker-ce_19.03.12~3-0~ubuntu-focal_amd64.deb

wget -P ~/Download https://download.docker.com/linux/ubuntu/dists/focal/pool/stable/amd64/docker-ce-cli_19.03.12~3-0~ubuntu-focal_amd64.debwget -P ~/Download https://download.docker.com/linux/ubuntu/dists/focal/pool/stable/amd64/containerd.io_1.2.13-2_amd64.deb
# installing docker-cli and docker-ce
sudo dpkg -i ~/Downloads/docker-ce-cli_19.03.12\~3-0\~ubuntu-focal_amd64.deb                        sudo dpkg -i ~/Downloads/containerd.io_1.2.13-2_amd64.deb                       sudo dpkg -i ~/Downloads/docker-ce_19.03.12\~3-0\~ubuntu-focal_amd64.deb
Try verify your installation with docker info, in case you found the output something like this one, try to use sudo.
尝试使用docker info验证安装,以防发现类似此输出的情况,请尝试使用sudo 。
Client:
 Debug Mode: falseServer:
ERROR: Got permission denied while trying to connect to the Docker daemon socket at unix:///var/run/docker.sock: Get http://%2Fvar%2Frun%2Fdocker.sock/v1.40/info: dial unix /var/run/docker.sock: connect: permission denied
errors pretty printing info
If you want to access docker without sudo you can run this following command:
如果要不使用sudo访问docker,则可以运行以下命令:
sudo usermod -aG docker $USERAfterwards, close the terminal or logout your profile to take effect. That command is going to add your linux user into docker user group.
然后,关闭终端或注销您的配置文件以生效。 该命令将把您的Linux用户添加到docker用户组中。
进一步设置 (Further Setup)
自动热键(键映射器) (AutoHotkey (Key Mapper))
AutoHotkey will help you to remap your keyboard buttons for better experience with your development. Let say you are using vim and you want to swap your CapsLock into extra Esc button.
AutoHotkey将帮助您重新映射键盘按钮,以更好地体验开发。 假设您正在使用vim并且想要将CapsLock交换为额外的Esc按钮。
Config for Swap CapsLock into extra Esc button:
将交换CapsLock配置为额外的Esc按钮:
;Remap hotkeys
CapsLock::Esc
Esc::CapsLock
PowerToys(应用启动器) (PowerToys (App Launcher))
PowerToys is an app launcher that might help you productivity. This app launcher works like “Spotlight Search” in the MacOS.
PowerToys是一个应用启动器,可以帮助您提高工作效率。 此应用启动器的工作方式类似于MacOS中的“ Spotlight Search”。
翻译自: https://medium.com/swlh/setup-windows-10-with-wsl-for-golang-development-a284c279d885
windows10 wsl


 3369
3369

 被折叠的 条评论
为什么被折叠?
被折叠的 条评论
为什么被折叠?
 到【灌水乐园】发言


