


 这篇博客介绍了如何利用Python的Click库构建你的第一个命令行界面(CLI)应用程序,引导读者逐步完成CLI的创建过程。
python cli
Life at the terminal is sweet. It’s fast powering up tasks, makes multitasking feel remarkably easy and allows you to keep resources that would otherwise be used by a fancy, but unnecessary, GUI.
码头的生活很甜蜜。 它可以快速启动任务,使多任务处理变得异常简单,并允许您保留原本可以由花哨的但不必要的GUI使用的资源。
Think about having to load up a graphical interface Version Control tool every time you want to track a change in your file — it’s scary how time-wasting that is. That’s our need for command-line interfaces on applications. When you get the itch to create a CLI for an application for the use of you or your team, you scratch it, of course, by building one!
考虑一下每次您要跟踪文件中的更改时都必须加载图形界面版本控制工具-这太浪费时间了,这太可怕了。 这就是我们对应用程序上的命令行界面的需求。 当您想为应用程序创建CLI以便您或您的团队使用时,您当然会通过构建一个来开始使用它!
In this article, well explore Python Click for creating command-line interfaces. We’ll familiarize ourselves with Click’s most useful features and see them at play. To do so, we have to get our hands dirty by creating a media file convertor CLI application — a little dirt never hurt!
在本文中,您将深入探索Python Click来创建命令行界面。 我们将使自己熟悉Click的最有用的功能,并在使用中看到它们。 为此,我们必须通过创建媒体文件转换器CLI应用程序来弄脏我们的手,一点脏物永远不会伤害您!
If you would like to jump right into the complete project first, the code is here.
In the first part of our Python click tutorial, we cover a general but pretty cool Command Line Interface features undirectly related to click. If you’re about to create your first CLI app, you’ll find this bit useful. But for a direct dive, go straight to the section Bringing Click into the Picture.
在我们的Python Click教程的第一部分中,我们介绍了与Click无关的常规但非常酷的Command Line Interface功能。 如果您要创建第一个CLI应用程序,那么您会发现这很有用。 但是,如果要直接潜水,请直接转到“ 将图片插入图片”部分 。
那么,为什么要使用命令行库? (So, Why a Command-Line Library?)
Click is a Python library. It’s possible to create your own CLI from scratch. Take a look at this prompt:
Click是一个Python库。 可以从头开始创建自己的CLI。 请看以下提示:
$ >>> Make the world go round?
       A little [default]
       Yes
       No
It’s a simple prompt that asks the user to select from three available choices. We can simply have this with the command below:
这是一个简单的提示,要求用户从三个可用选项中进行选择。 我们可以使用以下命令简单地做到这一点:
user_choice = input('Make the world go round?\n' +
      'A little [default]\n' + 'Yes\n' + 'No\n')
Just like that, we can interact with the user at the command line. We’re taking a leap of faith and hoping that the user gives us a response from the available choices — which may not happen. This takes us to the issue of parsing user inputs.
这样,我们可以在命令行与用户进行交互。 我们的信念飞跃,希望用户能从可用的选择中给我们答复-可能不会发生。 这将我们带到了解析用户输入的问题。
We have to be ready for the user who replies “spin it” or something fancier like “I’m not sure”.
我们必须为回复的用户做好准备 “旋转”或像“我不确定”这样的幻想者。
By looping with that condition, we restrict our user to giving us one of the three options. That should do it.
通过循环这种条件,我们限制了用户为我们提供三个选项之一。 那应该做。
But…remember we wanted “A little” to be our default option if the user doesn’t specify anything. We tweak our code a bit to accommodate this. We should end up with something along these lines:
但是…记住我们想要“一点” 如果用户未指定任何内容,则为默认选项。 我们对代码进行了一些调整以适应这一点。 我们应该遵循以下原则:
It might lessen the excitement, noticing how much patience it takes to parse a single user input. Most of the effort has gone into handling side cases of users who don’t like to follow instructions.
注意到分析单个用户输入需要花费多少耐心,这可能会减少兴奋感。 大多数工作已用于处理不喜欢遵循说明的用户的附带情况。
It would also be better if the app could specify the error in their input, rather than just repeat the same line — another consideration.
如果应用程序可以在输入中指定错误,而不是仅重复同一行,则更好。
It’s possible to do this for a complete CLI app — parse each prompt, have descriptive error messages, give the user frequent feedback (we hate guessing — remember the last time you used dd). Importantly, we should be asked if we’re sure when we’re about to do something that seems silly.
可以针对完整的CLI应用程序执行此操作-解析每个提示,获取描述性错误消息,为用户提供频繁的反馈(我们讨厌猜测-记住上次使用dd的时间)。 重要的是,应该问我们是否确定何时要做一些看起来很愚蠢的事情。
We’re getting our hands dirty. We should be focusing on feature delivery. Command-line libraries are here to take away this pain so we can focus on the cool part. Remember, dirt doesn’t hurt — as long as it’s just a little dirt!
我们正在弄脏我们的手。 我们应该专注于功能交付。 命令行库可以减轻这种痛苦,因此我们可以集中精力处理很酷的部分。 记住,污垢不会伤害-只要是一点污垢即可!

跳入参数向量(Argv) (Jumping Into Argument Vectors (Argv))
In the example spinning the world, we used input to interact with the user. However, it would make more sense to allow the user to supply their input directly when launching the application.
在旋转世界的示例中,我们使用input与用户进行交互。 但是,在启动应用程序时允许用户直接提供他们的输入会更有意义。
To run what we currently have, we would use:
要运行当前拥有的内容,我们将使用:
>>> python spin_world_v2.pyMake the world go round?
 A little [default]
 Yes
 No: #    User gives input
The user has to wait for the app to run to give their desired input. What we think would be a well-behaved script is:
用户必须等待应用运行以提供所需的输入。 我们认为,行为良好的脚本是:
>>> python spin_world_v2.py 'a little'# Then the world spins. Of course, a littleThat way, we won’t have to wait for an input prompt to ask the user if they want the world to spin. We use argv to do this. Shall we tweak our first script a little more?
这样,我们将不必等待输入提示来询问用户是否希望世界旋转。 我们使用argv来做到这一点。 我们可以再稍微调整一下第一个脚本吗?
Running the script produces the following results:
运行脚本将产生以下结果:
Option 1 - Known argument
>>> python spin_world_v2.py 'a little'

# Output    [spin_world_v3.py 'a little'] # Our argv list    Spinning this thing a littleOption 2 - Unknown argument
>>> python spin_world_v2.py 'some more'# Output    [spin_world_v3.py 'a little'] # Our argv list

    Use with: a little yes, or no. Cool?
We’ve created a command-line script. All command-line apps use the argv concept when requiring the user to supply an argument while starting the application. Now, it will be sure to click when we have a look at the same concept, but using click library.
我们已经创建了一个命令行脚本。 当要求用户在启动应用程序时提供参数时,所有命令行应用程序都使用argv概念。 现在,当我们查看相同的概念但使用单击库时,将确保单击。
界面选项 (Interface Options)
We use the shell ls all the time. We can learn some tips about interfaces by having a look at it.
我们一直在使用shell ls 。 我们可以通过学习一些有关接口的技巧。
Running ls in a terminal window:
运行ls 在终端窗口中:
ls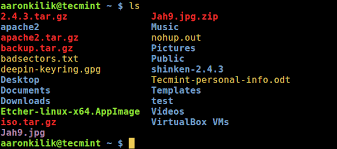
It’s a simple tool. We can use it without calling an argument and be happy.
这是一个简单的工具。 我们可以使用它而无需调用参数并感到高兴。
But would the use of an argument make us happier? Let’s see.
但是使用论点会使我们更快乐吗? 让我们来看看。
ls -l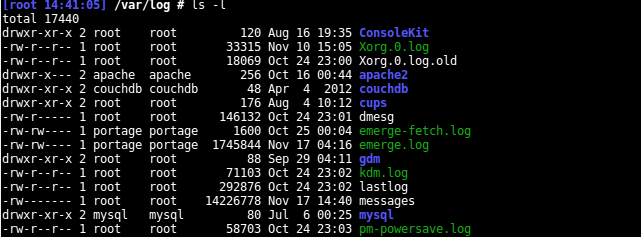
Here, we made the tool a little noisy by requesting details. It throws at us the file permissions, the owner, the group, size, time, and name. It worked! In this case, -l is an option. Let’s see docs on its use:
在这里,我们通过询问详细信息使该工具有点嘈杂。 它向我们抛出文件许可权,所有者,组,大小,时间和名称。 有效! 在这种情况下, -l是一个选项。 让我们看看它的用法文档:
>>> ls --help
Usage: ls [OPTION]... [FILE]...# Run this to see the complete [OPTIONS] list
We see ls takes only two arguments — the option, and an optional path. We can vary the taste of information we get on our files and sub-directories by playing around with the listed options.
我们看到ls 仅接受两个参数-选项和可选路径。 我们可以通过使用列出的选项来改变在文件和子目录中获得的信息的口味。
接口命令 (Interface Commands)
ls has options. However, we can say it has no commands. The use of commands is to group related options of a CLI.
ls 有选择。 但是, 可以说它没有命令。 命令的使用是对CLI的相关选项进行分组。
tool command --optionWe can have hundreds of options in hundreds of commands. Why not place everything in a single list of options? That’s like filling your house with traps so trap admirers can come and visit you! Maintenance of your application will be difficult and users will find it hard to work with more complex features.
我们可以在数百个命令中包含数百个选项。 为什么不将所有内容都放在一个选项列表中? 这就像用陷阱塞满你的房子,使陷阱崇拜者可以来拜访您! 应用程序的维护将很困难,并且用户会发现很难使用更复杂的功能。
Let’s go back to our world spinning example and see something cool about commands.
让我们回到旋转世界的示例,看看有关命令的一些很棒的东西。
The spinning of the world is in our control. Perhaps we can specify when the spinning occurs? Our script could have an interface command that allows us to set the time the spinning should take place.
世界的旋转在我们的掌控之中。 也许我们可以指定何时进行旋转? 我们的脚本可以具有一个接口命令,该命令允许我们设置旋转发生的时间。
python spin_world_v3.py time 0900 1700Here, we set the time interval for which we want the world to spin. From 9 am (0900 hrs) because that’s when we take breakfast, to 5 pm (1700hrs) when we should be leaving work. Since these are working hours, we might want the world to spin faster than usual during this period.
在这里,我们设置希望世界旋转的时间间隔。 从早上9点(0900小时)开始,因为那是我们早餐的时间,到下午5点(1700小时),我们应该离开工作。 由于这些都是工作时间,因此我们可能希望在此期间世界旋转得比平常更快。
So we give our application a spin command where we can specify the spinning speed.
因此,我们为应用程序提供了一个旋转命令,可以在其中指定旋转速度。
python spin_world_v3.py time 0900 1700 --speed 1500m/hThis has given us a simple understanding of the CLI commands concept.
这使我们对CLI命令概念有了简单的了解。
点击进入图片 (Bringing Click into the Picture)
We’ve looked at how command-line tools work and the basics of creating a command-line interface.
我们已经研究了命令行工具的工作方式以及创建命令行界面的基础。
Now, let’s create our media-convertor-CLI app. Our application should allow us to convert a media file to a format of our choice. We often use video to audio-conversion tools— it will be exciting to have one that we can tweak ourselves.
现在,让我们创建我们的媒体转换器CLI应用。 我们的应用程序应允许我们将媒体文件转换为我们选择的格式。 我们经常使用视频到音频转换工具-拥有一个我们可以自己调整的工具将非常令人兴奋。
应用设置 (App setup)
Our directory structure will look like this:
我们的目录结构如下所示:
| audioConvertor  |-convertor
    |- __init__.py
    |- utils
      |- __init__.py    |- cli.py|- tests
    |- __init__.py- setup.py
We create the interface of our app in the file cli.py.
我们在文件cli.py创建应用程序的界面。
添加使用选项 (Adding usage options)
To convert a file, we need to know its location. So we need to allow the user to tell our application where to get this file. We start building our app by creating a simple script that does that.
要转换文件,我们需要知道其位置。 因此,我们需要允许用户告诉我们的应用程序在何处获取此文件。 我们通过创建一个简单的脚本来开始构建我们的应用程序。
We give our users an option --input_directory to specify which file to convert. We can run the script as follows:
我们为用户提供--input_directory选项,以指定要转换的文件。 我们可以如下运行脚本:
$ python cli.py --input_directory Videos/musicVideo.mp4# Output
Videos/musicVideo.mp4
Our script echoes back the file the user has specified. It works!
我们的脚本回显用户指定的文件。 有用!
How will our users know how to interact with the app? A short help menu works a charm. With Click, we get this easy and for free. Let’s check it out by running:
我们的用户将如何知道如何与该应用进行交互? 短暂的帮助 菜单很有魅力。 用 点击,我们可以轻松,免费地进行此操作。 让我们通过运行检查一下:
$ python cli.py --help# OutputUsage: cli.py [OPTIONS]audioConvertor is a command-line tool that helps convert video files to audio file formats.example: python cli.py -i input/file/path -o output/pathOptions:
  -i, --input_directory TEXT  Location of the media file to be converted
  --help                      Show this message and exit.
Note the convenience. -i is also interchangeable with --input_directory. The help example says an output path is necessary too.
注意方便。 -i也可以与--input_directory互换。 帮助示例说输出路径也是必需的。
example: python cli.py -i input/file/path -o output/pathWe can get it working this way by adding the following lines to our script:
我们可以通过在脚本中添加以下几行来使其工作:
The added lines are marked ++. Adding an option is as easy as calling @click.option and passing our string to the decorated function. Remember to pass your options to main in order of creation.
添加的行标记为++ 。 添加选项就像调用@click.option并将我们的字符串传递给装饰函数一样容易。 请记住按创建顺序将选项传递给main 。
解析用户选项 (Parsing user options)
It would be good manners to confirm the existence of a file before we attempt to convert it. We can do so like this:
在尝试转换文件之前,最好先确认文件的存在。 我们可以这样做:
The script should now terminate if a user provides a non-existent media file. But with Click, parsing and validation are handled for us. The snippet of code below serves the same purpose as what we’ve just done above:
现在,如果用户提供的媒体文件不存在,该脚本应终止。 但是使用Click可以为我们处理解析和验证。 以下代码段的目的与上面所做的目的相同:
The magic happens at line six. By supplying the type parameter to Click’s options command, we can tell Click to ensure the user gives as --input_directory as a path, and that it exists.
魔术发生在第六行。 通过提供type Click选项的参数,我们可以告诉Click确保用户输入为--input_directory 作为一条路径,并且它存在。
Click gives us plenty of arguments to use in an option. We get to see more of them in play as we progress.
单击为我们提供了在选项中使用的大量参数 。 随着我们的进步,我们可以看到更多的游戏。
添加命令 (Adding commands)
Using commands will allow us to isolate different features of our application for the convenience of users. It also makes it easier to add new options. For example, we have two options — it would make sense to nest them in a command that describes what they do.
使用命令将使我们能够隔离应用程序的不同功能,以方便用户使用。 它还使添加新选项更加容易。 例如,我们有两个选项-将它们嵌套在描述它们功能的命令中是有意义的。
python cli.py convert -i input/file/path -o output/pathWe want to bundle our options in a convert command, so our app can be used as shown. What’s something else we would want our app to do besides converting? If we could play our converted songs, that would be nice. So, if we use it as shown below, something should pop out of our speakers:
我们希望将选项捆绑在convert命令中,因此可以如图所示使用我们的应用程序。 除了转换外,我们还希望我们的应用程序还要做什么? 如果我们可以播放转换后的歌曲,那就太好了。 因此,如果我们按如下所示使用它,则扬声器中应该弹出一些声音:
python cli.py play --playlist path/to/audioWe know how we want our app to work. Let’s get to it.
我们知道我们希望我们的应用程序如何工作。 让我们开始吧。
分组命令 (Grouping the commands)
The first thing we do is add the commands play and convert to our app.
我们要做的第一件事是添加命令play并将其convert为我们的应用程序。
Let’s go through this script.
让我们来看一下这个脚本。
We have three functions: — main, load_files, and load_audio. The function main is helping us group our two commands with Click by decorating it with @click.group. This is our first step.
我们有三个功能: - main , load_files和load_audio 。 功能main 通过用@click.group装饰它来帮助我们将两个命令与Click @click.group 。 这是我们的第一步。
After that, notice how easy it is to add a command — we call @main.command then specify the options we think will make us happy.
之后,请注意添加命令有多容易-我们调用@main.command然后指定我们认为会让我们满意的选项。
There’s this line hovering around:
这条线徘徊:
@click.pass_contextWhenever we want to use an argument specified in command but in a different function, we pass its context. This is done by storing it in the click context object dictionary. See what we do in line 21:
每当我们要使用命令中指定的参数但在其他函数中使用时,我们都会传递其上下文。 这是通过将其存储在单击上下文对象字典中来完成的。 看看我们在第21行中所做的事情:
ctx.obj[‘VERBOSE’] = verboseThis allows us to access the value of VERBOSE in any other function with a click decorator by passing in ctx. (Remember to call main with the obj argument as in line 52). For example:
这使我们可以通过传入ctx来通过单击装饰器访问任何其他函数中的VERBOSE值。 (请记住,如第52行所示,使用obj参数调用main)。 例如:
def load_files(ctx, input_directory, output):
    """
        :   Convert video file input to audio.
    """
    if ctx.obj.get('VERBOSE'):
        # shout a lot
    else:
       #  convert quietly
We introduced some new arguments to our command options too. Here’s what they help us achieve:
我们还在命令选项中引入了一些新参数。 以下是他们帮助我们实现的目标:
required: mandatory input.required:必填项。multiple: allow users to add many parameters e.g convert -i video_1 -i video_2.multiple:允许用户添加许多参数,例如convert- i video_1- i video_2。nargs: almost same as multiple e.g convert -i video_1 video_2 video_3nargs:几乎相同的s倍数,例如,转换-i video_1 video_2 video_3
In our case, nargs would help us specify multiple input files.
就我们而言, nargs将帮助我们指定多个输入文件。
is_flag: A boolean option that doesn’t need a parameter`.is_flag:不需要参数的布尔选项。
转换-选项 (Convert — option)
Let’s list out all our decorators for function (load_files) running the convert command.
让我们列出所有用于运行convert命令的函数( load_files )装饰器。
That’s a list of options for one command on our CLI. Now let’s dive into processing the parameters received from the user. For easier maintenance, we will isolate all our processing functionality to a new file, in a class called Convertor.
这是CLI上一个命令的选项列表。 现在,让我们深入研究处理从用户那里收到的参数。 为了简化维护,我们将所有处理功能隔离到一个名为Convertor的类中的新文件中。
| audioConvertor|-convertor
    |- __init__.py
    |- utils
      |- __init__.py    |- cli.py    |- formats.py|- tests
    |- __init__.py- setup.py
Since our focus is on the CLI, we won’t dwell on the Convertor class. But I made an effort to document it quite nicely, so don’t worry about it.
由于我们专注于CLI,因此我们将不再关注Convertor 类。 但是我尽力将其很好地记录下来 ,所以不用担心。
Let’s add these lines to the top of our cli.py:
让我们将这些行添加到cli.py的顶部:
import click
from formats import Convertor # +convertor_instance = Convertor() # +Let’s toy around a bit on our interface with the above options:
让我们在上面的选项中玩一些玩具:
$ python3 convertor/cli.py convert -i /root/Videos/# Output
/root/Videos/ is a directory. --recursive Needed for a directory
Let’s point our app to a file and attempt to convert it again:
让我们将应用程序指向一个文件,然后尝试再次将其转换:
python3 convertor/cli.py convert -i Videos/snoring_noises.aviInput specified as file name.
.
Conversion Complete
saved: snoring_noises.mp3
The app should prompt us to install ffmpeg, which is the media convertor library we shall use. This is getting exciting!
该应用程序应提示我们安装ffmpeg ,这是我们将使用的媒体转换器库。 这真令人兴奋!
Next, let’s allow the user to convert multiple video files at once by running:
接下来,让用户通过运行一次转换多个视频文件:
python3 convertor/cli.py convert -i /root/Videos/* -o /root/converted_musicThis command should convert for us all video files in the Videos folder to audio and save the output to the directory converted_music. Adding the following code to the load_files function should do it:
此命令应为我们将“视频”文件夹中的所有视频文件转换为音频,并将输出保存到目录converted_music 。 将以下代码添加到load_files函数即可:
播放—选项 (Play — option)
The play command decorates the load_audio function:
播放命令装饰 load_audio函数:
The app should now allow us to load a playlist of our choice.
该应用程序现在应允许我们加载我们选择的播放列表。
链接命令 (Chaining Commands)
Whenever we want to convert a file then play its audio, our CLI application restricts us from running the convert and play command individually. That’s good enough, but wouldn’t it be better if we could use the interface as follows?
每当我们要转换文件然后播放其音频时,我们的CLI应用程序都会限制我们分别运行convert and play命令。 那已经足够好了,但是如果我们可以按如下方式使用接口,那会更好吗?
python convertor/cli.py convert -i my_video_file.mp4 playTo use more than one command at a go, we pass the chain argument to our multi-command:
要一次使用多个命令,我们将chain参数传递给我们的多命令:
@click.group(invoke_without_command=True, chain=True)That’s just the first step. We are invoking convert first. When we run play later, the location of our converted file shall need to be known. For every successful conversion, our interface should know the path of the saved file(s).
那只是第一步。 我们正在调用convert 第一。 当我们运行play 以后,我们转换后的文件的位置必须是已知的。 对于每次成功的转换,我们的界面都应知道已保存文件的路径。
ctx.obj[‘PLAYLIST’] = convertor_instance.get_file_save_path()We add the PLAYLIST key as a context accessible to all our sub-commands. get_file_save_path is the function that does this. The above line shall be added in two places in the load_files function:
我们将PLAYLIST键添加为所有子命令均可访问的上下文。 get_file_save_path是执行此操作的函数。 上一行应在load_files函数的两个位置添加:
其他注意事项 (Some Additional Considerations)
单个和多个文件转换 (Individual and multiple file conversion)
To differentiate between the single and multiple file inputs, one tweak would be allowing the user to set a recursive option. The recursive flag, during processing, will let us know if we are to convert a single or more than one file.
为了区分单个文件输入和多个文件输入,一项调整将允许用户设置一个递归选项。 在处理过程中, recursive标志将让我们知道我们是否要转换单个或多个文件。
Additionally, to check if the input is a directory, we recurse through all its children and find any valid file matching a video format.
另外,要检查输入是否为目录,我们遍历其所有子级,然后找到与视频格式匹配的任何有效文件。
if os.path.isfile(input_directory) and not recursive:
    # convert single fileelse:    # convert multiple files
That solves it for us. We can even match input files recursively using the wild-card, *:
那为我们解决了。 我们甚至可以使用通配符*递归匹配输入文件:
python convertor/cli.py convert -i Videos/snoring*.mp4 play可选参数 (Optional arguments)
If we attempted to run the above command, we might get an output such as this:
如果尝试运行上述命令,则可能会得到如下输出:
python convertor/cli.py convert -i Videos/snoring*.mp4 playUsage: cli.py play [OPTIONS]
Try "cli.py play --help" for help.Error: Missing option "--playlist" / "-p".
It means playlist is a required argument. To make it optional, required set to False as follows:
这意味着playlist是必填参数。 要使其可选,必须将其设置为False ,如下所示:
@click.option('--playlist', '-p', required=False, type=click.Path(exists=True),
              help="Folder containing audio files to be played")
结论 (Conclusion)
That’s it, folks.
就是这样,伙计们。
We’re now familiar with command-line interfaces and have learned how to interface an application to the terminal, using Click. I hope this Python Click tutorial has helped you gain something exciting and useful. Remember you can have a tour of the complete project on its GitHub repo.
现在,我们已经熟悉命令行界面,并且学习了如何使用Click将应用程序连接到终端。 希望本Python Click教程能帮助您获得激动人心且有用的东西。 记住,您可以在其GitHub repo上浏览整个项目。
You are awesome. Make your next CLI better.
你真棒。 使您的下一个CLI更好。
python cli


 552
552

 被折叠的 条评论
为什么被折叠?
被折叠的 条评论
为什么被折叠?
 到【灌水乐园】发言


