


react hooks使用
WebAssembly (often abbreviated to WASM) is a hot topic right now, and with good reason. It promises to usher in a new era of high-performance, desktop-grade web applications and opens web development up to a new set of languages and developers. If you’re a React developer, you may be wondering how to start adding WASM to your application.
WebAssembly(通常缩写为WASM)是当前的热门话题,并且有充分的理由。 它有望迎来高性能桌面级Web应用程序的新时代,并向新的语言和开发人员开放Web开发。 如果您是React开发人员,您可能想知道如何开始将WASM添加到您的应用程序中。
In this article we’ll discuss the following:
在本文中,我们将讨论以下内容:
- A brief overview of WebAssembly and why we might use it with React. WebAssembly的简要概述以及为什么我们可以将其与React一起使用。
- How to add WASM development capabilities to our code-base. 如何将WASM开发功能添加到我们的代码库中。
- How we can use WASM in our React application with hooks. 我们如何在带有钩子的React应用程序中使用WASM。
In the end, we’ll see that with only a minor amount of effort we can get set up to take advantage of WASM’s capabilities in our React app.
最后,我们将看到,只需少量的工作,我们就可以进行设置以利用React应用程序中WASM的功能。
什么是WebAssembly? (What is WebAssembly?)
At a high-level, WebAssembly is a recent addition to the small family of languages that can run in the browser. It’s an assembly-like language that delivers speed in a secure and portable package.
从总体上讲,WebAssembly是可在浏览器中运行的小型语言家族的最新成员。 这是一种类似于汇编的语言,可在安全且可移植的程序包中提供速度。
It’s fast because it’s a compiled language and the browser doesn’t need to do much to optimize and run our code. It’s secure because it runs in a sandbox, and can only access that which we explicitly allow it to access. It’s portable because WASM modules can be used in a variety of languages, and can be built from a variety of languages.
它之所以快速,是因为它是一种编译语言,并且浏览器不需要做很多事情来优化和运行我们的代码。 它之所以安全是因为它在沙盒中运行,并且只能访问我们明确允许其访问的内容。 它是可移植的,因为WASM模块可以用多种语言使用,并且可以用多种语言构建。
If you’d like to go deeper, There are plenty of great resources focusing deeply on WASM from a more technical perspective. I recommend this great series by Lin Clark.
如果您想更深入一点,那么有很多很棒的资源可以从更技术的角度深入关注WASM。 我推荐林·克拉克(Lin Clark)的精彩系列 。
但为什么? (But Why?)
So why would we want to use WebAssembly in React?
那么,为什么我们要在React中使用WebAssembly?
Maybe there’s a piece of logic that needs to stay consistent with other apps, written in other languages. Maybe there’s a Rust Crate that you’d really love to use in your JS module. WebAssembly’s portability could help us there. Maybe we’d like to allow users to run untrusted code within our system to customize a report or add logic to an interaction. Seems like a good fit for WASM’s sandboxing. Perhaps we just need something to go really fast, think identifying a bar-code in an image, collaborative design tools, video games or other thoughts.
也许有一种逻辑需要与使用其他语言编写的其他应用保持一致。 也许您真的很想在JS模块中使用一个Rust Crate 。 WebAssembly的可移植性可以为我们提供帮助。 也许我们希望允许用户在我们的系统中运行不受信任的代码,以自定义报告或为交互添加逻辑。 似乎非常适合WASM的沙箱。 也许我们只需要真正快速地进行操作,考虑识别图像中的条形码 , 协作设计工具 , 视频游戏或其他想法 。
Maybe we’re just curious 😺.
也许我们只是好奇😺。
结合使用介绍 (Introducing use-as-bind)
Use-as-bind is a React hook that allows developers to load and instantiate WebAssembly created with AssemblyScript and the AsBind loader.
Use-as-bind是一个React挂钩,允许开发人员加载和实例化用AssemblyScript和AsBind加载器创建的WebAssembly。
I created the use-as-bind hook as a part of a workshop that I ran where attendees integrated WASM built with assembly-script into a number of environments. After the workshop, I felt that the hook might be useful to others and published it on NPM.
我创建了“绑定绑定”钩子,作为我参加的研讨会的一部分,与会者在其中将使用汇编脚本构建的WASM集成到许多环境中。 研讨会结束后,我觉得这个钩子可能对其他人有用,并将其发布在NPM上。
While you could skip the remainder of this article and start using the use-as-bind hook immediately, it may also be beneficial to find out how it works! What follows are the considerations that went into the creation of use-as-bind, and a tutorial showing the reader how to implement this hook on their own.
尽管您可以跳过本文的其余部分,并立即开始使用“绑定绑定”钩子,但了解它的工作原理也可能会有所帮助! 接下来是创建绑定绑定时要考虑的因素,以及一个向读者展示如何自行实现此挂钩的教程。
决定,决定 (Decisions, Decisions)
Before we start using WebAssembly in React there are three things that we’re going to need to decide on: 1.) how we’re going to write it, 2.) how we’re going to load it, and 3.) how we’re going to use it.
在我们开始在React中使用WebAssembly之前,我们需要确定三件事:1.)我们将如何编写它; 2.)我们将如何加载它;以及3.)我们将如何使用它。
编写我们的WASM (Writing our WASM)
The first thing we’ll need to decide on is how we’re going to write our WebAssembly. There are many options here, but the three most popular options for writing one-off WASM modules are (at the time of this writing), C, Rust, and AssemblyScript. Each of these options has its own pros and cons.
我们需要决定的第一件事是如何编写WebAssembly。 这里有很多选项,但是(在撰写本文时)编写一次性WASM模块的三个最受欢迎的选项是C,Rust和AssemblyScript。 这些选项中的每一个都有其优点和缺点。
C is great because it’s been around for a super long time, has great performance, a massive community, and excellent tooling. It also has a high learning curve coming from JS or TS.
C很棒,因为它已经存在了很长时间,它具有出色的性能 ,庞大的社区和出色的工具 。 它还具有来自JS或TS的高学习曲线 。
Rust is great because it has a fantastic compiler, memory safety, and a toolchain that makes integrating WASM into your app super easy, like C it has a high learning curve coming from JS or TS.
Rust之所以出色,是因为它具有出色的编译器 , 内存安全性和工具链 ,从而使WASM轻松集成到您的应用中非常容易,就像C一样,它的学习 曲线来自JS或TS。
AssemblyScript is great because it’s a subset of TypeScript, and as JS devs, it’s probable that we’ve had some level of experience with TS at this point, it’s also great because it’s a purpose-built language meant for compiling to WASM, (though it can do other things too).
AssemblyScript很棒,因为它是TypeScript的子集,而作为JS开发人员,这时我们可能已经在TS方面有了一定的经验,这也很棒,因为它是一种旨在编译成WASM的专用语言(尽管它也可以做其他事情)。
Given that we’re already using React and writing in JavaScript or TypeScript, AssemblyScript should be a natural fit and fairly accessible for anybody working in the codebase. Let’s go with that.
鉴于我们已经在使用React并使用JavaScript或TypeScript进行编写,AssemblyScript应该很自然,并且对于在代码库中工作的任何人都可以轻松访问。 让我们开始吧。
加载我们的Wasm (Loading our Wasm)
The second is how we’re going to instantiate our WebAssembly. WebAssembly is downloaded as binary data and needs to be instantiated before it can be used. If we’re using AssemblyScript there are three popular options:
第二个是我们如何实例化WebAssembly。 WebAssembly是作为二进制数据下载的,需要实例化才能使用。 如果我们正在使用AssemblyScript,则有三个流行的选项:
The built-in WebAssembly module, which is available in the browser and offers low-level functionality.
内置的WebAssembly模块 ,在浏览器中可用,并提供低级功能。
AssemblyScript Loader, which is meant to be used alongside AssemblyScript compiled WASM. It offers methods for manipulating memory.
AssemblyScript Loader ,旨在与AssemblyScript编译的WASM一起使用。 它提供了操作内存的方法。
AsBind, a loader built on top of AssemblyScript Loader which abstracts away the additional steps required to safely use strings and arrays of numbers with WASM.
AsBind ,构建在AssemblyScript加载程序之上的加载程序,它抽象化了在WASM中安全使用字符串和数字数组所需的其他步骤。
As-Bind lets us do all of the things the other loaders do, plus it makes it easy for us to use strings and arrays of numbers, so let’s use that.
As-Bind使我们能够执行其他装载程序的所有工作,此外,它还使我们可以轻松地使用字符串和数字数组,因此让我们使用它。
使用我们的WASM (Using our WASM)
The third thing we should figure out is how we would like to bring the WebAssembly functionality we create into our React App. React has many interesting patterns around fetching data.
我们应该弄清楚的第三件事是我们如何将我们创建的WebAssembly功能引入我们的React App。 React在获取数据方面有许多有趣的模式。
- We could create a service that gets called during the component life-cycle. 我们可以创建一个在组件生命周期内被调用的服务。
- We could use thunks, sagas, or observables for fetching as a side-effect in a Redux backed application. 在Redux支持的应用程序中,我们可以使用thunk,sagas或observables作为获取的副作用。
- We could create a custom hook to fetch and instantiate our WASM. 我们可以创建一个自定义钩子来获取和实例化我们的WASM。
Let’s go with custom hooks! They are advantageous because they can be used with functional components and they don’t require any additional libraries beyond React.
让我们来定制钩子吧! 它们之所以具有优势是因为它们可以与功能组件一起使用,并且它们除了React之外不需要任何其他库。
设置我们的应用 (Setting up our App)
Let’s walk through setting up a React Application with AssemblyScript and AsBind in six quick steps.
让我们通过六个快速步骤逐步完成如何使用AssemblyScript和AsBind设置React应用程序。
- Set up our React application 设置我们的React应用程序
$ npx create-react-app wasm-hook-example
$ cd wasm-hook-example
2. Install AssemblyScript and AsBind
2.安装AssemblyScript和AsBind
$ npm i -D assemblyscript
$ npm i as-bind
3. Set up AssemblyScript
3.设置AssemblyScript
$ mkdir assembly
$ touch assembly/tsconfig.json
$ touch assembly/index.ts
4. Add the following to assembly/tsconfig.json
4.将以下内容添加到assembly / tsconfig.json
5. Add the following to assembly/index.ts
5.将以下内容添加到assembly / index.ts
Yeah, this is going to add two strings together, and while that isn’t very exciting, it’s useful to ensure that AsBind works as expected.
是的,这将把两个字符串加在一起,虽然这不是很令人兴奋,但是确保AsBind能够按预期工作非常有用。
6. Add the following to your package.json file
6.将以下内容添加到您的package.json文件中
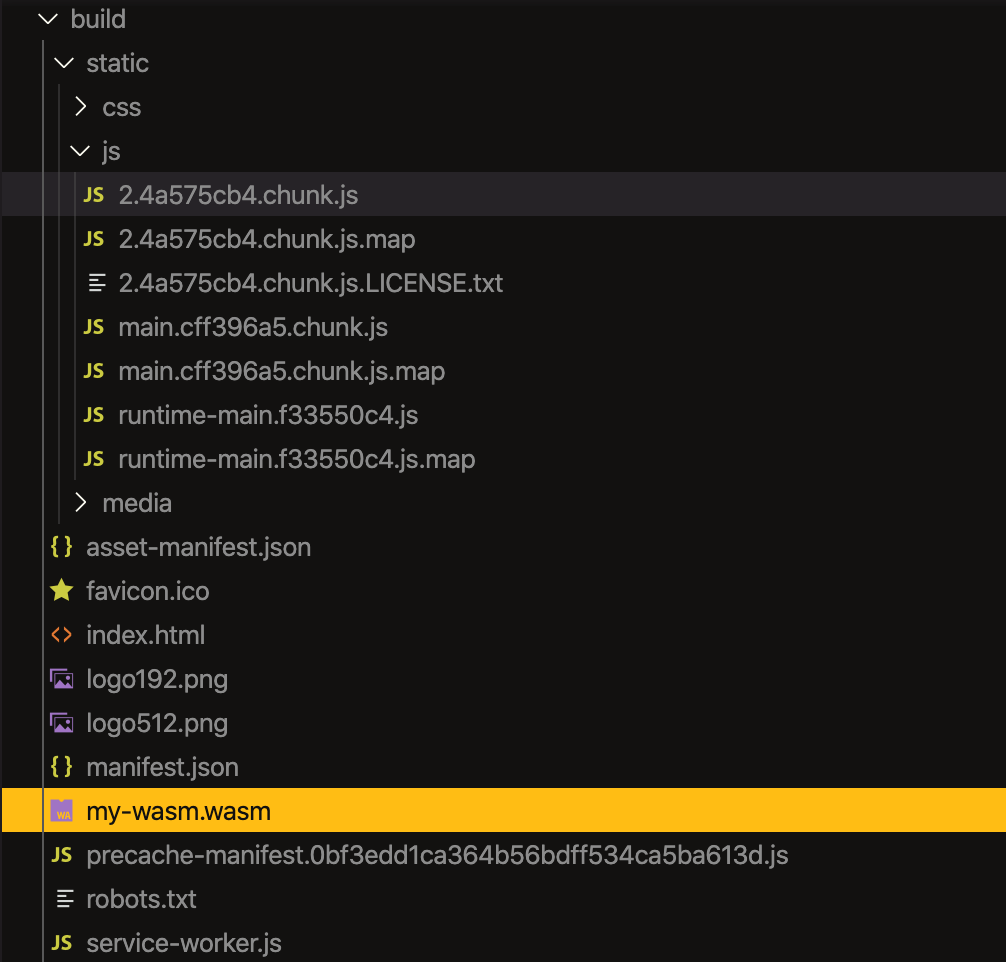
As you can see we’ve renamed a build to build:react and added a build:wasm script. What this is going to do is run the AssemblyScript compiler with as-bind.ts and our index.ts file as inputs, and build us an optimized WASM file in our public folder named my-wasm.wasm. Lastly, we’ve added a new build script, which builds both our WASM files and our React app.
如您所见,我们已将build重命名为build:react并添加了build:wasm脚本。 要做的是运行AssemblyScript编译器,并将as-bind.ts和我们的index.ts文件作为输入,并在名为my-wasm.wasm公用文件夹中为我们构建优化的WASM文件。 最后,我们添加了一个新的build脚本,该脚本可以构建我们的WASM文件和我们的React应用程序。
Let’s run it and take a look around.
让我们运行它,环顾四周。
$ npm run buildWe now have a build folder with our incredible app inside, and in the root folder we can find our WASM files.
现在,我们有了一个内部包含令人难以置信的应用程序的构建文件夹,并且在根文件夹中可以找到我们的WASM文件。
Great, it builds! Now to use it.
太好了! 现在使用它。
设置我们的自定义挂钩 (Setting up our Custom Hook)
Let’s start by creating a new file for our hook
让我们从为钩子创建一个新文件开始
$ touch src/useWasm.jsand inside we’ll set it up like this:
在内部,我们将其设置如下:
This is a pretty straight-forward hook, we’ll get a state inside using useState, which we’ll return, and in the meantime, we’ll also perform a side-effect with the useEffect hook. This hook is going to fetch our WASM file from the public directory, instantiate it with AsBind, and then update our state, which in turn updates our view.
这是一个非常简单的钩子,我们将在useState获得一个状态,并将其返回,与此同时,我们还将对useEffect钩子产生useEffect 。 这个挂钩将从公共目录中获取我们的WASM文件,使用AsBind实例化它,然后更新我们的状态,从而更新我们的视图。
Now all that’s left is to hook it into our app and use it:
现在剩下的就是将其挂接到我们的应用程序中并使用它:
We’ve set the hook up to run in our functional AppComponent and when the instance is loaded we call the addString method on our WebAssembly module.
我们已经将挂钩设置为在我们的功能性AppComponent中运行,并且在加载实例时,我们在WebAssembly模块上调用addString方法。
So, with only a small amount of effort, we were able to get some WebAssembly running in our React application! We could probably leave this here and in most cases be fine, but what if we’ve got multiple WASM files to load, or the files are big enough that the user may navigate away before loading is complete? Let’s refine our hook to make it more robust and re-usable.
因此,只需少量的工作,我们就能在React应用程序中运行一些WebAssembly! 我们可能会把它留在这里,在大多数情况下还可以,但是如果我们要加载多个WASM文件,或者文件足够大以至于用户可能在加载完成之前就离开了,该怎么办? 让我们完善一下挂钩,使其更健壮和可重复使用。
一钩,许多文件 (One Hook, Many Files)
The first thing we’re likely to want to do is to allow our hook to load different WASM files with different capabilities. Doing this will make our hook re-usable within our application, and in any other applications, we want to add it to. To do this we’re going to need to give our hook the ability to take arguments. Not only will our WASM files have different names, but they’ll also have different requirements. Each WASM file can define functions that it expects to receive from the instantiating environment. With AsBind we can pass these functions to the instantiate method using the second argument.
我们可能要做的第一件事是允许我们的钩子加载具有不同功能的不同WASM文件。 这样做将使我们的钩子在我们的应用程序中可重复使用,并且在任何其他应用程序中,我们都希望将其添加到其中。 为此,我们将需要让钩子接受参数。 我们的WASM文件不仅具有不同的名称,而且具有不同的要求。 每个WASM文件都可以定义期望从实例化环境接收的功能。 使用AsBind,我们可以使用第二个参数将这些函数传递给实例化方法。
Awesome, now we can take arguments and use our hook in different situations, but what if we wanted to dynamically load things with it? Right now we’ve still got an empty array as the second argument for useEffect, which means that that effect will pretty much never re-run. Likely, it should re-run every time one of the arguments changes, so let’s add those arguments to useEffect’s dependencies.
太棒了,现在我们可以接受参数并在不同情况下使用钩子,但是如果我们想用它动态加载东西怎么办? 现在,我们仍然有一个空数组作为useEffect的第二个参数,这意味着该效果几乎永远不会重新运行。 可能,它应该在每次参数之一更改时重新运行,因此让我们将这些参数添加到useEffect的依赖项中。
Finally, let’s update our our App.js file to supply the arguments we’re expecting.
最后,让我们更新App.js文件,以提供期望的参数。
更新API (Updating the API)
Ok, that’s cool, now we can dynamically load different WASM files if we want to and give them capabilities through the imports object, but the API feels a bit unpolished, after all, it’s simply returning null before the WebAssembly has been instantiated. Let’s be a bit more explicit by adding an initial state and updating it when the WebAssembly has instantiated.
好的,这很酷,现在我们可以根据需要动态加载不同的WASM文件,并通过imports对象为它们提供功能,但是API感觉有些粗糙,毕竟,它只是在实例化WebAssembly之前返回null 。 通过添加初始状态并在WebAssembly实例化后对其进行更新来更明确一些。
And we’ll update our App.js file to use the new API:
我们将更新App.js文件以使用新的API:
添加错误处理 (Adding Error Handling)
The last thing we’re going to need is a bit of error handling. There are a couple of places in the hook where things can go terribly terribly wrong, specifically, the fetch request may not find anything, or the thing that it finds may not be a well-formed .wasm file. If either of these two things happen we will have an error. One option would be to let the error happen, crashing the parent application. Another option is to catch the error and present it to the parent application, allowing it to do something based on the error. To do this we’ll need a new key for our state, as well as some extra logic around the fetching and instantiating of our WASM.
我们需要做的最后一件事是一些错误处理。 挂钩中有几个地方可能会发生非常严重的错误,特别是,获取请求可能找不到任何东西,或者它找到的东西可能不是格式正确的.wasm文件。 如果这两种情况之一发生,我们将有一个错误。 一种选择是让错误发生,使父应用程序崩溃。 另一个选择是捕获错误并将其呈现给父应用程序,从而允许它根据错误执行某些操作。 为此,我们需要一个新的状态键,以及一些有关WASM的获取和实例化的额外逻辑。
Here we’ve got a new error key in our state, and our fetchWasm function will update the error key if an error is caught while we’re loading and instantiating our .wasm file. While this will work if we load a malformed .wasm file, it won’t work if we attempt to fetch a file that isn’t there, as fetch won’t throw an error for that case. Let’s make another update:
此处,我们在状态中有了一个新的错误密钥,如果在加载和实例化.wasm文件时发现错误,则fetchWasm函数将更新该error密钥。 虽然这在加载格式错误的.wasm文件时有效,但在尝试获取不存在的文件时它将不起作用,因为在这种情况下,获取不会引发错误。 让我们再进行一次更新:
Now, if our fetch doesn’t find a file, we’ll throw an error and trigger the catch block. That’s looking pretty good so far, but there’s just one other thing — WASM files can be pretty big, and can potentially take some time to load. There’s a chance that a user may visit a page with a component that uses our hook, and then leave before the WASM has loaded, but after the request has been made. This is going to result in an annoying error message and possibly a memory leak. We can avoid this situation by using an AbortController.
现在,如果提取未找到文件,则将引发错误并触发catch块。 到目前为止看起来还不错,但是还有另一件事-WASM文件可能很大,并且可能需要一些时间来加载。 用户可能会访问包含使用我们的钩子的组件的页面,然后在WASM加载之前但在请求发出之后离开。 这将导致令人讨厌的错误消息,并可能导致内存泄漏。 我们可以通过使用AbortController来避免这种情况。
Now when our component gets destroyed and our hook gets cleaned up our AbortController will abort the fetch request and stop our state from being set, averting disaster. We’ll need to update our component one last time to take advantage of our new error state:
现在,当我们的组件被破坏并且挂钩被清理时,我们的AbortController将中止获取请求并停止设置我们的状态,从而避免了灾难。 我们需要最后一次更新组件,以利用我们的新错误状态:
全做完了! (All done!)
To summarize, we’ve set up AssemblyScript and AsBind to build and instantiate our WebAssembly, built a React hook to load our WASM files into our React application, and added error handling to deal with possible exceptions. Now go write some AssemblyScript that does more than add strings together! 🎉 🎉 🎉
总而言之,我们已经设置了AssemblyScript和AsBind来构建和实例化我们的WebAssembly,构建了一个React钩子以将WASM文件加载到我们的React应用程序中,并添加了错误处理以处理可能的异常。 现在去编写一些AssemblyScript,它不仅可以将字符串加在一起! 🎉
If this seems like a lot and you’d rather use an external lib, I’ve created a package called use-as-bind, which implements everything described in this article.
如果这看起来很多,而您宁愿使用外部库,则我创建了一个名为use-as-bind的包,该包实现了本文中介绍的所有内容。
翻译自: https://medium.com/@tylervipond/getting-started-with-react-and-webassembly-using-hooks-441818c91608
react hooks使用


 6759
6759

 被折叠的 条评论
为什么被折叠?
被折叠的 条评论
为什么被折叠?
 到【灌水乐园】发言


