


项目开发实现前后端分离,Swagger2是非常好用使用的一个框架!!!真香警告,个人感觉比Postman开发效率提升了很多,注解项会让代码更容易读
在后端开发中经常需要对移动客户端提供RESTful API接口,在后期版本快速迭代的过程中,修改接口实现的时候都必须同步修改接口文档,而文档与代码又处于两个不同的媒介,除非有严格的管理机制,不然很容易导致写出的代码与接口文档不一致现象。
为了前后台更好的对接,为了以后交接方便,为了不再长篇大论的手写api文档,那么就来用Swagger吧(不是打广告),它可以轻松的整合到Spring中,它既可以减少我们手写api文档的时间,同时又将说明文档整合到我们的代码中,这样前台看着也方便,后台工作也舒坦,
Swagger 是一个规范和完整的框架,用于生成、描述、调用和可视化 RESTful 风格的 Web 服务。总体目标是使客户端和文件系统作为服务器以同样的速度来更新。文件的方法,参数和模型紧密集成到服务器端的代码,允许API来始终保持同步。Swagger 让部署管理和使用功能强大的API从未如此简单(其他好处网上自己搜在这里就不再多说了)。
Swagger也提供了强大的页面测试功能来调试每个写好的接口:
1.开发环境
SpringBoot 2.0.4.RELEASE
Swagger 2.6.1
JDK 1.8
2.maven依赖
io.springfox
springfox-swagger2
2.6.1
io.springfox
springfox-swagger-ui
2.6.1
3.Swagger2配置类(以下属于较为基本的属性配置,后期继续增加)
import org.springframework.context.annotation.Bean;
import org.springframework.context.annotation.Configuration;
import springfox.documentation.builders.ApiInfoBuilder;
import springfox.documentation.builders.PathSelectors;
import springfox.documentation.builders.RequestHandlerSelectors;
import springfox.documentation.service.ApiInfo;
import springfox.documentation.spi.DocumentationType;
import springfox.documentation.spring.web.plugins.Docket;
@Configuration
public class Swagger2Config {
@Bean
public Docket createDocket(){
return new Docket(DocumentationType.SWAGGER_2).apiInfo(apiInfo())
.select().apis(RequestHandlerSelectors.basePackage("com.iflytek.studyproject.controller"))
.paths(PathSelectors.any()).build();
}
private ApiInfo apiInfo(){
return new ApiInfoBuilder().title("Spring boot整合Swagger2学习")
.description("ApiInfo的描述")
.termsOfServiceUrl("no term url")
.version("1.0")
.build();
}
}
@Configuration会被项目启动加载为配置类,等同于XML中配置的beans;
@Bean标注方法等同于XML中配置的bean
4.启动类启动Swagger2(启动类中加入@EnableSwagger2 代表swagger开启:)
import org.springframework.boot.SpringApplication;
import org.springframework.boot.autoconfigure.SpringBootApplication;
import springfox.documentation.swagger2.annotations.EnableSwagger2;
@SpringBootApplication
@EnableSwagger2
public class StudyprojectApplication {
public static void main(String[] args) {
SpringApplication.run(StudyprojectApplication.class, args);
}
}
5.定义Restful风格接口
import com.alibaba.fastjson.JSONObject;
import com.iflytek.studyproject.bean.Swagger2Bean;
import org.springframework.web.bind.annotation.PostMapping;
import org.springframework.web.bind.annotation.RequestMapping;
import org.springframework.web.bind.annotation.RestController;
@RestController
@RequestMapping("/swagger2Controller")
public class Swagger2TestController {
@PostMapping("/getSwagger2")
public JSONObject getSwagger2(Swagger2Bean swagger2Bean){
JSONObject put = (JSONObject) new JSONObject().put(swagger2Bean.getId(), swagger2Bean.getName());
return put;
}
}
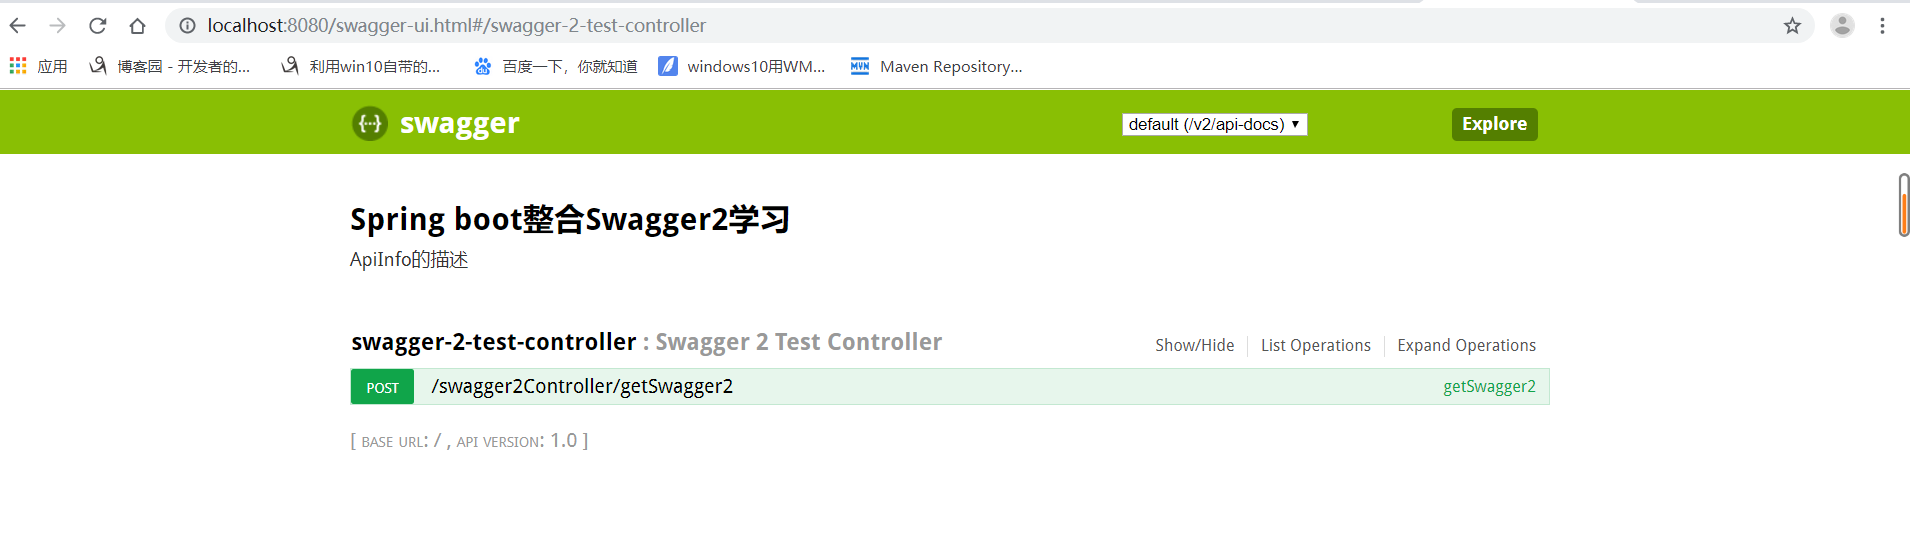
6.启动
7.Swagger2常用注解
- @Api()用于类;
表示标识这个类是swagger的资源
- @ApiOperation()用于方法;
表示一个http请求的操作
- @ApiParam()用于方法,参数,字段说明;
表示对参数的添加元数据(说明或是否必填等)
- @ApiModel()用于类
表示对类进行说明,用于参数用实体类接收
- @ApiModelProperty()用于方法,字段
表示对model属性的说明或者数据操作更改
- @ApiIgnore()用于类,方法,方法参数
表示这个方法或者类被忽略
- @ApiImplicitParam() 用于方法
表示单独的请求参数
- @ApiImplicitParams() 用于方法,包含多个 @ApiImplicitParam
具体使用举例说明:
@Api()
用于类;表示标识这个类是swagger的资源
tags–表示说明
value–也是说明,可以使用tags替代
但是tags如果有多个值,会生成多个list


 5250
5250


 被折叠的 条评论
为什么被折叠?
被折叠的 条评论
为什么被折叠?
 到【灌水乐园】发言


