


文件下载后,要重新保存一下sIFR.as否则加载报错
What Is sIFR3?
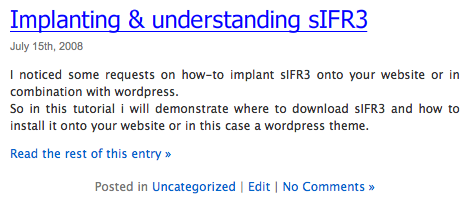
sIFR3 is a combination of JavaScript and flash, which allows you to dynamically view text using flash. This can improve you website look dramatically, because you are sure that it will look the same in every browser and that its much smoother looking than basic HTML text. If you take a look at a <h2> title in IE6, you will notice the pixels and that its not very smooth looking. In IE7 they changed this, so all the text should look smooth and nice. But that's not anything near what sIFR3 can do for you. The image below will show the difference when sIFR3 is turned on and when its turned off.
As you can see, sIFR3 allows you to display a more detailed rendered text. However, there are a few minor points about sIFR3.
- Website visitors must have flash installed and enabled.
- Titles will not work on many mobile devices such as PDAs and mobile phones.
- Your website can become a bit slower.
So know you know what sIFR3 is and what it can do, lets get started with the rest of the tutorial.
Step 1 - Downloading sIFR3
sIFR3 is developed by Mark Wubben; you can find the latest version at his website. In this tutorial i will be using the latest version, which can be found at the nightlies directory.
The zip file will contain flash, JavaScript and CSS files. Also a live demo is included, the files you need are:
- css/sIFR-print.css
- css/sIFR-screen.css
- js/sifr.js
- js/sifr-config.js
- flash/sifr.fla
Step 2 - Editing sifr.fla
Before we can upload everything, we first need to set up our flash file. A .fla file is included as you can see in step 1. If you don't have Flash, Adobe offers free product trials, also for Flash CS3, which can be downloaded here at Adobe.
After you've downloaded & installed Flash, open sifr.fla
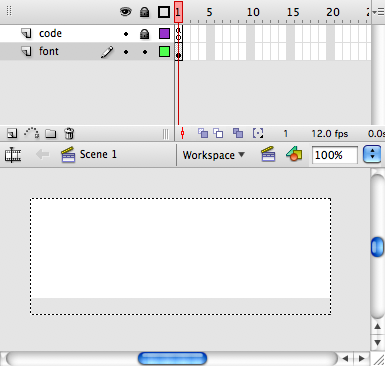
You'll begin with simply a white box. This is because the file is divided into layers. In order to change the font family of the sIFR3 you are going to use on you website, you have to double click in the white box, if the box still is white, double click again and the text will show "Bold Italic Normal"
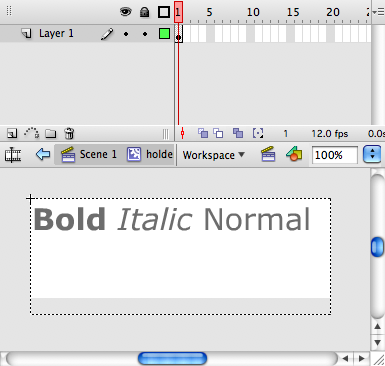
Now click the text line and you should go into the text edit mode. The default font is Verdana. You can use the font chooser to pick your desired font, in this tutorial I chose Tahoma.
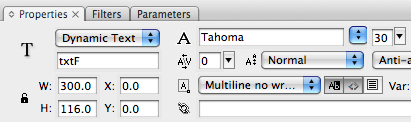
Please note that you do not need to change any other options, font size, color and other text styling options can be changed using the JavaScript included in sIFR3.
Now that's done, we need to compile it to a .swf in order to display flash on your website.
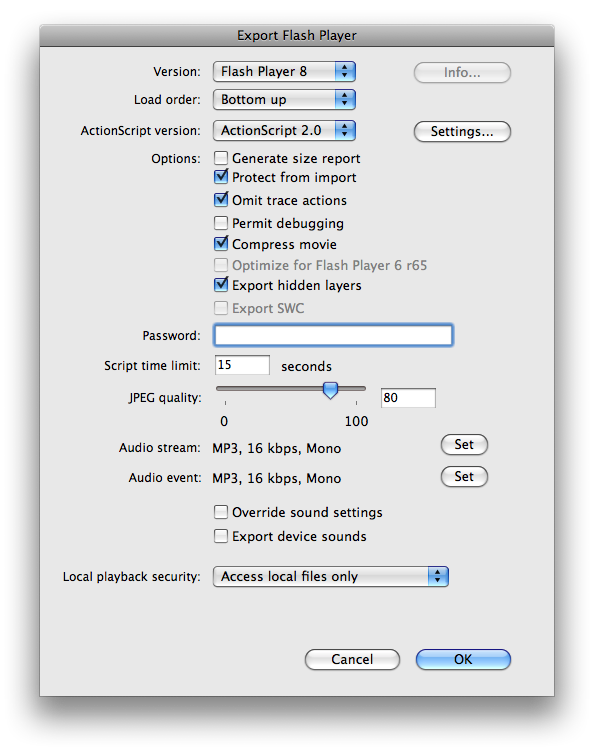
So lets compile a .swf file, shall we? To do this go to File->Export->Export Movie A new window will pop up, in this window you can give the file a name and chose a directory where to export it. Make sure the format displays Flash Movie, I'm naming the file "sifr.swf". Click Save.
Again, a new window will pop up, the default settings should work good. Click OK, and you will see a progress bar while the swf file is being compiled.
Step 3 - Uploading sIFR3
In order to make sIFR3 work, you need to upload the needed files (displayed in Step 1) to your WordPress directory. To keep things organized i will suggest that you upload the files to wp-content/themes/default Please note that you can use any other theme you prefer.
You should upload the files in the same directories as the theme, so the CSS files will go into wp-content/themes/default/css , you can do the same with the JavaScript files and flash files. When you're through, the file structure should look like this:
- wp-content/themes/default/css/sIFR-print.css
- wp-content/themes/default/css/sIFR-screen.css
- wp-content/themes/default/js/sifr.js
- wp-content/themes/default/js/sifr-config.js
- wp-content/themes/default/flash/sifr.swf
Don't forget: you need to upload sifr.swf and not sifr.fla.
Step 4 - Installing sIFR3
Now that all files are uploaded, we can install sIFR3 into our WordPress theme. First we need to include the JavaScript and the CSS files. We are going to do this between the <head> </head> tags, so lets open wp-content/themes/default/header.php . This file contains the header of the complete template, now we are going to add these lines just before:
- <?php wp_head(); ?>
- </head>
<?php wp_head(); ?> </head>
First let's include the CSS files by using the <link> tag:
- <link rel="stylesheet" href="<?php bloginfo('stylesheet_directory'); ?>/css/sIFR-print.css" type="text/css" media="screen" />
- <link rel="stylesheet" href="<?php bloginfo('stylesheet_directory'); ?>/css/sIFR-screen.css" type="text/css" media="print" />
<link rel="stylesheet" href="<?php bloginfo('stylesheet_directory'); ?>/css/sIFR-print.css" type="text/css" media="screen" /> <link rel="stylesheet" href="<?php bloginfo('stylesheet_directory'); ?>/css/sIFR-screen.css" type="text/css" media="print" />
We don't use the complete url to a file in a template file. WordPress has predefined tags, such as <?php bloginfo('stylesheet_directory'); ?> which will automatically return the theme directory, in this case http://www.nettuts.com/wp-content/themes/default As you can see it does not return the link with a / at the end! So make sure that you don't forget to type it.
Now we still have to include the JavaScript using the <script> tags. We can use the same method by using the predefined tags:
- <script src="<?php bloginfo('stylesheet_directory'); ?>/js/sifr.js" type="text/javascript"></script>
- <script src="<?php bloginfo('stylesheet_directory'); ?>/js/sifr-config.js" type="text/javascript"></script>
<script src="<?php bloginfo('stylesheet_directory'); ?>/js/sifr.js" type="text/javascript"></script> <script src="<?php bloginfo('stylesheet_directory'); ?>/js/sifr-config.js" type="text/javascript"></script>
Now we include the CSS and the JavaScript, which together looks like:
- <link rel="stylesheet" href="<?php bloginfo('stylesheet_directory'); ?>/css/sIFR-print.css" type="text/css" media="screen" />
- <link rel="stylesheet" href="<?php bloginfo('stylesheet_directory'); ?>/css/sIFR-screen.css" type="text/css" media="print" />
- <script src="<?php bloginfo('stylesheet_directory'); ?>/js/sifr.js" type="text/javascript"></script>
- <script src="<?php bloginfo('stylesheet_directory'); ?>/js/sifr-config.js" type="text/javascript"></script>
- <?php wp_head(); ?>
- </head>
<link rel="stylesheet" href="<?php bloginfo('stylesheet_directory'); ?>/css/sIFR-print.css" type="text/css" media="screen" /> <link rel="stylesheet" href="<?php bloginfo('stylesheet_directory'); ?>/css/sIFR-screen.css" type="text/css" media="print" /> <script src="<?php bloginfo('stylesheet_directory'); ?>/js/sifr.js" type="text/javascript"></script> <script src="<?php bloginfo('stylesheet_directory'); ?>/js/sifr-config.js" type="text/javascript"></script> <?php wp_head(); ?> </head>
When you load the page, you will find that nothing has happened... this is correct!
Step 5 - Configuring sIFR3
Before sIFR3 will replace defined text with flash, it needs to be configured. The configuration takes place in the sifr-config.js file, so let's open that file. (the file is empty) What we are going to do first is define the font name and the link to the flash file.
- var tahoma = {
- src: 'wp-content/themes/default/flash/sifr.swf'
- };
var tahoma = { src: 'wp-content/themes/default/flash/sifr.swf' };
Here, we are defining a variable that links to our flash file. Now this doesn't do anything yet. First we need to activate it by typing the activate command.
- sIFR.activate(tahoma);
sIFR.activate(tahoma);
Now that sIFR3 has been installed and a font has been activated we need to define what text it should be replaced with flash text. To do this, we use the replace command in sIFR3.
- sIFR.replace(tahoma, {
- selector: 'h2'
- });
sIFR.replace(tahoma, { selector: 'h2' });
What we did is tell sIFR3 to replace all text between h2 tags. But you can replace it with anything you want, for example: p, b, i, pre etc.... Although it's not advised to replace all text on your website with sIFR3 because this will slow your website down.
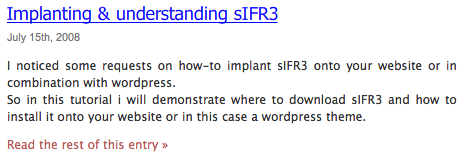
Now save the sIFR-config.js file and refresh your WordPress page. You will see that the titles have been replaced with flash.
As you can see, the title looks much more clear and sharp than the default html titles. Plus, you are now sure that it looks the same in every browser. Using sIFR3 can truly give your website a unique look, because you can specify any font you like.
Step 6 - Styling sIFR3
Now that sIFR3 is working, we still need to style it. The styling takes place in the sifr-config.js file and the sIFR-screen.css
Personally, i think the text size is a bit large. In order to change that, we need to add some CSS to sIFR-screen.css, so lets open that. Again, to keep things organized, we will start styling after the designated line:
- /*---- Header styling ---*/
Now, if you know the basics of CSS you know that you can style h1, h2, h3, etc. by simply typing it. For those who are new to CSS, this is how:
- h2{
- //styling code
- }
h2{ //styling code }
To make sure that it only applies to the sIFR3 text, we will add the sIFR-active class in front of the h2. We will try to make the text a bit smaller by using font-size, and lets try 14 pixels.
- .sIFR-active h2{
- visibility: hidden;
- font-size: 14px;
- }
.sIFR-active h2{ visibility: hidden; font-size: 14px; }
When you save it, you will notice that the font size has been reduced. As you can see, we also changed the visibility to hidden because we want to make sure the normal (not flash text) is hidden.
Other things you can style using this method is line-height & font-family, to name a few. Things that will not work using this method are the text color and background! This needs to be done in the sifr-config.js file, so lets save sIFR-screen.css and open sifr-config.js
When the files is open, you can start adding some new lines after the selector. We want to style the text, so lets call in the CSS function.
- sIFR.replace(tahoma, {
- selector: 'h2'
- ,css: [ ]
- });
sIFR.replace(tahoma, { selector: 'h2' ,css: [ ] });
Don't forget the "," or the CSS will not apply! Or sIFR3 might stop working! So lets add some color, remember that the WordPress titles are links? So we have to add some hover and link colors.
- sIFR.replace(tahoma, {
- selector: 'h2'
- ,css: [
- 'a { color: #333333; }'
- ,'a:link { color: #333333; }'
- ,'a:hover { color: #0066CC; }'
- ]
- });
sIFR.replace(tahoma, { selector: 'h2' ,css: [ 'a { color: #333333; }' ,'a:link { color: #333333; }' ,'a:hover { color: #0066CC; }' ] });
This looks like normal CSS, only that the style commands are between ' ' and a "," has to be added after each command, except for the last.
One important thing is that you have to write the color codes completely! So if you want white text:
- 'a { color: #FFF; }' <- WRONG!
- 'a { color: #FFFFFF; }' <- GOOD
'a { color: #FFF; }' <- WRONG! 'a { color: #FFFFFF; }' <- GOOD
Link

Mouse Over

sifr-config.js
- var tahoma = {
- src: 'wp-content/themes/default/flash/sifr.swf'
- };
- sIFR.activate(tahoma);
- sIFR.replace(tahoma, {
- selector: 'h2'
- ,css: [
- 'a { color: #333333; }'
- ,'a:link { color: #333333; }'
- ,'a:hover { color: #0066CC; }'
- ]
- });
var tahoma = { src: 'wp-content/themes/default/flash/sifr.swf' }; sIFR.activate(tahoma); sIFR.replace(tahoma, { selector: 'h2' ,css: [ 'a { color: #333333; }' ,'a:link { color: #333333; }' ,'a:hover { color: #0066CC; }' ] });
That's the end of this tutorial. If you enjoyed this article, please Digg and/or StumbleUpon it!


 1万+
1万+

 被折叠的 条评论
为什么被折叠?
被折叠的 条评论
为什么被折叠?
 到【灌水乐园】发言


