


转载:https://wxpython.org/pages/overview/
Hello World
Every programming language and UI toolkit needs to have a Hello World example. I think it's the law in most jurisdictions. ? Their intent is obviously to tell you everything you need to know in order to select the language or toolkit for your own use. So, here is wxPython's Hello World:
# First things, first. Import the wxPython package.
import wx

# Next, create an application object.
app = wx.App()  # Then a frame. frm = wx.Frame(None, title="Hello World")  # Show it. frm.Show()  # Start the event loop. app.MainLoop()
Five lines of code to create and show a window, and run an event handler. That's really all it takes.
What, you think 5 lines is too many? Okay, fine. Here it is in one line ? :
import wx; a=wx.App(); wx.Frame(None, title="Hello World").Show(); a.MainLoop() Hello World, Part 2
Okay, now let's put a little more flesh on the bones of that Hello World sample to give a little better idea of what creating a wxPython application is all about. The finished application looks like these screenshots when run:
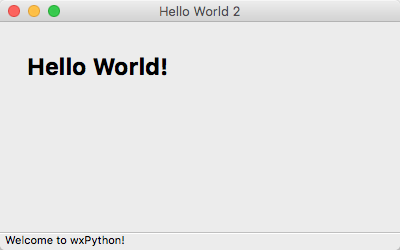
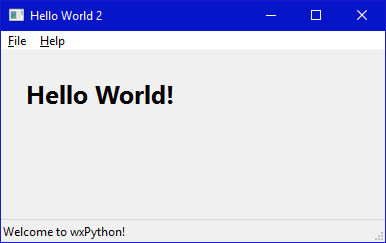
And here is the source code. The docstrings and the comments in the code will help you understand what it is doing.
#!/bin/python
"""
Hello World, but with more meat.
"""

import wx  class HelloFrame(wx.Frame):  """  A Frame that says Hello World  """   def __init__(self, *args, **kw):  # ensure the parent's __init__ is called  super(HelloFrame, self).__init__(*args, **kw)   # create a panel in the frame  pnl = wx.Panel(self)   # and put some text with a larger bold font on it  st = wx.StaticText(pnl, label="Hello World!", pos=(25,25))  font = st.GetFont()  font.PointSize += 10  font = font.Bold()  st.SetFont(font)   # create a menu bar  self.makeMenuBar()   # and a status bar  self.CreateStatusBar()  self.SetStatusText("Welcome to wxPython!")    def makeMenuBar(self):  """  A menu bar is composed of menus, which are composed of menu items.  This method builds a set of menus and binds handlers to be called  when the menu item is selected.  """   # Make a file menu with Hello and Exit items  fileMenu = wx.Menu()  # The "\t..." syntax defines an accelerator key that also triggers  # the same event  helloItem = fileMenu.Append(-1, "&Hello...\tCtrl-H",  "Help string shown in status bar for this menu item")  fileMenu.AppendSeparator()  # When using a stock ID we don't need to specify the menu item's  # label  exitItem = fileMenu.Append(wx.ID_EXIT)   # Now a help menu for the about item  helpMenu = wx.Menu()  aboutItem = helpMenu.Append(wx.ID_ABOUT)   # Make the menu bar and add the two menus to it. The '&' defines  # that the next letter is the "mnemonic" for the menu item. On the  # platforms that support it those letters are underlined and can be  # triggered from the keyboard.  menuBar = wx.MenuBar()  menuBar.Append(fileMenu, "&File")  menuBar.Append(helpMenu, "&Help")   # Give the menu bar to the frame  self.SetMenuBar(menuBar)   # Finally, associate a handler function with the EVT_MENU event for  # each of the menu items. That means that when that menu item is  # activated then the associated handler function will be called.  self.Bind(wx.EVT_MENU, self.OnHello, helloItem)  self.Bind(wx.EVT_MENU,