


在学习Lucene之前呢,我们当然首先要了解下什么是Lucene.
0x01 什么是Lucene ?
Lucene是一套用于全文检索和搜索的开放源代码程序库,由Apache软件基金会支持和提供。
Lucene提供了一个简单却强大的应用程序接口,能够做全文索引和搜索,在Java开发环境里Lucene是一个成熟的免费开放源代码工具;
就其本身而论,Lucene是现在并且是这几年,最受欢迎的免费Java信息检索程序库。
Lucene最初是由Doug Cutting所撰写的,他贡献出Lucene的目标是为各种中小型应用程序加入全文检索功能。
Tips: 摘要来自维基百科 https://zh.wikipedia.org/wiki/Lucene
这里我们只需要知道Lucene是目前最为流行的基于 Java 开源全文检索工具包。
0x02 Lucene 是用来做什么的?
基于Lucene的著名项目
| 项目名称 | 项目描述 |
| Apache Nutch | 提供成熟可用的网络爬虫 |
| Apache Solr | 基于Lucenne核心的高性能搜索服务器,提供JSON/Python/Ruby API |
| Elasticsearch | 企业搜索平台,目的是组织数据并使其易于获取 |
| DocFetcher | 跨平台的本机文件搜索桌面程序 |
| Lucene.NET | 提供给.Net平台用户的Lucene类库的封装 |
| Swiftype | 基于Lucene的企业级搜索 |
| Apache Lucy | 为动态语言提供全文搜索的能力,是Lucene Java 库的C接口 |
其实我们不难发现主要用途
- 可以用来编写网络爬虫
- 也可以用来实现网站后台的全文检索。
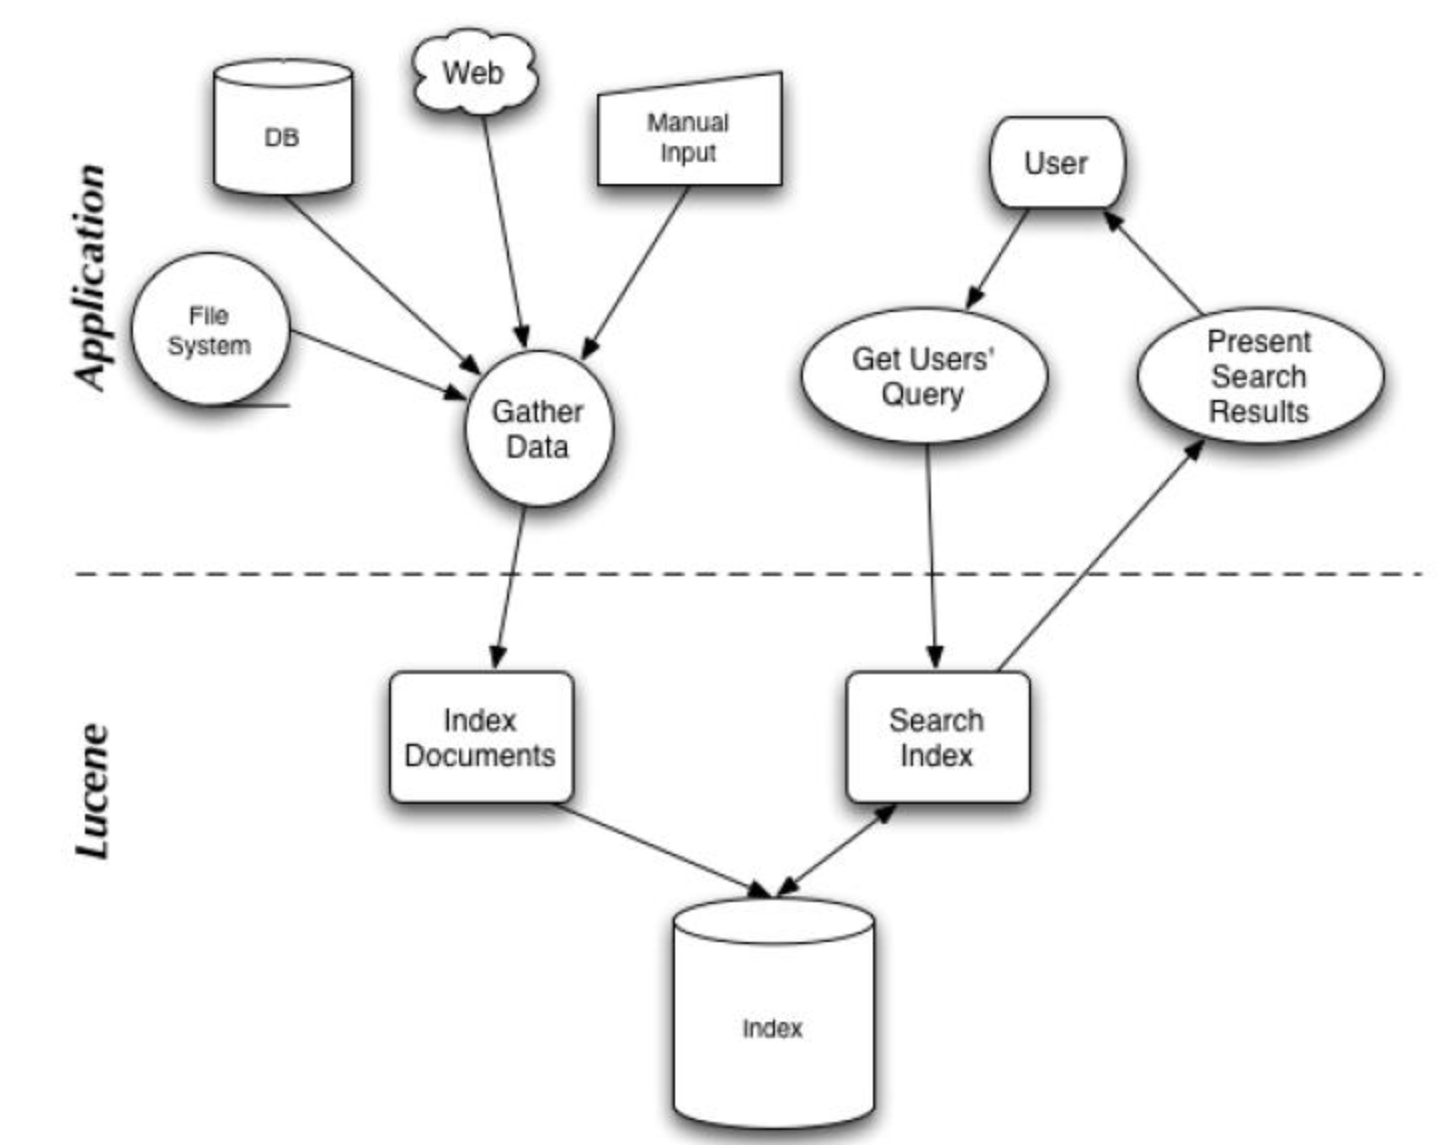
偶然发现这张图感觉挺不错的,在这里分享下:
搜索应用程序和 Lucene 之间的关系
Lucene 能够为文本类型的数据建立索引,所以你只要能把你要索引的数据格式转化的文本的,Lucene 就能对你的文档进行索引和搜索。
0x03 Lucene 软件包分析
Lucene 软件包的发布形式是一个 JAR 文件,下面我们分析一下这个 JAR 文件里面的主要的 JAVA 包,使读者对之有个初步的了解。
Package: org.apache.lucene.document
这个包提供了一些为封装要索引的文档所需要的类,比如 Document, Field。这样,每一个文档最终被封装成了一个 Document 对象。
Package: org.apache.lucene.analysis
这个包主要功能是对文档进行分词,因为文档在建立索引之前必须要进行分词,所以这个包的作用可以看成是为建立索引做准备工作。
Package: org.apache.lucene.index
这个包提供了一些类来协助创建索引以及对创建好的索引进行更新。这里面有两个基础的类:IndexWriter 和 IndexReader,
其中 IndexWriter 是用来创建索引并添加文档到索引中的,IndexReader 是用来删除索引中的文档的。
Package: org.apache.lucene.search
这个包提供了对在建立好的索引上进行搜索所需要的类。比如 IndexSearcher 和 Hits, IndexSearcher 定义了在指定的索引上进行搜索的方法,Hits 用来保存搜索得到的结果。
0x04 搭建Lucene 开发环境?
相信你和我一样已经控制不住自己的洪荒之力想要写个demo来跑跑了,但是在此之前我们还是要先搭建好开发环境。
1. 首先我们需要找到Lucene的官网
Lucene官网:https://lucene.apache.org/

翻译内容如下:
Apache LuceneTM项目开发开源搜索软件,其中包括:
我们的旗舰子项目Lucene Core提供了基于Java的索引和搜索技术,以及拼写检查,高亮显示和高级分析/标记化功能。
SolrTM是一款使用Lucene Core构建的高性能搜索服务器,具有XML / HTTP和JSON / Python / Ruby API,高亮显示,多面搜索,缓存,复制和Web管理界面。
PyLucene是Core项目的Python端口。
2.点击上图中的Download 按钮,会跳转到这个下载页面

Tips: 这里存在很多镜像下载链接,我们选择推荐的下载链接下载即可。
0x05 Lucene Hello World Sample
文档资料相信你在其他网站已经看了不少,但是不写一个能跑起来的Hello World 对于初学者来说是非常痛苦的。
对于这个简单的例子,我们将从一些字符串中创建一个内存索引
1.创建Maven 项目
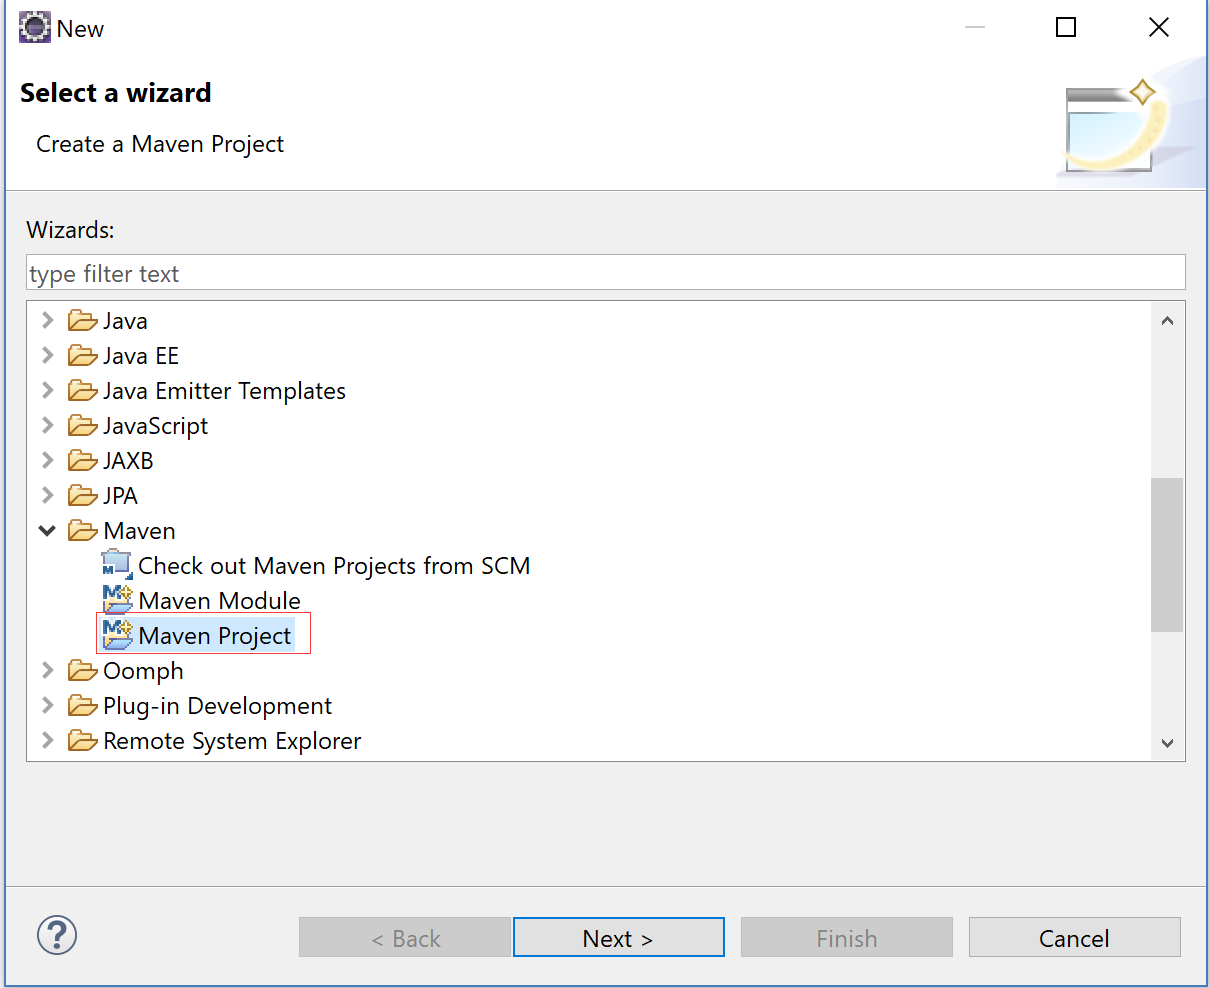
2.选择创建一个简单的Maven Project

3. 配置工程信息

4. 点击完成

5. 配置POM.xml
<project xmlns="http://maven.apache.org/POM/4.0.0" xmlns:xsi="http://www.w3.org/2001/XMLSchema-instance" xsi:schemaLocation="http://maven.apache.org/POM/4.0.0 http://maven.apache.org/xsd/maven-4.0.0.xsd">
  <modelVersion>4.0.0</modelVersion>
  <groupId>com.xingyun</groupId>
  <artifactId>lucene-sample</artifactId>
  <version>0.0.1-SNAPSHOT</version>
  <packaging>jar</packaging>

  <name>lucene-sample</name>

    <properties>
        <project.build.sourceEncoding>UTF-8</project.build.sourceEncoding>
    </properties>

    <build>
      <plugins>
          <plugin>
              <groupId>org.codehaus.mojo</groupId>
              <artifactId>exec-maven-plugin</artifactId>
              <version>1.3.2</version>
              <executions>
                  <execution>
                      <id>ex</id>
                      <phase>package</phase>
                      <goals>
                          <goal>exec</goal>
                      </goals>
                      <configuration>
                          <executable>java</executable>
                          <arguments>
                              <argument>-classpath</argument>
                              <classpath />
                              <argument>HelloLucene.HelloLucene</argument>
                          </arguments>
                      </configuration>
                  </execution>
              </executions>
          </plugin>
      </plugins>
    </build>

    <dependencies>
        <dependency>
            <groupId>org.apache.lucene</groupId>
            <artifactId>lucene-core</artifactId>
            <version>4.0.0</version>
        </dependency>
        <dependency>
            <groupId>org.apache.lucene</groupId>
            <artifactId>lucene-queries</artifactId>
            <version>4.0.0</version>
        </dependency>
        <dependency>
            <groupId>org.apache.lucene</groupId>
            <artifactId>lucene-test-framework</artifactId>
            <version>4.0.0</version>
        </dependency>
        <dependency>
            <groupId>org.apache.lucene</groupId>
            <artifactId>lucene-analyzers-common</artifactId>
            <version>4.0.0</version>
        </dependency>
        <dependency>
            <groupId>org.apache.lucene</groupId>
            <artifactId>lucene-queryparser</artifactId>
            <version>4.0.0</version>
        </dependency>
    </dependencies>
</project>
6. 创建HelloLucene.java
package com.xingyun;

import java.io.IOException;
import java.text.ParseException;

import org.apache.lucene.analysis.standard.StandardAnalyzer;
import org.apache.lucene.document.Document;
import org.apache.lucene.document.Field;
import org.apache.lucene.document.StringField;
import org.apache.lucene.document.TextField;
import org.apache.lucene.index.DirectoryReader;
import org.apache.lucene.index.IndexReader;
import org.apache.lucene.index.IndexWriter;
import org.apache.lucene.index.IndexWriterConfig;
import org.apache.lucene.queryparser.classic.QueryParser;
import org.apache.lucene.search.IndexSearcher;
import org.apache.lucene.search.Query;
import org.apache.lucene.search.ScoreDoc;
import org.apache.lucene.search.TopScoreDocCollector;
import org.apache.lucene.store.Directory;
import org.apache.lucene.store.RAMDirectory;
import org.apache.lucene.util.Version;

public class HelloLucene {

    public static void main(String[] args) throws IOException, ParseException {

        // 对于这个简单的例子,我们将从一些字符串中创建一个内存索引。
        // 0. Specify the analyzer for tokenizing text.
        // The same analyzer should be used for indexing and searching
        StandardAnalyzer analyzer = new StandardAnalyzer(Version.LUCENE_40);

        // 1. create the index
        Directory index = new RAMDirectory();

        IndexWriterConfig config = new IndexWriterConfig(Version.LUCENE_40, analyzer);

        IndexWriter w = new IndexWriter(index, config);
        addDoc(w, "Lucene in Action", "193398817");
        addDoc(w, "Lucene for Dummies", "55320055Z");
        addDoc(w, "Managing Gigabytes", "55063554A");
        addDoc(w, "The Art of Computer Science", "9900333X");
        w.close();

        // 2. query
        String querystr = args.length > 0 ? args[0] : "lucene";

        // the "title" arg specifies the default field to use
        // when no field is explicitly specified in the query.
        Query q = null;
        try {
            q = new QueryParser(Version.LUCENE_40, "title", analyzer).parse(querystr);
        } catch (org.apache.lucene.queryparser.classic.ParseException e) {
            e.printStackTrace();
        }

        // 3. search
        int hitsPerPage = 10;
        IndexReader reader = DirectoryReader.open(index);
        IndexSearcher searcher = new IndexSearcher(reader);
        TopScoreDocCollector collector = TopScoreDocCollector.create(hitsPerPage, true);
        searcher.search(q, collector);
        ScoreDoc[] hits = collector.topDocs().scoreDocs;

        // 4. display results
        System.out.println("Found " + hits.length + " hits.");
        for (int i = 0; i < hits.length; ++i) {
            int docId = hits[i].doc;
            Document d = searcher.doc(docId);
            System.out.println((i + 1) + ". " + d.get("isbn") + "\t" + d.get("title"));
        }

        // reader can only be closed when there
        // is no need to access the documents any more.
        reader.close();
    }

    private static void addDoc(IndexWriter w, String title, String isbn) throws IOException {
        Document doc = new Document();
        doc.add(new TextField("title", title, Field.Store.YES));

        // use a string field for isbn because we don't want it tokenized
        doc.add(new StringField("isbn", isbn, Field.Store.YES));
        w.addDocument(doc);
    }

}
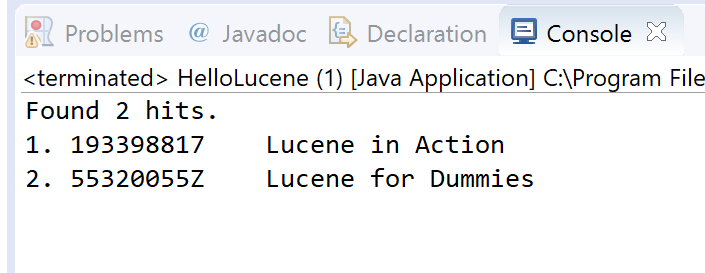
7. 运行后,我们便可以得到索引集合中带有Lucene的所有内容
0x06 代码剖析
我们运行成功后,相信此时的你已经有心情和我一起来分析代码了吧。
1. 创建索引
StandardAnalyzer analyzer = new StandardAnalyzer();
Directory index = new RAMDirectory();

IndexWriterConfig config = new IndexWriterConfig(analyzer);

IndexWriter w = new IndexWriter(index, config);
addDoc(w, "Lucene in Action", "193398817");
addDoc(w, "Lucene for Dummies", "55320055Z");
addDoc(w, "Managing Gigabytes", "55063554A");
addDoc(w, "The Art of Computer Science", "9900333X");
w.close();
我们需要虚构一些假的数据,通过上面的方式来对一些字符串和数字创建索引
addDoc 方法定义如下所示:
private static void addDoc(IndexWriter w, String title, String isbn) throws IOException {
  Document doc = new Document();
  doc.add(new TextField("title", title, Field.Store.YES));
  doc.add(new StringField("isbn", isbn, Field.Store.YES));
  w.addDocument(doc);
}
2. 查询
String querystr = args.length > 0 ? args[0] : "lucene";
Query q = new QueryParser("title", analyzer).parse(querystr);
3.搜索
int hitsPerPage = 10;
IndexReader reader = DirectoryReader.open(index);
IndexSearcher searcher = new IndexSearcher(reader);
TopDocs docs = searcher.search(q, hitsPerPage);
ScoreDoc[] hits = docs.scoreDocs;
4.显示结果
System.out.println("Found " + hits.length + " hits.");
for(int i=0;i<hits.length;++i) {
    int docId = hits[i].doc;
    Document d = searcher.doc(docId);
    System.out.println((i + 1) + ". " + d.get("isbn") + "\t" + d.get("title"));
}
0x07 参考资料:
Lucene in 5 minutes:http://www.lucenetutorial.com/lucene-in-5-minutes.html
Lucene常识总结以及小demo总结 http://www.imooc.com/article/21946
Lucene 概述: https://www.ibm.com/developerworks/cn/java/j-lo-lucene1/
视频实战教程:
基于Lucene4.6+Solr4.6+Heritrix1.14+S2SH实战开发从无到有垂直搜索引擎
网盘地址:https://pan.baidu.com/s/1nwkAamt 密码: 9ang
备用地址(腾讯微云):http://url.cn/5CmEW7s 密码:p8TmhQ


 139
139


 被折叠的 条评论
为什么被折叠?
被折叠的 条评论
为什么被折叠?
 到【灌水乐园】发言


