


Unity4.6 兴许版本号都已经内置了寻路AI了。之前的文章有介绍
然而两年来项目中一直使用的是 A* Pathfinding 这个插件的。所以抽时间来写下这个插件的简单使用。
依据游戏的类型。使用到的插件功能可能会不一样,我这里仅仅介绍最简单的,也是使用的最多的简单寻路。复杂的如尾随、动态。都有相应的样例来学习。
我也一直都没有去看……
转自http://blog.csdn.net/huutu http://www.thisisgame.com.cn
以下是动态图,借助 A* 插件,编写非常少的代码就能够做到寻路。
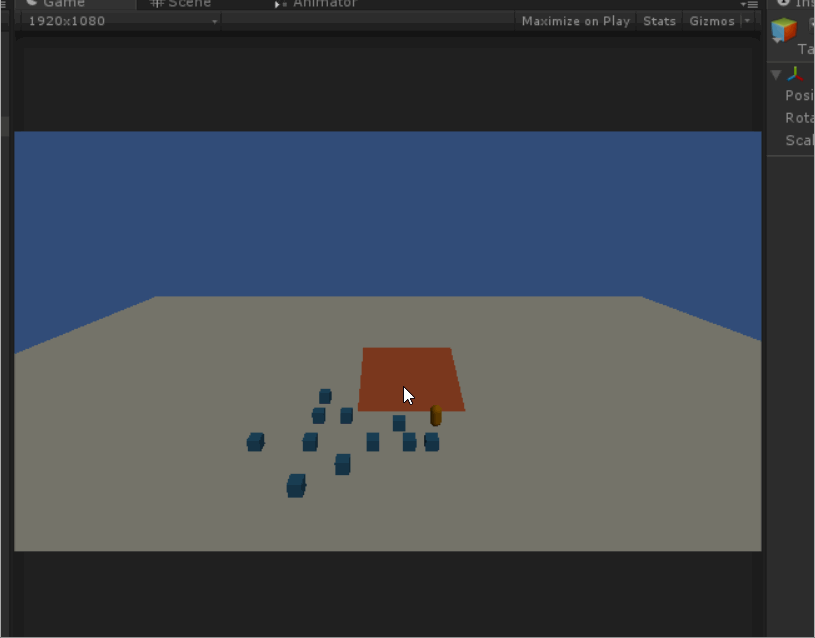
1、创建场景
在场景中加入一些Cube 作为障碍物 Obstacles,加入一个 Capsule 作为Player,然后加入一个Plane 作为地面。再加入一个Plane。作为斜坡測试。
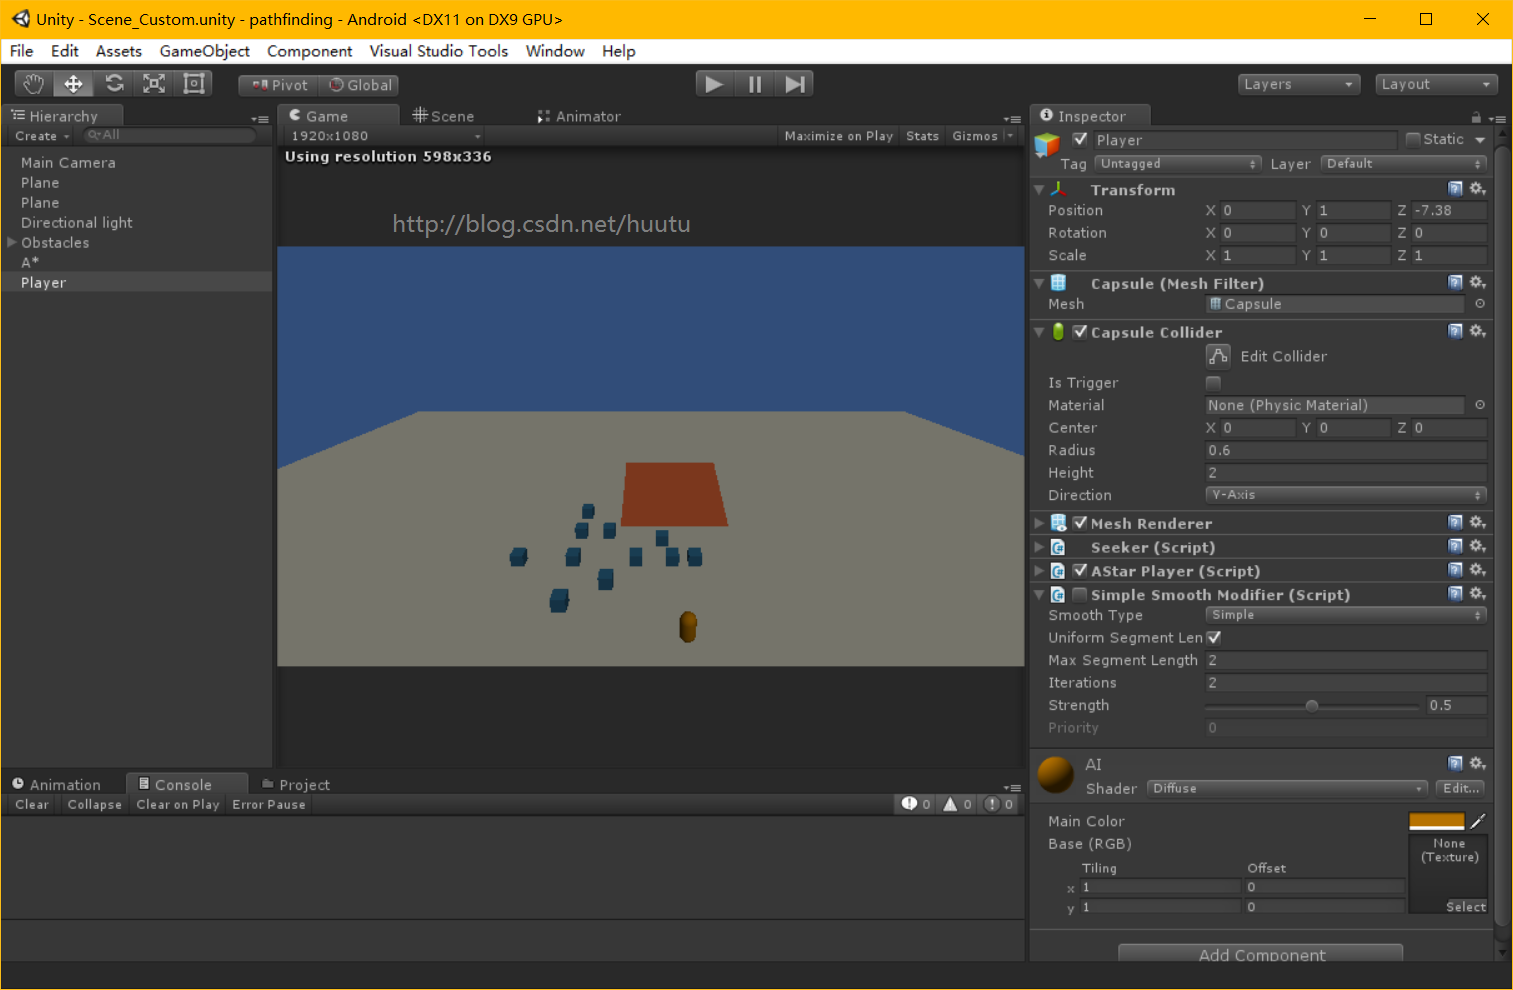
在创建一个GameObject,改名为 A* 。加入A Star Path (Path finder) 组件。

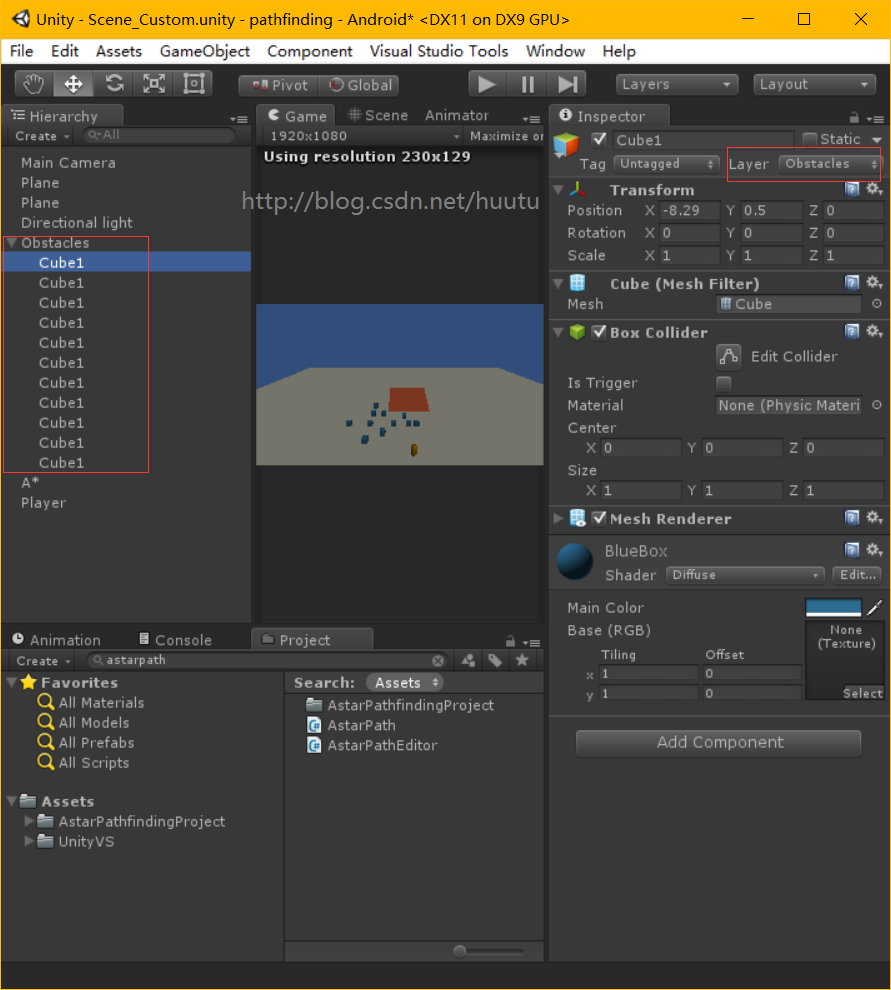
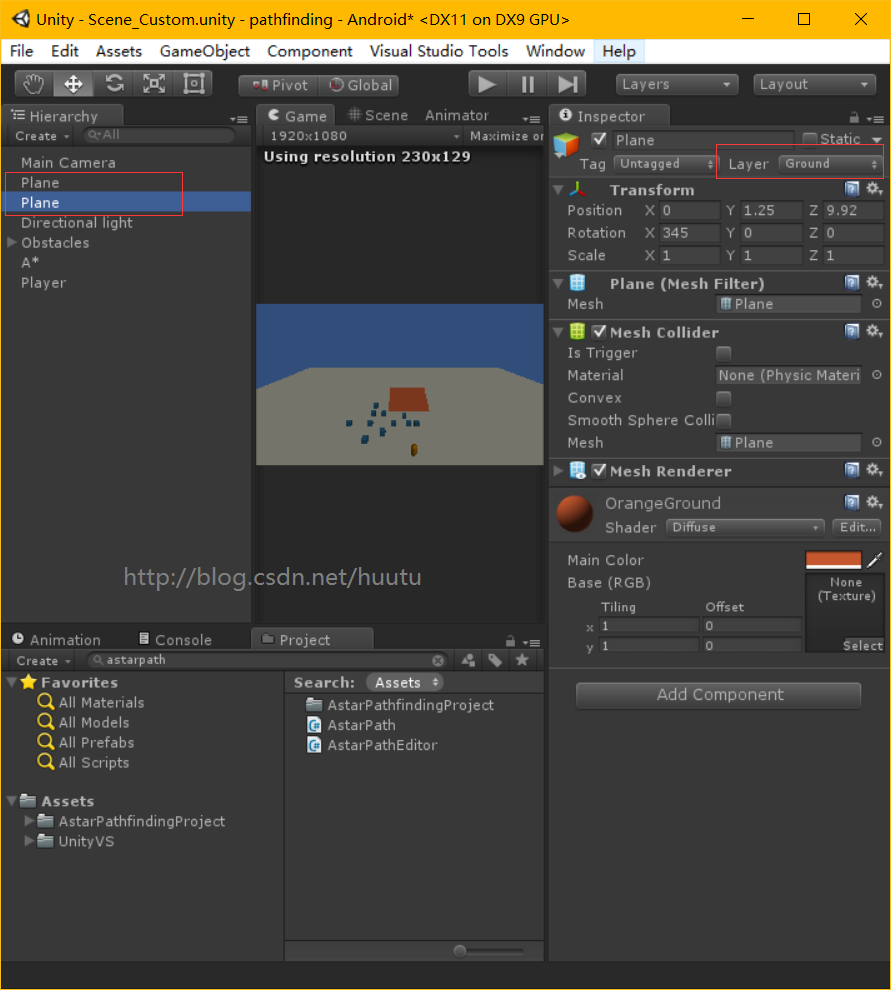
2、编辑场景,指定障碍物
A* 插件中,是依据 Layer 来推断障碍物的,所以我们要把 作为障碍物的 Cubes 都设置到 Obstacle 这一个Layer。
然后给我们的地板,设置Layer 为 Ground ,两块地板都是
转自http://blog.csdn.net/huutu http://www.thisisgame.com.cn
3、生成寻路网格
选中 A* ,在Inspector 中,展开 。
查看以下的面板。
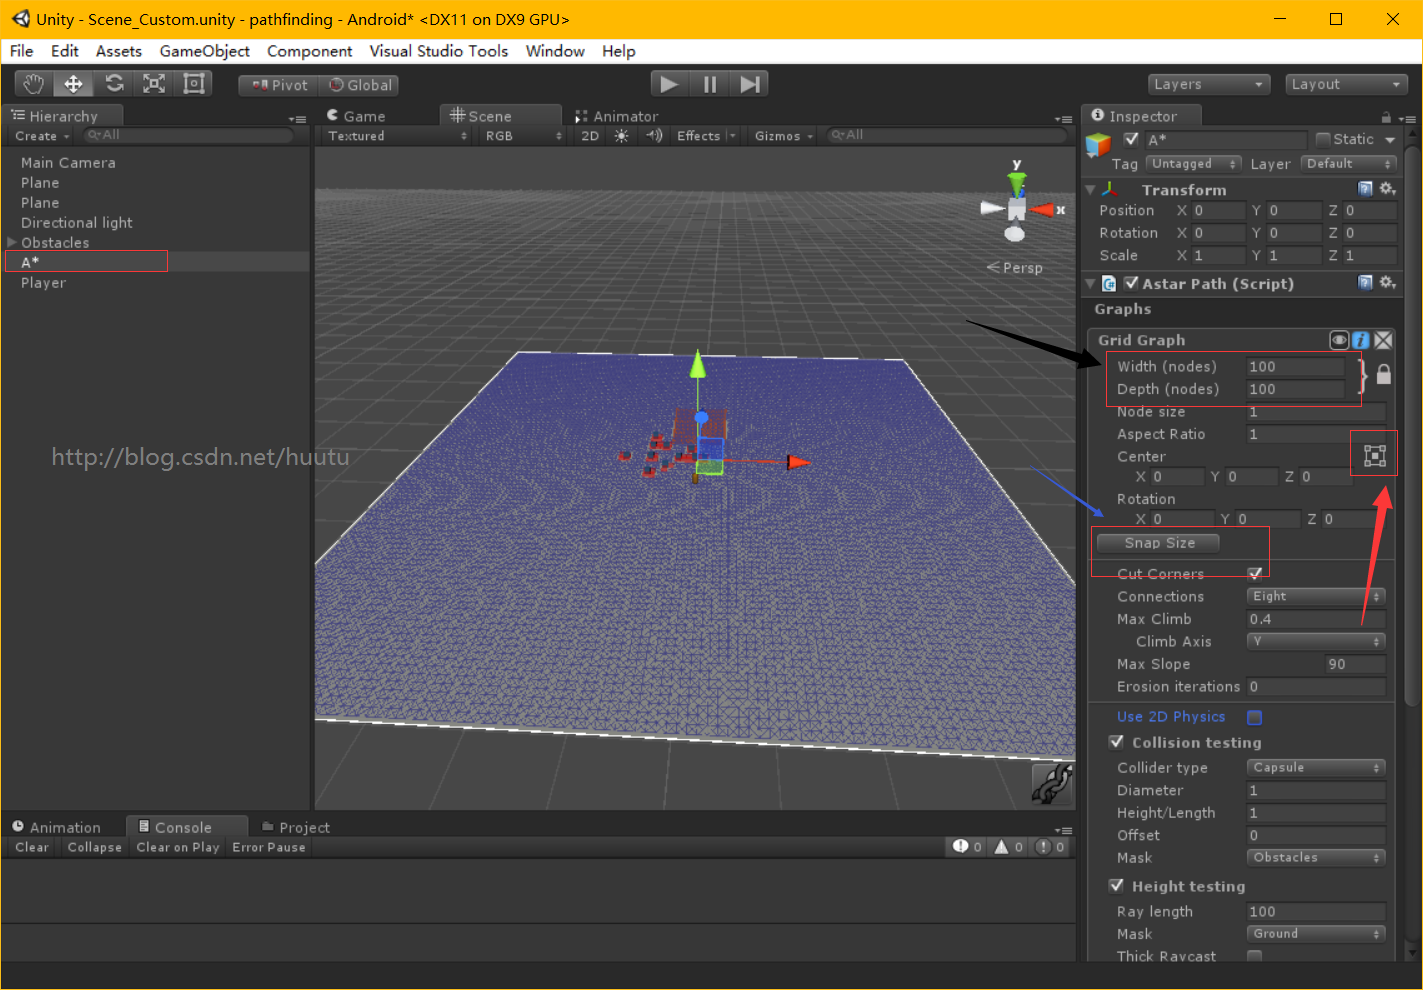
如图中,
黑色箭头所指是宽高。这里的宽高。是指格子的数量。
这里用到的就是 A* 的格子寻路。
调整宽高,覆盖整个Plane。
红色箭头所指,是左上、右上、左下、右下、中心 四个点,选中当中一个点,就能够调整这个点的位置。
选中中心。点击蓝色箭头所指的 Snap Size,会依据中心的位置来自己主动对齐。
继续设置。
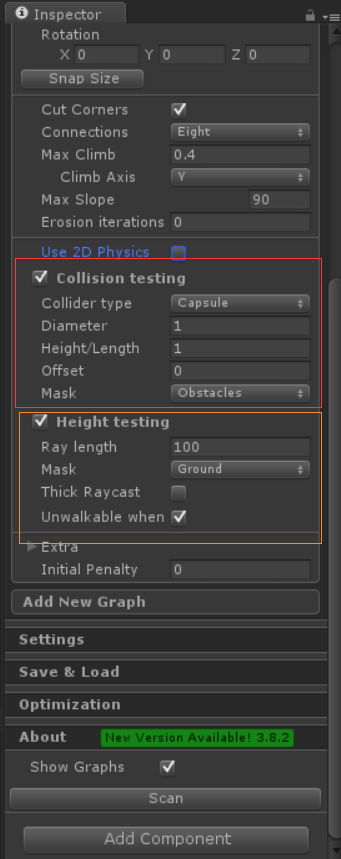
红框中的Collision Testing。是生成 禁止通过 格子的。
由于我们的 Cubes 是障碍物,所以在 Mask 中选择 Cubes 所在的Layer - Obstacles。
黄色框中的Height Testing 是用来 让寻路节点 与 Ground 进行检測的。比方要爬坡的时候就须要检測高度。
设置完毕后,点击Scan,就会生成寻路网格。
转自http://blog.csdn.net/huutu http://www.thisisgame.com.cn
4、编写寻路 AI 代码
生成寻路网格之后,我们在代码中就能够使用 A* 来进行寻路了。
首先在 Player 这个 Capsule 上加入Seeker 组件。
然后新建脚本 AStarPlayer.cs 作为測试代码。
在代码中,首先我们从 屏幕发射射线。来定位目标位置。
然后使用 Seeker 来開始生成最短路径。
Seeker生成路径成功后。会把每个节点的位置保存在 List中。
我们依照顺序读取 List 中的位置,位移Player 到相应的位置,就完毕了寻路。
以下是完整代码:
using UnityEngine;
using System.Collections;
using Pathfinding;

public class AStarPlayer : MonoBehaviour
{
    //目标位置;
     Vector3 targetPosition;

    Seeker seeker;
    CharacterController characterController;

    //计算出来的路线;
     Path path;

    //移动速度;
     float playerMoveSpeed = 10f;

    //当前点
    int currentWayPoint = 0;

    bool stopMove = true;

    //Player中心点;
    float playerCenterY = 1.0f;


	// Use this for initialization
	void Start ()
    {
        seeker = GetComponent<Seeker>();

        playerCenterY = transform.localPosition.y;
	}

    //寻路结束;
    public void OnPathComplete(Path p)
    {
        Debug.Log("OnPathComplete error = "+p.error);

        if (!p.error)
        {
            currentWayPoint = 0;
            path = p;
            stopMove = false;
        }

        for (int index = 0; index < path.vectorPath.Count; index++)
        {
            Debug.Log("path.vectorPath["+index+"]="+path.vectorPath[index]);
        }
    }

	// Update is called once per frame
	void Update ()
    {
        if (Input.GetMouseButtonDown(0))
        {
            RaycastHit hit;
            if (!Physics.Raycast(Camera.main.ScreenPointToRay(Input.mousePosition), out hit, 100))
            {
                return;
            }
            if (!hit.transform)
            {
                return;
            }
            targetPosition = hit.point;// new Vector3(hit.point.x, transform.localPosition.y, hit.point.z);

            Debug.Log("targetPosition=" + targetPosition);

            seeker.StartPath(transform.position, targetPosition,OnPathComplete);
        }
	}

    void FixedUpdate()
    {
        if (path == null || stopMove)
        {
            return;
        }

        //依据Player当前位置和 下一个寻路点的位置,计算方向;
        Vector3 currentWayPointV = new Vector3(path.vectorPath[currentWayPoint].x, path.vectorPath[currentWayPoint].y + playerCenterY, path.vectorPath[currentWayPoint].z);
        Vector3 dir = (currentWayPointV - transform.position).normalized;

        //计算这一帧要朝着 dir方向 移动多少距离;
        dir *= playerMoveSpeed * Time.fixedDeltaTime;

        //计算加上这一帧的位移,是不是会超过下一个节点;
        float offset = Vector3.Distance(transform.localPosition, currentWayPointV);

        if (offset < 0.1f)
        {
            transform.localPosition = currentWayPointV;

            currentWayPoint++;

            if (currentWayPoint == path.vectorPath.Count)
            {
                stopMove = true;

                currentWayPoint = 0;
                path = null;
            }
        }
        else
        {
            if (dir.magnitude > offset)
            {
                Vector3 tmpV3 = dir * (offset / dir.magnitude);
                dir = tmpV3;

                currentWayPoint++;

                if (currentWayPoint == path.vectorPath.Count)
                {
                    stopMove = true;

                    currentWayPoint = 0;
                    path = null;
                }
            }
            transform.localPosition += dir;
        }
    }
}
至此简单的寻路了。
在A* 的Example 中,有非常多个样例。
最简单的寻路脚本写法是 直接继承 AIPath 。
以下新建一个 脚本 PlayerAI.cs 继承 AIPath 来作为測试
using UnityEngine;
using System.Collections;
using Pathfinding.RVO;

namespace Pathfinding
{
    [RequireComponent(typeof(Seeker))]
    [RequireComponent(typeof(CharacterController))]
    public class PlayerAI : AIPath
    {
        /** Minimum velocity for moving */
        public float sleepVelocity = 0.4F;

        /** Speed relative to velocity with which to play animations */
        public float animationSpeed = 0.2F;

        /** Effect which will be instantiated when end of path is reached.
         * \see OnTargetReached */
        public GameObject endOfPathEffect;

        public new void Start()
        {
            //Call Start in base script (AIPath)
            base.Start();
        }

        /** Point for the last spawn of #endOfPathEffect */
        protected Vector3 lastTarget;

        public override void OnTargetReached()
        {
            if (endOfPathEffect != null && Vector3.Distance(tr.position, lastTarget) > 1)
            {
                GameObject.Instantiate(endOfPathEffect, tr.position, tr.rotation);
                lastTarget = tr.position;
            }
        }

        public override Vector3 GetFeetPosition()
        {
            return tr.position;
        }

        protected new void Update()
        {

            if (Input.GetMouseButtonDown(0))
            {
                RaycastHit hit;
                if (!Physics.Raycast(Camera.main.ScreenPointToRay(Input.mousePosition), out hit, 100))
                {
                    return;
                }
                if (!hit.transform)
                {
                    return;
                }
                target.localPosition = hit.point;
            }

            //Get velocity in world-space
            Vector3 velocity;
            if (canMove)
            {
                //Calculate desired velocity
                Vector3 dir = CalculateVelocity(GetFeetPosition());

                //Rotate towards targetDirection (filled in by CalculateVelocity)
                RotateTowards(targetDirection);

                dir.y = 0;
                if (dir.sqrMagnitude > sleepVelocity * sleepVelocity)
                {
                    //If the velocity is large enough, move
                }
                else
                {
                    //Otherwise, just stand still (this ensures gravity is applied)
                    dir = Vector3.zero;
                }

                if (this.rvoController != null)
                {
                    rvoController.Move(dir);
                    velocity = rvoController.velocity;
                }
                else
                    if (navController != null)
                    {
#if FALSE
					navController.SimpleMove (GetFeetPosition(), dir);
#endif
                        velocity = Vector3.zero;
                    }
                    else if (controller != null)
                    {
                        controller.SimpleMove(dir);
                        velocity = controller.velocity;
                    }
                    else
                    {
                        Debug.LogWarning("No NavmeshController or CharacterController attached to GameObject");
                        velocity = Vector3.zero;
                    }
            }
            else
            {
                velocity = Vector3.zero;
            }
        }
    }
}
代码量少,可是不如自己写的直观。
两种不同的脚本都能够实现寻路效果。
演示样例项目打包下载:
http://pan.baidu.com/s/1hsm6YNi


 1239
1239

 被折叠的 条评论
为什么被折叠?
被折叠的 条评论
为什么被折叠?
 到【灌水乐园】发言


