


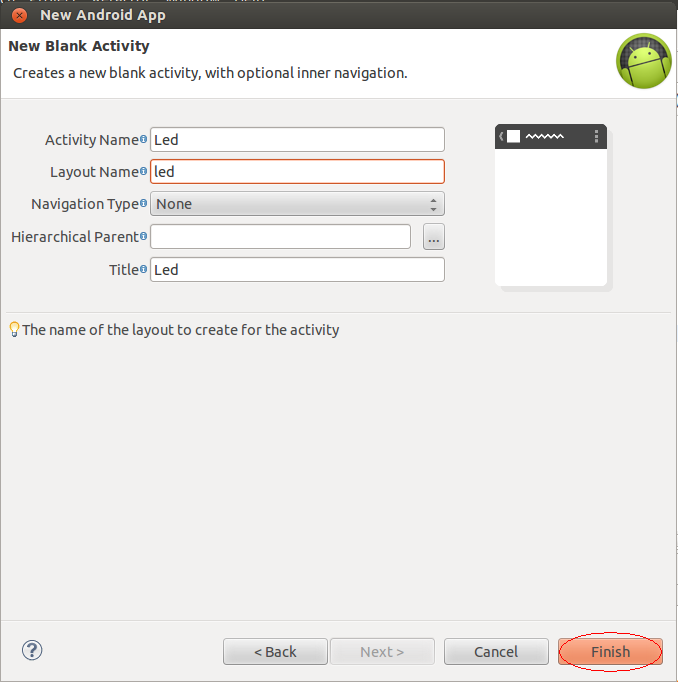
1.新建eclipse项目


2.在led.java中加入public static native int led(int i, int j);
led.java:
- package com.example.led;
- import android.os.Bundle;
- import android.app.Activity;
- import android.view.Menu;
- public class LED extends Activity {
- @Override
- public void onCreate(Bundle savedInstanceState) {
- super.onCreate(savedInstanceState);
- setContentView(R.layout.led);
- }
- @Override
- public boolean onCreateOptionsMenu(Menu menu) {
- getMenuInflater().inflate(R.menu.led, menu);
- return true;
- }
- <span style="color:#ff6666;">public static native int led(int i, int j);</span>
- }
3.编译项目文件,bin目录下会生成led.apk.
4.终端进入项目目录,新建jni目录

5.利用javah命令生成头文件,该头文件中包含了符合jni格式的函数名,
javah -classpath bin/classes -d jni com.example.led.LED

6. jni目录下新建led.c
此c程序实际上是linux下的LED测试程序,函数入口更换为上面javah生成的函数名,以便java调用.
- #include <jni.h>
- #include <stdio.h>
- #include <stdlib.h>
- #include <fcntl.h>
- #include <unistd.h>
- #include <sys/ioctl.h>
- #include <android/log.h>
- #define LOG_TAG "LED" //android logcat
- #define LOGI(...) __android_log_print(ANDROID_LOG_INFO,LOG_TAG,__VA_ARGS__ )
- #define LOGE(...) __android_log_print(ANDROID_LOG_ERROR,LOG_TAG,__VA_ARGS_ _)
- //int main(int argc, char **argv)
- jint JNICALL Java_com_example_led_Led_led(JNIEnv *env, jclass thiz, jint led_nu, jint on)
- {
- int fd;
- fd = open("/dev/leds0", O_RDWR);
- if(fd < 0)
- printf("Can't open /dev/leds!\n");
- ioctl(fd, on, led_nu);
- LOGI("led_nu=%d,state=%d\n", led_nu, on);
- close(fd);
- return 0;
- }
7. 在jni目录下新建Andorid.mk [实际上是为led.c编写makefile]
Android.mk:
- LOCAL_PATH := $(call my-dir)
- include $(CLEAR_VARS)
- LOCAL_MODULE := LED
- LOCAL_SRC_FILES := led.c
- LOCAL_LDLIBS := -llog
- LOCAL_C_INCLUDES := $(MY_ANDROID_SOURCE)/frameworks/base/core/jni/android/graphics \
- include $(BUILD_SHARED_LIBRARY)
用ndk-build编译生成so库

8.回到eclipse中,将生成的so库添加进led.java中
led.java:
- package com.example.led;
- import android.os.Bundle;
- import android.app.Activity;
- import android.view.Menu;
- public class LED extends Activity {
- @Override
- public void onCreate(Bundle savedInstanceState) {
- super.onCreate(savedInstanceState);
- setContentView(R.layout.led);
- }
- @Override
- public boolean onCreateOptionsMenu(Menu menu) {
- getMenuInflater().inflate(R.menu.led, menu);
- return true;
- }
- public static native int led(int i, int j);
- static
- {
- System.loadLibrary("LED");
- }
- }
9. 修改布局,在led.xml中为界面添加按钮
res --> layout --> led.xml:
- <LinearLayout xmlns:android="http://schemas.android.com/apk/res/android"
- xmlns:tools="http://schemas.android.com/tools"
- android:layout_width="fill_parent"
- android:layout_height="fill_parent"
- android:orientation="vertical" >
- <ToggleButton
- android:id="@+id/btn1"
- android:layout_width="140dip"
- android:layout_height="wrap_content"
- android:textOn="led1 on"
- android:textOff="led1 off"
- android:layout_gravity="center_horizontal"
- />
- <ToggleButton
- android:id="@+id/btn2"
- android:layout_width="140dip"
- android:layout_height="wrap_content"
- android:textOn="led2 on"
- android:textOff="led2 off"
- android:layout_gravity="center_horizontal"
- />
- <ToggleButton
- android:id="@+id/btn3"
- android:layout_width="140dip"
- android:layout_height="wrap_content"
- android:textOn="led3 on"
- android:textOff="led3 off"
- android:layout_gravity="center_horizontal"
- />
- <ToggleButton
- android:id="@+id/btn4"
- android:layout_width="140dip"
- android:layout_height="wrap_content"
- android:textOn="led4 on"
- android:textOff="led4 off"
- android:layout_gravity="center_horizontal"
- />
- </LinearLayout>
10. 在led.java中添加监听按键代码(最终的led.java)
- package com.example.led;
- import android.app.Activity;
- import android.content.Intent;
- import android.net.Uri;
- import android.os.Bundle;
- import android.view.View;
- import android.widget.Button;
- import android.widget.ToggleButton;
- import android.util.Log;
- import android.widget.CompoundButton.OnCheckedChangeListener;
- public class Led extends Activity {
- private static final String TAG = "LED";
- private ToggleButton button1;
- private ToggleButton button2;
- private ToggleButton button3;
- private ToggleButton button4;
- @Override
- public void onCreate(Bundle savedInstanceState) {
- super.onCreate(savedInstanceState);
- setContentView(R.layout.led);
- Log.w(TAG,"layout");
- button1 = (ToggleButton)findViewById(R.id.btn1);
- button2 = (ToggleButton)findViewById(R.id.btn2);
- button3 = (ToggleButton)findViewById(R.id.btn3);
- button4 = (ToggleButton)findViewById(R.id.btn4);
- Log.w(TAG,"button");
- button1.setOnClickListener(new Button.OnClickListener()
- {
- public void onClick(View v)
- {
- if (button1.isChecked())
- {
- Log.w(TAG,"----led1 on");
- led(0, 1);
- }
- else
- {
- Log.w(TAG,"----led1 off");
- led(0, 0);
- }
- }
- });
- button2.setOnClickListener(new Button.OnClickListener()
- {
- public void onClick(View v)
- {
- if (button2.isChecked())
- {
- Log.w(TAG,"----led2 on");
- led(1, 1);
- }
- else
- {
- Log.w(TAG,"----led2 off");
- led(1, 0);
- }
- }
- });
- button3.setOnClickListener(new Button.OnClickListener()
- {
- public void onClick(View v)
- {
- if (button3.isChecked())
- {
- Log.w(TAG,"----led3 on");
- led(2, 1);
- }
- else
- {
- Log.w(TAG,"----led3 off");
- led(2, 0);
- }
- }
- });
- button4.setOnClickListener(new Button.OnClickListener()
- {
- public void onClick(View v)
- {
- if (button4.isChecked())
- {
- Log.w(TAG,"----led4 on");
- led(3, 1);
- }
- else
- {
- Log.w(TAG,"-----led4 off");
- led(3, 0);
- }
- }
- });
- }
- public static native int led(int i, int j);
- static
- {
- System.loadLibrary("LED");
- }
- }
11. 编译整个项目,在bin目录下生成led.apk, 拷贝到开发板中就可以安装运行了.
注意:安装led.apk前,请先加载led.ko模块,并确认编译模块所用的内核版本和android版本一至.另外,还需要通过串口修改 /dev/leds0 的权限为 777.(chmod 777 /dev/leds0),否则led.c中的open("/dev/leds0", o_RDWR)会失败.


 1300
1300

 被折叠的 条评论
为什么被折叠?
被折叠的 条评论
为什么被折叠?
 到【灌水乐园】发言


