


上一节,已经用OOP方法,把几个类抽象出来了,但是都集中在一个.py文件中,代码显得很冗长,这一节复用模块化的思想,把这个大文件拆分成几个小文件:
先把主角Player单独放到一个文件player.py里:
import pygame


# 主角
class Player(object):

    def __init__(self, x, y, width, height, img_base_path):
        self.x = x
        self.y = y
        self.width = width
        self.height = height
        self.speed = 5
        self.left = False
        self.right = True
        self.isJump = False
        self.walkCount = 0
        self.t = 10
        self.speed = 5
        self.char = pygame.image.load(img_base_path + 'standing.png')
        # 向右走的图片数组
        self.walkRight = [pygame.image.load(img_base_path + 'actor/R1.png'),
                          pygame.image.load(img_base_path + 'actor/R2.png'),
                          pygame.image.load(img_base_path + 'actor/R3.png'),
                          pygame.image.load(img_base_path + 'actor/R4.png'),
                          pygame.image.load(img_base_path + 'actor/R5.png'),
                          pygame.image.load(img_base_path + 'actor/R6.png'),
                          pygame.image.load(img_base_path + 'actor/R7.png'),
                          pygame.image.load(img_base_path + 'actor/R8.png'),
                          pygame.image.load(img_base_path + 'actor/R9.png')]

        # 向左走的图片数组
        self.walkLeft = [pygame.image.load(img_base_path + 'actor/L1.png'),
                         pygame.image.load(img_base_path + 'actor/L2.png'),
                         pygame.image.load(img_base_path + 'actor/L3.png'),
                         pygame.image.load(img_base_path + 'actor/L4.png'),
                         pygame.image.load(img_base_path + 'actor/L5.png'),
                         pygame.image.load(img_base_path + 'actor/L6.png'),
                         pygame.image.load(img_base_path + 'actor/L7.png'),
                         pygame.image.load(img_base_path + 'actor/L8.png'),
                         pygame.image.load(img_base_path + 'actor/L9.png')]

    def draw(self, win):
        if self.walkCount >= 9:
            self.walkCount = 0

        if self.left:
            win.blit(self.walkLeft[self.walkCount % 9], (self.x, self.y))
            self.walkCount += 1
        elif self.right:
            win.blit(self.walkRight[self.walkCount % 9], (self.x, self.y))
            self.walkCount += 1
        else:
            win.blit(self.char, (self.x, self.y))
其次是子弹类:
import pygame


# 子弹类
class Bullet(object):

    def __init__(self, x, y, direction, img_base_path):
        self.x = x
        self.y = y
        self.facing = direction
        self.vel = 8 * direction
        self.width = 24
        self.height = 6
        self.bullet_right = pygame.image.load(img_base_path + 'r_bullet.png')
        self.bullet_left = pygame.image.load(img_base_path + 'l_bullet.png')

    def draw(self, win):
        # 根据人物行进的方向,切换不同的子弹图片
        if self.direction == -1:
            win.blit(self.bullet_left, (self.x - 35, self.y))
        else:
            win.blit(self.bullet_right, (self.x + 10, self.y))
做为一个射击类的小游戏,这一节我们再加入目标敌人的类:
import pygame


class Enemy(object):

    def __init__(self, x, y, width, height, end, img_base_path):
        self.x = x
        self.y = y
        self.width = width
        self.height = height
        self.path = [x, end]
        self.walkCount = 0
        self.vel = 3
        self.walkRight = [pygame.image.load(img_base_path + 'enemy/R1E.png'),
                          pygame.image.load(img_base_path + 'enemy/R2E.png'),
                          pygame.image.load(img_base_path + 'enemy/R3E.png'),
                          pygame.image.load(img_base_path + 'enemy/R4E.png'),
                          pygame.image.load(img_base_path + 'enemy/R5E.png'),
                          pygame.image.load(img_base_path + 'enemy/R6E.png'),
                          pygame.image.load(img_base_path + 'enemy/R7E.png'),
                          pygame.image.load(img_base_path + 'enemy/R8E.png'),
                          pygame.image.load(img_base_path + 'enemy/R9E.png'),
                          pygame.image.load(img_base_path + 'enemy/R10E.png'),
                          pygame.image.load(img_base_path + 'enemy/R11E.png')]

        self.walkLeft = [pygame.image.load(img_base_path + 'enemy/L1E.png'),
                         pygame.image.load(img_base_path + 'enemy/L2E.png'),
                         pygame.image.load(img_base_path + 'enemy/L3E.png'),
                         pygame.image.load(img_base_path + 'enemy/L4E.png'),
                         pygame.image.load(img_base_path + 'enemy/L5E.png'),
                         pygame.image.load(img_base_path + 'enemy/L6E.png'),
                         pygame.image.load(img_base_path + 'enemy/L7E.png'),
                         pygame.image.load(img_base_path + 'enemy/L8E.png'),
                         pygame.image.load(img_base_path + 'enemy/L9E.png'),
                         pygame.image.load(img_base_path + 'enemy/L10E.png'),
                         pygame.image.load(img_base_path + 'enemy/L11E.png')]

    def draw(self, win):
        self.move()
        if self.walkCount >= 11:
            self.walkCount = 0

        if self.vel > 0:
            win.blit(self.walkRight[self.walkCount % 11], (self.x, self.y))
            self.walkCount += 1
        else:
            win.blit(self.walkLeft[self.walkCount % 11], (self.x, self.y))
            self.walkCount += 1

    def move(self):
        if self.vel > 0:
            if self.x < self.path[1] + self.vel:
                self.x += self.vel
            else:
                self.vel = self.vel * -1
                self.x += self.vel
                self.walkCount = 0
        else:
            if self.x > self.path[0] - self.vel:
                self.x += self.vel
            else:
                self.vel = self.vel * -1
                self.x += self.vel
                self.walkCount = 0
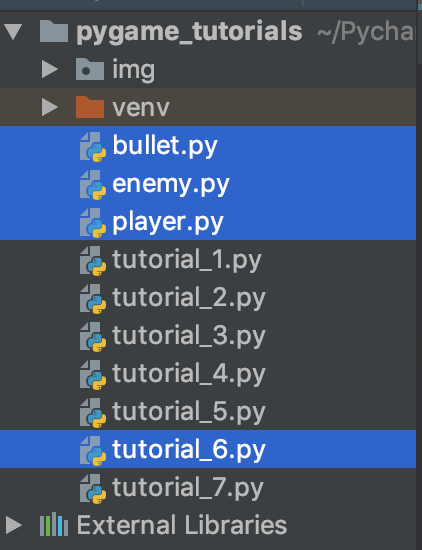
这3个.py文件放在与主文件tutorial_6.py同一个目录下,如下图:
然后在主文件tutorial_6.py里,把这3个模块导进来:
import os
# 导入3个模块
from bullet import *
from player import *
from enemy import *

pygame.init()

WIN_WIDTH, WIN_HEIGHT = 500, 500

win = pygame.display.set_mode((WIN_WIDTH, WIN_HEIGHT))
pygame.display.set_caption("first game")

img_base_path = os.getcwd() + '/img/'
bg = pygame.image.load(img_base_path + 'bg.jpg')

clock = pygame.time.Clock()


def redraw_game_window():
    win.blit(bg, (0, 0))
    man.draw(win)
    goblin.draw(win)
    for b in bullets:
        b.draw(win)
    pygame.display.update()


# main
man = Player(200, 410, 64, 64, img_base_path)
goblin = Enemy(100, 410, 64, 64, 400, img_base_path)
run = True
bullets = []
while run:
    clock.tick(24)

    for event in pygame.event.get():
        if event.type == pygame.QUIT:
            run = False

    for bullet in bullets:
        if WIN_WIDTH > bullet.x > 0:
            bullet.x += bullet.vel
        else:
            bullets.pop(bullets.index(bullet))

    keys = pygame.key.get_pressed()

    if keys[pygame.K_SPACE]:
        if man.left:
            facing = -1
        else:
            facing = 1

        if len(bullets) < 5:
            bullets.append(Bullet(round(man.x + man.width // 2), round(man.y + man.height // 2), facing, img_base_path))

    if keys[pygame.K_LEFT] and man.x > 0:
        man.x -= man.speed
        man.left = True
        man.right = False
    elif keys[pygame.K_RIGHT] and man.x < win.get_size()[0] - man.width:
        man.x += man.speed
        man.left = False
        man.right = True
    else:
        man.walkCount = 0

    if not man.isJump:
        if keys[pygame.K_UP]:
            man.isJump = True
            man.walkCount = 0
    else:
        if man.t >= -10:
            a = 1
            if man.t < 0:
                a = -1
            man.y -= 0.5 * a * (man.t ** 2)

            man.t -= 1
        else:
            man.isJump = False
            man.t = 10

    redraw_game_window()

pygame.quit()
效果:

该出场的人物与道具都齐全了,下一节将讨论"碰撞检测"。


 3813
3813


 被折叠的 条评论
为什么被折叠?
被折叠的 条评论
为什么被折叠?
 到【灌水乐园】发言


