win10+CUDA10.0/10.1+CUDNN10.1+tensorflow-gpu==2.0+python3.6安装

我的小程序:

待办计划:卷起来吧,少年!
我们记账:年薪50w够花么?


首先我不是在Anaconda下安装。

中间尝试过不同的组合,但都失败了,最后定的是下面的组合:

  • win10
  • VS2017
  • CUDA10.1+CUDA10.0
  • CUDNN10.1
  • tensorflow2 gpu版
  • python3.6

一开始安装的是VS2019 community和CUDA10.1,装完tensorflow2发现没用,无法import,提示的意思就是找不到一些模块。

经过了一大段折腾后还是没办法,最后只能卸了VS2019,改装VS2017,当时我还安装了CUDA10.0,当心是CUDA10.1有问题,也就是我现在电脑上CUDA10.0和CUDA10.1都存在。但现在看来应该是VS2019的问题,CUDA10.1没问题,因为装完VS2017,CUDA10.0在装的过程中,我去测了下import tensorflow,就已经可以了。

能回想到的一些细节(步骤):

  1. 安装python3.6(指定安装路径),下的exe包
  2. 更新显卡驱动到10.1(默认安装路径),这步应该不需要,貌似装CUDA的时候会自动把驱动更新到与CUDA匹配的版本
  3. 装CUDA的时候发现没有VS,就停下来去装VS
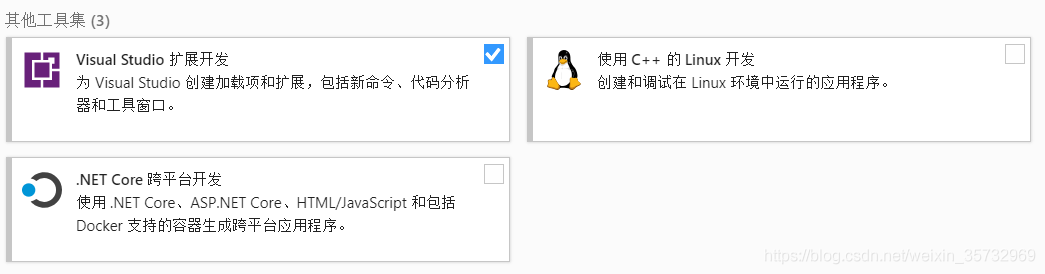
  4. 一开始装的VS2019,后来卸载重装了VS2017(指定安装路径),当时装了一堆东西,见下图,应该没必要
  5. 装完VS,就可以继续装CUDA了(默认安装路径)
  6. 把CUDNN三个文件拷贝到CUDA对应路径中,网上很多教程
  7. 安装tensorflow2 gpu版:pip install tensorflow-gpu==2.0.0-alpha0
  8. 网上提到说要添加环境变量什么的,我并没涉及到
  9. 中间还碰到numpy跟tensorflow版本不匹配的问题,import tensorflow的时候报了很多关于numpy的warning,解决办法是降低numpy版本,我降到了1.16:pip3 install numpy==1.16

新买的宏基暗影骑士,连续奋战三天三夜,不错不错。性价比超高~

待办计划:卷起来吧,少年!
我们记账:年薪50w够花么?


  • 0
    点赞
  • 1
    收藏
    觉得还不错? 一键收藏
  • 1
    评论
自编译tensorflow: 1.python3.5,tensorflow1.12; 2.支持cuda10.0,cudnn7.3.1,TensorRT-5.0.2.6-cuda10.0-cudnn7.3; 3.支持mkl,无MPI; 软硬件硬件环境:Ubuntu16.04,GeForce GTX 1080 配置信息: hp@dla:~/work/ts_compile/tensorflow$ ./configure WARNING: --batch mode is deprecated. Please instead explicitly shut down your Bazel server using the command "bazel shutdown". You have bazel 0.19.1 installed. Please specify the location of python. [Default is /usr/bin/python]: /usr/bin/python3 Found possible Python library paths: /usr/local/lib/python3.5/dist-packages /usr/lib/python3/dist-packages Please input the desired Python library path to use. Default is [/usr/local/lib/python3.5/dist-packages] Do you wish to build TensorFlow with XLA JIT support? [Y/n]: XLA JIT support will be enabled for TensorFlow. Do you wish to build TensorFlow with OpenCL SYCL support? [y/N]: No OpenCL SYCL support will be enabled for TensorFlow. Do you wish to build TensorFlow with ROCm support? [y/N]: No ROCm support will be enabled for TensorFlow. Do you wish to build TensorFlow with CUDA support? [y/N]: y CUDA support will be enabled for TensorFlow. Please specify the CUDA SDK version you want to use. [Leave empty to default to CUDA 10.0]: Please specify the location where CUDA 10.0 toolkit is installed. Refer to README.md for more details. [Default is /usr/local/cuda]: /usr/local/cuda-10.0 Please specify the cuDNN version you want to use. [Leave empty to default to cuDNN 7]: 7.3.1 Please specify the location where cuDNN 7 library is installed. Refer to README.md for more details. [Default is /usr/local/cuda-10.0]: Do you wish to build TensorFlow with TensorRT support? [y/N]: y TensorRT support will be enabled for TensorFlow. Please specify the location where TensorRT is installed. [Default is /usr/lib/x86_64-linux-gnu]:/home/hp/bin/TensorRT-5.0.2.6-cuda10.0-cudnn7.3/targets/x86_64-linux-gnu Please specify the locally installed NCCL version you want to use. [Default is to use https://github.com/nvidia/nccl]: Please specify a list of comma-separated Cuda compute capabilities you want to build with. You can find the compute capability of your device at: https://developer.nvidia.com/cuda-gpus. Please note that each additional compute capability significantly increases your build time and binary size. [Default is: 6.1,6.1,6.1]: Do you want to use clang as CUDA compiler? [y/N]: nvcc will be used as CUDA compiler. Please specify which gcc should be used by nvcc as the host compiler. [Default is /usr/bin/gcc]: Do you wish to build TensorFlow with MPI support? [y/N]: No MPI support will be enabled for TensorFlow. Please specify optimization flags to use during compilation when bazel option "--config=opt" is specified [Default is -march=native -Wno-sign-compare]: Would you like to interactively configure ./WORKSPACE for Android builds? [y/N]: Not configuring the WORKSPACE for Android builds. Preconfigured Bazel build configs. You can use any of the below by adding "--config=" to your build command. See .bazelrc for more details. --config=mkl # Build with MKL support. --config=monolithic # Config for mostly static monolithic build. --config=gdr # Build with GDR support. --config=verbs # Build with libverbs support. --config=ngraph # Build with Intel nGraph support. --config=dynamic_kernels # (Experimental) Build kernels into separate shared objects. Preconfigured Bazel build configs to DISABLE default on features: --config=noaws # Disable AWS S3 filesystem support. --config=nogcp # Disable GCP support. --config=nohdfs # Disable HDFS support. --config=noignite # Disable Apacha Ignite support. --config=nokafka # Disable Apache Kafka support. --config=nonccl # Disable NVIDIA NCCL support. Configuration finished 编译: hp@dla:~/work/ts_compile/tensorflow$ bazel build --config=opt --config=mkl --verbose_failures //tensorflow/tools/pip_package:build_pip_package 卸载已有tensorflow: hp@dla:~/temp$ sudo pip3 uninstall tensorflow 安装自己编译的成果: hp@dla:~/temp$ sudo pip3 install tensorflow-1.12.0-cp35-cp35m-linux_x86_64.whl
安装和配置Anaconda3、PyCharm、CUDA 10.1cuDNN 7.6和TensorFlow 2.2的步骤如下: 1. 首先,下载并安装Anaconda3。访问Anaconda官方网站,并下载适合您操作系统的安装程序。运行安装程序,按照提示进行安装。 2. 安装完成后,打开终端或命令提示符,并创建一个新的Anaconda环境。运行以下命令: ``` conda create -n env_name python=3.7 ``` 将"env_name"替换为您想要的环境名称。 3. 激活新创建的环境。运行以下命令: ``` conda activate env_name ``` 4. 下载并安装PyCharm。访问JetBrains官方网站,下载适合您操作系统的PyCharm安装程序。运行安装程序,按照提示进行安装。 5. 下载并安装CUDA 10.1。访问NVIDIA官方网站,下载与您的显卡和操作系统兼容的CUDA 10.1安装程序。运行安装程序,按照提示进行安装。 6. 下载并安装cuDNN 7.6。访问NVIDIA官方网站,并下载与您的CUDA版本和操作系统兼容的cuDNN 7.6库。将cuDNN文件解压缩到CUDA安装目录中。 7. 配置PyCharm以使用Anaconda环境。打开PyCharm并导航到"Settings" > "Project Interpreter"。单击右上角的设置图标,并选择"Add"。在打开的窗口中,选择"Conda Environment" > "Existing environment"。在"Interpreter"字段中,选择Anaconda环境的路径。 8. 在PyCharm中安装TensorFlow 2.2。返回"Settings" > "Project Interpreter",并单击右下角的"+"按钮。在搜索栏中输入"tensorflow",并选择TensorFlow包。单击"Install"按钮,完成安装。 9. 现在,您已成功安装和配置Anaconda3、PyCharm、CUDA 10.1cuDNN 7.6和TensorFlow 2.2。您可以开始使用TensorFlow进行深度学习任务。 请注意,安装和配置步骤可能因操作系统和版本而异。建议在查找和安装这些软件时参考官方文档和教程。

“相关推荐”对你有帮助么?

  • 非常没帮助
  • 没帮助
  • 一般
  • 有帮助
  • 非常有帮助
提交
评论 1
添加红包

请填写红包祝福语或标题

红包个数最小为10个

红包金额最低5元

当前余额3.43前往充值 >
需支付:10.00
成就一亿技术人!
领取后你会自动成为博主和红包主的粉丝 规则
hope_wisdom
发出的红包
实付
使用余额支付
点击重新获取
扫码支付
钱包余额 0

抵扣说明:

1.余额是钱包充值的虚拟货币,按照1:1的比例进行支付金额的抵扣。
2.余额无法直接购买下载,可以购买VIP、付费专栏及课程。

余额充值