


1、下载下面几个包
eigen-3.3.9
https://eigen.tuxfamily.org/index.php?title=Main_Page
gflags-2.2.2
https://gitcode.net/mirrors/gflags/gflags?utm_source=csdn_github_accelerator
glog-0.6.0
GitHub - google/glog: C++ implementation of the Google logging module
https://gitcode.net/mirrors/google/glog?utm_source=csdn_github_accelerator
ceres-solver-2.1.0
https://github.com/ceres-solver/ceres-solver
cmake-3.25.0
https://cmake.org/download/
2、先安装通过cmake,再通过cmake依次安装glog, gflags, eigen, ceres, 安装过程都一样,下面以glog安装为例
3、glog安装
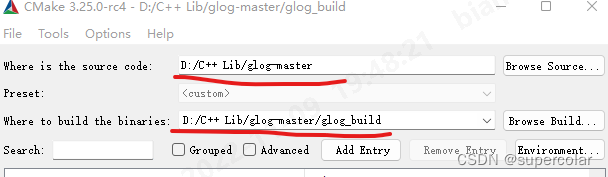
解压得到源码文件glog-master后,在同级目录下建立glog_build文件夹,用来放置编译后的文件。打开CMAKE客户端,对应选择源码文件路径和编译文件路径,如下图所示:
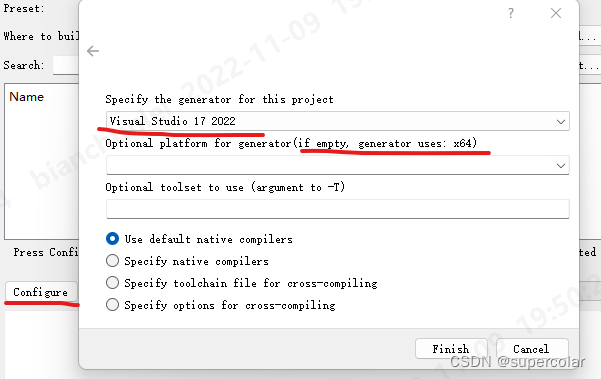
然后就可以通过Configure按钮选择配置属性,我们这里选择VS2022的x64,如图:
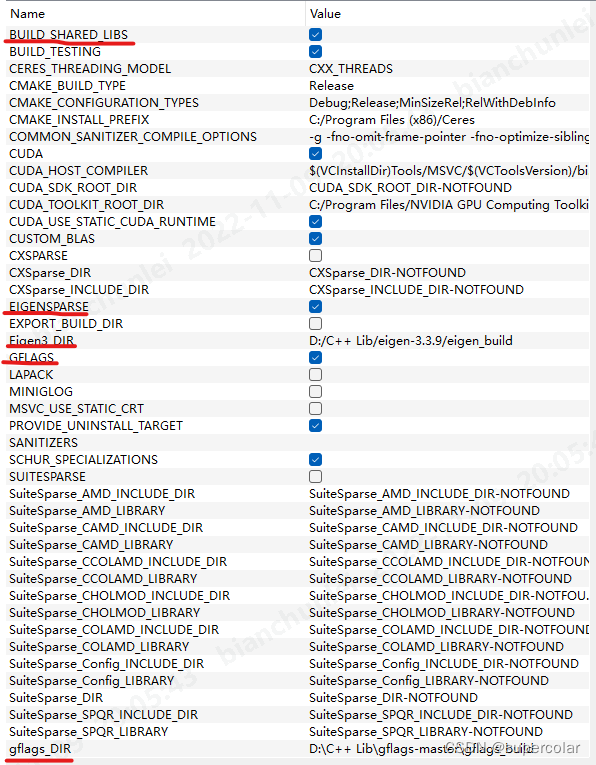
之后点击Finish就可以触发Cmake进行配置,配置表单会有一些标红的项目,此时需要注意一点:BUILD_SHARED_LIBS选项需要勾选,用来生成dll文件,如图:

Configure完成后,点击generate。然后在glog_build文件夹下打开glog.sln文件,分别在Release x64和Debug x64模式下重新生成ALL_BUILD。
至此,glog安装完成,一样的方法安装gflag, eigen 和ceres。
4、ceres安装中的不同
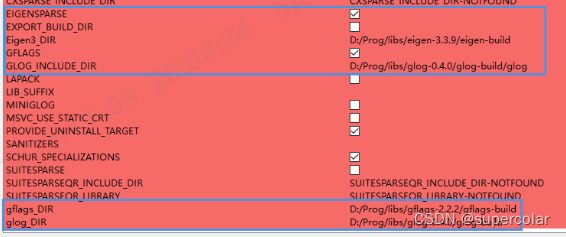
Ceres安装过程中,需要手动勾选(若未勾选)和配置如下内容:

完成后,同样需要在vs中编译debug和release两个版本。
5、全部安装完成后,就是在vs中的项目中进行路径配置了,有如下四个方面:
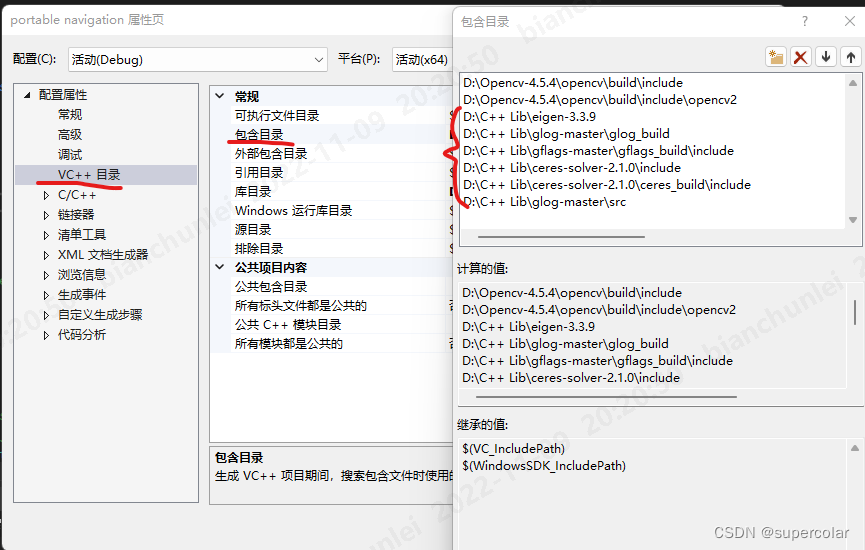
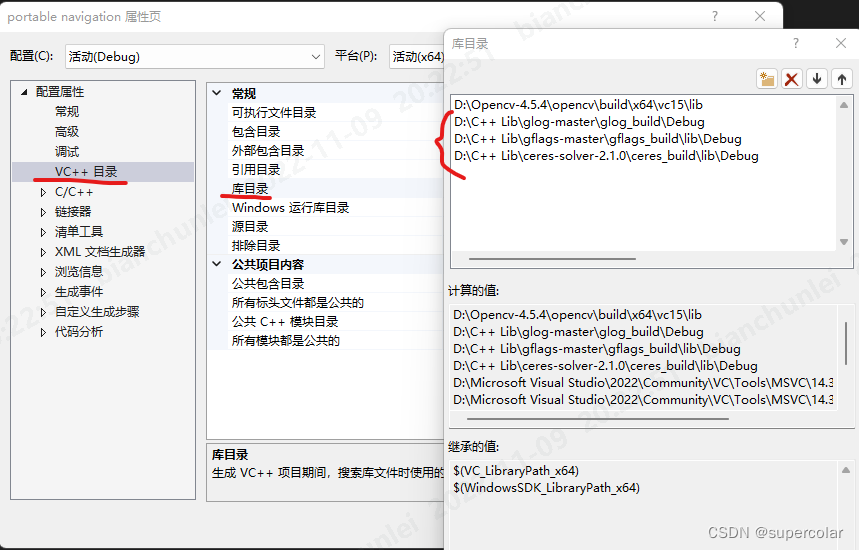
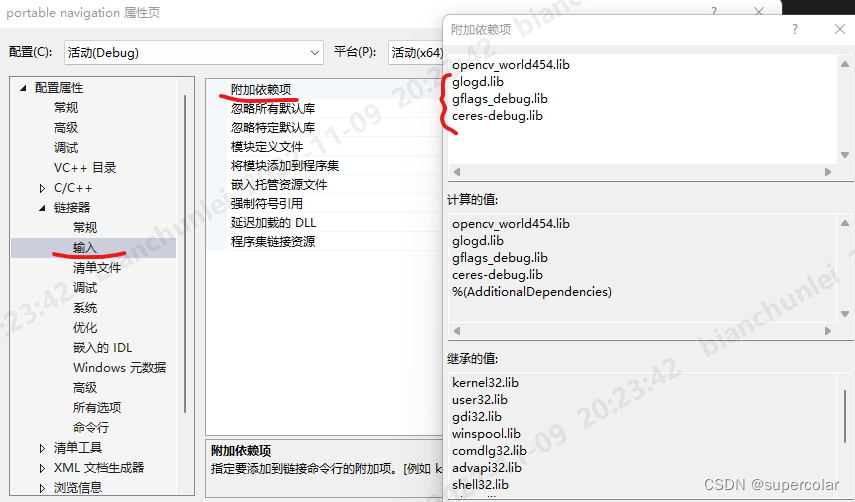
最后,要将:
ceres-solver-2.0.0/ceres-build/lib/Release/ceres.lib
gflags-2.2.2/gflags-build/lib/Release/gflags.lib
glog-0.4.0/glog-build/Release/glog.lib
三个地方的dll复制到项目目录下: 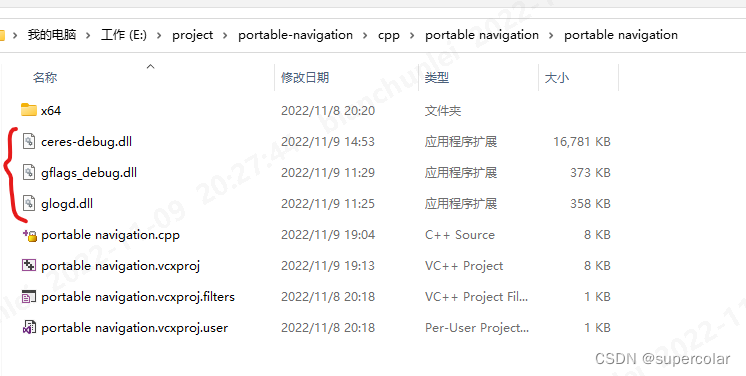
完成后跑示例代码:
struct CostFunctor {
	template <typename T>
	bool operator()(const T* const x, T* residual) const {
		residual[0] = 10.0 - x[0];
		return true;
	}
};

int main(int argc, char** argv) {

	// google::InitGoogleLogging(argv[0]);

	// The variable to solve for with its initial value.
	double initial_x = 5.0;
	double x = initial_x;

	// Build the problem.
	Problem problem;

	// Set up the only cost function (also known as residual). This uses
	// auto-differentiation to obtain the derivative (jacobian).
	CostFunction* cost_function = new AutoDiffCostFunction<CostFunctor, 1, 1>(new CostFunctor);
	problem.AddResidualBlock(cost_function, nullptr, &x);

	// Run the solver!
	Solver::Options options;
	options.linear_solver_type = ceres::DENSE_QR;
	options.minimizer_progress_to_stdout = true;
	Solver::Summary summary;
	Solve(options, &problem, &summary);

	std::cout << summary.BriefReport() << "\n";
	std::cout << "x : " << initial_x
		<< " -> " << x << "\n";

	system("pause");
	return 0;
}

可能会出现如下报错:
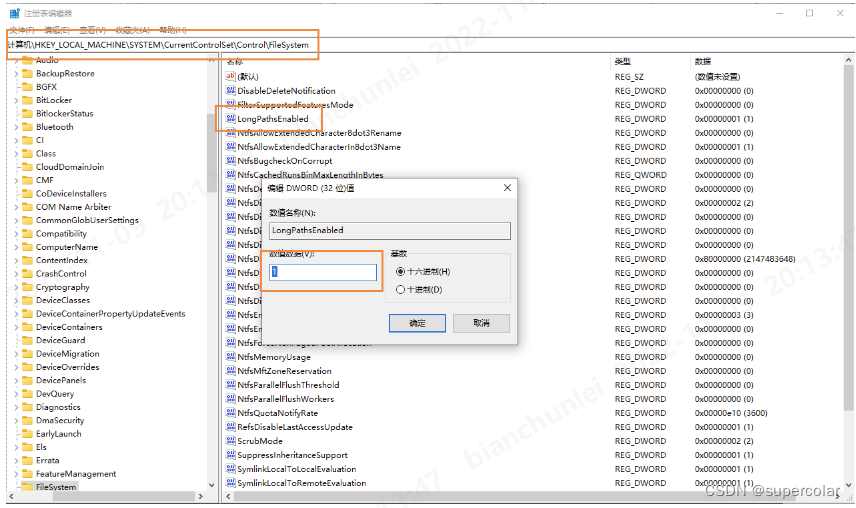
报错:vs编译文件长度超过260字符
解决:修改注册表解除文件长度限制,搜索regedit,打开注册表,地址栏输入:计算机\HKEY_LOCAL_MACHINE\SYSTEM\CurrentControlSet\Control\FileSystem,找到LongPathsEnabled,设为1即可。
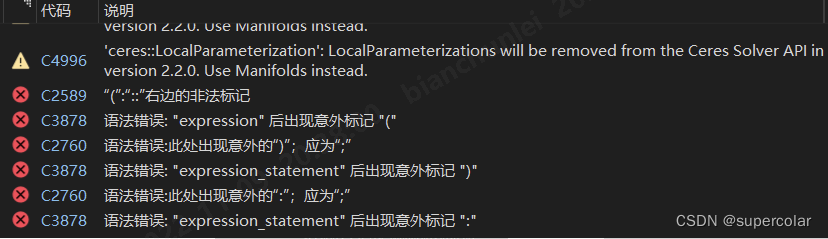
报错:C4996 :ceres::LocalParameterization': LocalParameterizations will be removed from the Ceres Solver API in version 2.2.0. Use Manifolds instead
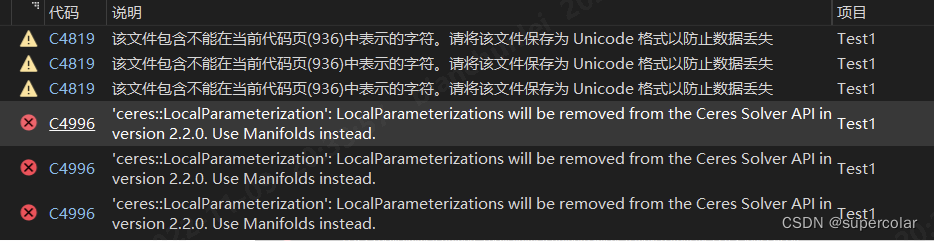
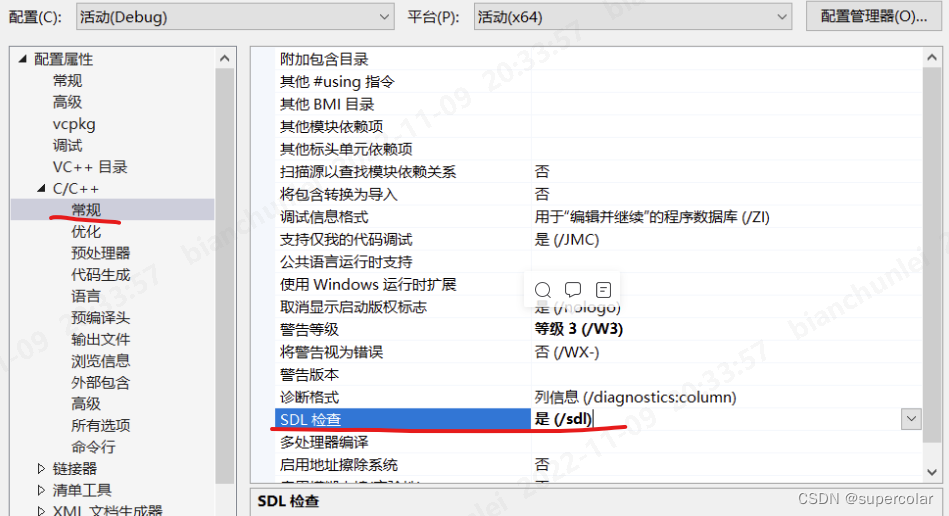
解决:将项目->属性->C/C++->常规中的SDL检查改为否即可(Security Development Lifecycle,安全开发生命周期检查,微软在VS2012新推出的东西,为了能更好的监管开发者的代码安全,如果勾选了这一项则将严格按照SDL的规则编译代码,会有一些以前常用的函数无法通过编译。)
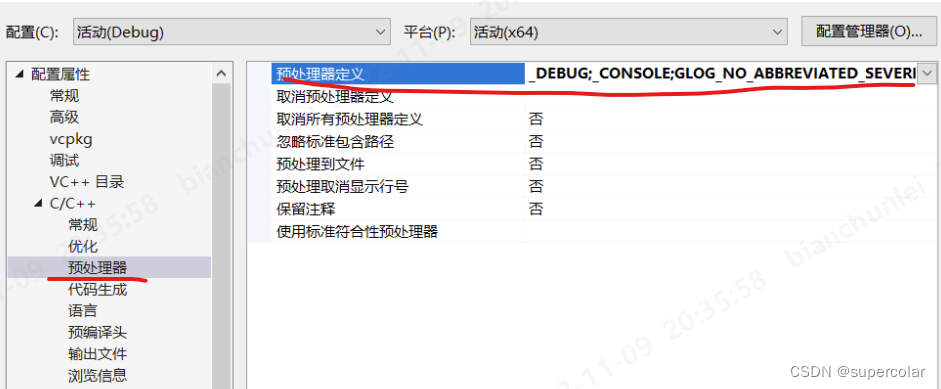
报错:E0035 #error 指令: ERROR macro is defined. Define GLOG_NO_ABBREVIATED_SEVERITIES before including logging.h. See the document for detail.
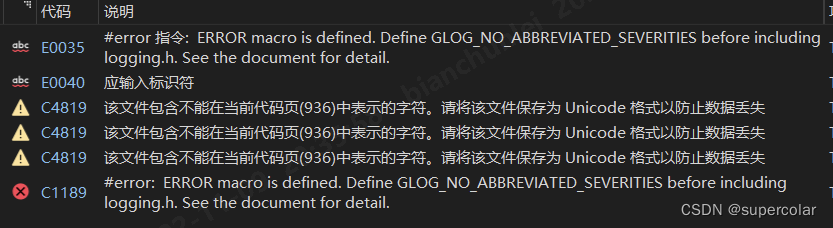 将项目->属性->C/C++->预处理器中的预处理器定义增GLOG_NO_ABBREVIATED_SEVERITIES即可 。
报错:std::max报错
解决:将项目->属性->C/C++->预处理器中的预处理器定义增加NOMINMAX即可
我的小程序:


参考文章:
Win10 + VS2017 + Ceres配置_四片叶子的三叶草的博客-CSDN博客_ceres windows


 862
862


 被折叠的 条评论
为什么被折叠?
被折叠的 条评论
为什么被折叠?
 到【灌水乐园】发言


