


2019 Stata & Python 实证计量与爬虫分析暑期工作坊还有几天就要开始了。之前在公众号里分享过好几次LDA话题模型的,但考虑的问题都比较简单。这次我将分享在这个notebook中,将会对以下问题进行实战:
提取话题的关键词
gridsearch寻找最佳模型参数
可视化话题模型
预测新输入的文本的话题
如何查看话题的特征词组
如何获得每个话题的最重要的n个特征词
1.导入数据
这里我们使用的20newsgroups数据集
import pandas as pd
df = pd.read_json('newsgroups.json')
df.head()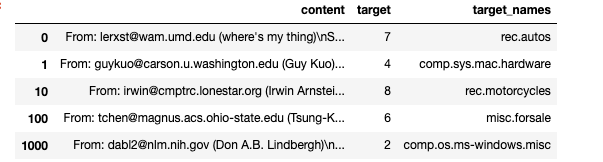
查看target_names有哪些类别
df.target_names.unique()Run
array(['rec.autos', 'comp.sys.mac.hardware', 'rec.motorcycles',
       'misc.forsale', 'comp.os.ms-windows.misc', 'alt.atheism',
       'comp.graphics', 'rec.sport.baseball', 'rec.sport.hockey',
       'sci.electronics', 'sci.space', 'talk.politics.misc', 'sci.med',
       'talk.politics.mideast', 'soc.religion.christian',
       'comp.windows.x', 'comp.sys.ibm.pc.hardware', 'talk.politics.guns',
       'talk.religion.misc', 'sci.crypt'], dtype=object)
2.英文清洗数据
使用正则表达式去除邮件和换行等多余空白字符
使用gensim库的simple_preprocess分词,得到词语列表
保留某些词性的词语 https://www.guru99.com/pos-tagging-chunking-nltk.html
注意:
nltk和spacy安装配置比较麻烦,可以看这篇文章。
自然语言处理库nltk、spacy安装及配置方法其中nltk语料库和spacy的英文模型均已放置在教程文件夹内~
import nltk
import gensim
from nltk import pos_tag
import re
from nltk.corpus import stopwords
#导入spacy的模型
nlp = spacy.load('en_core_web_sm', disable=['parser', 'ner'])
def clean_text(text, allowed_postags=['NOUN', 'ADJ', 'VERB', 'ADV']):
    text = re.sub('\S*@\S*\s?', '', text) #去除邮件
    text = re.sub('\s+', ' ', text)       #将连续空格、换行、制表符  替换为 空格
    #deacc=True可以将某些非英文字母转化为英文字母,例如
    #"Šéf chomutovských komunistů dostal poštou bílý prášek"转化为
    #u'Sef chomutovskych komunistu dostal postou bily prasek'
    words = gensim.utils.simple_preprocess(text, deacc=True)
    #可以在此处加入去停词操作
    stpwords = stopwords.words('english')
    #保留词性为'NOUN', 'ADJ', 'VERB', 'ADV'词语
    doc = nlp(' '.join(words))
    text = " ".join([token.lemma_ if token.lemma_ not in ['-PRON-'] else ''
                     for token in doc
                     if token.pos_ in allowed_postags])
    return text
test = "From: lerxst@wam.umd.edu (where's my thing)\nSubject: WHAT car is this!?\nNntp-Posting-Host: rac3.wam.umd.edu\nOrganization: University of Maryland, College Park\nLines: 15\n\n I was wondering if anyone out there could enlighten me on this car I saw\nthe other day. It was a 2-door sports car, looked to be from the late 60s/\nearly 70s. It was called a Bricklin. The doors were really small. In addition,\nthe front bumper was separate from the rest of the body. This is \nall I know. If anyone can tellme a model name, engine specs, years\nof production, where this car is made, history, or whatever info you\nhave on this funky looking car, please e-mail.\n\nThanks,\n- IL\n   ---- brought to you by your neighborhood Lerxst ----\n\n\n\n\n"
clean_text(test)
Run
'where thing subject car be nntp post host rac wam umd edu organization university maryland college park line be wonder anyone out there could enlighten car see other day be door sport car look be late early be call bricklin door be really small addition front bumper be separate rest body be know anyone can tellme model name engine spec year production where car be make history info have funky look car mail thank bring neighborhood lerxst'将将数据content列进行批处理(数据清洗clean_text)
df.content = df.content.apply(clean_text)
df.head()
3. 构建文档词频矩阵 document-word matrix
from sklearn.feature_extraction.text import TfidfVectorizer,CountVectorizer
#vectorizer = TfidfVectorizer(min_df=10)#单词至少出现在10个文档中
vectorizer = CountVectorizer(analyzer='word',
                             min_df=10,                        # minimum reqd occurences of a word
                             lowercase=True,                   # convert all words to lowercase
                             token_pattern='[a-zA-Z0-9]{3,}',  # num chars > 3
                             # max_features=50000,             # max number of uniq words
                            )
data_vectorized = vectorizer.fit_transform(df.content)
检查数据的稀疏性,
data_dense = data_vectorized.todense()
# Compute Sparsicity = Percentage of Non-Zero cells
print("Sparsicity: ", ((data_dense > 0).sum()/data_dense.size)*100, '%')
Run
Sparsicity: 0.9138563473570427 %4.构建LDA模型
使用sklearn库的LatentDirichletAllocation
from sklearn.decomposition import LatentDirichletAllocation
# 构建LDA话题模型
lda_model = LatentDirichletAllocation(n_components=20)              # 话题数
lda_output = lda_model.fit_transform(data_vectorized)
模型表现
# 越高越好
print(lda_model.score(data_vectorized))
#训练好的模型的参数
print(lda_model.get_params())
Run
-11868684.751381714
{'batch_size': 128, 'doc_topic_prior': None, 'evaluate_every': -1, 'learning_decay': 0.7, 'learning_method': 'batch', 'learning_offset': 10.0, 'max_doc_update_iter': 100, 'max_iter': 10, 'mean_change_tol': 0.001, 'n_components': 20, 'n_jobs': None, 'perp_tol': 0.1, 'random_state': None, 'topic_word_prior': None, 'total_samples': 1000000.0, 'verbose': 0}
5. 如何找到最佳的话题数
LatentDirichletAllocation中有很多参数,调整参数会使得结果发生变化。为了训练出更好的模型,这里我们使用ncomponents和learningdecay这两个参数作为示范,设置这两个参数可能的取值范围。
运行时间 半个小时~
from sklearn.model_selection import GridSearchCV
# 设置参数搜寻的范围
search_params = {'n_components': [10, 15, 20, 25, 30],
                 'learning_decay': [.5, .7, .9]}
# 初始化LDA模型
lda = LatentDirichletAllocation()
# 初始化GridSearchCV
model = GridSearchCV(lda, param_grid=search_params)
# 训练LDA模型
model.fit(data_vectorized)
查看模型参数
model.cv_results_Run
{'mean_fit_time': array([76.23844155, 78.47619971, 75.65877469, 92.04278994, 92.47375035,
        70.50102162, 77.17208759, 77.42245611, 78.51173854, 80.36060111,
        64.35273759, 80.74369526, 78.33191927, 97.60522366, 91.52556197]),
 'std_fit_time': array([ 1.90773724,  6.00546298,  2.90480388, 10.82104708,  2.15837996,
         0.91492716,  1.78299082,  0.99124146,  0.88202007,  2.52887488,
         1.42895102,  3.4966494 ,  4.10921772,  8.57965772,  2.97772162]),
 'mean_score_time': array([3.03948617, 3.12327973, 3.17385236, 4.1181256 , 4.14796472,
        2.80464379, 3.00497603, 3.18396346, 3.29176935, 3.34573205,
        2.60685007, 3.05136299, 3.39874609, 3.77345729, 4.19327569]),
 'std_score_time': array([0.29957093, 0.0616576 , 0.13170509, 0.4152717 , 0.58759639,
        0.05777709, 0.17347846, 0.06664403, 0.13021069, 0.12982755,
        0.06256295, 0.13255927, 0.43057235, 0.29978059, 0.44248399]),
 'param_learning_decay': masked_array(data=[0.5, 0.5, 0.5, 0.5, 0.5, 0.7, 0.7, 0.7, 0.7, 0.7, 0.9,
                    0.9, 0.9, 0.9, 0.9],
              mask=[False, False, False, False, False, False, False, False,
                    False, False, False, False, False, False, False],
        fill_value='?',
             dtype=object),
 'param_n_components': masked_array(data=[10, 15, 20, 25, 30, 10, 15, 20, 25, 30, 10, 15, 20, 25,
                    30],
              mask=[False, False, False, False, False, False, False, False,
                    False, False, False, False, False, False, False],
        fill_value='?',
             dtype=object),
 'params': [{'learning_decay': 0.5, 'n_components': 10},
  {'learning_decay': 0.5, 'n_components': 15},
  {'learning_decay': 0.5, 'n_components': 20},
  {'learning_decay': 0.5, 'n_components': 25},
  {'learning_decay': 0.5, 'n_components': 30},
  {'learning_decay': 0.7, 'n_components': 10},
  {'learning_decay': 0.7, 'n_components': 15},
  {'learning_decay': 0.7, 'n_components': 20},
  {'learning_decay': 0.7, 'n_components': 25},
  {'learning_decay': 0.7, 'n_components': 30},
  {'learning_decay': 0.9, 'n_components': 10},
  {'learning_decay': 0.9, 'n_components': 15},
  {'learning_decay': 0.9, 'n_components': 20},
  {'learning_decay': 0.9, 'n_components': 25},
  {'learning_decay': 0.9, 'n_components': 30}],
 'split0_test_score': array([-3874856.42190824, -3881092.28265286, -3905854.25463761,
        -3933237.60526826, -3945083.8541135 , -3873412.75021688,
        -3873882.90565526, -3911751.31895979, -3921171.68942096,
        -3949413.2598192 , -3876577.95159756, -3886340.65539402,
        -3896362.39547871, -3926181.21965185, -3950533.84046263]),
 'split1_test_score': array([-4272638.34477011, -4294980.87988645, -4310841.4440567 ,
        -4336244.55854965, -4341014.91687451, -4279229.66282939,
        -4302326.23456232, -4317599.83998105, -4325020.1483235 ,
        -4338663.90026249, -4284095.2173055 , -4294941.56802545,
        -4299746.08581904, -4331262.03558289, -4338027.82208097]),
 'split2_test_score': array([-4200870.80494405, -4219318.82663835, -4222122.82436968,
        -4237003.85511169, -4258352.71194228, -4192824.54480934,
        -4200329.40329793, -4231613.93138699, -4258255.99302186,
        -4270014.58888107, -4199499.64459735, -4209918.86599275,
        -4230265.99859102, -4247913.06952193, -4256046.3237088 ]),
 'mean_test_score': array([-4116100.53270373, -4131775.17089196, -4146251.59136724,
        -4168807.85000785, -4181462.93317874, -4115134.28591336,
        -4125490.60725673, -4153633.64919084, -4168127.44754368,
        -4186009.66931221, -4120036.0842904 , -4130378.79165891,
        -4142103.10465406, -4168430.69488042, -4181515.57804474]),
 'std_test_score': array([173105.26046897, 179953.68165447, 173824.10245002, 171450.68036995,
        170539.38663682, 174546.8275931 , 182743.94823856, 174623.71594324,
        176761.14575071, 169651.81366214, 175603.01769822, 176039.50084949,
        176087.37700361, 174665.17839821, 166743.56843518]),
 'rank_test_score': array([ 2,  6,  8, 12, 13,  1,  4,  9, 10, 15,  3,  5,  7, 11, 14],
       dtype=int32)}
输出参数搜寻出模型的效果并将其可视化
import matplotlib.pyplot as plt
# Get Log Likelyhoods from Grid Search Output
n_topics = [10, 15, 20, 25, 30]
log_likelyhoods_5 = model.cv_results_['mean_test_score'][model.cv_results_['param_learning_decay']==0.5]
log_likelyhoods_7 = model.cv_results_['mean_test_score'][model.cv_results_['param_learning_decay']==0.7]
log_likelyhoods_9 = model.cv_results_['mean_test_score'][model.cv_results_['param_learning_decay']==0.9]
# Show graph
plt.figure(figsize=(12, 8))
plt.plot(n_topics, log_likelyhoods_5, label='0.5')
plt.plot(n_topics, log_likelyhoods_7, label='0.7')
plt.plot(n_topics, log_likelyhoods_9, label='0.9')
plt.title("Choosing Optimal LDA Model")
plt.xlabel("Num Topics")
plt.ylabel("Log Likelyhood Scores")
plt.legend(title='Learning decay', loc='best')
plt.show()
#最佳话题模型
best_lda_model = model.best_estimator_
print("Best Model's Params: ", model.best_params_)
print("Best Log Likelihood Score: ", model.best_score_)
Run
Best Model's Params:  {'learning_decay': 0.7, 'n_components': 10}
Best Log Likelihood Score:  -4115134.285913357
6. 如何查看每个文档的话题信息
LDA会给每个文档分配一个话题分布,其中概率最大的话题最能代表该文档
import numpy as np
# 构建文档-词频矩阵
lda_output = best_lda_model.transform(data_vectorized)
# 列名
topicnames = ["Topic" + str(i)
              for i in range(best_lda_model.n_components)]
# 行索引名
docnames = ["Doc" + str(i)
            for i in range(len(df.content))]
# 转化为pd.DataFrame
df_document_topic = pd.DataFrame(np.round(lda_output, 2),
                                 columns=topicnames,
                                 index=docnames)
# Get dominant topic for each document
dominant_topic = np.argmax(df_document_topic.values, axis=1)
df_document_topic['dominant_topic'] = dominant_topic
# Styling
def color_green(val):
    color = 'green' if val > .1 else 'black'
    return 'color: {col}'.format(col=color)
def make_bold(val):
    weight = 700 if val > .1 else 400
    return 'font-weight: {weight}'.format(weight=weight)
# Apply Style
df_document_topics = df_document_topic.sample(10).style.applymap(color_green).applymap(make_bold)
df_document_topics
查看话题分布情况
df_topic_distribution = df_document_topic['dominant_topic'].value_counts().reset_index(name="Num Documents")
df_topic_distribution.columns = ['Topic Num', 'Num Documents']
df_topic_distribution
7.如何可视化LDA
pyLDAvis可视化话题
import pyLDAvis
import pyLDAvis.sklearn
#在notebook中显示
pyLDAvis.enable_notebook()
panel = pyLDAvis.sklearn.prepare(best_lda_model, #训练好的lda模型
                                 data_vectorized,#训练库语料的词语特征空间(即Tfidfvecterizer或者CounterVecterizer)
                                 vectorizer)
panel
由于网络问题,这里插不了gif动图,我放之前的文章链接,大家可以看看可视化效果。手把手教你学会LDA话题模型可视化pyLDAvis库
8. 如何查看话题的特征词组
每个话题都是由带有权重的词组进行表征,是一个二维空间
# 话题-关键词矩阵(Topic-Keyword Matrix)
df_topic_keywords = pd.DataFrame(best_lda_model.components_)
# 重新分配dataframe中的列名和行索引名
df_topic_keywords.columns = vectorizer.get_feature_names() #训练集的词语空间的词表
df_topic_keywords.index = topicnames
df_topic_keywords
9.如何获得每个话题的最重要的n个特征词
# 显示每个话题最重要的n个词语
def show_topics(vectorizer=vectorizer, lda_model=lda_model, top_n=20):
    keywords = np.array(vectorizer.get_feature_names())
    topic_keywords = []
    #话题-词语权重矩阵
    for topic_weights in lda_model.components_:
        #获得权重最大的top_n词语的权重向量
        top_keyword_locs = (-topic_weights).argsort()[:top_n]
        #在keywords中找到对于的关键词
        topic_keywords.append(keywords.take(top_keyword_locs))
    return topic_keywords
topic_keywords = show_topics(vectorizer=vectorizer,
                             lda_model=best_lda_model,
                             top_n=10)     #最重要的10个词语
df_topic_keywords = pd.DataFrame(topic_keywords)
df_topic_keywords.columns = ['Word '+str(i) for i in range(df_topic_keywords.shape[1])]
df_topic_keywords.index = ['Topic '+str(i) for i in range(df_topic_keywords.shape[0])]
df_topic_keywords
10. 如何对新文本进行话题预测
给训练好的模型输入新文本,预测该文本的话题
# Define function to predict topic for a given text document.
#nlp = spacy.load('en', disable=['parser', 'ner'])
def predict_topic(texts, nlp=nlp):
    #清洗数据,如提出空格、邮箱、剔除无意义的词语、保留信息量比较大的词性
    cleaned_texts = []
    for text in texts:
        cleaned_texts.append(clean_text(text))
    doc_term_matrix = vectorizer.transform(cleaned_texts)
    #LDA transform
    topic_term_prob_matrix = best_lda_model.transform(doc_term_matrix)
    #话题
    topic_index = np.argmax(topic_term_prob_matrix)
    topic_word = df_topic_keywords.iloc[topic_index, :].values.tolist()
    return topic_index, topic_word, topic_term_prob_matrix
#预测
mytext = ["Some text about christianity and bible"]
topic_index, topic_word, topic_term_prob_matrix = predict_topic(mytext)
print("该文本的所属的话题是Topic",topic_index)
print("该话题的特征词 ", topic_word)
print("特征词的权重分布情况 ", topic_term_prob_matrix)
Run
该文本的所属的话题是Topic 5
该话题的特征词  ['not', 'have', 'max', 'god', 'say', 'can', 'there', 'write', 'christian', 'would']
特征词的权重分布情况  [[0.02500225 0.025      0.02500547 0.02500543 0.02500001 0.7749855
  0.02500082 0.02500052 0.025      0.025     ]]
推荐阅读
2019年7月13-18日(杭州)Stata & Python 实证计量与爬虫分析暑期工作坊
pandas_profiling:生成动态交互的数据探索报告
cufflinks: 让pandas拥有plotly的炫酷的动态可视化能力
使用Pandas、Jinja和WeasyPrint制作pdf报告
大神kennethreitz写出requests-html号称为人设计的解析库

后台回复“20190710”,即可下载本教程


 1119
1119


 被折叠的 条评论
为什么被折叠?
被折叠的 条评论
为什么被折叠?
 到【灌水乐园】发言


