


Guthub 个人主页 (官方称呼是 profile)可以展示很多有用的信息,例如添加一个首页被访问次数的计数器,一个被 Star 与 Commit 的概览信息,以及各种技能标签,设备标签等,还可以利用 wakatime 显示你最近编码各类语言的使用时长,以及你最近 Steam 游戏游玩排行榜。
默认主页
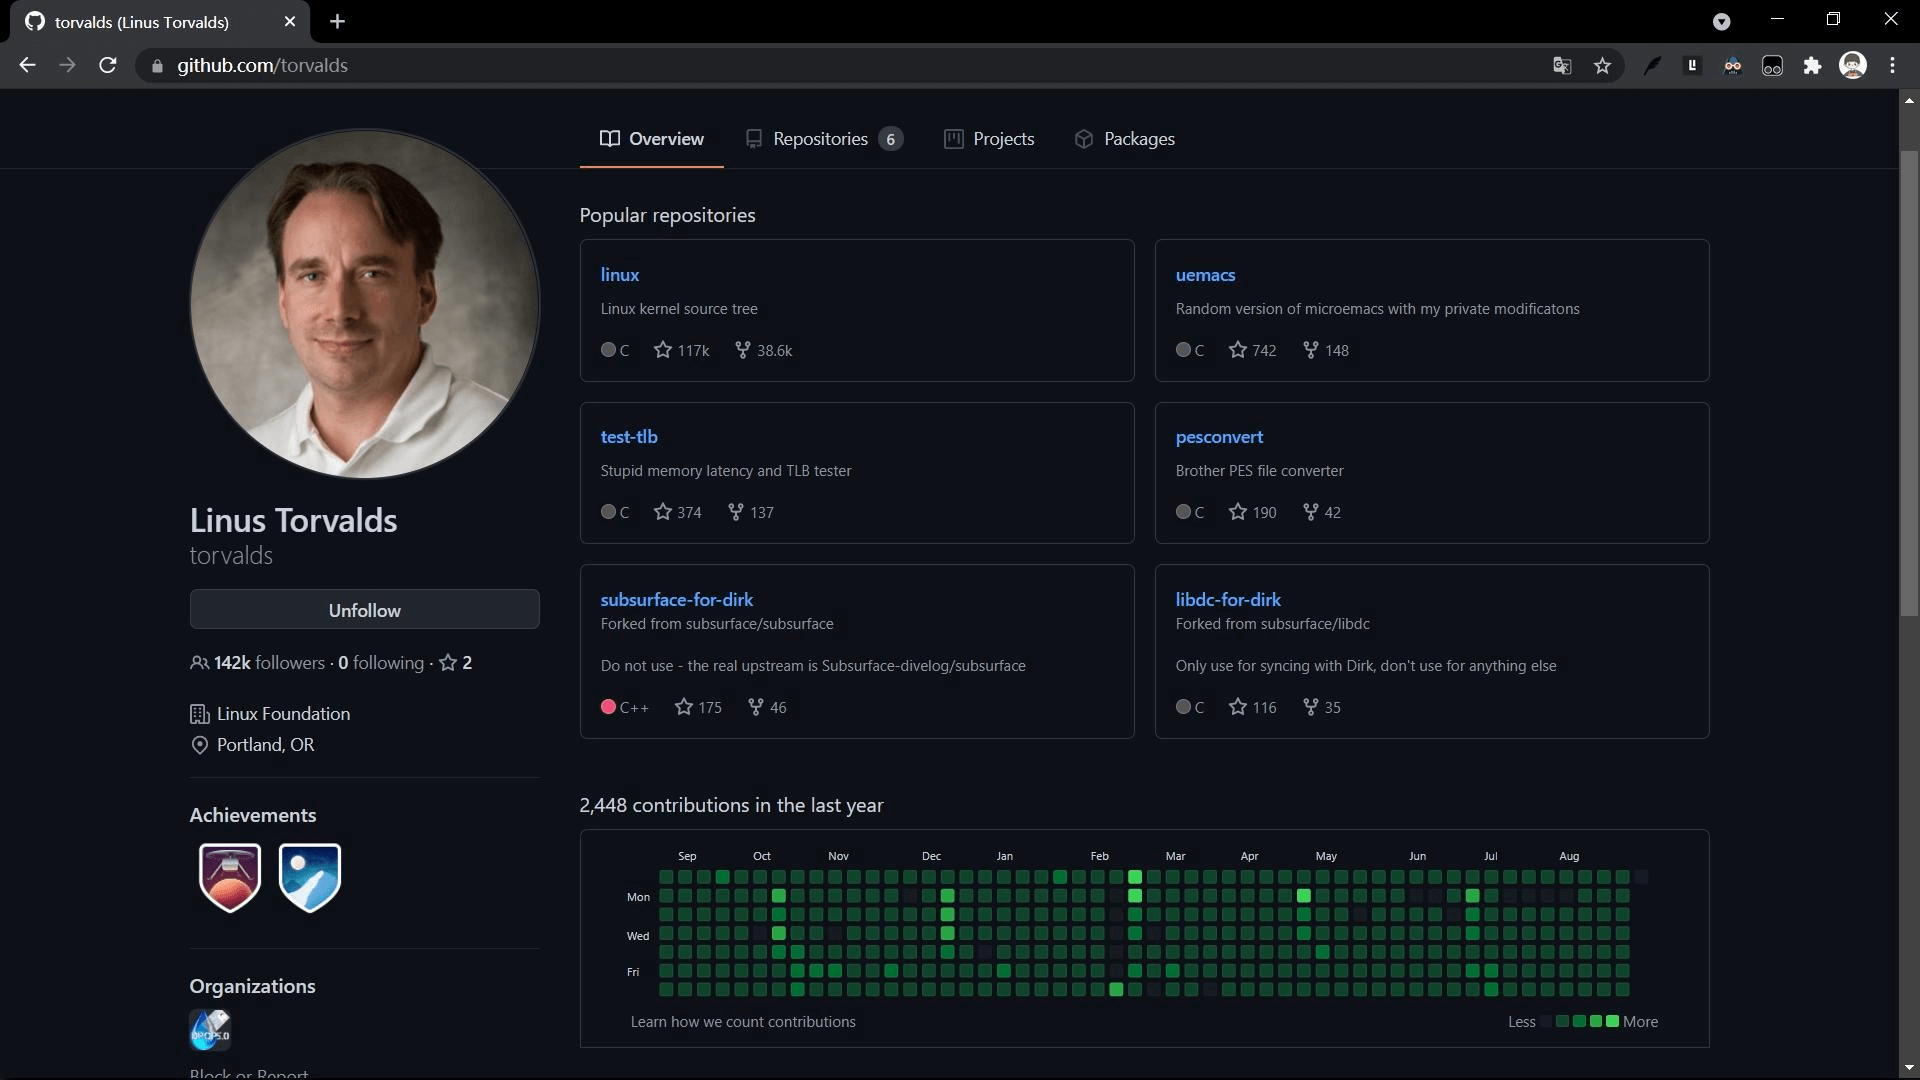
默认情况下,GitHub 个人主页会显示其仓库信息、提交信息,例如 Linux 之父 Linus 的 GitHub 主页 长这样:
但是,这个主页是可以定制的。GitHub 支持这个功能,并且有相关的文档说明:Setting up and managing your GitHub profile - GitHub Docs。
例如有的长这样:Luo Lei

这就远比默认主页好看不少,令人印象深刻。
原理
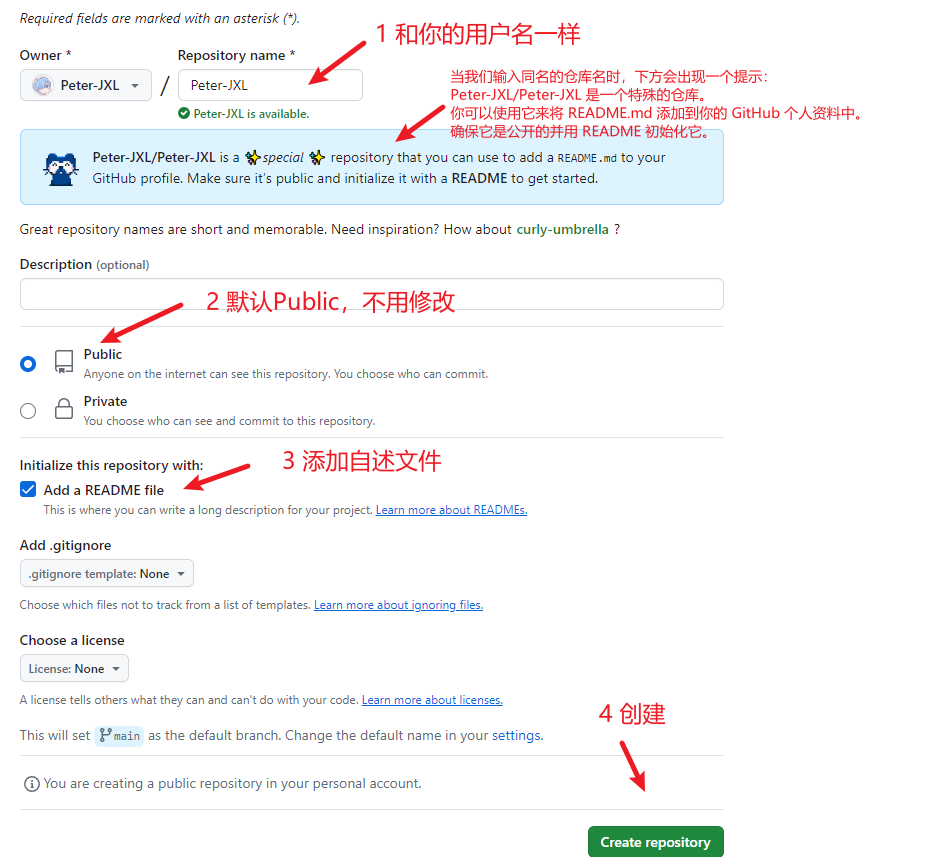
自定义主页很简单。我们首先在 GitHub 上新建一个仓库,仓库名和自己 Github 用户名相同,然后添加一个 README.md 自述文件,在该文件里添加信息即可。
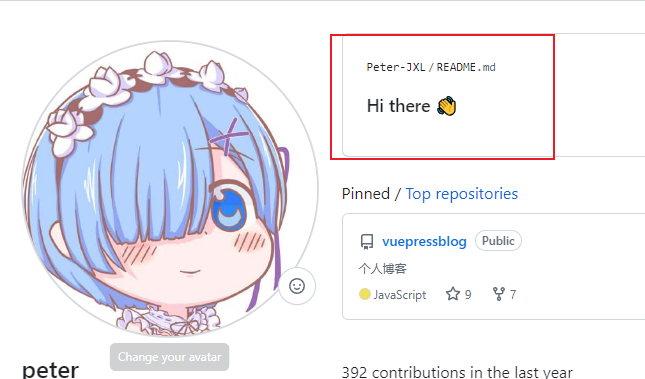
例如,我创建的仓库:github.com/Peter-JXL/Peter-JXL
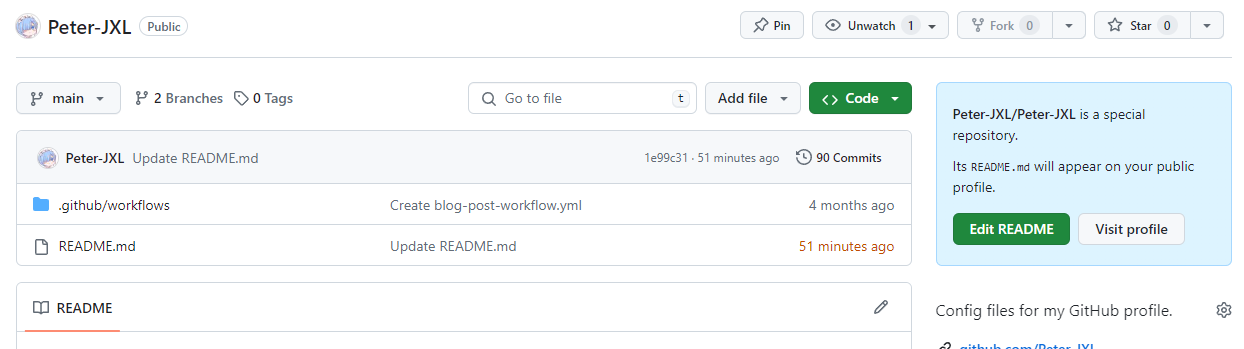
可以看到右上角有个提示:
Peter-JXL/Peter-JXL is a special repository.
Its
README.md will appear on your public profile.翻译:
这是一个特殊的仓库。
它的
README.md 会出现在你的首页中。
侧边栏
在讲解如何定制之前,我们先关注下左侧也有个人信息展示:

这个可以直接在个人首页上,点击左侧的 Edit profile 进行编辑:

可以修改名字、签名(Bio)、公司、地点、邮箱、网站… 按需修改即可。

接下来讲讲如何定制右侧。
新建仓库
新建一个同名仓库,并添加一个自述文件(README.md),确认:
GitHub 默认为此文件添加了一行字:
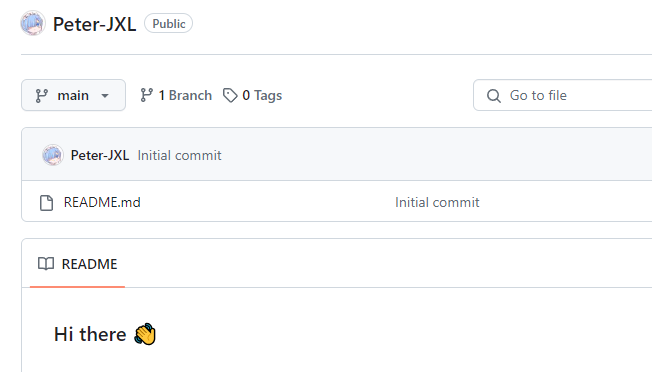
此时我们的首页也会跟着变:
如何定制
接下来,你就可以通过修改 README.md 来定制主页了。由于是 Markdown 文件,扩展性很高,并且全面支持 emoji。
此外,人的创造力有限,如何短时间内拥有一个酷炫的个人主页呢?
答案是 ctrl+c,ctrl+v。看到好看的模板,可以直接 fork,修改下相关变量即可。
此外 GitHub 上也有不少人收集优秀案例:
接下来讲讲一些常见的信息展示。
GitHub 统计卡片
官网:github.com/anuraghazra/github-readme-stats
效果:
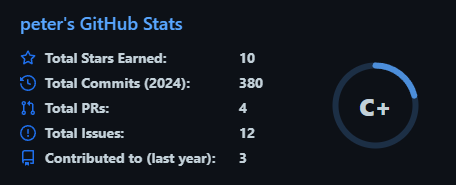
使用方法很简单,将如下代码复制到你的 markdown 文件中,更改 ?username= 的值为你的 GitHub 用户名:

这个是默认样式,很简陋,可以配置显示图标、主题样式等,具体请看官网文档。
GitHub 使用语言统计
官网:github.com/anuraghazra/github-readme-stats
效果:
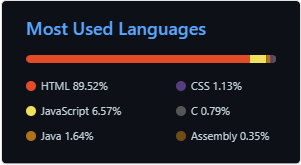
使用方法同上,复制如下代码,更改 ?username= 的值:

同理,这个也可以配置主题和布局(参考文档)。
Metrics 统计信息
会展示 GitHub 上的一些统计信息,效果:
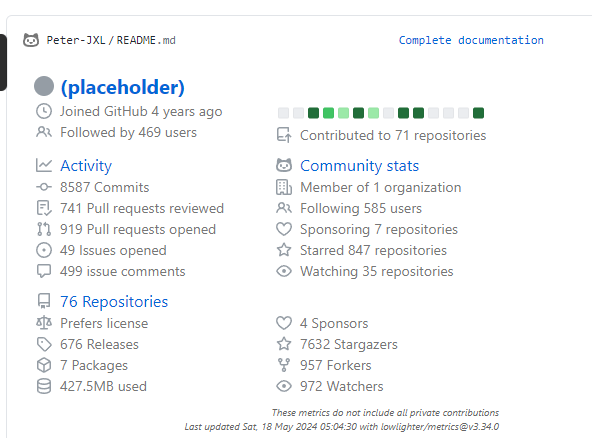
我们可以去官网演示下:输入你的 GitHub 用户名,然后点击按钮:
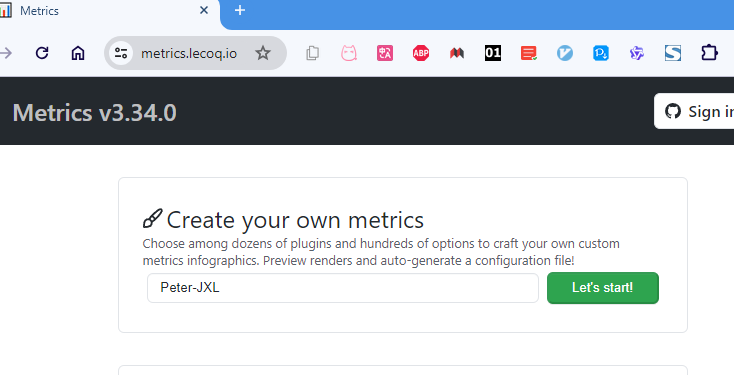
PS:这个项目也是开源在 GitHub 上的:github.com/lowlighter/metrics,并且还有其他的功能(后续会讲到)。
就能看到效果如下:
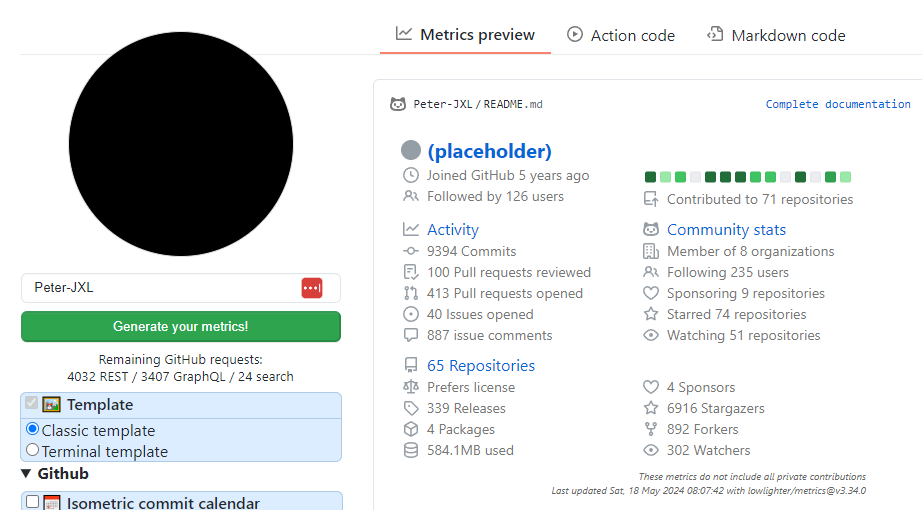
这个配置起来稍微复杂一点点。根据官网文档,使用该功能的方式之一是使用 GitHub Action。
首先我们得创建一个 GitHub personal token,位置:右上角个人头像 → settings → Developer settings → Personal access tokens:

接下来就是勾选 scopes(可以理解为权限,这个就根据不同插件的要求来勾选了,具体得看文档):

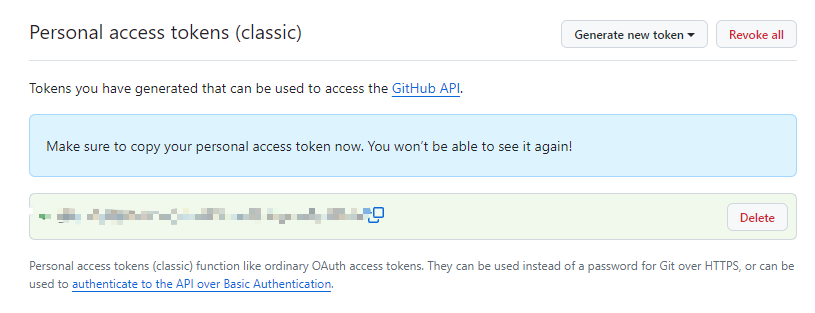
然后会生成 token,只展示一次,注意好好保管:
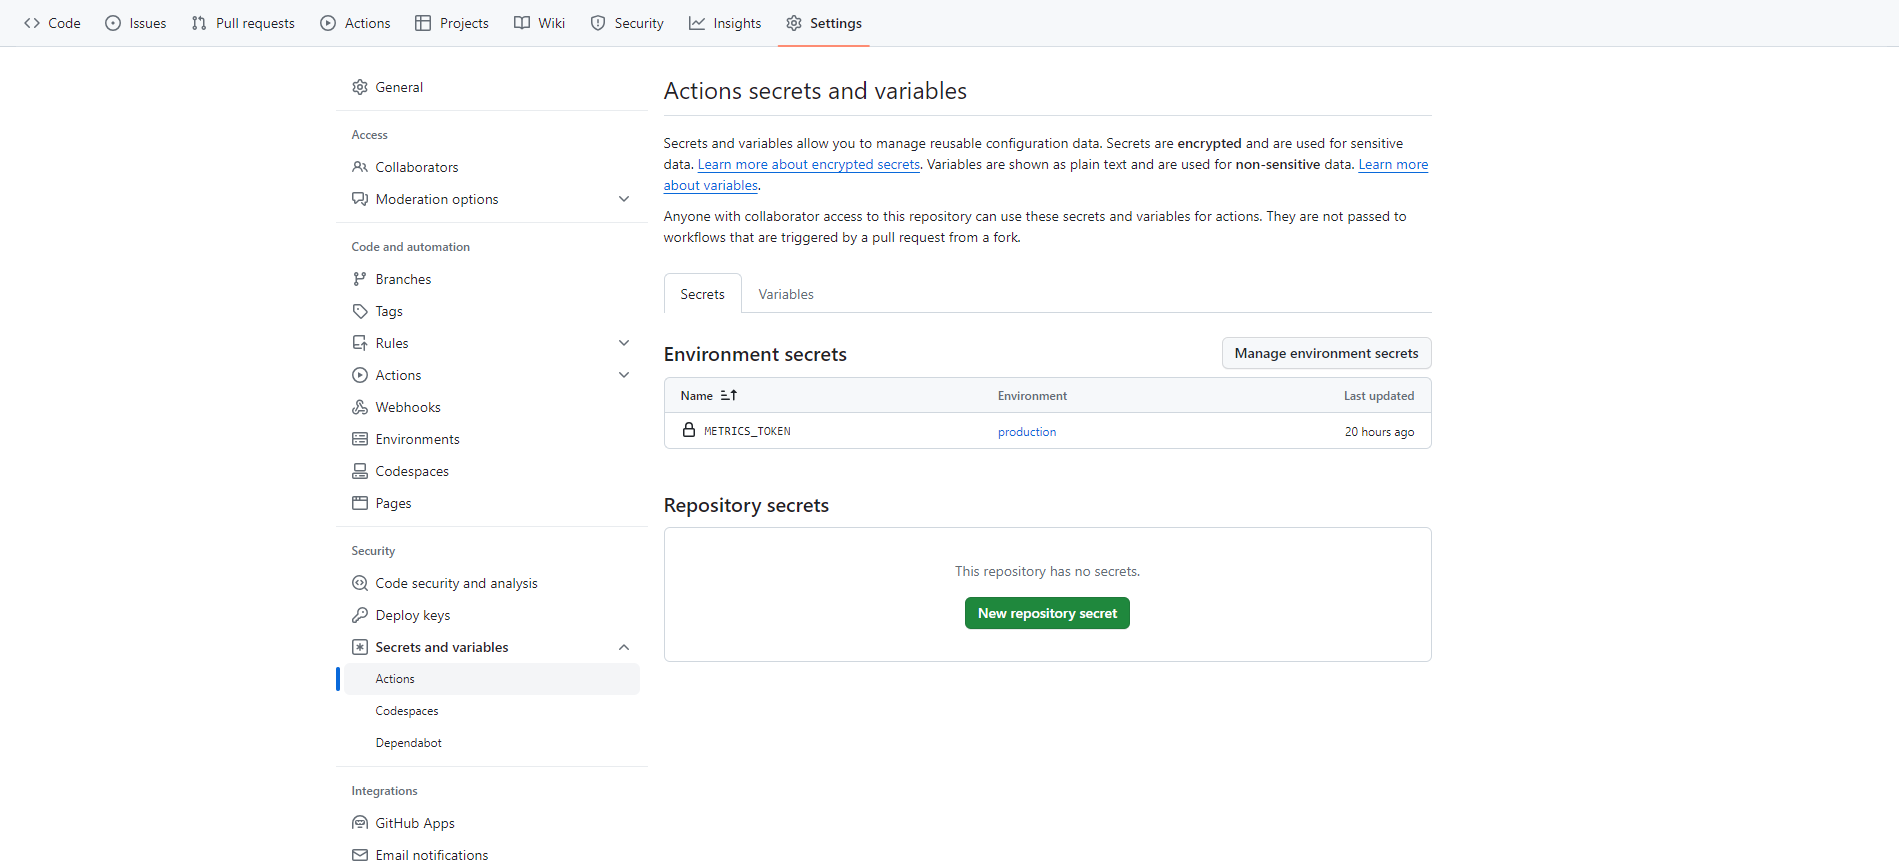
然后去到个人项目里的 settings 页面,将刚刚生成的 token 作为一个密钥(先创建一个环境,名字为 production;然后再创建一个名字为 METRICS_TOKEN 的 secret,值为刚刚生成的 token):
第三步,生成一个 Action,其实 metrics 已经帮我们生成了一个 Action:
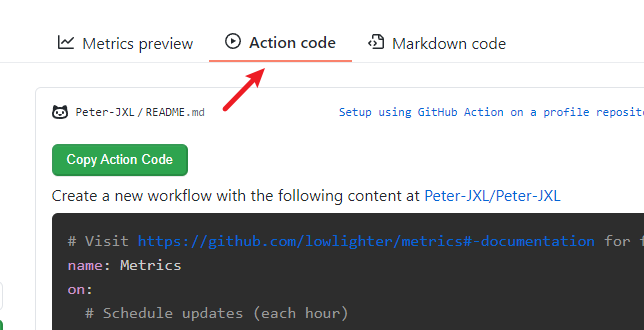
内容如下(建议自行核对下,例如我这边在第 9 行加了个 environment 变量):
name: Metrics
on:
  # Schedule updates (each hour)
  schedule: [{cron: "0 * * * *"}]
  # Lines below let you run workflow manually and on each commit
  workflow_dispatch:
  push: {branches: ["master", "main"]}
jobs:
  github-metrics:
    runs-on: ubuntu-latest
    environment:
      name: production
    permissions:
      contents: write
    steps:
      - uses: lowlighter/metrics@latest
        with:
          # Your GitHub token
          # The following scopes are required:
          #  - public_access (default scope)
          # The following additional scopes may be required:
          #  - read:org      (for organization related metrics)
          #  - read:user     (for user related data)
          #  - read:packages (for some packages related data)
          #  - repo          (optional, if you want to include private repositories)
          token: ${{ secrets.METRICS_TOKEN }}

          # Options
          user: Peter-JXL
          template: classic
          base: header, activity, community, repositories, metadata
          config_timezone: Asia/Shanghai
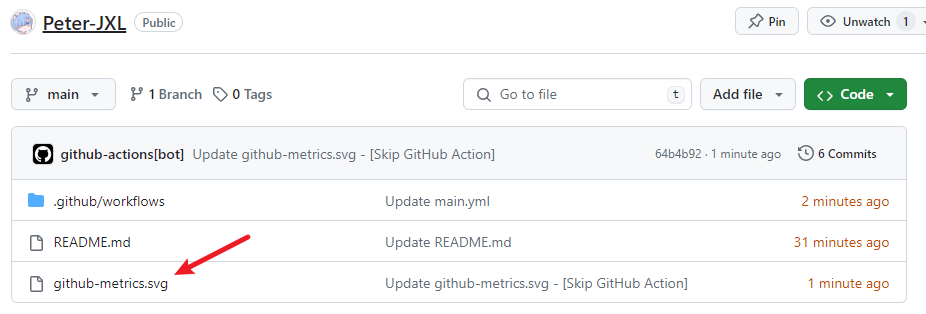
等我们提交后,就会自动生成一个 svg 文件:
然后我们在自述文件里添加这个图片,例如 Markdown 格式如下(其实也可以用 HTML 格式,更灵活):

此时的首页效果:

GitHub 资料奖杯
官网:github.com/ryo-ma/github-profile-trophy
效果:

使用方法同上,复制如下代码,更改 ?username= 的值:

同理,这个也可以配置主题。
GitHub 徽章
为你的开源项目生成高质量小徽章图标,直接复制链接使用。
官网:Shields.io
效果:

示例代码:
<img src="https://img.shields.io/badge/-HTML5-E34F26?style=flat-square&logo=html5&logoColor=white" />
<img src="https://img.shields.io/badge/-CSS3-1572B6?style=flat-square&logo=css3" />
<img src="https://img.shields.io/badge/-JavaScript-oringe?style=flat-square&logo=javascript" />
GitHub 访客徽章
这个徽章会实时改变,记录此页面被访问的次数。
效果:
使用方法:复制如下代码到 Markdown 并替换 page_id 的值为用户名

可以配置颜色,参数为:left_color,right_color
GitHub 活动统计图
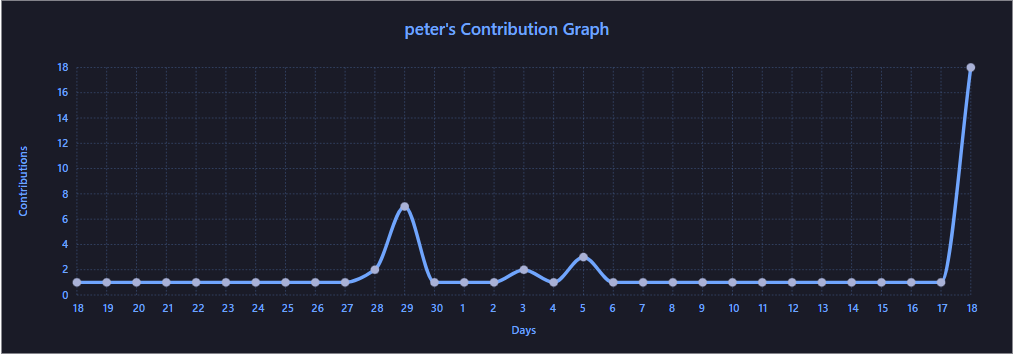
动态生成的活动图,用于显示您过去 31 天的 GitHub 活动。
官网:github.com/Ashutosh00710/github-readme-activity-graph
效果:
使用方法同上,复制如下代码,更改 ?username= 的值:

可以配置主题。
修仙系列统计卡片
一个以凡人修仙传境界为基础的 Github 统计卡片。等级分为:[‘道祖’, ‘大罗’, ‘太乙’, ‘金仙’, ‘真仙’, ‘大乘’, ‘合体’, ‘炼虚’, ‘化神’, ‘元婴’, ‘金丹’, ‘筑基’, ‘练气’],对应区间:[1, 5, 10, 15, 20, 30,40,50,60, 70, 80, 90, 100]。
效果:

使用方法同上,复制如下代码,更改 ?username= 的值:

GitHub 连续打卡
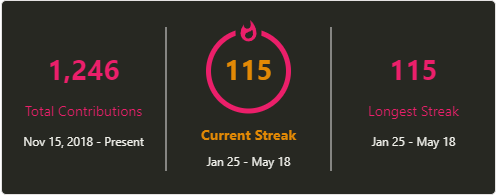
在 README 中展示您连续提交代码的次数。
官网:github.com/DenverCoder1/github-readme-streak-stats
效果:
使用方法同上,复制如下代码,更改 ?username= 的值:

同理,支持主题、样式等配置。
社交统计
在 README 中展示你在一些流行的网站的数据,例如知乎,GitHub,B 站,LeetCode,掘金,CSDN,牛客。
官网:github.com/songquanpeng/stats-cards
效果:

使用方法:复制代码到 Markdown 并替换 username 的值为那个网站的用户名

star 趋势
如果想要统计和展示自己某个项目的 star 趋势,可以使用下面这两个工具。
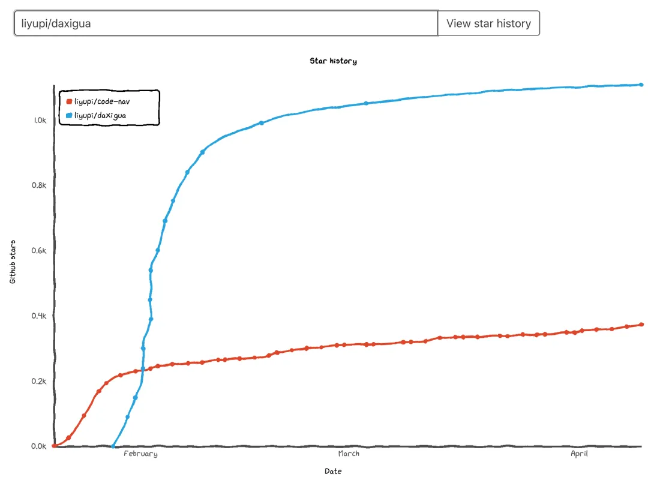
Star History
官网:https://star-history.t9t.io
输入仓库名,就能自动生成 star 增长曲线。还能输入多个仓库查看项目对比:
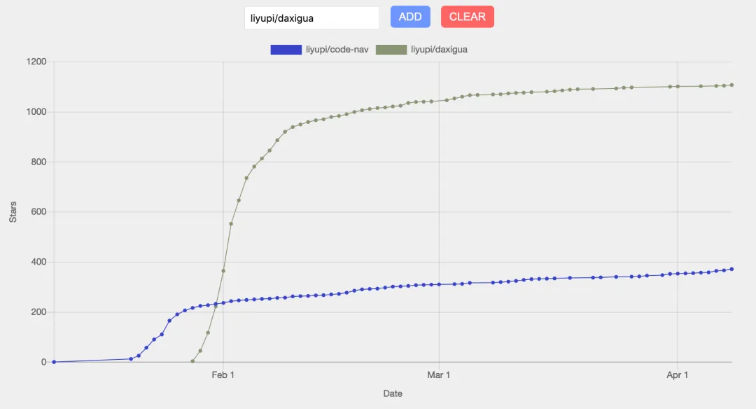
GitHub Star History
官网:https://codetabs.com/github-stars/github-star-history.html
用法和上一个工具完全一样,就是样式有点不同:
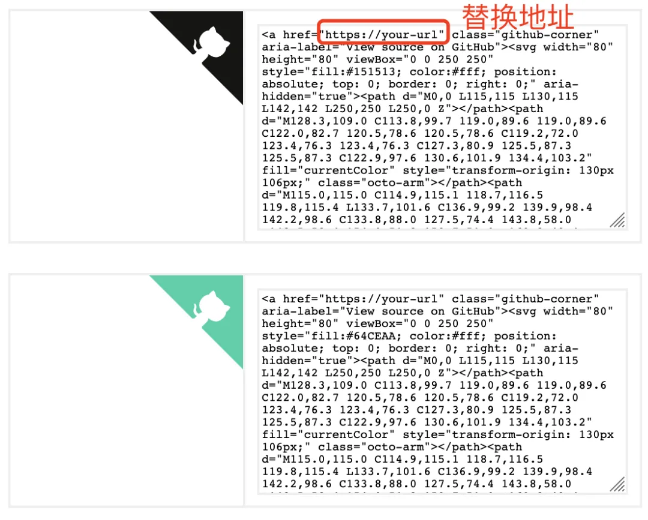
GitHub Corners:分享角标
如果你的 GitHub 项目有一个对应的网站,并且想要用户通过网站跳转到 GitHub 项目页从而得到 star,不防试试这个。
官网:https://tholman.com/github-corners
它可以帮你生成给网站添加 GitHub 角标的代码,只需要选择一个风格,复制代码到自己的项目主页文件中,将超链接替换为自己的仓库地址即可。
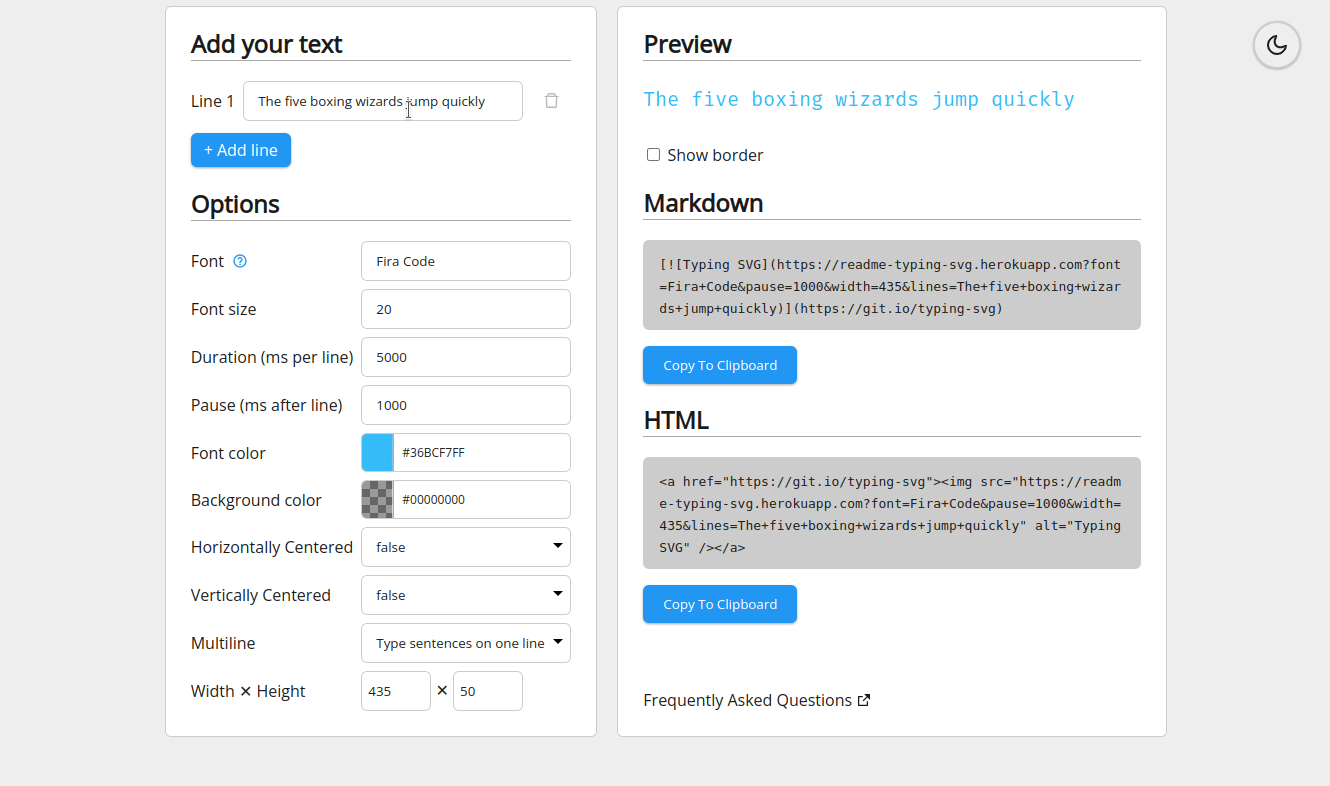
打字特效
让内容通过打字的特效来展示,炫酷。
官网:github.com/DenverCoder1/readme-typing-svg
效果:

使用方法:复制代码到 Markdown 并替换 ?lines= 的值为你想要的内容,字与字之间用分号隔开

更多配置参考官网文档。还可以去 demo 站里自行调试:
贪吃蛇
默认的提交信息是这样子的:
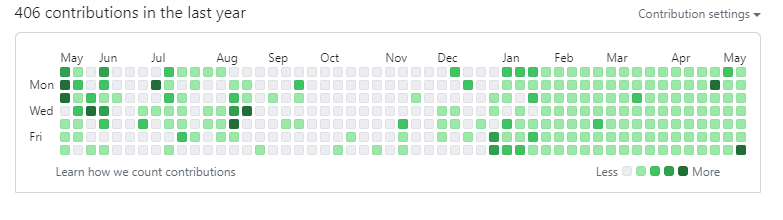
而我们可以将其变成一个动画:一只贪吃蛇挨个吃掉图里的绿点:

使用起来也不难,先新建一个 workflow 文件(名字随意),不需要任何改动,然后提交:
name: generate animation

on:
  # run automatically every 2 hours
  schedule:
    - cron: "0 */2 * * *"

  # allows to manually run the job at any time
  workflow_dispatch:

  # run on every push on the master branch
  push:
    branches:
    - master


jobs:
  generate:
    permissions:
      contents: write
    runs-on: ubuntu-latest
    timeout-minutes: 5

    steps:
      # generates a snake game from a github user (<github_user_name>) contributions graph, output a svg animation at <svg_out_path>
      - name: generate github-contribution-grid-snake.svg
        uses: Platane/snk/svg-only@v3
        with:
          github_user_name: ${{ github.repository_owner }}
          outputs: |
            dist/github-contribution-grid-snake.svg
            dist/github-contribution-grid-snake-dark.svg?palette=github-dark


      # push the content of <build_dir> to a branch
      # the content will be available at https://raw.githubusercontent.com/<github_user>/<repository>/<target_branch>/<file> , or as github page
      - name: push github-contribution-grid-snake.svg to the output branch
        uses: crazy-max/ghaction-github-pages@v3.1.0
        with:
          target_branch: output
          build_dir: dist
        env:
          GITHUB_TOKEN: ${{ secrets.GITHUB_TOKEN }}
将下列代码复制到 Markdown 内,将用户名部分替换成你自己的,并提交。
这段代码的目的是:加载贪吃蛇动画,且贪吃蛇的暗亮风格与你的 Github 的暗亮风格进行自动适配。
<picture>
  <source media="(prefers-color-scheme: dark)" srcset="https://raw.githubusercontent.com/Peter-JXL/Peter-JXL/output/github-contribution-grid-snake-dark.svg">
  <source media="(prefers-color-scheme: light)" srcset="https://raw.githubusercontent.com/Peter-JXL/Peter-JXL/output/github-contribution-grid-snake.svg">
  <img alt="github contribution grid snake animation" src="https://raw.githubusercontent.com/Peter-JXL/Peter-JXL/output/github-contribution-grid-snake.svg">
</picture>
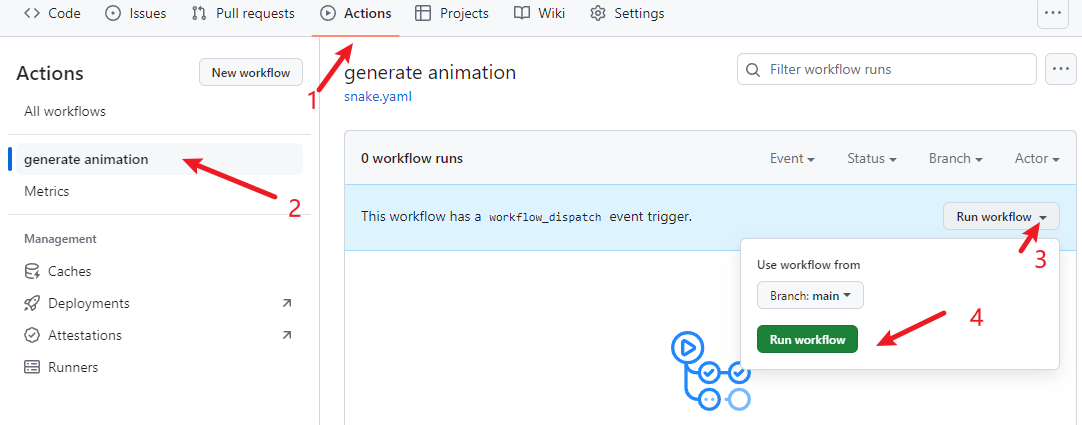
之前我们设置的是每隔 2 小时更新一次,我们可以先手动跑一次。点击 generate animation,点击 Run workflow:
稍等片刻,显示运行成功,再次回到仓库主页就会看到贪吃蛇动画已被加载:

博客文章同步
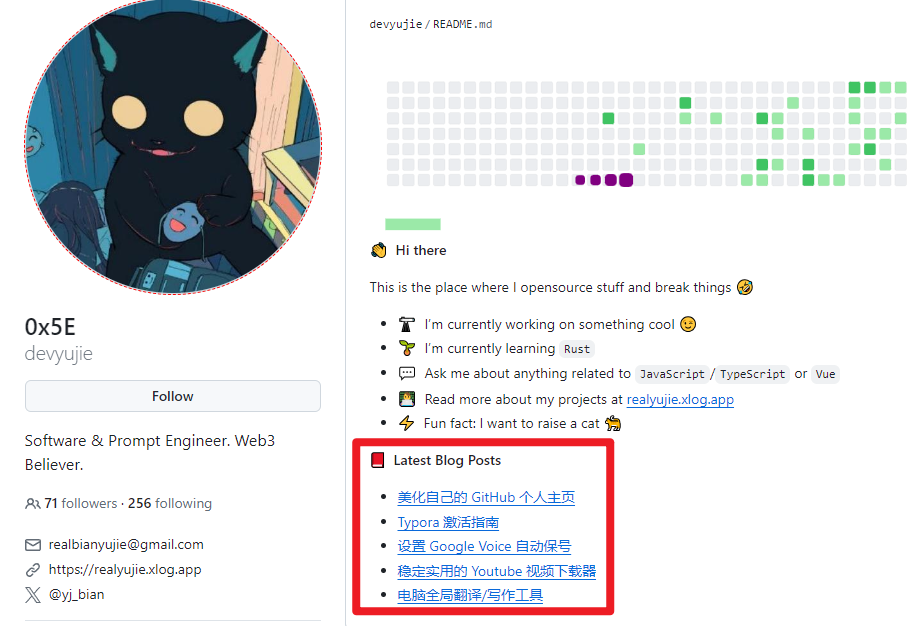
如果你有博客网站,且网站带有 RSS 功能,就可以配置此功能,它能在你的 GitHub 首页上显示最近更新的博客
原理:利用 blog-post-workflow 在自述文件上展示最近几篇博客文章。
效果:
使用起来也很简单。首先创建一个 workflow(例如 blog-post-workflow.yml ),需要改动最后一行的 feed_list 的内容为你自己网站的 RSS 链接。
name: Latest blog post workflow
on:
  schedule: # Run workflow automatically
    - cron: '0 */2 * * *' # Runs every hour, on the hour
  workflow_dispatch: # Run workflow manually (without waiting for the cron to be called), through the GitHub Actions Workflow page directly
permissions:
  contents: write # To write the generated contents to the readme

jobs:
  update-readme-with-blog:
    name: Update this repo's README with latest blog posts
    runs-on: ubuntu-latest
    steps:
      - name: Checkout
        uses: actions/checkout@v3
      - name: Pull in blog's posts
        uses: gautamkrishnar/blog-post-workflow@v1
        with:
          feed_list: "https://www.peterjxl.com/rss.xml"
更多构建参数请参考 🔗 github.com/gautamkrishnar/blog-post-workflow,包括显示文章数量、显示主题等等。
然后在自述文件输入这些内容,程序会自动抓取文章标题、链接等并替换这两个注释:
📕  **Latest Blog Posts**
<!-- BLOG-POST-LIST:START -->
<!-- BLOG-POST-LIST:END -->
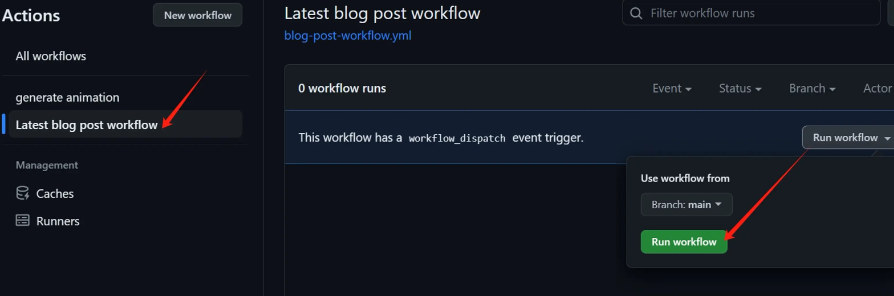
同理,此时是看不到文章列表的,我们得先手工运行一次 action:
你的 GitHub 故事
GitHub 已经内置了年度提交数统计,方便我们回顾:
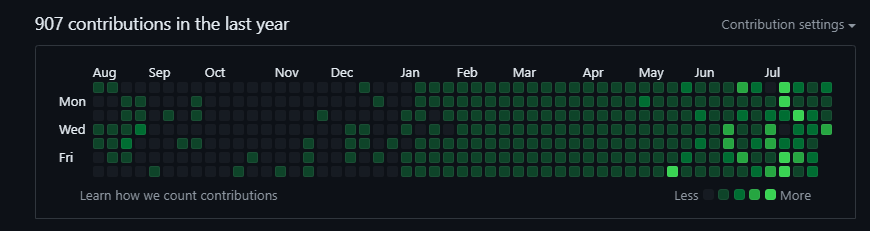
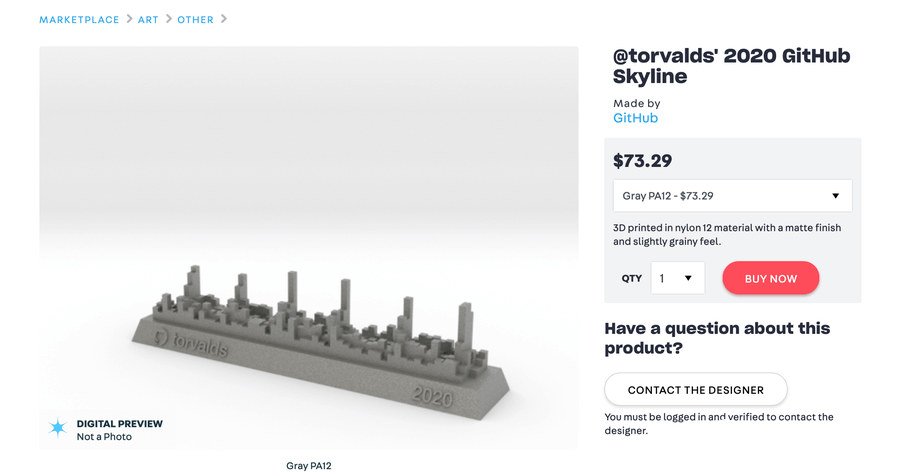
但我们可以更炫酷地用 3D 模型来展示:

用法:输入自己的 GitHub 用户名,和想要查看的年份,i就可以自动生成炫酷的 3D 模型。
PS:
- 这个功能是 GitHub 官方在 2021 年推出的,但是后续又下线了,暂时不知道什么时候回归。
- 该网站可以生成 STL 文件,这是用于 3D 立体光刻的文件格式。
- GitHub 本身也是支持查看 3D 文件的,也就是可以托管和渲染 .stl 的 3D 文件
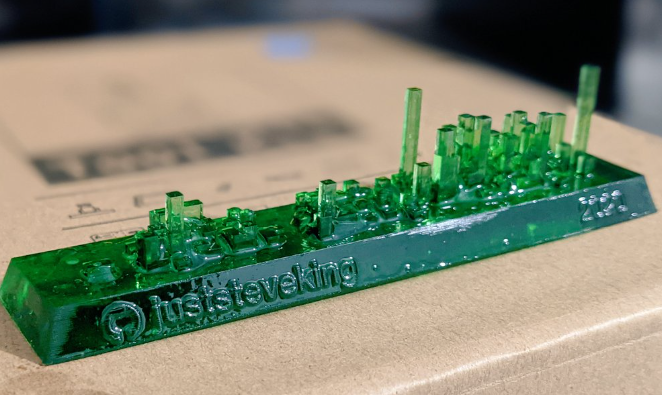
- 如果你有 3D 打印机的话,可以通过该文件自己打印出来。或者用线上打印服务 shapeways.com:
也有不少开发者拿到了打印后的纪念品:
GitHub 3D 统计
使用 3D 图来展示信息。
官网:github.com/yoshi389111/github-profile-3d-contrib
效果:

使用方法是用 GitHub Action。首先创建文件 .github/workflows/profile-3d.yml,内容如下:
name: GitHub-Profile-3D-Contrib

on:
  schedule: # 03:00 JST == 18:00 UTC
    - cron: "0 18 * * *"
  workflow_dispatch:

jobs:
  build:
    runs-on: ubuntu-latest
    name: generate-github-profile-3d-contrib
    steps:
      - uses: actions/checkout@v3
      - uses: yoshi389111/github-profile-3d-contrib@0.7.1
        env:
          GITHUB_TOKEN: ${{ secrets.GITHUB_TOKEN }}
          USERNAME: ${{ github.repository_owner }}
      - name: Commit & Push
        run: |
          git config user.name github-actions
          git config user.email github-actions@github.com
          git add -A .
          git commit -m "generated"
          git push
然后手动执行一次 action:Actions -> GitHub-Profile-3D-Contrib -> Run workflow
然后会生成这些文件(带路径,各种主题的都有):
profile-3d-contrib/profile-green-animate.svgprofile-3d-contrib/profile-green.svgprofile-3d-contrib/profile-season-animate.svgprofile-3d-contrib/profile-season.svgprofile-3d-contrib/profile-south-season-animate.svgprofile-3d-contrib/profile-south-season.svgprofile-3d-contrib/profile-night-view.svgprofile-3d-contrib/profile-night-green.svgprofile-3d-contrib/profile-night-rainbow.svgprofile-3d-contrib/profile-gitblock.svg
最后在 Markdown 里添加即可。
PS,如果遇到了这样的报错:
remote: Permission to mthsBelloni/mthsBelloni.git denied to github-actions[bot].
fatal: unable to access 'https://github.com/Peter-JXL/Peter-JXL/': The requested URL returned error: 403
Error: Process completed with exit code 128.
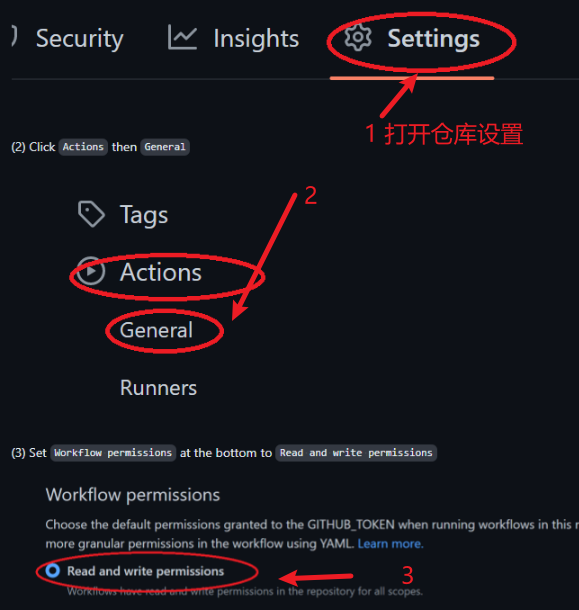
大概率是因为没有配置 actions 的写权限,导致无法写入 svg 文件。解决办法:加上权限
感谢参与者
每位开源项目的参与者都值得记录和感谢,传统方式是手工编辑,项目负责人一个一个地把参与者的名字记录到 README.md,非常低效。
可以使用一种更高效、自动化的方式来添加项目贡献者:
项目名:All Contributors
官网:https://allcontributors.org
可以用命令行或者机器人的方式自动将项目的贡献者补充到项目文档中,并且生成排版精美的表格,效果如下:

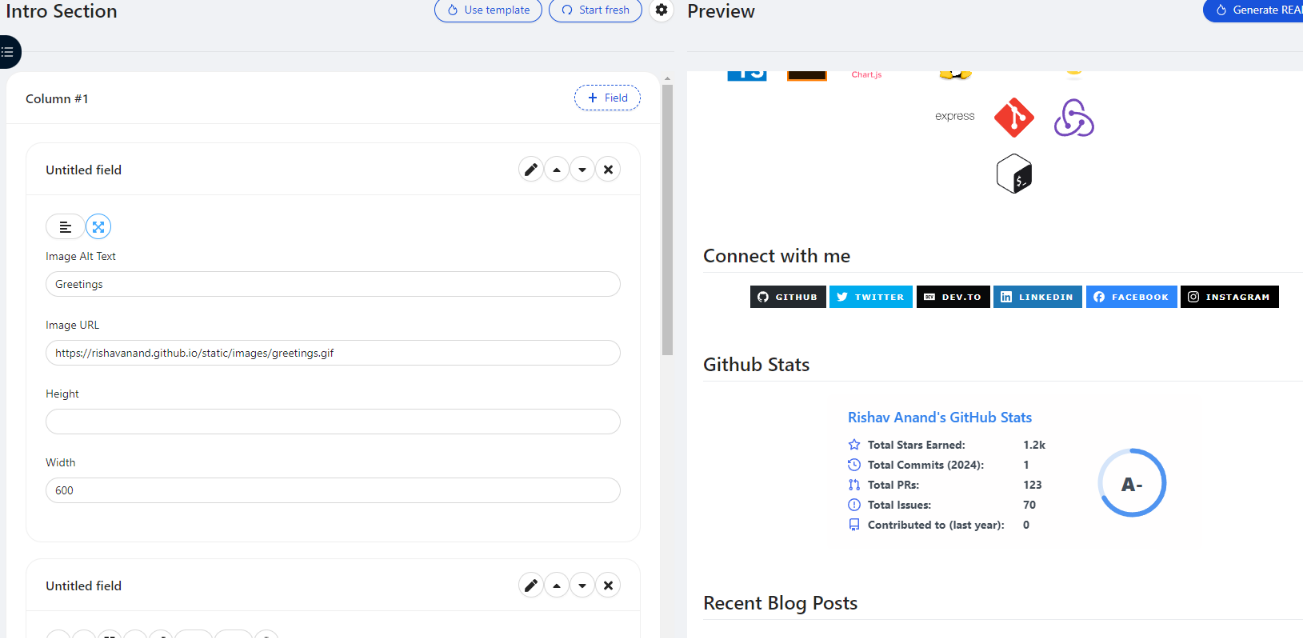
Profile 编辑器
这个项目是一个是一个可视化 profile 生成工具,使用者无需学习 Markdown 语法,仅需要在对应窗口中输入或者选择相应的内容,工具会自动生成 Markdown 脚本。脚本编辑完成以后,直接复制粘贴到自己的 Github 即可。
效果:
关于 Gitee
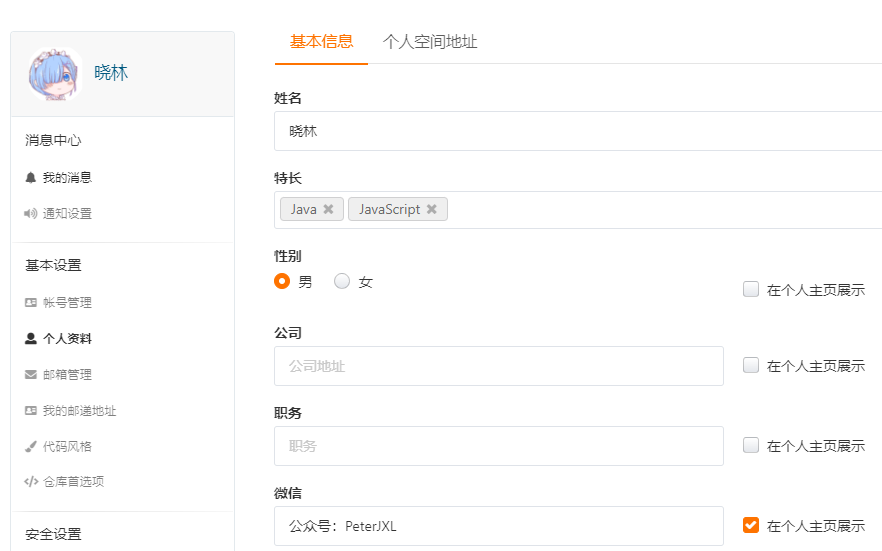
很遗憾,Gitee,号称国内版的 GitHub,并没有提供类似的功能。但我们可以完善下个人信息部分:

方法:在个人主页里打开个人设置

打开个人资料,可以修改公司,职务,微信,QQ,领英,微博,博客,所在地,自我介绍等信息,多多少少能优化下个人主页:
例如鱼皮的长这样:

最后
本文仅仅列出一些常见的功能,感兴趣的同学可以自行搜索更多功能,甚至自定义。
这是我的 GitHub 主页,大家可以抄抄作业(如果能点个 star 就更好了😏):https://github.com/Peter-JXL
特别注意:由于 GFW 的原因,可能需要魔法上网后才能看到一些内容。
最后,祝你玩得开心!
参考
Github 首页美化教程(一):打造个性化的 GitHub 首页 - 知乎
Github 自定义个人首页_github 主页搭建-CSDN 博客


 3678
3678

 被折叠的 条评论
为什么被折叠?
被折叠的 条评论
为什么被折叠?
 到【灌水乐园】发言


