


史上最全spring注解,没有之一
<div class="htmledit_views">
<p><span></span><em>注解是个好东西,但好东西我们也是看见过,整理过,理解过,用过才知道好。不求我们每个都记住,但求保有印象,在需要的时候能提取出来再查找相关资料,平时工作就不会显得那么被动了。</em></p><p><em><span></span></em></p><p>1.@Configuration注解</p><p>该类等价 与XML中配置beans,相当于Ioc容器,它的某个方法头上如果注册了@Bean,就会作为这个Spring容器中的Bean,与xml中配置的bean意思一样。</p><p>@Configuration注解的类必需使用<context:component-scanbase-package=”XXX”/>扫描.如下:</p><p></p><div class="dp-highlighter bg_html"><div class="bar"><div class="tools"><b>[html]</b> <a href="https://blog.csdn.net/achenyuan/article/details/72786759#" rel="nofollow" class="ViewSource" title="view plain" data-token="02f29dcd988d21fb2418f4fb1282901f">view plain</a><span> <a href="https://blog.csdn.net/achenyuan/article/details/72786759#" rel="nofollow" class="CopyToClipboard" title="copy" data-token="02f29dcd988d21fb2418f4fb1282901f">copy</a><div style="position: absolute; left: 647px; top: 444px; width: 16px; height: 16px; z-index: 99;"><embed id="ZeroClipboardMovie_1" src="https://csdnimg.cn/public/highlighter/ZeroClipboard.swf" loop="false" menu="false" quality="best" bgcolor="#ffffff" width="16" height="16" name="ZeroClipboardMovie_1" align="middle" allowscriptaccess="always" allowfullscreen="false" type="application/x-shockwave-flash" pluginspage="http://www.macromedia.com/go/getflashplayer" flashvars="id=1&width=16&height=16" wmode="transparent"></div></span><div></div><div></div><span> <a href="https://blog.csdn.net/achenyuan/article/details/72786759#" rel="nofollow" class="PrintSource" title="print" data-token="02f29dcd988d21fb2418f4fb1282901f">print</a></span><a href="https://blog.csdn.net/achenyuan/article/details/72786759#" rel="nofollow" class="About" title="?" data-token="02f29dcd988d21fb2418f4fb1282901f">?</a></div></div><ol start="1" class="dp-xml"><li class="alt"><span><span>@Configuration </span></span></li><li class=""><span>public class MainConfig { </span></li><li class="alt"><span> </span></li><li class=""><span>//在properties文件里配置 </span></li><li class="alt"><span> @Value(“${wx_appid}”) </span></li><li class=""><span>public String appid; </span></li><li class="alt"><span> </span></li><li class=""><span> protected MainConfig(){} </span></li><li class="alt"><span> </span></li><li class=""><span> @Bean </span></li><li class="alt"><span> public WxMpService wxMpService() { </span></li><li class=""><span> WxMpService <span class="attribute">wxMpService</span><span> = </span><span class="attribute-value">new</span><span> WxMpServiceImpl(); </span></span></li><li class="alt"><span> wxMpService.setWxMpConfigStorage(wxMpConfigStorage()); </span></li><li class=""><span> return wxMpService; </span></li><li class="alt"><span>} </span></li><li class=""><span>} </span></li></ol></div><pre class="prettyprint"><code class="language-html has-numbering">@Configuration
public class MainConfig {
//在properties文件里配置
@Value("${wx_appid}")
public String appid;
 protected MainConfig(){}

@Bean
public WxMpService wxMpService() {
    WxMpService wxMpService = new WxMpServiceImpl();
    wxMpService.setWxMpConfigStorage(wxMpConfigStorage());
    return wxMpService;
}
}
- 1
- 2
- 3
- 4
- 5
- 6
- 7
- 8
- 9
- 10
- 11
- 12
- 13
- 14
- 15
- 16
定义一个MainConfig,用@Configuration注解,那MainConfig相当于xml里的beans,里面用@Bean注解的和xml里定义的bean等价,用<context:component-scanbase-package=”XXX”/>扫描该类,最终我们可以在程序里用@AutoWired或@Resource注解取得用@Bean注解的bean,和用xml先配置bean然后在程序里自动注入一样。目的是减少xml里配置。
2.@Value注解
为了简化从properties里取配置,可以使用@Value, 可以properties文件中的配置值。
在dispatcher-servlet.xml里引入properties文件。
- <context:property-placeholder location=“classpath:test.properties” />
<context:property-placeholder location=“classpath:test.properties” />
在程序里使用@Value:
@Value(“${wx_appid}”)
publicString appid;即使给变量赋了初值也会以配置文件的值为准。
3. @Controller, @Service, @Repository,@Component
目前4种注解意思是一样,并没有什么区别,区别只是名字不同。使用方法:
1.使用<context:component-scanbase-package=”XXX”/>扫描被注解的类
2. 在类上写注解:
@Controller
public class TestController {
}
4. @PostConstruct 和 @PreDestory
实现初始化和销毁bean之前进行的操作,只能有一个方法可以用此注释进行注释,方法不能有参数,返回值必需是void,方法需要是非静态的。
例如:- public class TestService {
- @PostConstruct
- public void init(){
- System.out.println(“初始化”);
- }
- @PreDestroy
- public void dostory(){
- System.out.println(“销毁”);
- }
- }
public class TestService {@PostConstruct public void init(){ System.out.println("初始化"); } @PreDestroy public void dostory(){ System.out.println("销毁"); }
}
- 1
- 2
- 3
- 4
- 5
- 6
- 7
- 8
- 9
- 10
- 11
- 12
@PostConstruct:在构造方法和init方法(如果有的话)之间得到调用,且只会执行一次。
@PreDestory:注解的方法在destory()方法调用后得到执行。
网上拷贝的流程图:

引深一点,Spring 容器中的 Bean 是有生命周期的,Spring 允许在 Bean 在初始化完成后以及 Bean 销毁前执行特定的操作,常用的设定方式有以下三种:
1.通过实现 InitializingBean/DisposableBean 接口来定制初始化之后/销毁之前的操作方法;
2.通过 <bean> 元素的 init-method/destroy-method属性指定初始化之后 /销毁之前调用的操作方法;
3.在指定方法上加上@PostConstruct 或@PreDestroy注解来制定该方法是在初始化之后还是销毁之前调用
但他们之前并不等价。即使3个方法都用上了,也有先后顺序.
Constructor > @PostConstruct >InitializingBean > init-method
5. @Primary
自动装配时当出现多个Bean候选者时,被注解为@Primary的Bean将作为首选者,否则将抛出异常。
例如:
- @Component
- public class Apple implements Fruit{
- @Override
- public String hello() {
- return ”我是苹果”;
- }
- }
- @Component
- @Primary
- public class Pear implements Fruit{
- @Override
- public String hello(String lyrics) {
- return ”梨子”;
- }
- }
- public class FruitService {
- //Fruit有2个实例子类,因为梨子用@Primary,那么会使用Pear注入
- @Autowired
- private Fruit fruit;
- public String hello(){
- return fruit.hello();
- }
- }
@Component
public class Apple implements Fruit{@Override public String hello() { return "我是苹果"; }
}
@Component
@Primary
public class Pear implements Fruit{
@Override
public String hello(String lyrics) {
    return "梨子";
}
}
public class FruitService {
//Fruit有2个实例子类,因为梨子用@Primary,那么会使用Pear注入
@Autowired
private Fruit fruit;
public String hello(){
    return fruit.hello();
}
}
- 1
- 2
- 3
- 4
- 5
- 6
- 7
- 8
- 9
- 10
- 11
- 12
- 13
- 14
- 15
- 16
- 17
- 18
- 19
- 20
- 21
- 22
- 23
- 24
- 25
- 26
- 27
- 28
- 29
6. @Lazy(true)
用于指定该Bean是否取消预初始化,用于注解类,延迟初始化。
7. @Autowired
Autowired默认先按byType,如果发现找到多个bean,则,又按照byName方式比对,如果还有多个,则报出异常。
1.可以手动指定按byName方式注入,使用@Qualifier。
//通过此注解完成从spring配置文件中 查找满足Fruit的bean,然后按//@Qualifier指定pean
@Autowired
@Qualifier(“pean”)
public Fruit fruit;
2.如果要允许null 值,可以设置它的required属性为false,如:@Autowired(required=false)
public Fruit fruit;
8. @Resource
默认按 byName自动注入,如果找不到再按byType找bean,如果还是找不到则抛异常,无论按byName还是byType如果找到多个,则抛异常。
可以手动指定bean,它有2个属性分别是name和type,使用name属性,则使用byName的自动注入,而使用type属性时则使用byType自动注入。
@Resource(name=”bean名字”)
或
@Resource(type=”bean的class”)
这个注解是属于J2EE的,减少了与spring的耦合。
9. @Async
java里使用线程用3种方法:
1. 继承Thread,重写run方法
2. 实现Runnable,重写run方法
3. 使用Callable和Future接口创建线程,并能得到返回值。
前2种简单,第3种方式特别提示一下,例子如下:
- class MyCallable implements Callable<Integer> {
- private int i = 0;
- // 与run()方法不同的是,call()方法具有返回值
- @Override
- public Integer call() {
- int sum = 0;
- for (; i < 100; i++) {
- System.out.println(Thread.currentThread().getName() + ” ” + i);
- sum += i;
- }
- return sum;
- }
- }
class MyCallable implements Callable<Integer> {

private int i = 0;

// 与run()方法不同的是,call()方法具有返回值

@Override

public Integer call() {

int sum = 0;

for (; i < 100; i++) {

System.out.println(Thread.currentThread().getName() + " " + i);

sum += i;

}

return sum;

}

}
- 1
- 2
- 3
- 4
- 5
- 6
- 7
- 8
- 9
- 10
- 11
- 12
- 13
main方法:
- public static void main(String[] args) {
- Callable<Integer> myCallable = new MyCallable(); // 创建MyCallable对象
- FutureTask<Integer> ft = new FutureTask<Integer>(myCallable); //使用FutureTask来包装MyCallable对象
- for (int i = 0; i < 100; i++) {
- System.out.println(Thread.currentThread().getName() + ” ” + i);
- if (i == 30) {
- Thread thread = new Thread(ft); //FutureTask对象作为Thread对象的target创建新的线程
- thread.start(); //线程进入到就绪状态
- }
- }
- System.out.println(“主线程for循环执行完毕…”);
- try {
- int sum = ft.get(); //取得新创建的新线程中的call()方法返回的结果
- System.out.println(“sum = ” + sum);
- } catch (InterruptedException e) {
- e.printStackTrace();
- } catch (ExecutionException e) {
- e.printStackTrace();
- }
- }
public static void main(String[] args) {

Callable<Integer> myCallable = new MyCallable();    // 创建MyCallable对象

FutureTask<Integer> ft = new FutureTask<Integer>(myCallable); //使用FutureTask来包装MyCallable对象

for (int i = 0; i < 100; i++) {

System.out.println(Thread.currentThread().getName() + " " + i);

if (i == 30) {

Thread thread = new Thread(ft);   //FutureTask对象作为Thread对象的target创建新的线程

thread.start();                      //线程进入到就绪状态

}

}

System.out.println(“主线程for循环执行完毕…”);

try {

int sum = ft.get();            //取得新创建的新线程中的call()方法返回的结果

System.out.println(“sum = " + sum);

} catch (InterruptedException e) {

e.printStackTrace();

} catch (ExecutionException e) {

e.printStackTrace();

}

}
- 1
- 2
- 3
- 4
- 5
- 6
- 7
- 8
- 9
- 10
- 11
- 12
- 13
- 14
- 15
- 16
- 17
- 18
- 19
- 20
而使用@Async可视为第4种方法。基于@Async标注的方法,称之为异步方法,这个注解用于标注某个方法或某个类里面的所有方法都是需要异步处理的。被注解的方法被调用的时候,会在新线程中执行,而调用它的方法会在原来的线程中执行。
application.xml形势的配置:
第一步配置XML。
- <!–扫描注解,其中包括@Async –>
- <context:component-scan base-package=“com.test”/>
- <!– 支持异步方法执行, 指定一个缺省的executor给@Async使用–>
- <task:annotation-driven executor=“defaultAsyncExecutor” />
- <!—配置一个线程执行器–>
- <task:executor id=” defaultAsyncExecutor ”pool-size=“100-10000” queue-capacity=“10” keep-alive =”5”/>
<!–扫描注解,其中包括@Async -->

<context:component-scan base-package=“com.test”/>

<!-- 支持异步方法执行, 指定一个缺省的executor给@Async使用–>

<task:annotation-driven executor=“defaultAsyncExecutor”  />

<!—配置一个线程执行器–>

<task:executor id=” defaultAsyncExecutor "pool-size=“100-10000” queue-capacity=“10” keep-alive =”5”/>
- 1
- 2
- 3
- 4
- 5
- 6
参数解读:
<task:executor />配置参数:
id:当配置多个executor时,被@Async(“id”)指定使用;也被作为线程名的前缀。
pool-size:
core size:最小的线程数,缺省:1
max size:最大的线程数,缺省:Integer.MAX_VALUE
queue-capacity:当最小的线程数已经被占用满后,新的任务会被放进queue里面,当这个queue的capacity也被占满之后,pool里面会创建新线程处理这个任务,直到总线程数达到了max size,这时系统会拒绝这个任务并抛出TaskRejectedException异常(缺省配置的情况下,可以通过rejection-policy来决定如何处理这种情况)。缺省值为:Integer.MAX_VALUE
keep-alive:超过core size的那些线程,任务完成后,再经过这个时长(秒)会被结束掉
rejection-policy:当pool已经达到max size的时候,如何处理新任务
ABORT(缺省):抛出TaskRejectedException异常,然后不执行DISCARD:不执行,也不抛出异常
DISCARD_OLDEST:丢弃queue中最旧的那个任务
CALLER_RUNS:不在新线程中执行任务,而是有调用者所在的线程来执行
第二步在类或方法上添加@Async,当调用该方法时,则该方法即是用异常执行的方法单独开个新线程执行。
- @Async(“可以指定执行器id,也可以不指定”)
- public static void testAsyncVoid (){
- try {
- //让程序暂停100秒,相当于执行一个很耗时的任务
- System.out.println(“异常执行打印字符串”);
- Thread.sleep(100000);
- } catch (InterruptedException e) {
- e.printStackTrace();
- }
- }
@Async(“可以指定执行器id,也可以不指定”)

public static void testAsyncVoid (){

try {

//让程序暂停100秒,相当于执行一个很耗时的任务

System.out.println(“异常执行打印字符串”);

Thread.sleep(100000);

} catch (InterruptedException e) {

e.printStackTrace();

}

}
- 1
- 2
- 3
- 4
- 5
- 6
- 7
- 8
- 9
- 10
当在外部调用testAsync方法时即在新线程中执行,由上面<task: annotation-driven/>执行器去维护线程。
总结:先用context:component-scan去扫描注解,让spring能识别到@Async注解,然后task:annotation-driven去驱动@Async注解,并可以指定默认的线程执行器executor。那么当用@Async注解的方法或类得到调用时,线程执行器会创建新的线程去执行。
上面方法是无返回值的情况,还有异常方法有返回值的例子。
- @Async
- public Future<String> testAsyncReturn () {
- System.out.println(“Execute method asynchronously - ”
- + Thread.currentThread().getName());
- try {
- Thread.sleep(5000);
- return new AsyncResult<String>(“hello world !!!”);
- } catch (InterruptedException e) {
- //
- }
- return null;
- }
@Async

public Future<String> testAsyncReturn () {

System.out.println("Execute method asynchronously - "

+ Thread.currentThread().getName());

try {

Thread.sleep(5000);

return new AsyncResult<String>(“hello world !!!”);

} catch (InterruptedException e) {

//

}

return null;

}
- 1
- 2
- 3
- 4
- 5
- 6
- 7
- 8
- 9
- 10
- 11
- 12
返回的数据类型为Future类型,接口实现类是AsyncResult.
调用方法如下:
- public void test(){
- Future<String> future = cc.testAsyncReturn();
- while (true) { ///这里使用了循环判断,等待获取结果信息
- if (future.isDone()) { //判断是否执行完毕
- System.out.println(“Result from asynchronous process - ” + future.get());
- break;
- }
- System.out.println(“Continue doing something else. ”);
- Thread.sleep(1000);
- }
- }
public void test(){

Future<String> future = cc.testAsyncReturn();

while (true) {  ///这里使用了循环判断,等待获取结果信息

if (future.isDone()) {  //判断是否执行完毕

System.out.println("Result from asynchronous process - " + future.get());

break;

}

System.out.println("Continue doing something else. ");

Thread.sleep(1000);

}

}
- 1
- 2
- 3
- 4
- 5
- 6
- 7
- 8
- 9
- 10
- 11
通过不停的检查Future的状态来获取当前的异步方法是否执行完毕
参考文章
编程的方式使用@Async:
- @Configuration
- @EnableAsync
- public class SpringConfig {
- private int corePoolSize = 10;
- private int maxPoolSize = 200;
- private int queueCapacity = 10;
- private String ThreadNamePrefix = “MyLogExecutor-“;
- @Bean
- public Executor logExecutor() {
- ThreadPoolTaskExecutor executor = new ThreadPoolTaskExecutor();
- executor.setCorePoolSize(corePoolSize);
- executor.setMaxPoolSize(maxPoolSize);
- executor.setQueueCapacity(queueCapacity);
- executor.setThreadNamePrefix(ThreadNamePrefix);
- // rejection-policy:当pool已经达到max size的时候,如何处理新任务
- // CALLER_RUNS:不在新线程中执行任务,而是有调用者所在的线程来执行
- executor.setRejectedExecutionHandler(new ThreadPoolExecutor.CallerRunsPolicy());
- executor.initialize();
- return executor;
- }
- }
@Configuration
@EnableAsync
public class SpringConfig {private int corePoolSize = 10; private int maxPoolSize = 200; private int queueCapacity = 10; private String ThreadNamePrefix = "MyLogExecutor-"; @Bean public Executor logExecutor() { ThreadPoolTaskExecutor executor = new ThreadPoolTaskExecutor(); executor.setCorePoolSize(corePoolSize); executor.setMaxPoolSize(maxPoolSize); executor.setQueueCapacity(queueCapacity); executor.setThreadNamePrefix(ThreadNamePrefix); // rejection-policy:当pool已经达到max size的时候,如何处理新任务 // CALLER_RUNS:不在新线程中执行任务,而是有调用者所在的线程来执行 executor.setRejectedExecutionHandler(new ThreadPoolExecutor.CallerRunsPolicy()); executor.initialize(); return executor; }
}
- 1
- 2
- 3
- 4
- 5
- 6
- 7
- 8
- 9
- 10
- 11
- 12
- 13
- 14
- 15
- 16
- 17
- 18
- 19
- 20
- 21
- 22
- 23
@Named和Spring的@Component功能相同。@Named可以有值,如果没有值生成的Bean名称默认和类名相同。比如
@Named public class Person
或
@Named(“cc”) public class Person
11. @Inject
使用@Inject需要引用javax.inject.jar,它与Spring没有关系,是jsr330规范。
与@Autowired有互换性。
12. @Singleton
只要在类上加上这个注解,就可以实现一个单例类,不需要自己手动编写单例实现类。
@Valid
网上一大片使用@Valid失效不能用的情况。为什么呢?
1.@Valid必需使用在以@RequestBody接收参数的情况下。
2.使用ajax以POST方式提示数据,禁止用Fiddler以及浏览器直接访问的方式测试接口
3.用<mvc:annotation-driven />添加注解驱动。
4.@Valid是应用在javabean上的校验。
5.- <dependency>
- <groupId>org.hibernate</groupId>
- <artifactId>hibernate-validator</artifactId>
- <version>4.2.0.Final</version>
- </dependency>
- <dependency>
- <groupId>com.fasterxml.jackson.core</groupId>
- <artifactId>jackson-annotations</artifactId>
- <version>2.5.3</version>
- </dependency>
- <dependency>
- <groupId>com.fasterxml.jackson.core</groupId>
- <artifactId>jackson-core</artifactId>
- <version>2.5.3</version>
- </dependency>
- <dependency>
- <groupId>com.fasterxml.jackson.core</groupId>
- <artifactId>jackson-databind</artifactId>
- <version>2.5.3</version>
- </dependency>
- <dependency>
- <groupId>org.codehaus.jackson</groupId>
- <artifactId>jackson-mapper-asl</artifactId>
- <version>1.9.8</version>
- </dependency>
- <dependency>
- <groupId>com.fasterxml.jackson.module</groupId>
- <artifactId>jackson-module-jaxb-annotations</artifactId>
- <version>2.5.3</version>
<dependency>

<groupId>org.hibernate</groupId>

<artifactId>hibernate-validator</artifactId>

<version>4.2.0.Final</version>

</dependency>

<dependency>

<groupId>com.fasterxml.jackson.core</groupId>

<artifactId>jackson-annotations</artifactId>

<version>2.5.3</version>

</dependency>

<dependency>

<groupId>com.fasterxml.jackson.core</groupId>

<artifactId>jackson-core</artifactId>

<version>2.5.3</version>

</dependency>

<dependency>

<groupId>com.fasterxml.jackson.core</groupId>

<artifactId>jackson-databind</artifactId>

<version>2.5.3</version>

</dependency>

<dependency>

<groupId>org.codehaus.jackson</groupId>

<artifactId>jackson-mapper-asl</artifactId>

<version>1.9.8</version>

</dependency>

<dependency>

<groupId>com.fasterxml.jackson.module</groupId>

<artifactId>jackson-module-jaxb-annotations</artifactId>

<version>2.5.3</version>
- 1
- 2
- 3
- 4
- 5
- 6
- 7
- 8
- 9
- 10
- 11
- 12
- 13
- 14
- 15
- 16
- 17
- 18
- 19
- 20
- 21
- 22
- 23
- 24
- 25
- 26
- 27
- 28
- 29
这些jar包是需要的。@Valid是使用hibernate validation的时候使用,可参数下面介绍的@RequestBody
6.@Valid下后面紧跟BindingResult result,验证结果保存在result
例如:
- @RequestMapping(“/test”)
- public String testValid(@Valid User user, BindingResult result){
- if (result.hasErrors()){
- List<ObjectError> errorList = result.getAllErrors();
- for(ObjectError error : errorList){
- System.out.println(error.getDefaultMessage());
- }
- }
- return “test”;
- }
@RequestMapping("/test")

public String testValid(@Valid User user, BindingResult result){

if (result.hasErrors()){

List<ObjectError> errorList = result.getAllErrors();

for(ObjectError error : errorList){

System.out.println(error.getDefaultMessage());

}

}

return “test”;

}
- 1
- 2
- 3
- 4
- 5
- 6
- 7
- 8
- 9
- 10
在入参User上添加了@Valid做校验,在User类里属性上实行实际的特定校验。
例如在User的name属性上加
@NotBlank
private String name;
全部参数校验如下:
空检查
@Null 验证对象是否为null
@NotNull 验证对象是否不为null, 无法查检长度为0的字符串
@NotBlank 检查约束字符串是不是Null还有被Trim的长度是否大于0,只对字符串,且会去掉前后空格.
@NotEmpty 检查约束元素是否为NULL或者是EMPTY.
Booelan检查
@AssertTrue 验证 Boolean 对象是否为 true
@AssertFalse 验证 Boolean 对象是否为 false
长度检查
@Size(min=, max=) 验证对象(Array,Collection,Map,String)长度是否在给定的范围之内
@Length(min=, max=)验证注解的元素值长度在min和max区间内
日期检查
@Past 验证 Date 和 Calendar 对象是否在当前时间之前
@Future 验证 Date 和 Calendar 对象是否在当前时间之后
@Pattern 验证 String 对象是否符合正则表达式的规则
数值检查,建议使用在Stirng,Integer类型,不建议使用在int类型上,因为表单值为“”时无法转换为int,但可以转换为Stirng为”“,Integer为null
@Min(value=””) 验证 Number 和 String 对象是否大等于指定的值
@Max(value=””) 验证 Number 和 String 对象是否小等于指定的值
@DecimalMax(value=值) 被标注的值必须不大于约束中指定的最大值. 这个约束的参数是一个通过BigDecimal定义的最大值的字符串表示.小数存在精度
@DecimalMin(value=值) 被标注的值必须不小于约束中指定的最小值. 这个约束的参数是一个通过BigDecimal定义的最小值的字符串表示.小数存在精度
@Digits 验证 Number 和 String 的构成是否合法
@Digits(integer=,fraction=)验证字符串是否是符合指定格式的数字,interger指定整数精度,fraction指定小数精度。
@Range(min=, max=) 检查数字是否介于min和max之间.
@Range(min=10000,max=50000,message=”range.bean.wage”)
private BigDecimal wage;
@Valid 递归的对关联对象进行校验, 如果关联对象是个集合或者数组,那么对其中的元素进行递归校验,如果是一个map,则对其中的值部分进行校验.(是否进行递归验证)
@CreditCardNumber信用卡验证
@Email 验证是否是邮件地址,如果为null,不进行验证,算通过验证。
@ScriptAssert(lang=,script=, alias=)
@URL(protocol=,host=,port=,regexp=, flags=)
@Validated
@Valid是对javabean的校验,如果想对使用@RequestParam方式接收参数方式校验使用@Validated
使用@Validated的步骤:
第一步:定义全局异常,让该全局异常处理器能处理所以验证失败的情况,并返回给前台失败提示数据。如下,该类不用在任何xml里配置。- import javax.validation.ValidationException;
- import org.springframework.context.annotation.Bean;
- import org.springframework.http.HttpStatus;
- import org.springframework.stereotype.Component;
- import org.springframework.validation.beanvalidation.MethodValidationPostProcessor;
- import org.springframework.web.bind.annotation.ControllerAdvice;
- import org.springframework.web.bind.annotation.ExceptionHandler;
- import org.springframework.web.bind.annotation.ResponseBody;
- import org.springframework.web.bind.annotation.ResponseStatus;
- @ControllerAdvice
- @Component
- public class GlobalExceptionHandler {
- @Bean
- public MethodValidationPostProcessor methodValidationPostProcessor() {
- return new MethodValidationPostProcessor();
- }
- @ExceptionHandler
- @ResponseBody
- @ResponseStatus(HttpStatus.BAD_REQUEST)
- public String handle(ValidationException exception) {
- System.out.println(“bad request, ” + exception.getMessage());
- return “bad request, ” + exception.getMessage();
- }
- }
import javax.validation.ValidationException;
import org.springframework.context.annotation.Bean;
import org.springframework.http.HttpStatus;
import org.springframework.stereotype.Component;
import org.springframework.validation.beanvalidation.MethodValidationPostProcessor;
import org.springframework.web.bind.annotation.ControllerAdvice;
import org.springframework.web.bind.annotation.ExceptionHandler;
import org.springframework.web.bind.annotation.ResponseBody;
import org.springframework.web.bind.annotation.ResponseStatus;
@ControllerAdvice
@Component
public class GlobalExceptionHandler {
@Bean
public MethodValidationPostProcessor methodValidationPostProcessor() {
return new MethodValidationPostProcessor();
}
@ExceptionHandler
@ResponseBody
@ResponseStatus(HttpStatus.BAD_REQUEST)
public String handle(ValidationException exception) {
    System.out.println("bad request, " + exception.getMessage());
    return "bad request, " + exception.getMessage();
}
}
- 1
- 2
- 3
- 4
- 5
- 6
- 7
- 8
- 9
- 10
- 11
- 12
- 13
- 14
- 15
- 16
- 17
- 18
- 19
- 20
- 21
- 22
- 23
- 24
- 25
- 26
- 27
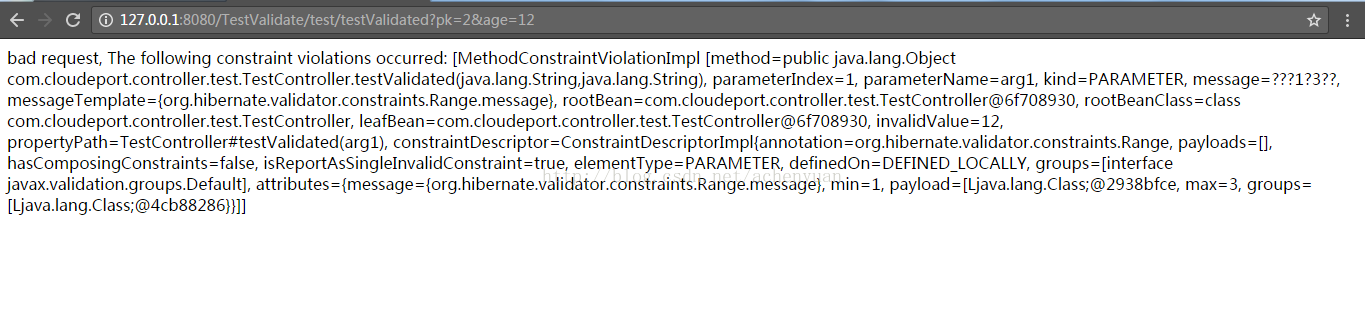
第二步。在XXController.java头上添加@Validated,然后在@RequestParam后台使用上面介绍的验证注解,比如@NotBlank,@Rank.
如下:
- @Controller
- @RequestMapping(“/test”)
- @Validated
- public class TestController extends BaseController {
- @RequestMapping(value = “testValidated”, method = RequestMethod.GET)
- @ResponseBody
- @ResponseStatus(HttpStatus.BAD_REQUEST)
- public Object testValidated(@RequestParam(value = “pk”, required = true) @Size(min = 1, max = 3) String pk,
- @RequestParam(value = “age”, required = false) @Range(min = 1, max = 3) String age) {
- try {
- return “pk:” + pk + ”,age=” + age;
- } catch (Throwable t) {
- return buildFailure(“消息列表查询失败”);
- }
- }
- }
@Controller
@RequestMapping("/test")
@Validated
public class TestController extends BaseController {@RequestMapping(value = "testValidated", method = RequestMethod.GET) @ResponseBody @ResponseStatus(HttpStatus.BAD_REQUEST) public Object testValidated(@RequestParam(value = "pk", required = true) @Size(min = 1, max = 3) String pk, @RequestParam(value = "age", required = false) @Range(min = 1, max = 3) String age) { try { return "pk:" + pk + ",age=" + age; } catch (Throwable t) { return buildFailure("消息列表查询失败"); } }
}
- 1
- 2
- 3
- 4
- 5
- 6
- 7
- 8
- 9
- 10
- 11
- 12
- 13
- 14
- 15
- 16
- 17
- 18
当入非法参数是,会被全局处理器拦截到,(Spring切面编程方式),如果参数非法即刻给前台返回错误数据。
测试:http://127.0.0.1:8080/TestValidate/test/testValidated?pk=2&age=12
返回:
注意
@Valid是使用hibernateValidation.jar做校验
@Validated是只用springValidator校验机制使用
gitHub下载地址@Validated与@RequestBody结合使用时,在接口方法里要增加@Valid。例如:
- public Object edit(@Valid @RequestBody AddrRo addrRo) {……}
public Object edit(@Valid @RequestBody AddrRo addrRo) {…}
14.@RequestBody
@RequestBody(required=true)
:有个默认属性required,默认是true,当body里没内容时抛异常。
application/x-www-form-urlencoded:窗体数据被编码为名称/值对。这是标准的编码格式。这是默认的方式
multipart/form-data:窗体数据被编码为一条消息,页上的每个控件对应消息中的一个部分。二进制数据传输方式,主要用于上传文件
注意:必需使用POST方式提交参数,需要使用ajax方式请求,用Fiddler去模拟post请求不能。
引用jar包:
Spring相关jar包。
以及
- <dependency>
- <groupId>com.fasterxml.jackson.core</groupId>
- <artifactId>jackson-annotations</artifactId>
- <version>2.5.3</version>
- </dependency>
- <dependency>
- <groupId>com.fasterxml.jackson.core</groupId>
- <artifactId>jackson-core</artifactId>
- <version>2.5.3</version>
- </dependency>
- <dependency>
- <groupId>com.fasterxml.jackson.core</groupId>
- <artifactId>jackson-databind</artifactId>
- <version>2.5.3</version>
- </dependency>
<dependency>

<groupId>com.fasterxml.jackson.core</groupId>

<artifactId>jackson-annotations</artifactId>

<version>2.5.3</version>

</dependency>

<dependency>

<groupId>com.fasterxml.jackson.core</groupId>

<artifactId>jackson-core</artifactId>

<version>2.5.3</version>

</dependency>

<dependency>

<groupId>com.fasterxml.jackson.core</groupId>

<artifactId>jackson-databind</artifactId>

<version>2.5.3</version>

</dependency>
- 1
- 2
- 3
- 4
- 5
- 6
- 7
- 8
- 9
- 10
- 11
- 12
- 13
- 14
- 15
dispatchServlet-mvc.xml配置
第一种,直接配置MappingJackson2HttpMessageCoverter:
- <bean class=“org.springframework.web.servlet.mvc.method.annotation.RequestMappingHandlerMapping”></bean>
- <bean class=“org.springframework.web.servlet.mvc.method.annotation.RequestMappingHandlerAdapter”>
- <property name=“messageConverters”>
- <bean class=“org.springframework.http.converter.json.MappingJackson2HttpMessageConverter”></bean>
- </property>
- </bean>
<bean class=“org.springframework.web.servlet.mvc.method.annotation.RequestMappingHandlerMapping”></bean>

<bean class=“org.springframework.web.servlet.mvc.method.annotation.RequestMappingHandlerAdapter”>

<property name=“messageConverters”>

<bean class=“org.springframework.http.converter.json.MappingJackson2HttpMessageConverter”></bean>

</property>

</bean>
- 1
- 2
- 3
- 4
- 5
- 6
第二种:<mvc:annotation-driven/> 就不用配置上面bean,默认会配好。
Ajax请求:
- function testRequestBody() {
- var o = {“status”:9};
- jQuery.ajax({
- type: “POST”,
- url: “http://127.0.0.1:8080/TestValidate/test/testValid”,
- xhrFields:{
- withCredentials:true
- },
- data: JSON.stringify(o),
- contentType: “application/json”,
- dataType: “json”,
- async: false,
- success:function (data) {
- console.log(data);
- },
- error: function(res) {
- console.log(res);
- }
- });
- }
function testRequestBody() {
var o = {“status”:9};
jQuery.ajax({
type: “POST”,
url: “http://127.0.0.1:8080/TestValidate/test/testValid”,
xhrFields:{
withCredentials:true
},
data: JSON.stringify(o),
contentType: “application/json”,
dataType: “json”,
async: false,
success:function (data) {
console.log(data);
},error: function(res) { console.log(res); } });
}
- 1
- 2
- 3
- 4
- 5
- 6
- 7
- 8
- 9
- 10
- 11
- 12
- 13
- 14
- 15
- 16
- 17
- 18
- 19
- 20
- 21
后台XXXcontroller.java:
- @RequestMapping(value=“/ testValid ”,method=RequestMethod.POST)
- @ResponseBody
- public Object setOrderInfo(@RequestBody InfoVO infoVO,HttpServletRequest request, HttpServletResponse response){
- InfoVO cVo = getInfoVo(infoVO);
- return “success”;
- }
@RequestMapping(value="/ testValid ",method=RequestMethod.POST)

@ResponseBody

public Object setOrderInfo(@RequestBody InfoVO infoVO,HttpServletRequest request, HttpServletResponse response){

InfoVO cVo = getInfoVo(infoVO);

return “success”;

}
- 1
- 2
- 3
- 4
- 5
- 6
开发时,不是报415,就是400错误,头都大了。还是细节没做到位,注意下面几个要点:
Content-Type必需是application/json
需要jackson-databind.jar
<mvc:annotation-driven/>要配置或直接配置bean
XXXController.jar在post方式接收数据
最最重要的,使用ajax以post方式请求。不能用Fiddler模拟,不然会出错。
是Cross-Origin ResourceSharing(跨域资源共享)的简写
作用是解决跨域访问的问题,在Spring4.2以上的版本可直接使用。在类上或方法上添加该注解
例如:
- @CrossOrigin
- public class TestController extends BaseController {
- XXXX
- }
@CrossOrigin
public class TestController extends BaseController {XXXX
}
- 1
- 2
- 3
- 4
- 5
- 6
如果失效则可能方法没解决是GET还是POST方式,指定即可解决问题。
作用是提取和解析请求中的参数。@RequestParam支持类型转换,类型转换目前支持所有的基本Java类型
@RequestParam([value=”number”], [required=false]) String number
将请求中参数为number映射到方法的number上。required=false表示该参数不是必需的,请求上可带可不带。
17. @PathVariable,@RequestHeader,@CookieValue,@RequestParam, @RequestBody,@SessionAttributes, @ModelAttribute;
@PathVariable:处理requet uri部分,当使用@RequestMapping URI template 样式映射时, 即someUrl/{paramId}, 这时的paramId可通过 @Pathvariable注解绑定它传过来的值到方法的参数上
例如:
- @Controller
- @RequestMapping(“/owners/{a}”)
- public class RelativePathUriTemplateController {
- @RequestMapping(“/pets/{b}”)
- public void findPet(@PathVariable(“a”) String a,@PathVariable String b, Model model) {
- // implementation omitted
- }
- }
@Controller

@RequestMapping("/owners/{a}")

public class RelativePathUriTemplateController {

@RequestMapping("/pets/{b}")

public void findPet(@PathVariable(“a”) String a,@PathVariable String b, Model model) {

// implementation omitted

}

}
- 1
- 2
- 3
- 4
- 5
- 6
- 7
- 8
@RequestHeader,@CookieValue: 处理request header部分的注解
将头部信息绑定到方法参数上:
- @RequestMapping(“/test”)
- public void displayHeaderInfo(@RequestHeader(“Accept-Encoding”) String encoding,
- @RequestHeader(“Keep-Alive”)long keepAlive) {
- //…
- }
@RequestMapping("/test")

public void displayHeaderInfo(@RequestHeader(“Accept-Encoding”) String encoding,

@RequestHeader(“Keep-Alive”)long keepAlive)  {
//…
}
- 1
- 2
- 3
- 4
- 5
- 6
- 7
//将cookie里JSESSIONID绑定到方法参数上
- @RequestMapping(“/test”)
- public void displayHeaderInfo(@CookieValue(“JSESSIONID”) String cookie) {
- //…
- }
@RequestMapping("/test")

public void displayHeaderInfo(@CookieValue(“JSESSIONID”) String cookie)  {
//…
}
- 1
- 2
- 3
- 4
- 5
- 6
@RequestParam, @RequestBody: 处理request body部分的注解,已经介绍过,不用介绍了。
@SessionAttributes,@ModelAttribute:处理attribute类型是注解。XXXX
配置bean的作用域。
@Controller
@RequestMapping(“/test”)
@Scope(“prototype”)
public class TestController {
}
默认是单例模式,即@Scope(“singleton”),
singleton:单例,即容器里只有一个实例对象。
prototype:多对象,每一次请求都会产生一个新的bean实例,Spring不无法对一个prototype bean的整个生命周期负责,容器在初始化、配置、装饰或者是装配完一个prototype实例后,将它交给客户端,由程序员负责销毁该对象,不管何种作用域,容器都会调用所有对象的初始化生命周期回调方法,而对prototype而言,任何配置好的析构生命周期回调方法都将不会被调用
request:对每一次HTTP请求都会产生一个新的bean,同时该bean仅在当前HTTP request内有效
web.xml增加如下配置:- <listener>
- <listener-class>org.springframework.web.context.request.RequestContextListener</listener-class>
- </listener>
- session:该针对每一次HTTP请求都会产生一个新的bean,同时该bean仅在当前HTTP session内有效。也要在web.xml配置如下代码:
- <listener>
- <listener-class>org.springframework.web.context.request.RequestContextListener</listener-class>
- </listener>
- global session:作用不大,可不用管他。
<listener>

<listener-class>org.springframework.web.context.request.RequestContextListener</listener-class>

</listener>

session:该针对每一次HTTP请求都会产生一个新的bean,同时该bean仅在当前HTTP session内有效。也要在web.xml配置如下代码:

<listener>

<listener-class>org.springframework.web.context.request.RequestContextListener</listener-class>

</listener>

global session:作用不大,可不用管他。
- 1
- 2
- 3
- 4
- 5
- 6
- 7
- 8
@ResponseStatus用于修饰一个类或者一个方法,修饰一个类的时候,一般修饰的是一个异常类,当处理器的方法被调用时,@ResponseStatus指定的code和reason会被返回给前端。value属性是http状态码,比如404,500等。reason是错误信息
当修改类或方法时,只要该类得到调用,那么value和reason都会被添加到response里
例如:
- @ResponseStatus(value=HttpStatus.FORBIDDEN, reason=“出现了错误”)
- public class UserException extends RuntimeException{
- XXXXX
- }
@ResponseStatus(value=HttpStatus.FORBIDDEN, reason=“出现了错误”)
public class UserException extends RuntimeException{XXXXX
}
- 1
- 2
- 3
- 4
- 5
当某处抛出UserException时,则会把value和reason返回给前端。
- @RequestMapping(“/testResponseStatus”)
- public String testResponseStatus(int i){
- if(i0)
- throw new UserNotMatchException();
- return “hello”;
- }
@RequestMapping("/testResponseStatus")

public String testResponseStatus(int i){

if(i0)

throw new UserNotMatchException();

return “hello”;

}
- 1
- 2
- 3
- 4
- 5
- 6
修改方法:
- @ControllerAdvice
- @Component
- public class GlobalExceptionHandler {
- @Bean
- public MethodValidationPostProcessor methodValidationPostProcessor() {
- return new MethodValidationPostProcessor();
- }
- @ExceptionHandler
- @ResponseBody
- @ResponseStatus(value=HttpStatus.BAD_REQUEST,reason=“哈哈”)
- public String handle(ValidationException exception) {
- System.out.println(“bad request, ” + exception.getMessage());
- return “bad request, ” + exception.getMessage();
- }
- }
@ControllerAdvice
@Component
public class GlobalExceptionHandler {
@Bean
public MethodValidationPostProcessor methodValidationPostProcessor() {
return new MethodValidationPostProcessor();
}@ExceptionHandler @ResponseBody @ResponseStatus(value=HttpStatus.BAD_REQUEST,reason="哈哈") public String handle(ValidationException exception) { System.out.println("bad request, " + exception.getMessage()); return "bad request, " + exception.getMessage(); }
}
- 1
- 2
- 3
- 4
- 5
- 6
- 7
- 8
- 9
- 10
- 11
- 12
- 13
- 14
- 15
- 16
结果如下:

正如上面所说,该方法得到调用,不论是否抛异常,都会把value和reason添加到response里。
总结:@ResponseStatus是为了在方法或类得到调用时将指定的code和reason添加到response里返前端,就像服务器常给我们报的404错误一样,我们可以自己指定高逼格错误提示。
20. @RestController
@RestController = @Controller + @ResponseBody。
是2个注解的合并效果,即指定了该controller是组件,又指定方法返回的是String或json类型数据,不会解决成jsp页面,注定不够灵活,如果一个Controller即有SpringMVC返回视图的方法,又有返回json数据的方法即使用@RestController太死板。
灵活的作法是:定义controller的时候,直接使用@Controller,如果需要返回json可以直接在方法中添加@ResponseBody
官方解释是:It is typically used todefine@ExceptionHandler,
@InitBinder, and@ModelAttribute methods that apply to all@RequestMapping methods
意思是:即把@ControllerAdvice注解内部使用@ExceptionHandler、@InitBinder、@ModelAttribute注解的方法应用到所有的 @RequestMapping注解的方法。非常简单,不过只有当使用@ExceptionHandler最有用,另外两个用处不大。
- @ControllerAdvice
- public class GlobalExceptionHandler {
- @ExceptionHandler(SQLException.class)
- @ResponseStatus(value=HttpStatus.INTERNAL_SERVER_ERROR,reason=”sql查询错误”)
- @ResponseBody
- public ExceptionResponse handleSQLException(HttpServletRequest request, Exception ex) {
- String message = ex.getMessage();
- return ExceptionResponse.create(HttpStatus.INTERNAL_SERVER_ERROR.value(), message);
- }
- }
@ControllerAdvice

public class GlobalExceptionHandler {

@ExceptionHandler(SQLException.class)

@ResponseStatus(value=HttpStatus.INTERNAL_SERVER_ERROR,reason=”sql查询错误”)

@ResponseBody

public ExceptionResponse handleSQLException(HttpServletRequest request, Exception ex) {

String message = ex.getMessage();

return ExceptionResponse.create(HttpStatus.INTERNAL_SERVER_ERROR.value(), message);

}

}
- 1
- 2
- 3
- 4
- 5
- 6
- 7
- 8
- 9
即表示让Spring捕获到所有抛出的SQLException异常,并交由这个被注解的handleSQLException方法处理,同时使用@ResponseStatus指定了code和reason写到response上,返回给前端。
22.元注解包括 @Retention @Target @Document @Inherited四种
元注解是指注解的注解,比如我们看到的 ControllerAdvice 注解定义如下。- @Target(ElementType.TYPE)
- @Retention(RetentionPolicy.RUNTIME)
- @Documented
- @Component
- public @interface ControllerAdvice {
- XXX
- }
@Target(ElementType.TYPE)

@Retention(RetentionPolicy.RUNTIME)

@Documented

@Component

public @interface ControllerAdvice {

XXX

}
- 1
- 2
- 3
- 4
- 5
- 6
- 7
@Retention: 定义注解的保留策略:
@Retention(RetentionPolicy.SOURCE) //注解仅存在于源码中,在class字节码文件中不包含
@Retention(RetentionPolicy.CLASS) //默认的保留策略,注解会在class字节码文件中存在,但运行时无法获得,
@Retention(RetentionPolicy.RUNTIME) //注解会在class字节码文件中存在,在运行时可以通过反射获取到
@Target:定义注解的作用目标:
@Target(ElementType.TYPE) //接口、类、枚举、注解
@Target(ElementType.FIELD) //字段、枚举的常量
@Target(ElementType.METHOD) //方法
@Target(ElementType.PARAMETER) //方法参数
@Target(ElementType.CONSTRUCTOR) //构造函数
@Target(ElementType.LOCAL_VARIABLE)//局部变量
@Target(ElementType.ANNOTATION_TYPE)//注解
@Target(ElementType.PACKAGE) ///包
由以上的源码可以知道,他的elementType 可以有多个,一个注解可以为类的,方法的,字段的等等
@Document:说明该注解将被包含在javadoc中
@Inherited:说明子类可以继承父类中的该注解
比如@Valid注解定义是

表示该注解只能用在方法,属性,构造函数及方法参数上。该注意会被编译到class里可通过反射得到。
处理映射请求的注解。用于类上,表示类中的所有响应请求的方法都是以该地址作为父路径。有6个属性。
1、 value, method:
value:指定请求的实际地址,指定的地址可以是URI Template 模式;
method:指定请求的method类型, GET、POST、PUT、DELETE等;
比如:
- @RequestMapping(value = “/testValid”, method = RequestMethod.POST)
- @ResponseBody
- public Object testValid(@RequestBody @Valid Test test,BindingResult result, HttpServletRequest request, HttpServletResponse response) {
- XXX
- }
@RequestMapping(value = “/testValid”, method = RequestMethod.POST)

@ResponseBody

public Object testValid(@RequestBody @Valid Test test,BindingResult result, HttpServletRequest request, HttpServletResponse response) {

XXX

}
- 1
- 2
- 3
- 4
- 5
value的uri值为以下三类:
A) 可以指定为普通的具体值;如@RequestMapping(value =”/testValid”)
B) 可以指定为含有某变量的一类值;如@RequestMapping(value=”/{day}”)
C) 可以指定为含正则表达式的一类值;如@RequestMapping(value=”/{textualPart:[a-z-]+}.{numericPart:[\d]+}”) 可以匹配…/chenyuan122912请求。
2、 consumes,produces:
consumes: 指定处理请求的提交内容类型(Content-Type),例如@RequestMapping(value = ”/test”, consumes=”application/json”)处理application/json内容类型
produces: 指定返回的内容类型,仅当request请求头中的(Accept)类型中包含该指定类型才返回;
3 params、headers:
params: 指定request中必须包含某些参数值是,才让该方法处理。
例如:
- @RequestMapping(value = “/test”, method = RequestMethod.GET, params=“name=chenyuan”)
- public void findOrd(String name) {
- // implementation omitted
- }
@RequestMapping(value = “/test”, method = RequestMethod.GET, params=“name=chenyuan”)

public void findOrd(String name) {

// implementation omitted

}
- 1
- 2
- 3
- 4
仅处理请求中包含了名为“name”,值为“chenyuan”的请求.
headers: 指定request中必须包含某些指定的header值,才能让该方法处理请求。
- @RequestMapping(value = “/test”, method = RequestMethod.GET, headers=“Referer=www.baidu.com”)
- public void findOrd(String name) {
- // implementation omitted
- }
@RequestMapping(value = “/test”, method = RequestMethod.GET, headers=“Referer=www.baidu.com”)

public void findOrd(String name) {

// implementation omitted

}
- 1
- 2
- 3
- 4
仅处理request的header中包含了指定“Refer”请求头和对应值为“www.baidu.com”的请求
另赠spring提供的注解:
24. @GetMapping和@PostMapping
@GetMapping(value = “page”)等价于@RequestMapping(value = “page”, method = RequestMethod.GET)
@PostMapping(value = “page”)等价于@RequestMapping(value = “page”, method = RequestMethod.POST)
下篇文章会研究自定义注解,自己动手试试注解的魅力。
</div>
- 1
            <link href="https://csdnimg.cn/release/phoenix/mdeditor/markdown_views-e44c3c0e64.css" rel="stylesheet">
                </div>
</article>
<div class="content" style="width: 712px;">
	<a href="https://blog.csdn.net/weixin_40753536/article/details/81285046" target="_blank" title="SpringBoot注解最全详解(整合超详细版本)">
	<h4 class="text-truncate oneline" style="width: 552px;">
			<em>Spring</em>Boot<em>注解</em><em>最全</em>详解(整合超详细版本)		</h4>
	<div class="info-box d-flex align-content-center">
		<p class="date-and-readNum oneline">
			<span class="date hover-show">07-30</span>
			<span class="read-num hover-hide">
				阅读数
				4万+</span>
			</p>
		</div>
	</a>
	<p class="content" style="width: 712px;">
		<a href="https://blog.csdn.net/weixin_40753536/article/details/81285046" target="_blank" title="SpringBoot注解最全详解(整合超详细版本)">
			<span class="desc oneline">使用注解的优势:1.采用纯java代码,不在需要配置繁杂的xml文件2.在配置中也可享受面向对象带来的好处3.类型安全对重构可以提供良好的支持4.减少复杂配置文件的同时亦能享受到springIoC容器...</span>
		</a>
		<span class="blog_title_box oneline ">
								<span class="type-show type-show-blog type-show-after">博文</span>
										<a target="_blank" href="https://blog.csdn.net/weixin_40753536">来自:	<span class="blog_title"> 浩瀚星空</span></a>
											</span>
	</p>
</div>
</div>
Spring:各种注解
05-29 阅读数 6673
1,@Conditional 按照一定的条件进行判断,当满足条件的时候,bean才注册到ioc容器中;publicclassWindowsConditionalimplementsCondition... 博文 来自: waterflying2015的博客
spring 注解标签总结
08-29 阅读数 1665
声明Bean的注解:@Component:组件,没有明确的角色@Service:在业务逻辑层(service层)使用@Repository:在数据访问层(dao层)使用.@Controller:在展现... 博文 来自: HelloWorld搬运工
<div class="recommend-item-box recommend-ad-box"><div id="kp_box_59" data-pid="59" data-track-view="{"mod":"kp_popu_59-78","con":",,"}" data-track-click="{"mod":"kp_popu_59-78","con":",,"}" data-report-click="{"mod":"kp_popu_59-78","keyword":""}"><script type="text/javascript">
(function() {
var s = "_" + Math.random().toString(36).slice(2);
document.write('<div style="" id="' + s + '"></div>');
(window.slotbydup = window.slotbydup || []).push({
id: "u3491668",
container: s
});
})();
Spring常用注解系列一
05-05 阅读数 522
Spring注解环境说明:spring4.3.13.RELEASE,jdk1.8一、容器1、组件注册1、@Configuration@Bean组件注册@Configuration标识的类为配置类,其... 博文 来自: hobart的专栏
spring中注解的实现原理
06-07 阅读数 259
@Autowired和@Resource的区别: 在Java中使用@Autowired和@Resource注解进行装配,这两个注解分别是:1、@Autowired按照默认类型(类名称)装配依赖对象,默... 博文 来自: 心态决定一切
史上最全的java spring注解,没有之一
05-27 阅读数 3万+
注解是个好东西,但好东西我们也是看见过,整理过,理解过,用过才知道好。不求我们每个都记住,但求保有印象,在需要的时候能提取出来再查找相关资料,平时工作就不会显得那么被动了。1.@Configurati... 博文 来自: 陈袁的博客
Spring 3.0 注解注入详解
05-31 阅读数 399
一、各种注解方式1.@Autowired注解(不推荐使用,建议使用@Resource)@Autowired可以对成员变量、方法和构造函数进行标注,来完成自动装配的工作。@Autowired的标注位置不... 博文 来自: 我不乖的专栏
使用 Spring 2.5 注释驱动的 IoC 功能
08-19 阅读数 478
基于注释(Annotation)的配置有越来越流行的趋势,Spring2.5顺应这种趋势,提供了完全基于注释配置Bean、装配Bean的功能,您可以使用基于注释的SpringIoC替换原来基于XML的... 博文 来自: cool_rain_man的专栏
史上最全的java spring注解,没有之一 - kas_uo的博客 - CSDN博客
3-10
史上最全的java spring注解,没有之一2018年03月20日 14:50:51 kas_uo 阅读数:259 注解是个好东西,但好东西我们也是看见过,整理过,理解过,用过才知道好。...
mybatis的注解—很全 - 随风飘扬 - CSDN博客
7-20
2018年06月21日 13:38:22 随风飘扬中 阅读数 4181 注解有下面这些: 注解 ...史上最全spring注解,没有之一 jerry11112:@Controller, @Service, @Repository...
<div class="recommend-item-box recommend-ad-box"><div id="kp_box_60" data-pid="60" data-track-view="{"mod":"kp_popu_60-43","con":",,"}" data-track-click="{"mod":"kp_popu_60-43","con":",,"}" data-report-view="{"mod":"kp_popu_60-43","keyword":""}" data-report-click="{"mod":"kp_popu_60-43","keyword":""}"><div class="mediav_ad"><newsfeed class="newsfeed QIHOO__WEB__SO__1565599628827_710" id="QIHOO__WEB__SO__1565599628827_710" style="display:block;margin:0;padding:0;border:none;width:900px;height:84px;overflow-y:hidden;overflow-x:hidden;position:relative;text-align:left;"><info-div id="QIHOO__WEB__SO__1565599628827_710-info" style="zoom:1"><info-div class="QIHOO__WEB__SO__1565599628827_710 singleImage clk" data-href="https://ssxd.mediav.com/s?type=2&r=20&mv_ref=blog.csdn.net&enup=CAAB246DeggAAnqDjtsA&mvid=MTY1NjU1MTQyNDk0NzE4MTEwNzAwMTk&bid=13863b037c562b2d&price=AAAAAF1RJ40AAAAAAAIE9eq7x02LcKrRTT9HDA==&finfo=DAABCAABAAAALQgAAgAAAC4EAAM/TUbIHpo+PgAIAAIAAAADCgADES1KOMuwYFoIAAQAAAAyBgAGG4sGAAoAAAgADgAAACIKAA8AAAAAAAhkcwA&ugi=FcTgigEVyNtrTBUCFSgVKBUAABXQsY7LDCXIARaA9fmb8vnHBRwW5pKVi9633KcEFQAAAA&uai=FeTGlAIlAhUEFvDhz+STyKCtIhXyCCWBmdm3AiUAFRoUABwWmbawxYKKnMvtARUAAAA&ubi=FZDmJBW+2sYCFdbnqBcVnue+WBUGFSIWmo3H+hQW8OHky52Opa0iNAIWqOAQJQYVrNz4oAUVngEVACQUFpDmJAA&clickid=0&cpx=__OFFSET_X__&cpy=__OFFSET_Y__&cs=__EVENT_TIME_START__&ce=__EVENT_TIME_END__&ldtype=2&csign2=OpO4Um1u22-=&url=http%3A%2F%2Fy.code.17tanwan.com%2Fhtmlcode%2F37386.html" data-clk="https://max-l.mediav.com/rtb?type=3&ver=1&v=CGQSEDEzODYzYjAzN2M1NjJiMmQYsqOKASCisEUoAWIXMTY1NjU1MTQyNDk0NzE4MTEwNzAwMTlwAA&k=1eUl9gAAAAA=&i=NIu-uUZM9937&exp=BQBECQBEAQJEEgJEEQBCEABDJQBD&x=__OFFSET_X__&y=__OFFSET_Y__&st=__EVENT_TIME_START__&et=__EVENT_TIME_END__&adw=__ADSPACE_W__&adh=__ADSPACE_H__&tc=&turl=">
<info-div class="wrap">
<info-div class="singleImage-img singleImage-img-left">
<info-div class="img" style="background-image:url(https://s3m.mediav.com/galileo/301448-abeeb273809c18bd15e1df9bcf4a4f25.gif)"><info-div class="ads-tag"></info-div></info-div>
</info-div>
<info-div class="singleImage-body singleImage-body-left">
<info-div class="singleImage-title">陈小春哭诉:北京土豪怒砸2亿请他代言这款0充值正版传奇!真经典!</info-div>
<info-div class="singleImage-desc">贪玩游戏 · 顶新</info-div>
</info-div>
精进Spring—Spring常用注解【经典总结】
07-29 阅读数 5万+
Spring的一个核心功能是IOC,就是将Bean初始化加载到容器中,Bean是如何加载到容器的,可以使用Spring注解方式或者SpringXML配置方式。Spring注解方式减少了配置文件内容,更... 博文 来自: 阿飞云
Spring:各种注解 - waterflying2015的博客 - CSDN博客
4-19
史上最全的java spring注解,没有之一 05-27 阅读数 3万+ 注解是个好东西...博文 来自: 随风飘扬 Spring - 注解解析器 08-13 阅读数 1428 SpringBoo...
你可能使用了Spring最不推荐的注解方式 - 程序新视界 - CSDN博客
7-6
史上最全spring注解,没有之一 06-22 阅读数 8277 注解是个好东西,但好东西...博文 来自: 随风飘扬 Spring注解学习笔记 08-23 阅读数 477 什么是注解...
<div class="recommend-item-box blog-expert-recommend-box" style="">
<div class="d-flex">
<div class="blog-expert-recommend">
<div class="blog-expert">
<div class="blog-expert-flexbox"></div>
</div>
</div>
</div>
</div><div class="recommend-item-box baiduSearch recommend-box-ident" data-report-view="{"mod":"popu_614","dest":"https://blog.csdn.net/qq_41582642/article/details/82147223","strategy":"searchFromBaidu1","index":"5"}" data-report-click="{"mod":"popu_614","dest":"https://blog.csdn.net/qq_41582642/article/details/82147223","strategy":"searchFromBaidu1","index":"5"}" data-track-view="{"mod":"popu_614","dest":"https://blog.csdn.net/qq_41582642/article/details/82147223","strategy":"searchFromBaidu1","index":4,"extend1":"_"}" data-track-click="{"mod":"popu_614","dest":"https://blog.csdn.net/qq_41582642/article/details/82147223","strategy":"searchFromBaidu1","index":4,"extend1":"_"}" data-flg="true"> <a href="https://blog.csdn.net/qq_41582642/article/details/82147223" target="_blank"> <h4 class="text-truncate oneline" style="width: 623px;"><em>spring</em><em>注解</em>详解,看完你就都全懂了!! - qq_41582642的博..._CSDN博客</h4> <div class="info-box d-flex align-content-center"> <p> <span class="date">7-20</span> </p> </div> <p class="content oneline" style="width: 712px;">史上最全spring注解,没有之一 06-22 阅读数 1万+ 注解是个好东西,但好...博文 来自: 随风飘扬 Spring注解原理的详细剖析与实现 08-14 阅读数 404 ...</p> </a> </div><div class="recommend-item-box baiduSearch recommend-box-ident" data-report-view="{"mod":"popu_614","dest":"https://blog.csdn.net/chenmh12/article/details/90166743","strategy":"searchFromBaidu1","index":"6"}" data-report-click="{"mod":"popu_614","dest":"https://blog.csdn.net/chenmh12/article/details/90166743","strategy":"searchFromBaidu1","index":"6"}" data-track-view="{"mod":"popu_614","dest":"https://blog.csdn.net/chenmh12/article/details/90166743","strategy":"searchFromBaidu1","index":5,"extend1":"_"}" data-track-click="{"mod":"popu_614","dest":"https://blog.csdn.net/chenmh12/article/details/90166743","strategy":"searchFromBaidu1","index":5,"extend1":"_"}" data-flg="true"> <a href="https://blog.csdn.net/chenmh12/article/details/90166743" target="_blank"> <h4 class="text-truncate oneline" style="width: 623px;"><em>最全</em>的<em>Spring</em><em>注解</em>详解 - chenmh12的博客 - CSDN博客</h4> <div class="info-box d-flex align-content-center"> <p> <span class="date">5-13</span> </p> </div> <p class="content oneline" style="width: 712px;">史上最全spring注解,没有之一 06-22 阅读数 2397 注解是个好东西,但好东西...博文 来自: 随风飘扬 spring注解大全解析 spring springboot注解等 06-15 阅...</p> </a> </div>
Spring2.5 注解介绍(3.0通用)(
02-28 阅读数 876
1-装配注解@Resource@Autowired •建议使用@Resource,不推荐使用@Autowired。@Resource的作用相当于@Autowired,只不过@Autowired按byT... 博文 来自: springsen的专栏
Jmeter:修改内存配置
10-14 阅读数 2万+
在压测过程中jmeter报内存溢出,可能的原因有很多。要注意下面三点:1、单击压测过程中使用过多的线程,官网建议1000-2000。具体看机器的配置和启动应用的情况。(AsingleJMetercli... 博文 来自: 测试蜗牛,一步一个脚印
Spring全注解式开发 - 爬行的小乌龟的博客 - CSDN博客
7-20
史上最全的java spring注解,没有之一 05-27 阅读数 3万+ 注解是个好...博文 来自: 随风飘扬 spring中注解的实现原理 06-07 阅读数 168 @Autowired...
Spring注解原理的详细剖析与实现
12-03 阅读数 1万+
一、注解的基本概念和原理及其简单实用注解(Annotation)提供了一种安全的类似注释的机制,为我们在代码中添加信息提供了一种形式化得方法,使我们可以在稍后某个时刻方便的使用这些数据(通过解析注解来... 博文 来自: rommel1的专栏
<div class="recommend-item-box recommend-ad-box"><div id="kp_box_61" data-pid="61" data-track-view="{"mod":"kp_popu_61-622","con":",,"}" data-track-click="{"mod":"kp_popu_61-622","con":",,"}" data-report-view="{"mod":"kp_popu_61-622","keyword":""}" data-report-click="{"mod":"kp_popu_61-622","keyword":""}"><div id="_cyxjv6vf45g"><div style="padding:0px;"><iframe width="852" frameborder="0" height="66" scrolling="no" src="//pos.baidu.com/s?hei=66&wid=852&di=u3600846&ltu=https%3A%2F%2Fblog.csdn.net%2Fweixin_39805338%2Farticle%2Fdetails%2F80770472&psi=2fbf98dd3a065452c9734afefccb1104&col=zh-CN&tcn=1565599629&cmi=4&ti=%E5%8F%B2%E4%B8%8A%E6%9C%80%E5%85%A8spring%E6%B3%A8%E8%A7%A3%EF%BC%8C%E6%B2%A1%E6%9C%89%E4%B9%8B%E4%B8%80&cja=false&ant=0&tlm=1565599629&chi=1&cdo=-1&cpl=3&par=1920x1040&psr=1920x1080&ps=37647x515&dtm=HTML_POST&dis=0&cec=UTF-8&pis=-1x-1&prot=2&cce=true&ccd=24&dc=3&exps=111000,119009,110011&drs=1&dri=0&dai=1&ari=2&pss=1730x40885&tpr=1565599629139&ltr=https%3A%2F%2Fblog.csdn.net%2Fweixin_39805338%2Farticle%2Fdetails%2F80770472&cfv=0&pcs=1730x881"></iframe><ins id="cxqjuewqei" style="display:none;"></ins></div></div><script type="text/javascript" src="//rabc1.iteye.com/common/web/production/79m9.js?f=aszggcwz"></script></div></div><div class="recommend-item-box baiduSearch recommend-box-ident" data-report-view="{"mod":"popu_614","dest":"https://blog.csdn.net/m0_37984616/article/details/90901987","strategy":"searchFromBaidu1","index":"9"}" data-report-click="{"mod":"popu_614","dest":"https://blog.csdn.net/m0_37984616/article/details/90901987","strategy":"searchFromBaidu1","index":"9"}" data-track-view="{"mod":"popu_614","dest":"https://blog.csdn.net/m0_37984616/article/details/90901987","strategy":"searchFromBaidu1","index":8,"extend1":"_"}" data-track-click="{"mod":"popu_614","dest":"https://blog.csdn.net/m0_37984616/article/details/90901987","strategy":"searchFromBaidu1","index":8,"extend1":"_"}" data-flg="true"> <a href="https://blog.csdn.net/m0_37984616/article/details/90901987" target="_blank"> <h4 class="text-truncate oneline" style="width: 623px;"><em>Spring</em> <em>注解</em> - Crystal---的博客 - CSDN博客</h4> <div class="info-box d-flex align-content-center"> <p> <span class="date">6-27</span> </p> </div> <p class="content oneline" style="width: 712px;"></p> </a> </div>
springMVC的常用注解有哪些?
01-04 阅读数 1万+
1、@Controller @Controller 用于标记在一个类上,使用它标记的类就是一个SpringMVCController 对象。分发处理器将会扫描使用了该注解的类的方法,并检测该方法是... 博文 来自: 海粟先生
Spring中如何用注解的方式对有参构造器进行注入
08-21 阅读数 7377
一、我,,,无法对有参构造函数进行注入,但是可通过另一种注解方式达到相同效果(目的);@Component/**①spring注解模式*/publicclassClassName{ @Value(&q... 博文 来自: chenfan0741的博客
SpringMVC支持跨域访问的CORS配置
02-09 阅读数 2万+
目前主流的跨域访问技术有JSONP和CORS,JSONP的优势在于能够支持较老版本的浏览器,弱势在于只能处理GET的请求,而CORS的优势在于能处理所有类型的请求,但弱势在于不能处理IE8以下版本的请... 博文 来自: lishirong_李世荣的专栏
maven针对JAVA-SE项目的打包范例
03-22 阅读数 68
&lt;projectxmlns="http://maven.apache.org/POM/4.0.0"xmlns:xsi="http://www.w3.or... 博文 来自: wwty
<div class="recommend-item-box recommend-ad-box"><div id="kp_box_62" data-pid="62" data-track-view="{"mod":"kp_popu_62-1062","con":",,"}" data-track-click="{"mod":"kp_popu_62-1062","con":",,"}" data-report-view="{"mod":"kp_popu_62-1062","keyword":""}" data-report-click="{"mod":"kp_popu_62-1062","keyword":""}"><iframe src="https://kunpeng-sc.csdnimg.cn/#/preview/237?positionId=62&queryWord=" frameborder="0" width="100%" height="75px" scrolling="no"></iframe></div></div>
springmvc常用注解标签详解
04-29 阅读数 19
1、@Controller在SpringMVC中,控制器Controller负责处理由DispatcherServlet分发的请求,它把用户请求的数据经过业务处理层处理之后封装成一个Model,然后再... 博文 来自: weixin_30340775的博客
Spring——基于注解的配置
07-15 阅读数 2881
Spring注解配置从Spring2.5开始就可以使用注解来配置依赖注入。使用注解的方式使我们无需在XML中配置一个Bean引用,更加简单和方便。注解配置默认情况下在Spring中是关闭的,我们需要在... 博文 来自: Gavin
spring事务注解配置
10-24 阅读数 86
目前常用的spring事务配置就是两种,使用tx命名空间和使用注解配置。在使用注解配置的时候,你只需要在spring的上下文配置下加入两行代码:[code="xml"] [/cod... 博文 来自: 午夜阳光
Spring 注解版
12-12 阅读数 1341
Spring注解版@Bean—组件注册对于一个普通的bean:Personpackagecom.spring.annotation.bean;publicclassPerson{privateStri... 博文 来自: lymboy的博客
Spring 常用注解
03-29 阅读数 482
原地址:http://www.cnblogs.com/xiaoxi/p/5935009.html1、@Autowired@Autowired顾名思义,就是自动装配,其作用是为了消除代码Java代码里面... 博文 来自: 屎壳郎情调-成长日记
<div class="recommend-item-box recommend-ad-box"><div id="kp_box_63" data-pid="63" data-track-view="{"mod":"kp_popu_63-1059","con":",,"}" data-track-click="{"mod":"kp_popu_63-1059","con":",,"}" data-report-view="{"mod":"kp_popu_63-1059","keyword":""}" data-report-click="{"mod":"kp_popu_63-1059","keyword":""}"><iframe src="https://kunpeng-sc.csdnimg.cn/#/preview/234?positionId=63&queryWord=" frameborder="0" width="100%" height="75px" scrolling="no"></iframe></div></div>
Spring IOC注解开发
02-07 阅读数 3091
SpringIOC注解开发@(Spring)[Spring,ioc,注解]SpringIOC注解开发Spring的IOC的注解使用步骤创建项目引入jar包引入配置文件创建相关包和类将类的控制权交给Sp... 博文 来自: Switch的博客
spring注解及扩展
08-05 阅读数 932
1,spring配置注解spring建议通过注解配置,替代原xml配置方式。使用配置类替代xml配置的优势大体:1,xml配置维护容易出错而且不易检查,java配置类基于java语法检查,对于java... 博文 来自: 空心菜的专栏
最全的Spring注解详解
05-13 阅读数 283
@Configuration:配置类==配置文件,告诉Spring这是一个配置类@ComponentScan(value=“com.atguigu”,excludeFilters={@Filter(t... 博文 来自: chenmh12的博客
Java面试之Spring注解
09-20 阅读数 1077
Spring的一个核心功能是IOC,就是将Bean初始化加载到容器中,Bean是如何加载到容器的,可以使用Spring注解方式或者SpringXML配置方式。Spring注解方式减少了配置文件内容,更... 博文 来自: 风尘小白沙
Spring注解大全
09-18 阅读数 5101
注解本身没有功能的,就和xml一样。注解和xml都是一种元数据,元数据即解释数据的数据,这就是所谓配置。本文主要罗列Spring相关注解的简介,不包含SpringMVC等其他部分。1.声明bean的注... 博文 来自: ITtraveler的专栏
<div class="recommend-item-box recommend-ad-box"><div id="kp_box_64" data-pid="64" data-track-view="{"mod":"kp_popu_64-1060","con":",,"}" data-track-click="{"mod":"kp_popu_64-1060","con":",,"}" data-report-view="{"mod":"kp_popu_64-1060","keyword":""}" data-report-click="{"mod":"kp_popu_64-1060","keyword":""}"><iframe src="https://kunpeng-sc.csdnimg.cn/#/preview/235?positionId=64&queryWord=" frameborder="0" width="100%" height="75px" scrolling="no"></iframe></div></div>
Spring各种注解及源码全套视频
06-08 阅读数 2386
本人微信zf363133213欢迎各位添加好友,共同探讨问题百度网盘链接:https://pan.baidu.com/s/11ut5ucpXlihVI7FgN4DbDw提取码:0mg4链接:https... 博文 来自: weixin_41126842的博客
Spring注解学习笔记
08-23 阅读数 768
什么是注解传统的Spring做法是使用.xml文件来对bean进行注入或者是配置aop、事物,这么做有两个缺点:如果所有的内容都配置在.xml文件中,那么.xml文件将会十分庞大;如果按需求分开.xm... 博文 来自: CrankZ的博客
使用spring注解方式的好处
08-05 阅读数 577
使用spring注解方式的好处一、什么是spring注解传统的Spring做法是使用.xml文件来对bean进行注入或者是配置aop、事物,这么做有两个缺点:1、如果所有的内容都配置在.xml文件中,... 博文 来自: chengaezakmi696的博客
spring mvc常用注解
06-28 阅读数 1万+
前两天,我的一位好朋友在微信给我留言,说:“让我总结一下SpringMVC常用注解。”我一口答应了,说:“好的!”于是我花了两天的时间来整理,今天决定将《SpringMVC的常用注解》分享至我的博客,... 博文 来自: 钱春华的专栏
<div class="recommend-item-box recommend-ad-box"><div id="kp_box_65" data-pid="65" data-track-view="{"mod":"kp_popu_65-1378","con":",,"}" data-track-click="{"mod":"kp_popu_65-1378","con":",,"}" data-report-view="{"mod":"kp_popu_65-1378","keyword":""}" data-report-click="{"mod":"kp_popu_65-1378","keyword":""}"><script type="text/javascript">
(function() {
var s = "_" + Math.random().toString(36).slice(2);
document.write('<div style="" id="' + s + '"></div>');
(window.slotbydup = window.slotbydup || []).push({
id: "u4221803",
container: s
});
})();
spring注解之@SessionAttributes
11-13 阅读数 20
一、@ModelAttribute 在默认情况下,ModelMap 中的属性作用域是 request 级别是,也就是说,当本次请求结束后,ModelMap中的属性将销毁。如果希望在多个请求中共享 ... 博文 来自: 骑着上帝去环游


 2275
2275


 到【灌水乐园】发言


