


视频讲解:
MuJoCo 解析 qfrc 三种力!带你测试鼠标拖拽物理交互效果
代码仓库:https://github.com/LitchiCheng/mujoco-learning
今天分享下,在MuJoCo中有三种力,可以在官方文档中的mjData中看到如下定义
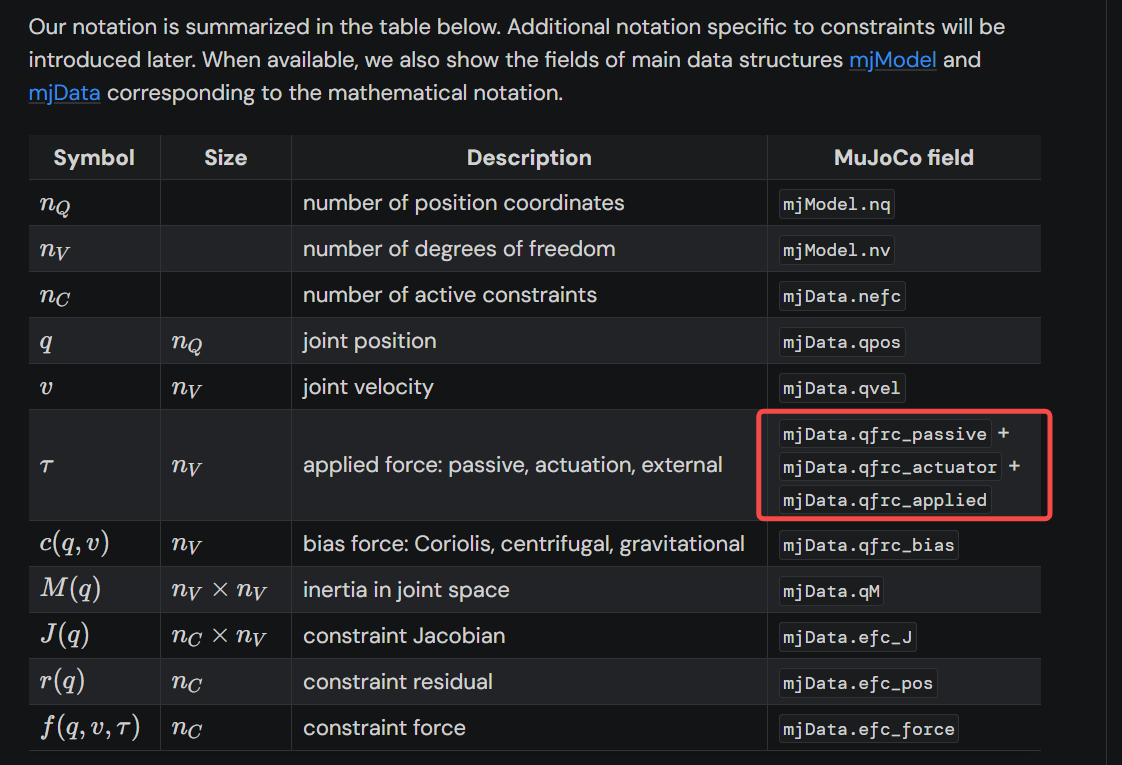
1. mjData.qfrc_actuator 对于关节电机,表现为力矩,如电机驱动关节转动;对于线性执行器,表现为线性力,如活塞推动连杆
2. mjData.qfrc_passive:由被动力学元件产生,像关节的弹簧力、阻尼力、摩擦力、接触力,比如 xml 中定义的关节的 ,接触,摩擦
3. mjData.qfrc_applied:外部施加的,比如手动给模型中的某个点施加力或力矩
| 力类型 | 来源 | 可控方式 |
| qfrc_actuator | 执行器(如电机) | 通过data.ctrl数组控制 |
| qfrc_passive | 弹簧、阻尼、接触、摩擦等 | 修改模型参数(如stiffness) |
| qfrc_applied | 手动施加或鼠标拖拽 | 直接修改data.qfrc_applied或鼠标交互 |
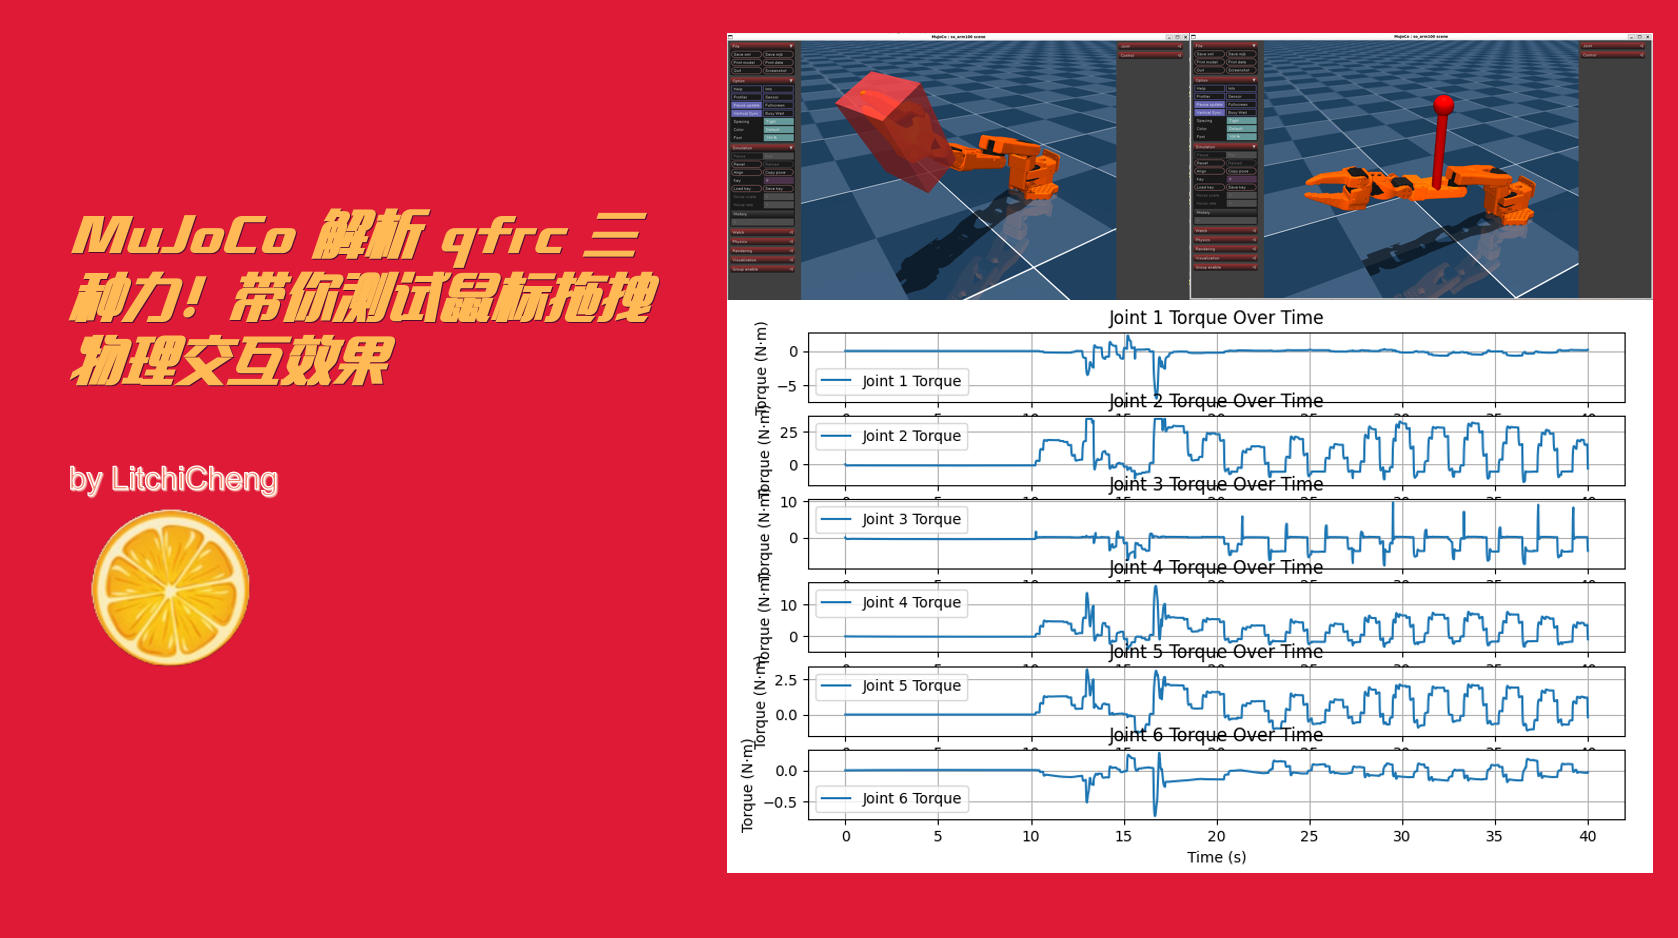
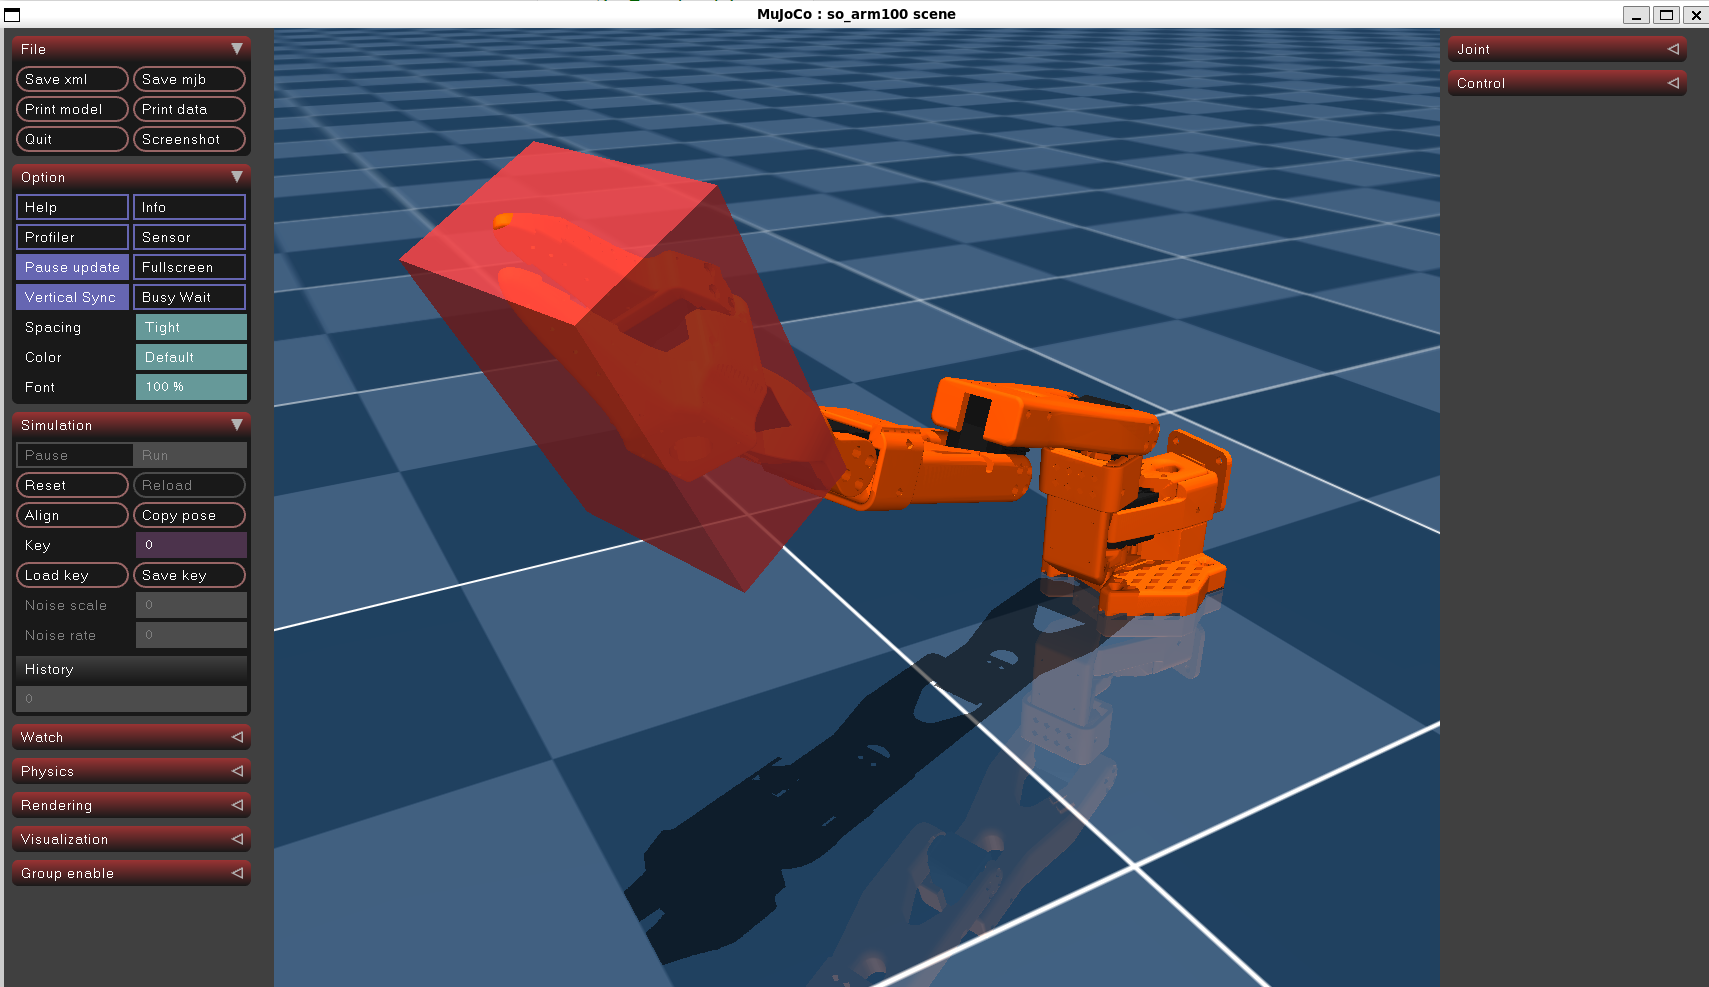
当在 MuJoCo 的可视化窗口中用鼠标拖拽模型时,MuJoCo 会自动计算并施加以下两种力:
位置拖拽(Position Drag):双击接触点或物体,按住Ctrl键,然后鼠标右键点击并拖动模型时,MuJoCo 会在接触点(或选中的物体)上施加一个位置约束,使物体跟随鼠标移动,等效于在接触点上施加一个弹簧阻尼力
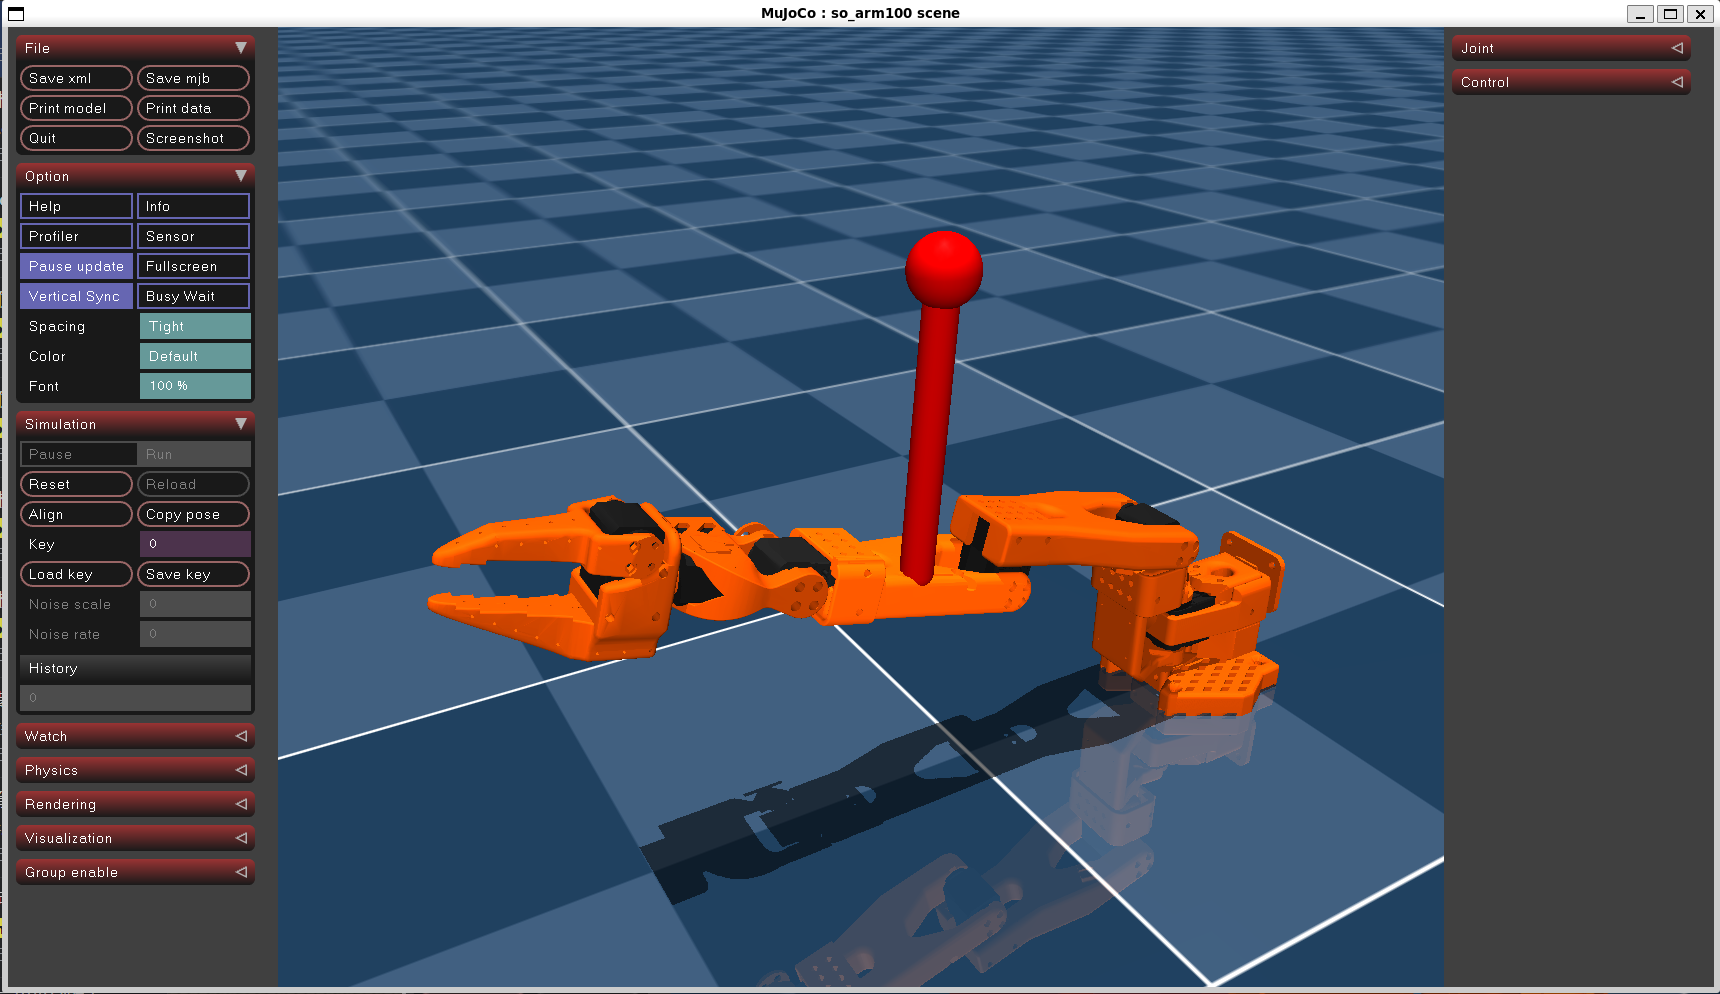
旋转拖拽(Rotation Drag):双击接触点或物体,按住Ctrl键,然后鼠标左键按住旋转模型时,MuJoCo 会在物体上施加力矩,使其绕指定轴旋转。
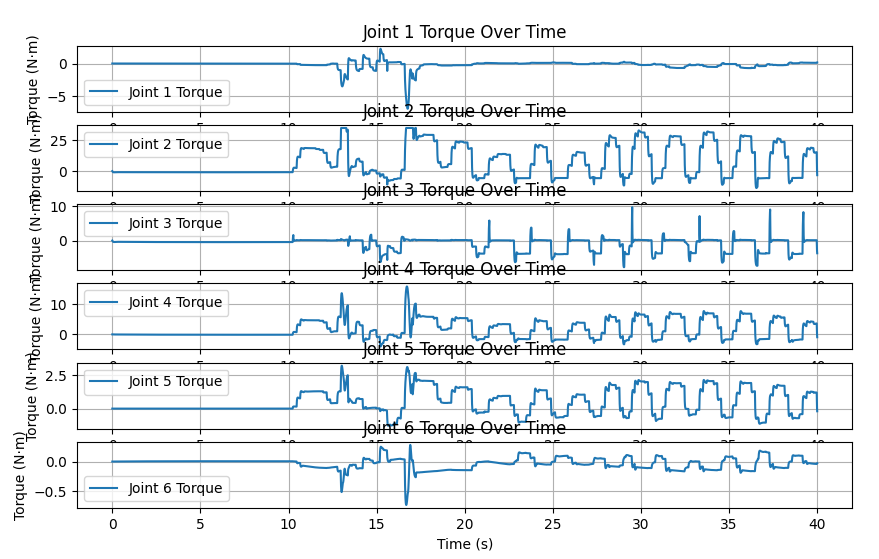
记录拖拽过程中的 qfrc_actuator,完整代码如下
import mujoco_viewer
import numpy as np
# matplotlib.use('TkAgg')
import matplotlib.pyplot as plt
import time,math

class Test(mujoco_viewer.CustomViewer):
    def __init__(self, path):
        super().__init__(path, 3, azimuth=180, elevation=-30)
        self.path = path

    def runBefore(self):
        # 存储关节力矩的列表
        self.torque_history = []
        self.time_history = []

    def runFunc(self):
        if True:
            self.time_history.append(self.data.time)
            self.torque_history.append(self.data.qfrc_actuator.copy())  # 存储关节力矩
            if len(self.torque_history) > 20000:
                torque_history = np.array(self.torque_history)
                # 绘制关节力矩曲线
                plt.figure(figsize=(10, 6))
                for i in range(torque_history.shape[1]):
                    plt.subplot(torque_history.shape[1], 1, i + 1)
                    plt.plot(self.time_history, torque_history[:, i], label=f'Joint {i + 1} Torque')
                    plt.xlabel('Time (s)')
                    plt.ylabel('Torque (N·m)')
                    plt.title(f'Joint {i + 1} Torque Over Time')
                    plt.legend()
                    plt.grid(True)
                # plt.tight_layout()
                plt.show()

if __name__ == "__main__":
    test = Test("model/trs_so_arm100/scene.xml")
    test.run_loop()


 被折叠的 条评论
为什么被折叠?
被折叠的 条评论
为什么被折叠?
 到【灌水乐园】发言


