


目录
建议对Guava Cache完全不了解的同学,先看一下Guava Cache核心参数及其原理的讲解,先了解一些关键的节点,再看下面的原理分析,可能更轻松一些:Guava Cache:核心参数深度剖析和相关源码分析
一、基础信息
1、版本
<dependency>
    <groupId>com.google.guava</groupId>
    <artifactId>guava</artifactId>
    <version>29.0-jre</version>
</dependency>
2、构造方式
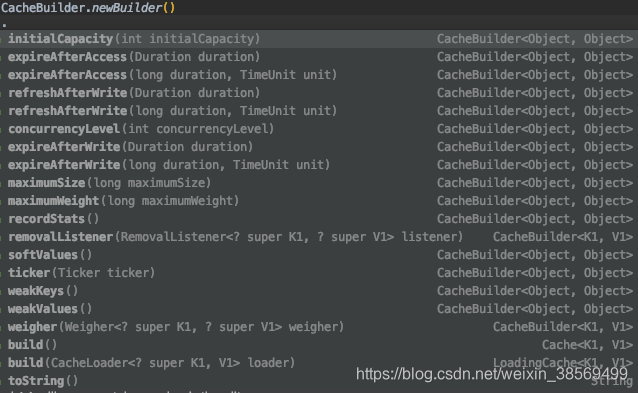
3、核心参数
核心参数详解参考:Guava Cache:核心参数深度剖析和相关源码分析
1、容量
- initialCapacity:初始容量;
- maximumSize:最大容量;
- maximumWeight:最大权重,每条缓存的默认权重为1,可以增加单挑缓存的权重;
- weither:权重器,用于衡量不同缓存条目的权重。
2、超时时长
- expireAfterAccess:超时计算方式:在访问请求之后重置超时计时器;
- expireAfterWrite:超时计算方式:在写请求之后重置超时计时器。
3、刷新
- refreshAfterWrite:写操作后多久刷新缓存内容,刷新使用下面的加载器;
- build(CacheLoader loader):构造LoadingCache实例,入参是用于刷新的加载器;
- removalListener:移除监听器,接收条目被移除的通知,可以过滤需要的缓存条目,进行相应处理。
4、引用强度
- weakValues:指定所有的value都是弱引用;
- weakKeys:指定所有的key都是弱引用;
- softValues:指定所有的key都是软引用。
5、其他
- concurrencyLevel:并发级别,级别越高支持的最大并发数越大;
- recordStats:启用缓存统计,即缓存操作期间的性能相关的统计;
- ticker:指定纳秒精度的时间源,默认使用System.nanoTime()。
二、基本原理
1、数据结构
Guava Cache的数据结构,和JDK 1.7版本的ConcurrentHashMap非常相似:
- 分段segment:最外层是分段segment,用于控制最大的写并发数量;
- 分段内的数组table:每个分段内维护一个原子引用数组table,根据元素的hash值确定在数组中的位置;
- 数组内的链表:数组的任一元素,存放的都是一个链表,用于解决哈希碰撞的情况;
- 和JDK 1.7的ConcurrentHashMap的一个重要区别在于,Guava Cache的数组中始终存放的都是链表,不会变成红黑树。
1.1 分段segment的数量
分段segment是缓存工具Cache的最外层结构。一个缓存可能会有多个segment,所有segment的内容之和,表示整个缓存。
segmentCount的值主要取决于建造者类CacheBuilder的参数并发级别concurrencyLevel,另外还会受到CacheBuilder参数最大加权值maximumWeight。
详情参考: Guava Cache:核心参数深度剖析和相关源码分析 # 并发级别concurrencyLevel
分段数量segmentCount的取值规则简述:
- segmentCount是2的整数倍;
- segmentCount在允许的取值范围内取最大值;
- concurrencyLevel的约束:1/2 * segmentCount满足:小于concurrencyLevel ;
- maxWeight的约束:如果maxWeight < 0(不限制缓存最大容量),则对segmentCount无影响;如果设置了有效的maxWeight,则 1/2 * segmentCount 小于等于1/20 * maxWeight。
分段数量segmentCount的计算代码(取自LocalCache.LocalLoadingCache的构造器):
    int segmentShift = 0;
    int segmentCount = 1;
    while (segmentCount < concurrencyLevel && (!evictsBySize() || segmentCount * 20 <= maxWeight)) {
      // 这时的segmentShift还是表示segmentCount是2的多少次幂
      ++segmentShift;
      // segmentCount是满足while条件的最大值的2倍
      segmentCount <<= 1;
    }
    // 最终的segmentShift用于取hash的高位的相应位数,用来计算寻找一个元素在哪个segment中
    this.segmentShift = 32 - segmentShift;
    // 掩码,取hash的低位的相应位数的值,即为在segment中的角标
    segmentMask = segmentCount - 1;


  // 是否限制容量
  boolean evictsBySize() {
    return maxWeight >= 0;
  }
1.2 分段segment的定位
如何找到一条缓存唯一对应的segment,是缓存使用过程中首先要考虑的。无论是缓存更新还是缓存查询,必须首先先根据缓存的key,匹配到一个segment,才能进行后续的操作。
1、相关成员:
Guava Cache是通过高位哈希的原理给缓存分配segment的。通过1.1分段segment的数量 可知,缓存工具Cache中会维护一些跟segment相关的参数,包括:
- segmentCount:segment的数量;
- segmentShift:计算segment使用的位数。指的是段的数量是1通过左移多少位计算得到的,再让32减去这个数字。例如segmentCount = 4的情况,segmentShift就是 32 - 2 = 30,表示计算segment的时候,使用hash值的30~32位;
- segmentMask:计算segment使用的掩码。segmentMask所有位的值都是1,它位数等于32 - segmentShift的值。例如segmentCount = 4的情况,segmentMask就是111。
2、分段segment的定位方式:
- Cache中维护着一个segment的数组segments,数组的大小是segmentCount;
- Cache计算缓存key的hash值;
- Cache让hash右移segmentShift位,得到hash从第segmentShift位开始的高位的值(例如当segmentCount = 4时,segmentShift=30,此时会右移30位,得到从30~32位的值);
- Cache将得到的hash高位的值,和掩码segmentMask相与(例如当segmentCount = 4时,segmentMask = 111,此时相与得到的结果就是hash的30~32位的值本身);
- 上一步得到的相与结果,就是Cache中维护的segment数组segments中的角标。
注意事项:
- 之所以有第四步和segmentMask相与的操作,是为了保证计算得到的segments的角标不会数组越界,因为segmentMask实际上就是segments中最大的角标;
- 这里计算segment,之所以使用hash的高位,是因为在segment中的数组中定位元素,使用的hash的低位。两者分开,可以让缓存在segments中的分布和缓存在segment的table中的分布互相正交,减少哈希碰撞导致的性能较差的情况。
3、代码:
  /**
   * Returns the segment that should be used for a key with the given hash.
   *
   * @param hash the hash code for the key
   * @return the segment
   */
  Segment<K, V> segmentFor(int hash) {
    // TODO(fry): Lazily create segments?
    return segments[(hash >>> segmentShift) & segmentMask];
  }
1.3 原子数组table
segment中维护了一个原子引用数组AtomicReferenceArray的实例table。table类似于一个数组,数组中的不同元素的hash值是不同的。
segment通过hash的低位,定位缓存在table中的位置。用key的hash值,和table的长度-1,进行与运算,得到的数值就是key在数组table中的位置。
    /** Returns first entry of bin for given hash. */
    ReferenceEntry<K, V> getFirst(int hash) {
      // read this volatile field only once
      AtomicReferenceArray<ReferenceEntry<K, V>> table = this.table;
      return table.get(hash & (table.length() - 1));
    }
1.4 链表节点ReferenceEntry
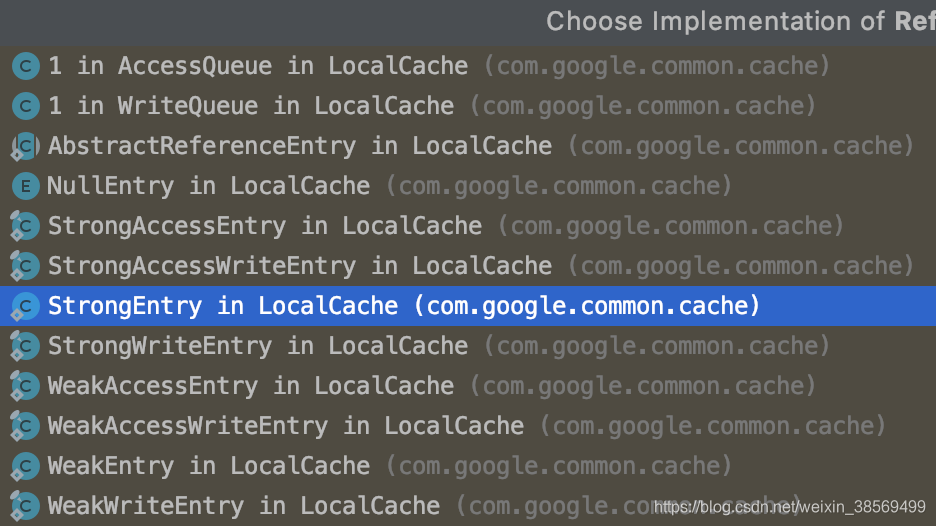
table中维护的是一个链表,链表的每个节点的类型,是ReferenceEntry。
ReferenceEntry是个接口,有多个实现类。Guava Cache会构造时设置的引用强度,选择相应的实现类:
2、并发控制
并发控制是通过参数并发级别concurrencyLevel设置的,还会受参数最大加权值maximumWeight的影响,最终通过分段segment的数量来起作用。分段数量的计算规则参考上述1.1分段segment的数量。
缓存的写操作(包括显式的写操作,以及读操作触发的缓存失效、缓存加载等)是需要加锁的,而加锁的基本单元是segment。类Segment是Java的重入锁ReentrantLock的子类。在写操作前后会分别调用ReentrantLock的lock()和unlock()方法,进行加锁和解锁操作。
3、缓存淘汰
Guava Cache定义了枚举类RemovalCause,用来标识缓存被移除的原因。这里通过分析RemovalCause的枚举值,来分析不同的缓存淘汰原因。
枚举类RemovalCause要求枚举值分别实现wasEvicted()方法,表示缓存是否是被淘汰的,而不是被用户显式清除的。
  /**
   * Returns {@code true} if there was an automatic removal due to eviction (the cause is neither
   * {@link #EXPLICIT} nor {@link #REPLACED}).
   */
  abstract boolean wasEvicted();
3.1 用户显式清除的两种场景
如果用户通过invalite或invalidateAll等方法主动失效了相应缓存,或者通过put方法使用新值替换了旧的缓存值,这两种情况表示缓存是被用户显式清除掉的,而不是被缓存内部清除的。
枚举值:
  /**
   * The entry was manually removed by the user. This can result from the user invoking {@link
   * Cache#invalidate}, {@link Cache#invalidateAll(Iterable)}, {@link Cache#invalidateAll()}, {@link
   * Map#remove}, {@link ConcurrentMap#remove}, or {@link Iterator#remove}.
   */
  // 用户主动失效掉了缓存
  EXPLICIT {
    @Override
    boolean wasEvicted() {
      return false;
    }
  },

  /**
   * The entry itself was not actually removed, but its value was replaced by the user. This can
   * result from the user invoking {@link Cache#put}, {@link LoadingCache#refresh}, {@link Map#put},
   * {@link Map#putAll}, {@link ConcurrentMap#replace(Object, Object)}, or {@link
   * ConcurrentMap#replace(Object, Object, Object)}.
   */
  // 用户主动使用新值替换了缓存
  REPLACED {
    @Override
    boolean wasEvicted() {
      return false;
    }
  },
3.2 被垃圾回收淘汰
Guava Cache支持将配置的引用强度设置成软引用和弱引用,以避免缓存过多导致内存溢出等问题。
相关的建造者类的方法包括:softValues()、weakValues()、weakKeys()。
详情参考:Guava Cache:核心参数深度剖析和相关源码分析 # 软引用和弱引用
枚举值:
  /**
   * The entry was removed automatically because its key or value was garbage-collected. This can
   * occur when using {@link CacheBuilder#weakKeys}, {@link CacheBuilder#weakValues}, or {@link
   * CacheBuilder#softValues}.
   */
  COLLECTED {
    @Override
    boolean wasEvicted() {
      return true;
    }
  },
3.3 超时淘汰
Guava Cache支持两种超时机制:访问后超时 和写后超时。
- 访问后超时会设置一个访问时间,每次读取缓存内容或者设置缓存的值,都会刷新访问的时间;如果下一次访问的时候,发现访问时长超时,会直接让缓存失效。访问超时通过方法expireAfterAccess进行设置;
- 写后超时会设置一个写时间,每次设置缓存的值,都会刷新写时间;如果下一次访问的时候,发现访问时长超时,会直接让缓存失效。访问超时通过方法expireAfterWrite进行设置。
详情参考:Guava Cache:核心参数深度剖析和相关源码分析 # 超时
枚举值:
  /**
   * The entry's expiration timestamp has passed. This can occur when using {@link
   * CacheBuilder#expireAfterWrite} or {@link CacheBuilder#expireAfterAccess}.
   */
  EXPIRED {
    @Override
    boolean wasEvicted() {
      return true;
    }
  },
3.4 容量超限淘汰(LRU算法)
如果缓存设置了最大容量(maximumSize,或者maximumWeight),则在添加缓存的时候,会去判断当前容量是否已经超限。如果缓存容量超限,则会通过LRU算法,淘汰掉最久没有访问的缓存。
枚举值:
  /**
   * The entry was evicted due to size constraints. This can occur when using {@link
   * CacheBuilder#maximumSize} or {@link CacheBuilder#maximumWeight}.
   */
  SIZE {
    @Override
    boolean wasEvicted() {
      return true;
    }
  };
三、核心源码:缓存淘汰
1、基本原理
缓存淘汰主要包括三方面:
垃圾回收回收软引用、弱引用的缓存:这是通过JVM进行的,基本不需要程序主动进行回收,所以这里不进行讨论;- 缓存超时被淘汰:主要分为访问时间超时expireAfterAccess和写时间超时expireAfterWrite两种;
- 容量超限淘汰:这种是通过LRU算法,淘汰掉最久没有访问/写入最晚的缓存。
在容量超限时,Guava Cache通过LRU算法进行缓存淘汰。
GuavaCache并没有独立的线程来管理缓存,以避免和应用程序发生资源的争夺。主要靠在写操作时来做一部分清理工作,如果清理写操作太少,也可能在读操作中触发清理操作清理部分缓存。
另外,用户可以自己决定如何清理缓存。如果写操作非常少,又需要有更快的读取速率,或者是又想长期维持较大的内存开销,可以自定义维护线程,定期清理失效缓存。
2、相关实现
LocalCache的Segment中实现了一些队列,用来协助完成缓存的淘汰:
- final Queue<ReferenceEntry<K, V>> recencyQueue:记录节点被访问的顺序,会在写操作执行或者DRAIN_THRESHOLD被触发的时候全部出队;
- final @Nullable ReferenceQueue<V> valueReferenceQueue:值引用队列,记录被垃圾回收、且需要被内部清理的值;
- final @Nullable ReferenceQueue<V> keyReferenceQueue:值键引用队列,记录被垃圾回收、且需要被内部清理的节点;
- @GuardedBy("this") final Queue<ReferenceEntry<K, V>> writeQueue:缓存中的全部节点,按写顺序排序,最近加入的元素会被加到队列的尾部;
- @GuardedBy("this") final Queue<ReferenceEntry<K, V>> accessQueue:缓存中的全部节点,按访问顺序排序,最近访问的元素会被加到队列的尾部,写操作也是访问的一种。
3、写方法缓存回收
主要步骤:
- 执行写入操作;
- 检查是否totalWeight > maxSegmentWeight,如果是,则执行移除操作
- 从当前segment的第一个节点开始删除,循环进行直到totalWeight <= maxSegmentWeight
循环逻辑:
      while (totalWeight > maxSegmentWeight) {
        // 获取下一个可回收的节点
        ReferenceEntry<K, V> e = getNextEvictable();
        if (!removeEntry(e, e.getHash(), RemovalCause.SIZE)) {
          throw new AssertionError();
        }
      }
删除逻辑:
    @VisibleForTesting
    @GuardedBy("this")
    boolean removeEntry(ReferenceEntry<K, V> entry, int hash, RemovalCause cause) {
      int newCount = this.count - 1;
      AtomicReferenceArray<ReferenceEntry<K, V>> table = this.table;
      int index = hash & (table.length() - 1);
      ReferenceEntry<K, V> first = table.get(index);

      for (ReferenceEntry<K, V> e = first; e != null; e = e.getNext()) {
        if (e == entry) {
          ++modCount;
          // 删除头节点,并更新头节点的指向
          ReferenceEntry<K, V> newFirst =
              removeValueFromChain(
                  first,
                  e,
                  e.getKey(),
                  hash,
                  e.getValueReference().get(),
                  e.getValueReference(),
                  cause);
          newCount = this.count - 1;
          table.set(index, newFirst);
          this.count = newCount; // write-volatile
          return true;
        }
      }

      return
最低0.47元/天 解锁文章


 5627
5627

 被折叠的 条评论
为什么被折叠?
被折叠的 条评论
为什么被折叠?
 到【灌水乐园】发言


