


下雨场景效果(一)
下雨效果
前言
下雨效果实现思路。大致组合是一个乌云效果+雨水效果+雨伞效果+水面效果+高度雾效果+植被的摇曳效果+建筑物的流水效果。
本片会解释雨水效果+雨伞效果+水面效果+高度雾效果。
第二篇文章会解释乌云效果实现+植被的摇曳效果 + 建筑物流水效果。
一、下雨场景的效果效果

二、实现步骤
1.雨水效果
我们使用屏幕后处理实现,我们需要一张噪声纹理。直接采样叠加效果
 fixed4 frag (v2f i) : SV_Target
            {
                // sample the texture
                float2 ruv = i.uv ;
                float2 st = i.uv;
                fixed3 final_col = tex2D(_MainTex, i.uv).rgb;
                final_col = final_col + tex2D(_NoiseTex, st).rgb;
                return fixed4(final_col.rgb, 1);
            }
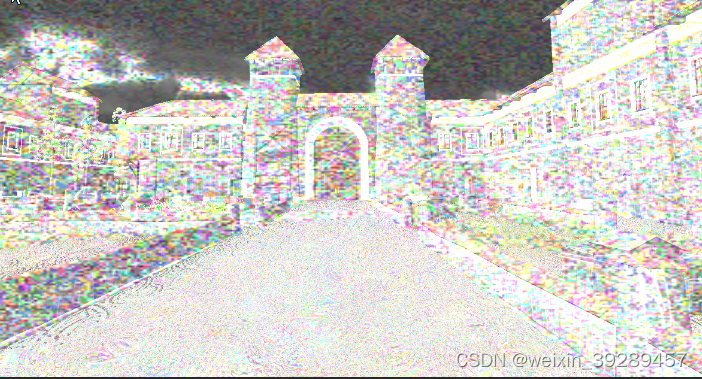
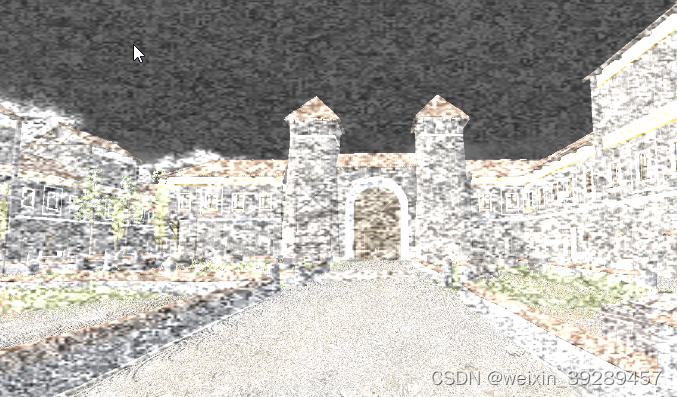
得到以上效果,我们继续优化他。我们不需要混合rgb三个通道的值,我们只需要取一。
  fixed4 frag (v2f i) : SV_Target
            {
                // sample the texture
                float2 ruv = i.uv ;
                float2 st = i.uv ;
                float f = tex2D(_NoiseTex, st).y ;

                fixed3 col = float3(f, f, f) ;

                fixed3 final_col = tex2D(_MainTex, i.uv).rgb;
                final_col = final_col + col;
                return fixed4(final_col.rgb, 1);
            }
增加线条效果
            fixed4 frag (v2f i) : SV_Target
            {
                // sample the texture
                float2 ruv = i.uv ;
                float2 st = i.uv * float2(.5 + (ruv.y + 1.0) * 0.5
                , 0.03) + float2(_Time.y * 0.2 - ruv.y * 0.2,
                _Time.y * 0.2);
                //float2(.5 + (ruv.y + 1.0) * 0.5, 0.03) 完成线条效果,模拟风对雨水轨迹的的偏移效果
                // + float2(_Time.y * 0.2 - ruv.y * 0.2, _Time.y * 0.2) 完成线条流动效果
                float f = tex2D(_NoiseTex, st).y ;

                fixed3 col = float3(f, f, f) * _NormalPower;

                fixed3 final_col = tex2D(_MainTex, i.uv).rgb;
                final_col = final_col + col;
                return fixed4(final_col.rgb, 1);
            }

调整密度,优化最后效果
            fixed4 frag (v2f i) : SV_Target
            {
                // sample the texture
                float2 ruv = i.uv ;
                float2 st = i.uv * float2(.5 + (ruv.y + 1.0) * 0.5
                , 0.03) + float2(_Time.y * 0.2 - ruv.y * 0.2,
                _Time.y * 0.2);
                float f = tex2D(_NoiseTex, st).y * tex2D(_NoiseTex, st * .773).x
                * 2;
                f = clamp(pow(abs(f), 23.0) * 13.0, 0.0, (ruv.y - .2) * .14);
                fixed3 col = float3(f, f, f) * _NormalPower;

                fixed3 final_col = tex2D(_MainTex, i.uv).rgb;
                final_col = final_col + col;
                return fixed4(final_col.rgb, 1);
            }

以上就是雨水的实现效果
2.雾气效果
我们这里使用高度雾。主要原理就是在世界空间中借助雾气公式
(_FogEnd - worldPos.y) / (_FogEnd - _FogStart)实现。
首先我们需要获取世界坐标
    //计算世界空间坐标
            float4 GetWorldSpacePosition(float depth, float2 uv)
            {
                // 屏幕空间 --> 视锥空间
                float4 view_vector = mul(_InverseProjectionMatrix, float4(2.0 * uv - 1.0, depth, 1.0));
                view_vector.xyz /= view_vector.w;
                //视锥空间 --> 世界空间
                float4x4 l_matViewInv = _InverseViewMatrix;
                float4 world_vector = mul(l_matViewInv, float4(view_vector.xyz, 1));
                return world_vector;
            }
接下来结合噪声图直接实现高度雾效果,并融合之前的雨水效果。以下是完整代码
              //计算世界空间坐标
            float4 GetWorldSpacePosition(float depth, float2 uv)
            {
                // 屏幕空间 --> 视锥空间
                float4 view_vector = mul(_InverseProjectionMatrix, float4(2.0 * uv - 1.0, depth, 1.0));
                view_vector.xyz /= view_vector.w;
                //视锥空间 --> 世界空间
                float4x4 l_matViewInv = _InverseViewMatrix;
                float4 world_vector = mul(l_matViewInv, float4(view_vector.xyz, 1));
                return world_vector;
            }

            fixed4 frag (v2f i) : SV_Target
            {
                // sample the texture
                float2 ruv = i.uv ;
                float2 st = i.uv * float2(.5 + (ruv.y + 1.0) * 0.5
                , 0.03) + float2(_Time.y * 0.2 - ruv.y * 0.2,
                _Time.y * 0.2);
                float f = tex2D(_NoiseTex, st).y * tex2D(_NoiseTex, st * .773).x
                * 2;
                f = clamp(pow(abs(f), 23.0) * 13.0, 0.0, (ruv.y - .2) * .14);
                fixed3 col = float3(f, f, f) * _NormalPower;

                fixed3 final_col = tex2D(_MainTex, i.uv).rgb;
                final_col = final_col + col;

                // float linearDepth = LinearEyeDepth(SAMPLE_DEPTH_TEXTURE(_CameraDepthTexture, i.uv_depth));
                // float3 worldPos = _WorldSpaceCameraPos + linearDepth * i.interpolatedRay.xyz;

                float depth = SAMPLE_DEPTH_TEXTURE(_CameraDepthTexture, i.uv);
                //世界空间坐标
                float4 worldPos = GetWorldSpacePosition(depth, i.uv);

                float2 speed = _Time.y * float2(_FogXSpeed, _FogYSpeed);
                float noise = (tex2D(_FogNoiseTex, i.uv + speed).r - 0.5) * _NoiseAmount;

                float fogDensity = (_FogEnd - worldPos.y) / (_FogEnd - _FogStart);
                fogDensity = saturate(fogDensity * _FogDensity * (1 + noise));


                fixed3 finalColor = lerp(final_col, _FogColor.rgb, fogDensity);
                fixed4 volume_col = tex2D(_DownsampleColor, i.uv);


               /*   finalColor.rgb *= volume_col.a;
                  finalColor.rgb += volume_col.rgb;*/
                return fixed4(finalColor.rgb, 1);
            }
            ENDCG
        }
得到如下效果

3.雨伞效果
前面的文章有解释过,可以翻翻这篇文章
雨伞效果实现
4.地面的水波效果
大致原理:这里是直接新增一个panel放在地形上,panel直接采样屏幕渲染结果,但在采样的uv上叠加了一个波形纹理的扰乱。波纹的实现效果是我封装了一个噪声函数。函数的大致思路是以当前像素为圆心,以给定的半径为范围,计算上下左右四个方向的振幅,从而推算当前点振幅。细节算法暂时没有完全hold住,后面想通了会开一篇文章介绍。
具体代码如下:
   fixed4 frag (v2f i) : SV_Target
            {
                float2 _uv = i.screenPos.xy / i.screenPos.w;
                float resolution8 = _Resolution;
                float2 uv8 = i.uv;
                int maxRadius8 = _MaxRadius;
                float mulTime16 = _Time.y * _TimeScale;
                float time8 = mulTime16;
                float hashScale8 = 0.1031;
                float3 hashScale38 = float3(0.1031,0.103,0.0973);
                float IntensityScale8 = _RippleIntensity;
                float3 my_normal = CalculateRipples( resolution8 , uv8 , maxRadius8 , time8 , hashScale8 , hashScale38 , IntensityScale8 );
                // sample the texture
                fixed4 col = tex2D(_MainSceneTexture, _uv + (my_normal * _NormalPower) );
                return col;
            }
波纹函数代码如下:
    #define _m3 (float3x3( 0.00,  0.80,  0.60, -0.80,  0.36, -0.48, -0.60, -0.48,  0.64 ))
            #define HASHSCALE3 float3(.1031, .1030, .0973)
            float Hash12( float2 pos, float hashScale )
            {
                float3 p3  = frac(float3(pos.xyx) * hashScale);
                p3 += dot(p3, p3.yzx + 19.19);
                return frac((p3.x + p3.y) * p3.z);
            }

            float Hash22( float2 pos, float3 hashScale3 )
            {
                float3 p3 = frac(float3(pos.xyx) * hashScale3);
                p3 += dot(p3, p3.yzx+19.19);
                return frac((p3.xx+p3.yz)*p3.zy);
            }

                       ///  2 out, 2 in...
            float2 Hash33(float2 p)
            {
                float3 p3 = frac(float3(p.xyx) * HASHSCALE3);
                p3 += dot(p3, p3.yzx+19.19);
                return frac((p3.xx+p3.yz)*p3.zy);
            }

            float PNoise( in float3 p )
            {
                float3 i = floor( p );
                float3 f = frac( p );

                float3 u = f*f*(3.0-2.0*f);

                return lerp( lerp( lerp( dot( Hash33( i + float3(0.0,0.0,0.0) ), f - float3(0.0,0.0,0.0) ),
                          dot( Hash33( i + float3(1.0,0.0,0.0) ), f - float3(1.0,0.0,0.0) ), u.x),
                     lerp( dot( Hash33( i + float3(0.0,1.0,0.0) ), f - float3(0.0,1.0,0.0) ),
                          dot( Hash33( i + float3(1.0,1.0,0.0) ), f - float3(1.0,1.0,0.0) ), u.x), u.y),
                lerp( lerp( dot( Hash33( i + float3(0.0,0.0,1.0) ), f - float3(0.0,0.0,1.0) ),
                          dot( Hash33( i + float3(1.0,0.0,1.0) ), f - float3(1.0,0.0,1.0) ), u.x),
                     lerp( dot( Hash33( i + float3(0.0,1.0,1.0) ), f - float3(0.0,1.0,1.0) ),
                          dot( Hash33( i + float3(1.0,1.0,1.0) ), f - float3(1.0,1.0,1.0) ), u.x), u.y), u.z );
}

 float3 CalculateRipples( float resolution, float2 uv, int maxRadius, float time,
            float hashScale, float3 hashScale3, float IntensityScale )
            {
                uv *= resolution;
                float2 p0 = floor(uv);
                float2 circles = float2(0,0);
                float maxRadiusf = maxRadius;
                for (int j = -maxRadius; j <= maxRadius; ++j)
                {
                    for (int i = -maxRadius; i <= maxRadius; ++i)
                    {
                        float2 pi = p0 + float2(i, j);
                        #if DOUBLE_HASH
                        float2 hsh = Hash22(pi,hashScale3);
                        #else
                        float2 hsh = pi;
                        #endif
                        float2 p = pi + Hash22(hsh,hashScale3);
                        float t = frac(0.3*time + Hash12(hsh,hashScale));
                        float2 v = p - uv;
                        float d = length(v) - (maxRadiusf + 1.0)*t;
                        float h = 1e-3;
                        float d1 = d - h;
                        float d2 = d + h;
                        float p1 = sin(31.*d1) * smoothstep(-0.6, -0.3, d1) * smoothstep(0.0, -0.3, d1);
                        float p2 = sin(31.*d2) * smoothstep(-0.6, -0.3, d2) * smoothstep(0.0, -0.3, d2);
                        circles += 0.5 * normalize(v) * ((p2 - p1) / (2 * h) * (1.0 - t) * (1.0 - t));
                    }
                }
                circles /= float((maxRadiusf*2.0+1.0)*(maxRadiusf*2.0+1.0));

                float noise_n = FBMR(fixed3(uv * 5, _Time.y * 5)) * 1;
                //circles.y = noise_n;
                float3 n = float3(circles, sqrt(1.0 - dot(circles, circles)));
                return n;
            }
总结
以上就是本次分享的全部内容,讲完这次下雨场景效果实现后打算开一篇光照专题的。


 631
631

 被折叠的 条评论
为什么被折叠?
被折叠的 条评论
为什么被折叠?
 到【灌水乐园】发言


