


训练一个分类器
关于数据?
一般情况下处理图像、文本、音频和视频数据时,可以使用标准的Python包来加载数据到一个numpy数组中。 然后把这个数组转换成 torch.*Tensor。
- 图像可以使用 Pillow, OpenCV
- 音频可以使用 scipy, librosa
- 文本可以使用原始Python和Cython来加载,或者使用 NLTK或 SpaCy 处理
特别的,对于图像任务,我们创建了一个包torchvision,它包含了处理一些基本图像数据集的方法。这些数据集包括 Imagenet, CIFAR10, MNIST 等。除了数据加载以外,torchvision还包含了图像转换器,torchvision.datasets和torch.utils.data.DataLoader。
torchvision包不仅提供了巨大的便利,也避免了代码的重复。
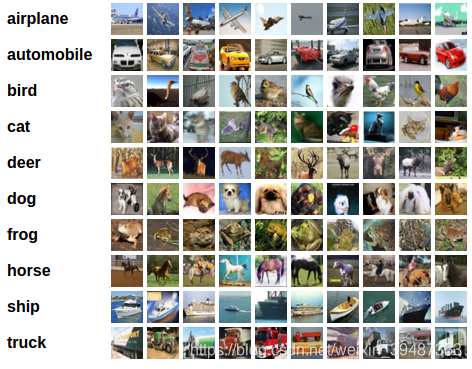
在这个教程中,我们使用CIFAR10数据集,它有如下10个类别 :‘airplane’, ‘automobile’, ‘bird’, ‘cat’, ‘deer’, ‘dog’, ‘frog’, ‘horse’, ‘ship’, ‘truck’。CIFAR-10的图像都是 3x32x32大小的,即,3颜色通道,32x32像素。
训练一个图像分类器
依次按照下列顺序进行:
- 使用torchvision加载和归一化CIFAR10训练集和测试集
- 定义一个卷积神经网络
- 定义损失函数
- 在训练集上训练网络
- 在测试集上测试网络
1. 读取和归一化 CIFAR10
使用torchvision可以非常容易地加载CIFAR10。
import torch
import torchvision
import torchvision.transforms as transforms
torchvision的输出是[0,1]的PILImage图像,我们把它转换为归一化范围为[-1, 1]的张量。
transform = transforms.Compose([transforms.ToTensor(), transforms.Normalize((0.5, 0.5, 0.5), (0.5, 0.5, 0.5))])
trainset = torchvision.datasets.CIFAR10(root='./data', train=True, download=True, transform=transform)
trainloader = torch.utils.data.DataLoader(trainset, batch_size=4, shuffle=True, num_workers=2)
testset = torchvision.datasets.CIFAR10(root='./data', train=False, download=True, transform=transform)
testloader = torch.utils.data.DataLoader(testset, batch_size=4, shuffle=False, num_workers=2)

classes = ('plane', 'car', 'bird', 'cat', 'deer', 'dog', 'frog', 'horse', 'ship', 'truck')

# 这里我直接离线下载了,链接下载真是太慢了。
# Using downloaded and verified file: ./data\cifar-10-python.tar.gz
# Extracting ./data\cifar-10-python.tar.gz to ./data
# Files already downloaded and verified
我们展示一些训练图像。
import matplotlib.pyplot as plt
import numpy as np

# 展示图像的函数

def imshow(img):
    img = img / 2 + 0.5     # unnormalize
    npimg = img.numpy()
    plt.imshow(np.transpose(npimg, (1, 2, 0)))

# 获取随机数据
dataiter = iter(trainloader)
images, labels = dataiter.next()

# 展示图像
imshow(torchvision.utils.make_grid(images))
plt.show()
# 显示图像标签
print(' '.join('%5s' % classes[labels[j]] for j in range(4)))
报错1:import matplotlib.pyplot as plt
解决方案1:conda activate pytorch,conda install matplotlib,重启pycharm
报错2:
RuntimeError:
        An attempt has been made to start a new process before the
        current process has finished its bootstrapping phase.
        This probably means that you are not using fork to start your
        child processes and you have forgotten to use the proper idiom
        in the main module:
            if __name__ == '__main__':
                freeze_support()
                ...
        The "freeze_support()" line can be omitted if the program
        is not going to be frozen to produce an executable.
解决方案2:将代码放在if __name__ == '__main__':下
运行代码如下:
import matplotlib.pyplot as plt
import numpy as np

# 展示图像的函数
def imshow(img):
    img = img / 2 + 0.5         # unnormalize
    npimg = img.numpy()
    plt.imshow(np.transpose(npimg, (1, 2, 0)))

if __name__ == '__main__':

    # 获取随机数据
    dataiter = iter(trainloader)
    images, labels = dataiter.next()

    # 展示图像
    imshow(torchvision.utils
最低0.47元/天 解锁文章


 4474
4474


 被折叠的 条评论
为什么被折叠?
被折叠的 条评论
为什么被折叠?
 到【灌水乐园】发言


