


备战数模美赛,由于有大量公式,遂想用LaTex排版论文,这几日忙于PDF的正反跳转问题,现今给与一个可行的配置方式以及代码块。
1.引入和简单介绍
LaTeX(LATEX,音译“拉泰赫”)是一种基于ΤΕΧ的排版系统,由美国计算机学家莱斯利·兰伯特(Leslie Lamport)在20世纪80年代初期开发,利用这种格式,即使使用者没有排版和程序设计的知识也可以充分发挥由TeX所提供的强大功能,能在几天,甚至几小时内生成很多具有书籍质量的印刷品。对于生成复杂表格和数学公式,这一点表现得尤为突出。因此它非常适用于生成高印刷质量的科技和数学类文档。这个系统同样适用于生成从简单的信件到完整书籍的所有其他种类的文档。——百度百科
经过一番搜索,发现目前最新的架构就是MikTex(或者其他的latex版本)+VS code+ LaTex workshop。因此特意找到办法配置Miktex+VSCode+Latex Workshop用于撰写学术论文,同时为了方便,对正反向搜索的配置也进行了介绍。
因为初次使用vscode,所受困扰较多。
2.配置过程
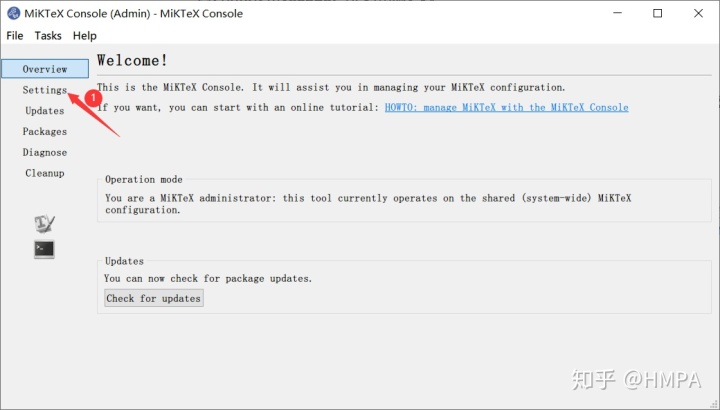
1.官网下载MikTex: Home - MiKTeX.org 的安装包,然后点击安装。安装完成有运行" Miktex console"进行配置(选择"以管理员身份运行")。接下来换做国内源,加快下载速度。
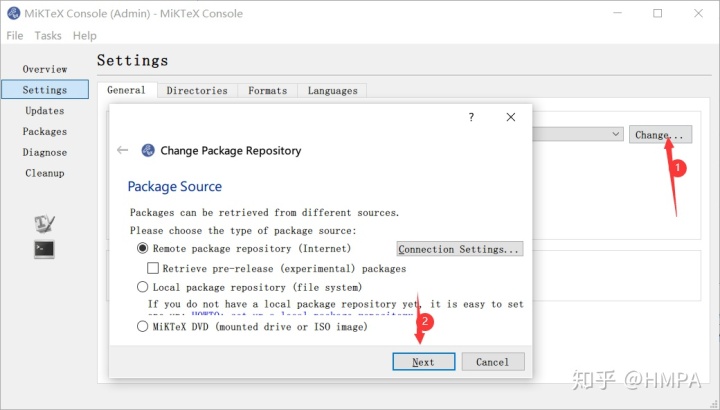
首先点击Updates标签,尽量升级你能使用的任何包,接下来点击"Packages"标签,然后依次安装ctex和CJK包等(或者待编译时再按需安装也可), 以便支持中文。
2.官网下载VSCode安装包然后安装。Visual Studio Code - Code Editing. Redefined
3.官网下载SumatraPDF安装包并进行安装。Download Sumatra PDF - a free reader
4.打开VS Code,安装其扩展Latex Workshop。对于Miktex, 需要对Latex Workshop配置其编译方案(recipe)。这里以Latex Workshop 8.9.0为例子。
// Latex workshop
{
    "latex-workshop.latex.recipes": [
        {
            "name": "xelatex",
            "tools": [
                "xelatex"
            ],
        },
        {
            "name": "pdflatex",
            "tools": [
                "pdflatex"
            ]
        },
        {
            "name": "xe->bib->xe->xe",
            "tools": [
                "xelatex",
                "bibtex",
                "xelatex",
                "xelatex"
            ]
        },
        {
            "name": "pdf->bib->pdf->pdf",
            "tools": [
                "pdflatex",
                "bibtex",
                "pdflatex",
                "pdflatex"
            ]
        }
    ],

  "latex-workshop.latex.tools": [
	{
        "name": "xelatex",
        "command": "xelatex",
        "args": [
            "-synctex=1",
            "-interaction=nonstopmode",
            "-file-line-error",
            "%DOCFILE%"
        ]
    },
    {
        "name": "pdflatex",
        "command": "pdflatex",
        "args": [
            "-synctex=1",
            "-interaction=nonstopmode",
            "-file-line-error",
            "%DOCFILE%"
        ]
    },
    {
        "name": "bibtex",
        "command": "bibtex",
        "args": [
            "%DOCFILE%"
        ]
    }
  ],
}
因为我只用XeLatex和BibTex,因此就只配置了这四种编译方式。
5.设置自动清理。众所周知,LaTex编译器下面会有用不着的文件,因此有如下清理命令。
注意:我为什么没有删除*.synctex.gz这个文件呢?因为我们后面设置跳转的时候会用到。
{
"latex-workshop.latex.autoClean.run": "onBuilt",
"latex-workshop.latex.clean.fileTypes": [
    "*.aux",
    "*.bbl",
    "*.blg",
    "*.idx",
    "*.ind",
    "*.lof",
    "*.lot",
    "*.out",
    "*.toc",
    "*.acn",
    "*.acr",
    "*.alg",
    "*.glg",
    "*.glo",
    "*.gls",
    "*.ist",
    "*.fls",
    "*.log",
    "*.fdb_latexmk",
],
}
6.设置正向和反向跳转,代码如下:
{
// 设置外部PDF预览器
"latex-workshop.view.pdf.viewer":"external",
"latex-workshop.view.pdf.ref.viewer":"external",
"latex-workshop.view.pdf.external.viewer.command": "C:/.../SumatraPDF/SumatraPDF.exe",//修改为你的具体SumatraPDF.exe的路径
"latex-workshop.view.pdf.external.viewer.args": [
        "-inverse-search",
        ""C:/.../Microsoft VS Code/code.exe" -g "%f:%l"", //修改为你的具体vscode.exe的路径
        "%PDF%"
    ],
// 设置正向跳转
"latex-workshop.view.pdf.external.synctex.command":"C:/.../SumatraPDF/SumatraPDF.exe",//修改为你的具体SumatraPDF.exe的路径
"latex-workshop.view.pdf.external.synctex.args": [
        "-forward-search",
        "%TEX%",
        "%LINE%",
        "%PDF%"
    ]
}
这样,你就可以在VScode和PDF中来回跳转了。
3.验证
输入如下内容latex源文件并保存,然后右键选择“Build Latex Project”编译, 点击预览即可看到内容:
%!TEX program = xelatex
% 使用 ctexart 文类,UTF-8 编码
documentclass[UTF8]{ctexart}
title{文章标题}
author{Siwind}
date{today}
begin{document}
maketitle
This is the context of the article.
这就是文章的所有内容。
end{document}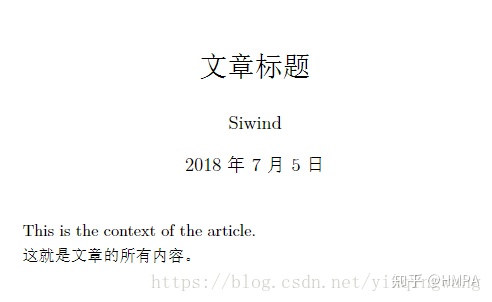
4.其他的要说的(引用自参考文献4,原文链接:论文写作的又一利器:VSCode + Latex Workshop + MikTex + Git)
1.指定pdflatex或者xelatex编译
A: 在latex源文件的第一行加入如下指令即可:
使用pdflatex编译:
%!TEX program = pdflatex使用xelatex编译:
%!TEX program = xelatex2. 配置反向搜索(PDF->Latex源代码)
A: 打开SumatraPDF,进入设置->选项 对话框,在“设置反向搜索命令行”处填入如下内容:
"C:...Microsoft VS CodeCode.exe" -g "%f:%l"双击PDF中的任意一处即可跳转到VSCode中所对应的内容的源代码处。
3.
4.新版的latex workshop,在latex源文件上点右键,右键菜单未出现 "build latex project" 选项。
A:新版本的latex workshop, 把右键菜单中latex相关编译/同步功能默认取消,而把这些功能放入了侧边栏的latex命令面板。点击侧边栏的相应项即可实现编译/预览PDF/等功能。如果要开启latex相关的右键菜单,再配置文件中添加如下内容即可:
"latex-workshop.showContextMenu":true,全配置代码,可直接替换替换settings.json(如果你不用其他环境的话):
// Latex workshop
{
    "latex-workshop.latex.recipes": [
        {
            "name": "xelatex",
            "tools": [
                "xelatex"
            ],
        },
        {
            "name": "pdflatex",
            "tools": [
                "pdflatex"
            ]
        },
        {
            "name": "xe->bib->xe->xe",
            "tools": [
                "xelatex",
                "bibtex",
                "xelatex",
                "xelatex"
            ]
        },
        {
            "name": "pdf->bib->pdf->pdf",
            "tools": [
                "pdflatex",
                "bibtex",
                "pdflatex",
                "pdflatex"
            ]
        }
    ],

  "latex-workshop.latex.tools": [
	{
        "name": "xelatex",
        "command": "xelatex",
        "args": [
            "-synctex=1",
            "-interaction=nonstopmode",
            "-file-line-error",
            "%DOCFILE%"
        ]
    },
    {
        "name": "pdflatex",
        "command": "pdflatex",
        "args": [
            "-synctex=1",
            "-interaction=nonstopmode",
            "-file-line-error",
            "%DOCFILE%"
        ]
    },
    {
        "name": "bibtex",
        "command": "bibtex",
        "args": [
            "%DOCFILE%"
        ]
    }
  ],
"latex-workshop.latex.autoClean.run": "onBuilt",
"latex-workshop.latex.clean.fileTypes": [
    "*.aux",
    "*.bbl",
    "*.blg",
    "*.idx",
    "*.ind",
    "*.lof",
    "*.lot",
    "*.out",
    "*.toc",
    "*.acn",
    "*.acr",
    "*.alg",
    "*.glg",
    "*.glo",
    "*.gls",
    "*.ist",
    "*.fls",
    "*.log",
    "*.fdb_latexmk",
],
// 设置外部PDF预览器
"latex-workshop.view.pdf.viewer":"external",
"latex-workshop.view.pdf.ref.viewer":"external",
"latex-workshop.view.pdf.external.viewer.command": "C:/.../SumatraPDF/SumatraPDF.exe",//修改为你的具体SumatraPDF.exe的路径
"latex-workshop.view.pdf.external.viewer.args": [
        "-inverse-search",
        ""C:/.../Microsoft VS Code/code.exe" -g "%f:%l"", //修改为你的具体vscode.exe的路径
        "%PDF%"
    ],
// 设置正向跳转
"latex-workshop.view.pdf.external.synctex.command":"C:/.../SumatraPDF/SumatraPDF.exe",//修改为你的具体SumatraPDF.exe的路径
"latex-workshop.view.pdf.external.synctex.args": [
        "-forward-search",
        "%TEX%",
        "%LINE%",
        "%PDF%"
    ]
}
参考文献:
1.vscode 配置 Latex 编译后自动清理多余文件(.log .out等文件)
2.Vscode+latex配置
3.Windows+VScode环境下Latex(MikTeX)使用入门指南
4.论文写作的又一利器:VSCode + Latex Workshop + MikTex + Git


 8953
8953


 被折叠的 条评论
为什么被折叠?
被折叠的 条评论
为什么被折叠?
 到【灌水乐园】发言


