树莓派python_树莓派使用Python控制LCD1602模块

本文将介绍使用Python通过树莓派控制LCD1602,LCD1602液晶模块相当便宜,关键是它很容易与树莓派(Raspberry Pi)进行接口连接。LCD1602模块有16个引脚,但是我们只需要在树莓派上使用6个GPIO引脚就可完成连接。

1602_lcd_iic.jpg

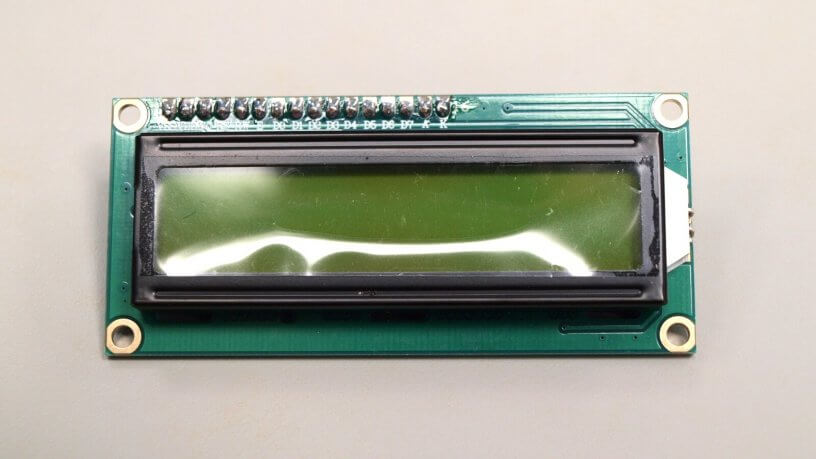
大部分的LCD 16×2 模块都采用日立HD44780 LCD控制器作为主控。这使得LCD 1602模块的兼容性非常好,几乎能买到的模块它的工作方式都是一样的。在网上有很多不同背光颜色的模块可以选择。本文采用的是蓝色背光的模块。

LCD 16×2 液晶模块的引脚定义

lcd1602_pinout-768x1024.jpg

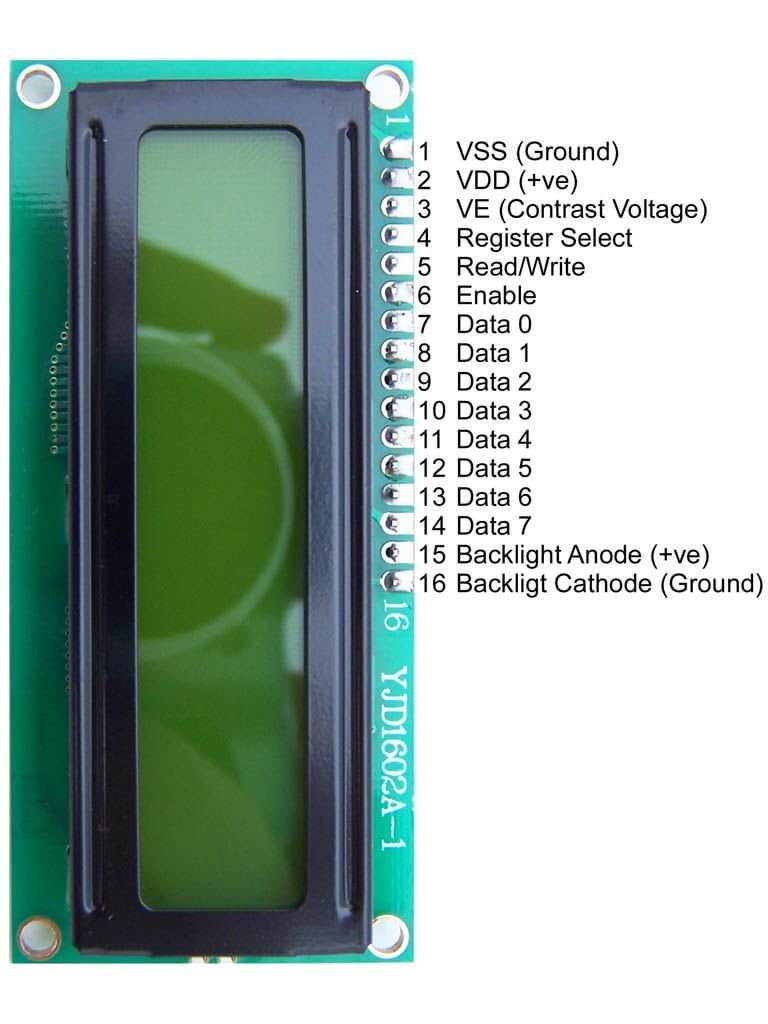
如上图,这就是LCD 16×2 液晶模块的引脚定义,正如前面所说的,大部分的1602模块的引脚都是一样的。深入了解可阅读: 1602 LCD液晶屏引脚定义图

通常模块需要8条数据线来提供0-7 Bits的数据。幸运的是,该模块可以设置为“4 Bits”模式,允许我们以4 Bits的两个小块来发送数据。这个特性太有用了,因为它可以减少LCD 1602与树莓派交互时的GPIO接口数量。以下是如何连接LCD和树莓派的接口信息:

LCD 引脚

LCD引脚定义

Pi 引脚定义

Pi 引脚

01

GND

GND

P1-06

02

+5V

+5V

P1-02

03

对比度

GND

P1-06

04

RS

GPIO7

P1-26

05

RW

GND

P1-06

06

E

GPIO8

P1-24

07

Data 0

08

Data 1

09

Data 2

10

Data 3

11

Data 4

GPIO25

P1-22

12

Data 5

GPIO24

P1-18

1

  • 0
    点赞
  • 3
    收藏
    觉得还不错? 一键收藏
  • 0
    评论
你好,树莓派使用LCD1602是一种常见的显示屏,可以通过Python编程语言来控制。以下是使用Python控制LCD1602的基本步骤: 1. 安装必要的库文件:需要安装RPi.GPIO和smbus库文件,可以通过以下命令进行安装: ``` sudo apt-get install python-dev python-rpi.gpio i2c-tools ``` 2. 连接硬件:将LCD1602屏幕连接到树莓派的GPIO引脚和I2C总线上。 3. 编写Python代码:使用Python编写代码来控制LCD1602屏幕。具体代码可以参考以下示例: ``` import smbus import time # Define some device parameters I2C_ADDR = 0x27 # I2C device address LCD_WIDTH = 16 # Maximum characters per line # Define some device constants LCD_CHR = 1 # Mode - Sending data LCD_CMD = 0 # Mode - Sending command LCD_LINE_1 = 0x80 # LCD RAM address for the 1st line LCD_LINE_2 = 0xC0 # LCD RAM address for the 2nd line # Define some timing constants E_PULSE = 0.0005 E_DELAY = 0.0005 # Open I2C interface bus = smbus.SMBus(1) # Rev 2 Pi uses 1 def lcd_init(): # Initialise display lcd_byte(0x33,LCD_CMD) # 110011 Initialise lcd_byte(0x32,LCD_CMD) # 110010 Initialise lcd_byte(0x06,LCD_CMD) # 000110 Cursor move direction lcd_byte(0x0C,LCD_CMD) # 001100 Display On,Cursor Off, Blink Off lcd_byte(0x28,LCD_CMD) # 101000 Data length, number of lines, font size lcd_byte(0x01,LCD_CMD) # 000001 Clear display time.sleep(E_DELAY) def lcd_byte(bits, mode): # Send byte to data pins # bits = the data # mode = 1 for data, 0 for command bits_high = mode | (bits & 0xF0) | 0x08 bits_low = mode | ((bits<<4) & 0xF0) | 0x08 # High bits bus.write_byte(I2C_ADDR, bits_high) lcd_toggle_enable(bits_high) # Low bits bus.write_byte(I2C_ADDR, bits_low) lcd_toggle_enable(bits_low) def lcd_toggle_enable(bits): # Toggle enable time.sleep(E_DELAY) bus.write_byte(I2C_ADDR, (bits | 0x04)) time.sleep(E_PULSE) bus.write_byte(I2C_ADDR, (bits & ~0x04)) time.sleep(E_DELAY) def lcd_string(message, line): # Send string to display message = message.ljust(LCD_WIDTH," ") lcd_byte(line, LCD_CMD) for i in range(LCD_WIDTH): lcd_byte(ord(message[i]),LCD_CHR) if __name__ == '__main__': try: lcd_init() while True: lcd_string("Hello world!",LCD_LINE_1) lcd_string("Raspberry Pi",LCD_LINE_2) time.sleep(3) # 3 second delay lcd_string("1234567890123456",LCD_LINE_1) lcd_string("abcdefghijklmnop",LCD_LINE_2) time.sleep(3) # 3 second delay except KeyboardInterrupt: pass lcd_byte(0x01, LCD_CMD) lcd_string("Goodbye!",LCD_LINE_1) lcd_string("See you later.",LCD_LINE_2) time.sleep(3) lcd_byte(0x01, LCD_CMD) ``` 以上代码是一个简单的例子,可以将其保存到树莓派上的.py文件中,然后使用以下命令运行: ``` python lcd1602.py ``` 希望能对你有所帮助!

“相关推荐”对你有帮助么?

  • 非常没帮助
  • 没帮助
  • 一般
  • 有帮助
  • 非常有帮助
提交
评论
添加红包

请填写红包祝福语或标题

红包个数最小为10个

红包金额最低5元

当前余额3.43前往充值 >
需支付:10.00
成就一亿技术人!
领取后你会自动成为博主和红包主的粉丝 规则
hope_wisdom
发出的红包
实付
使用余额支付
点击重新获取
扫码支付
钱包余额 0

抵扣说明:

1.余额是钱包充值的虚拟货币,按照1:1的比例进行支付金额的抵扣。
2.余额无法直接购买下载,可以购买VIP、付费专栏及课程。

余额充值