


看了闫令琪大佬的图形学公开课,和默然(这里我就不加“大佬”二字了,除非他也出一系列教学视频)推荐的Ray Tracing in One Weekend,手痒痒,决定用unity来写一个玩玩。
我是初学者,文章里肯定有错误之处,还请大家积极指出。
我这里假设你已经有基础的几何知识和足够的编程经验,也看过闫令琪大佬的公开课,所以不会花费字数在讲解原理上。
我们开始吧。
1.背景
本项目基于屏幕后处理,但不写shader,我们用cpu来计算像素颜色值。所以你只需要建一个脚本,挂载在Camera上就好。
这个脚本的关键代码是:
Graphics.Blit(tex, dest);tex是一个texture2D格式全局变量。texture2D格式可以定义长宽,设置每个像素的颜色,也能导出为图片。在本脚本我们把它显示在屏幕上,这行语句的作用正是如此。
如果你还未定义tex,你运行一下,应该是一片黑。
接下来我们定义这张图片。我们让它宽度为w,高为h,因为是其含义是像素个数,所以都是整型。用两个for循环来给图片上色,如果你的w和h取的超级大,那么上色会非常耗时。我推荐把上色代码写在协程里,这样就可以实时地看见上色进度了。这样的效率不及一次性计算完,但能看着色进度和结果还是很值的。
IEnumerator Render(int w, int h)
{
tex = new Texture2D(w,h); //初始化图片
for(int i = 0; i < w; i++)
{
for(int j = 0; j < h; j++)
{
tex.SetPixel(i, j, Color.Lerp(Color.white, new Color(1,0,0.5f), j/(float)h));
tex.Apply(); //让图片显示刚填充的颜色
yield return null; //下一帧接着执行
}
}
Debug.Log("---渲染完毕---");
StopCoroutine(cor); //养成好习惯,最后关闭协程
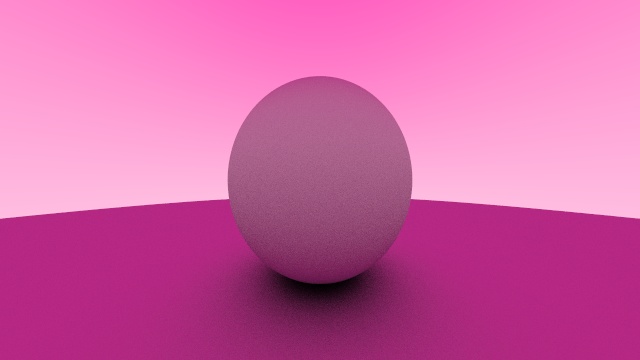
}我这里填充了渐变颜色,从白色到樱色。你运行一下,别把w和h设太大,设个320*180就可。便能看到一张由上而下,樱色变白的图片。
2.向量
现在进入正题,光线追踪。但首先我们需要的不是光线,而是一个世界。
这个世界由一个直角坐标系表示,此坐标系有x、y、z三个坐标轴,分别表示右、上、前三个方向。世界里的每一个点的位置可由三个数表示,分别代表那个点在你右方多少距离,上方多少距离,前方多少距离。假定你在(0, 0, 0)的位置(你是一个点,没有身高,没有宽度),那么(0, 1, 0)就表示你上方1个单位距离的点。这个单位距离可以随意取,我们假定是1米。而(2, 0, 3)就代表这个点在你右边2米的地方再往前3米的位置。
点的表示有了,很自然的就有了方向的表示方法。一个方向可以由一点指向另一点来描述,相应的,这两点的差就可以确定这个方向(方向是个很抽象的概念,我也不敢说理解了它,只是会使用它罢了)。两点的差很好算,相应的坐标相减就可以了。你在(2, 0, 3)的位置,我在(-1, 0, 2)的位置,那么从我到你的方向,就是你的位置减去我的位置,为(3, 0, 1);而你到我的方向,则是(-3, 0, -1)。
现在就可以表示光线了:一个起点加上方向,从起点出发,沿方向延申。很容易就能写出光线的类,只包含两个变量,一个起点,一个方向,都是Vector3类型;为了方便,我写了个构造方法。
    class MyRay
    {
        public Vector3 point;
        public Vector3 direction;

        public MyRay(Vector3 p, Vector3 d)
        {
            point = p;
            direction = d;
        }
    }
这个类是内部类——我们约定过只写一个脚本的。
3.用光线来取值
在第1部分,我们虽然给图片上了色,但,不够“光线追踪”,因为它不是靠光线来获取的颜色。现在我们来用光线获取颜色吧。
我们把光线的起点放在(0, 1.65, 0)的位置上(因为我眼睛距地面就是1.65米左右,这样更有代入感),从此起点朝各个方向发射光线。那么第一个问题就是,发射光线的范围有多大?总不能在360°里无死角发射光线吧?当然你可以这么干,结果就是失真,除了有特殊目的,也没啥用。这里我们有个“视野角度”的概念,Field angle of View,表示你能看到以你正前方向为角平分线,能看到多少度角内的景物。这个是横向视野的角度,纵向视野的角度,用图片的h/w高除以宽就能算出来。表示三维空间中的特定方向,需要两个角度:横向的和纵向的,也就是左右和俯仰。有了这个概念,你拿起草稿纸,欻欻欻一通算,以正前方为左右俯仰的0°方向,俯仰角φ向上为正,左右角θ向右为正,马上得到表示在你正前方偏右θ角度,偏上φ角度的向量(而且是归一化的):
这样你就可以很容易地写出覆盖视野的光线的方向了:
    Vector3 GetVectorFromAngle(float theta, float phi)
    {
        return new Vector3(
Mathf.Sin(theta)*Mathf.Cos(phi),
 Mathf.Sin(phi),
Mathf.Cos(theta)*Mathf.Cos(phi)
);
    }
然后在更新一下协程函数,求出图片每个像素所对应的光线的向量。现在就可以用它来取颜色值了。你可以根据y值也就是图片的上下方向来取,也可以根据x值,图片的左右来取。这里我们取一张纹理的颜色,记得把它的Read/Write Enable勾上。
我们需要知道,光线会和纹理交于何处。这个很简单了,你想让纹理在哪,咋摆,求出相应平面的方程,和光线的直线方程联立求解即得交点坐标;比较复杂的是得到此交点对应的纹理颜色,这个需要你计算交点在纹理上的位置,需要耐心编程。
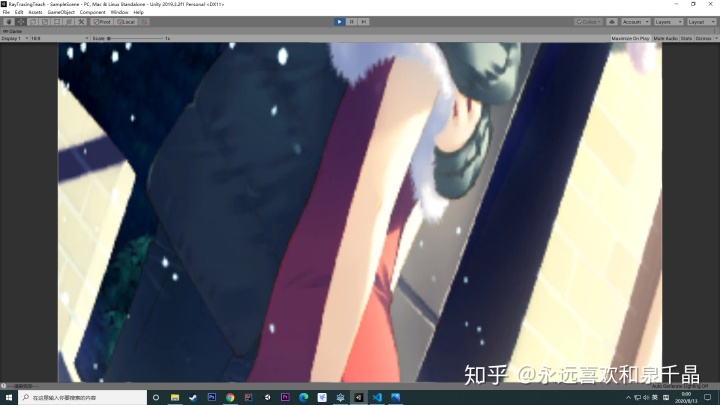
在这里我们让纹理充当背景,你大可以找一张风景图,或是色图,我随便找了一张二次元图。既然是背景,它必是无限大,所以无法用交点坐标取值,只能用方向。光线方向我们是有的;求出图片的uv值,再取色就完事了(用光线方向取值的话,就和光线起点无关了)。uv值的求法是关键,我们假设有一个平面在前方0.5米处,也就是平面z = 0.5。我们让光线和其相交,会得到一系列交点,如果你的fov不超过90的话(且h<=w,宽度不小于高度),这些交点的xy值都在[-0.5, 0.5]之间。只要都加上0.5,便会得到[0,1]内的值,变为可用的uv坐标。这一步,就是把z = 0.5,x,y∈[-0.5,0.5]²这一平面区域上的点,映射到所选背景纹理上。
计算向量(x0,y0,z0)和z=0.5平面的交点P是非常非常令人愉悦的。过程你们自己享受,我这里给出我的结果:
然后你就能得到一张以你选的纹理为背景的图片了。这当然一点也不炫酷。炫酷的是,颜色值不是直接从纹理上取的,而是用光线求交取的。
今天就到这里吧,下面是代码~!
using System.Collections;
using System.Collections.Generic;
using UnityEngine;

public class RayTracing : MonoBehaviour
{
    Texture2D tex;
    Coroutine cor;  //协程的引用,用来关闭协程
    public float fov;
    public Texture2D backTex;   //背景纹理
    Vector3 stand;  //光线起点
    // Start is called before the first frame update
    void Start()
    {
        if(fov<=0)
        {
            fov=60; //防止忘写
        }
        stand = new Vector3(0, 1.65f, 0);
        cor = StartCoroutine(Render(320, 180));
    }

    IEnumerator Render(int w, int h)
    {
        float theta = fov*Mathf.PI / 180f;
        float phi = theta*h/w;
        float angleStep = theta/w;  //光线角度取值的步长
        tex = new Texture2D(w,h);   //初始化图片
        for(int i = 0; i < w; i++)
        {
            for(int j = 0; j < h; j++)
            {
                Vector3 dir = GetVectorFromAngle(i*angleStep-theta/2, j*angleStep-phi/2);
                MyRay ray = new MyRay(stand, dir);
                int u = (int)(backTex.width * (dir.x/(2*dir.z) + 0.5f));
                int v = (int)(backTex.height * (dir.y/(2*dir.z) + 0.5f));
                tex.SetPixel(i, j, backTex.GetPixel(u, v));

                tex.Apply();    //让图片显示刚填充的颜色
                yield return null;  //下一帧接着执行
            }
        }
        Debug.Log("---渲染完毕---");
        StopCoroutine(cor);     //养成好习惯,最后关闭协程
    }

    Vector3 GetVectorFromAngle(float theta, float phi)
    {
        return new Vector3(Mathf.Sin(theta)*Mathf.Cos(phi), Mathf.Sin(phi), Mathf.Cos(theta)*Mathf.Cos(phi));
    }

    // Update is called once per frame
    void Update()
    {

    }

    void OnRenderImage(RenderTexture src, RenderTexture dest)
    {
        Graphics.Blit(tex, dest);
    }

    class MyRay
    {
        public Vector3 point;
        public Vector3 direction;

        public MyRay(Vector3 p, Vector3 d)
        {
            point = p;
            direction = d;
        }
    }
}


 8451
8451

 被折叠的 条评论
为什么被折叠?
被折叠的 条评论
为什么被折叠?
 到【灌水乐园】发言


