


简介
ESP32进行I2C通信的两个引脚SDA和SCL分别采用的17和16引脚。如对引脚使用有疑问,可参考文章ESP32外设管脚分配(I2C/I2S/UART等)
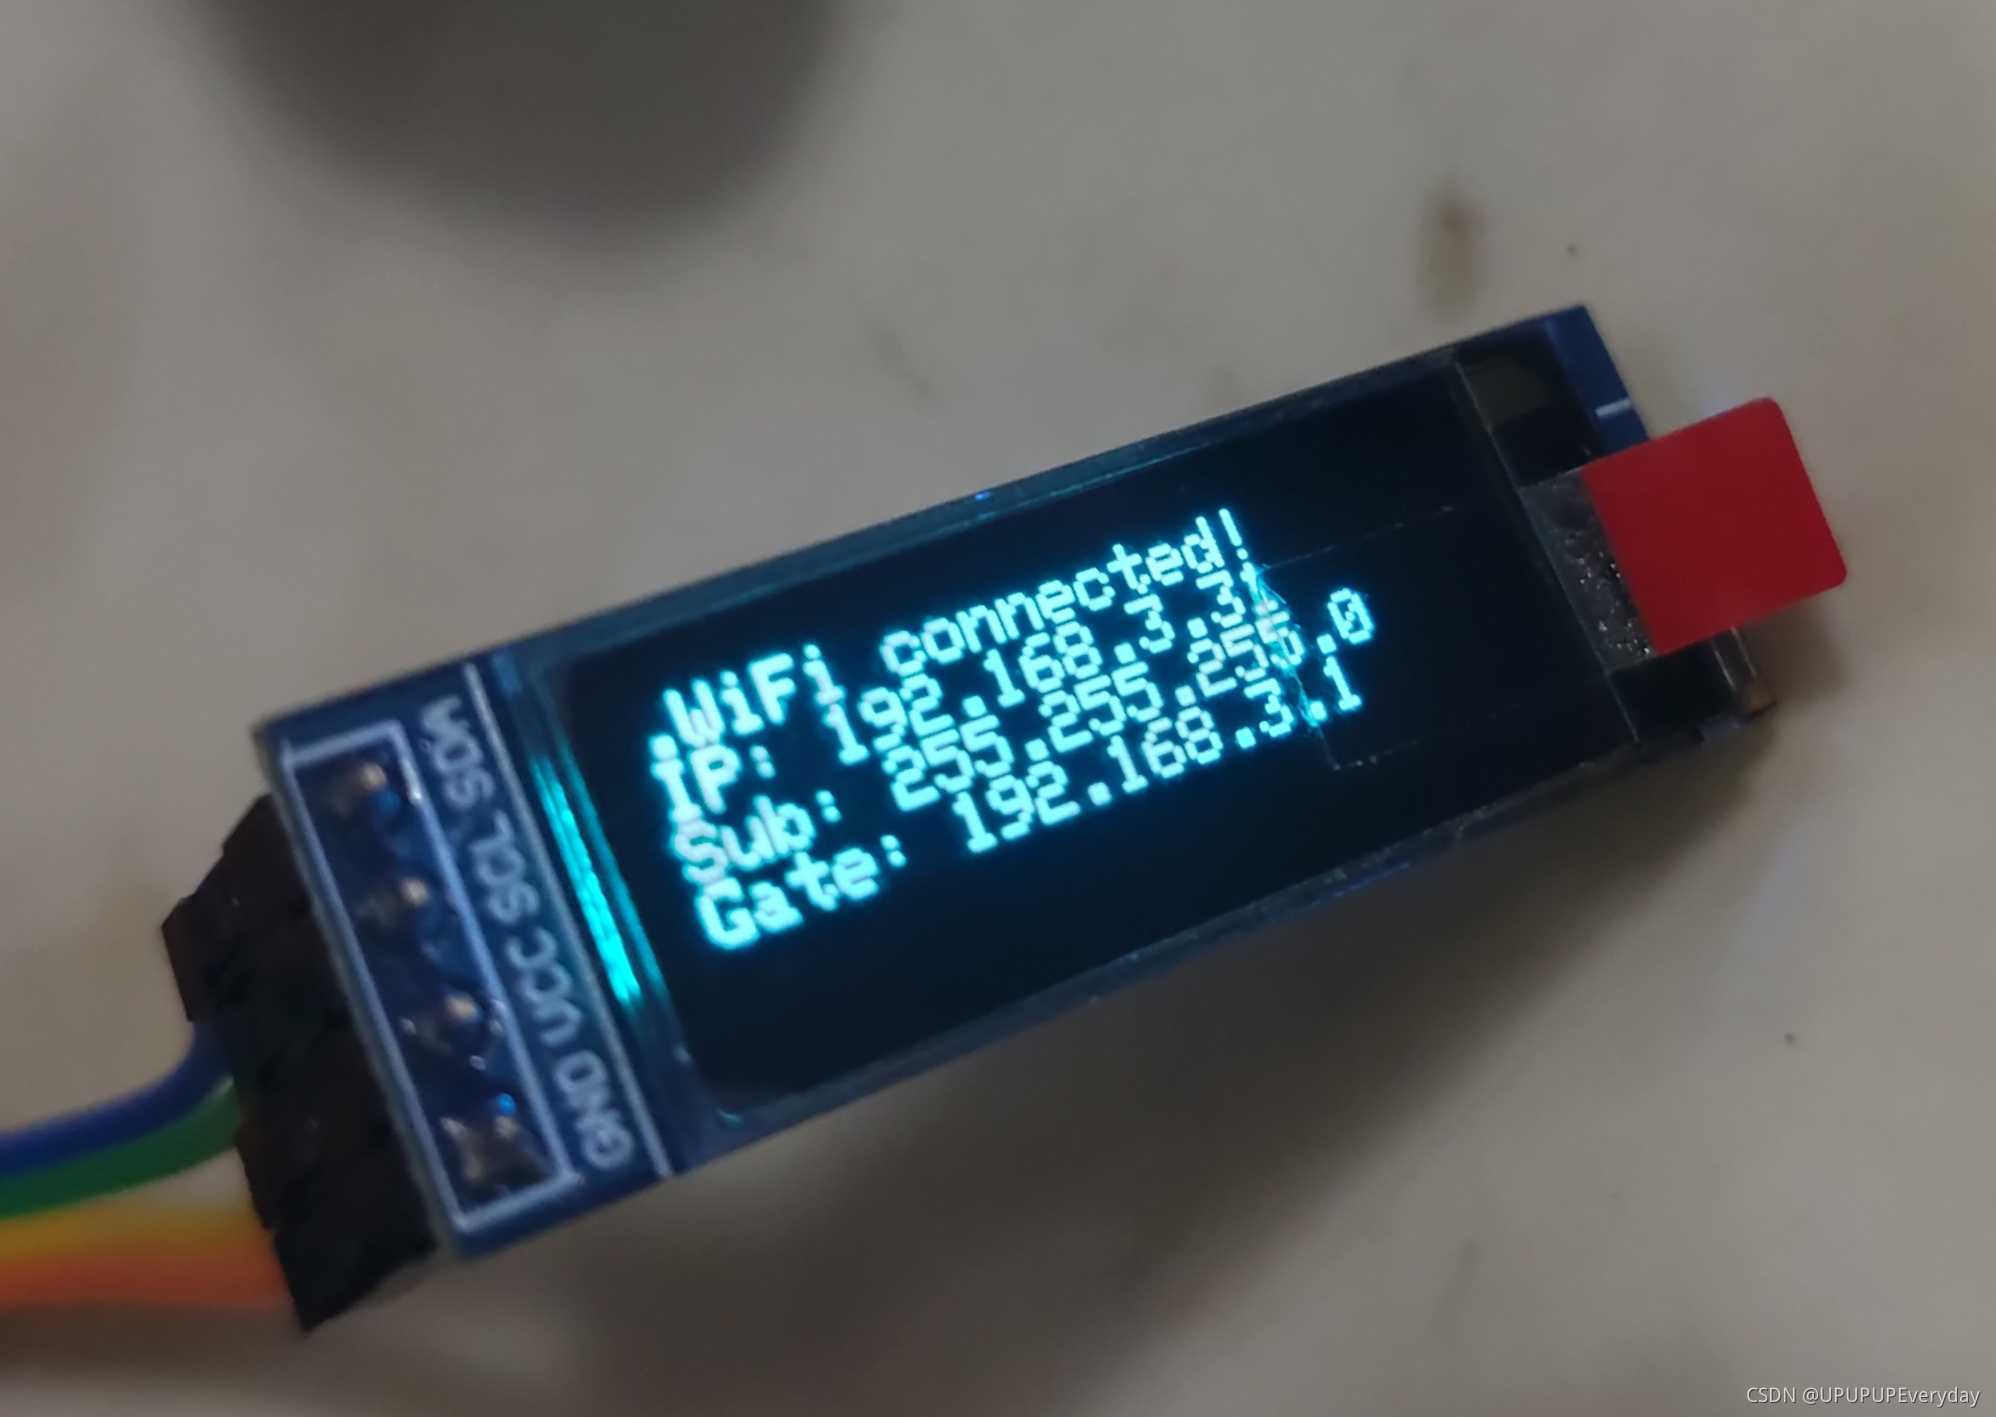
程序运行结果
Arduino示例程序
//  Author: Nick
//  Date:23 Sep,2021

//  This library is free software; you can redistribute it and/or
//  modify it under the terms of the GNU Lesser General Public
//  License as published by the Free Software Foundation; either
//  version 2.1 of the License, or (at your option) any later version.
//
//  This library is distributed in the hope that it will be useful,
//  but WITHOUT ANY WARRANTY; without even the implied warranty of
//  MERCHANTABILITY or FITNESS FOR A PARTICULAR PURPOSE.  See the GNU
//  Lesser General Public License for more details.
//
//  You should have received a copy of the GNU Lesser General Public
//  License along with this library; if not, write to the Free Software
//  Foundation, Inc., 51 Franklin St, Fifth Floor, Boston, MA  02110-1301  USA


//ESP32 Arduino驱动0.91" OLED
//NODEMCU-32 V1.2
//Arduino V1.8.16
//参考链接:
//该文章采用的是串口打印信息的方式进行显示:https://blog.csdn.net/Naisu_kun/article/details/86165403

#include <WiFi.h>

#include <Wire.h>

// 引入驱动OLED0.91所需的库
#include <Adafruit_GFX.h>
#include <Adafruit_SSD1306.h>

#define SCREEN_WIDTH 128 // 设置OLED宽度,单位:像素
#define SCREEN_HEIGHT 32 // 设置OLED高度,单位:像素

// 自定义重置引脚,虽然教程未使用,但却是Adafruit_SSD1306库文件所必需的
#define OLED_RESET 4
Adafruit_SSD1306 display(SCREEN_WIDTH, SCREEN_HEIGHT, &Wire, OLED_RESET);

const char *ssid = "********"; //你的网络名称
const char *password = "********"; //你的网络密码

void setup()
{
  // put your setup code here, to run once:

  //设置I2C的两个引脚SDA和SCL,这里用到的是17作为SDA,16作为SCL
  Wire.setPins(/*SDA*/17,/*SCL*/16);
  //初始化OLED并设置其IIC地址为 0x3C
  display.begin(SSD1306_SWITCHCAPVCC, 0x3C);
  //清除屏幕
  display.clearDisplay();
  //设置字体颜色,白色可见
  display.setTextColor(WHITE);
  //设置字体大小
  display.setTextSize(1.5);
  //设置光标位置
  display.setCursor(0, 0);

  WiFi.begin(ssid, password); //连接网络

  while (WiFi.status() != WL_CONNECTED) //等待网络连接成功
  {
    delay(500);
    display.print(".");
  }

  display.println("WiFi connected!");
  display.print("IP: ");
  display.println(WiFi.localIP()); //打印IP
  display.print("Sub: ");
  display.println(WiFi.subnetMask()); //打印SubnetMask
  display.print("Gate: ");
  display.println(WiFi.gatewayIP()); //打印Gateway
  display.display();
}

void loop()
{
  // put your main code here, to run repeatedly:
}
参考链接
该文章采用的是串口打印信息的方式进行显示:https://blog.csdn.net/Naisu_kun/article/details/86165403


 1642
1642


 被折叠的 条评论
为什么被折叠?
被折叠的 条评论
为什么被折叠?
 到【灌水乐园】发言


