


一、制作数据集
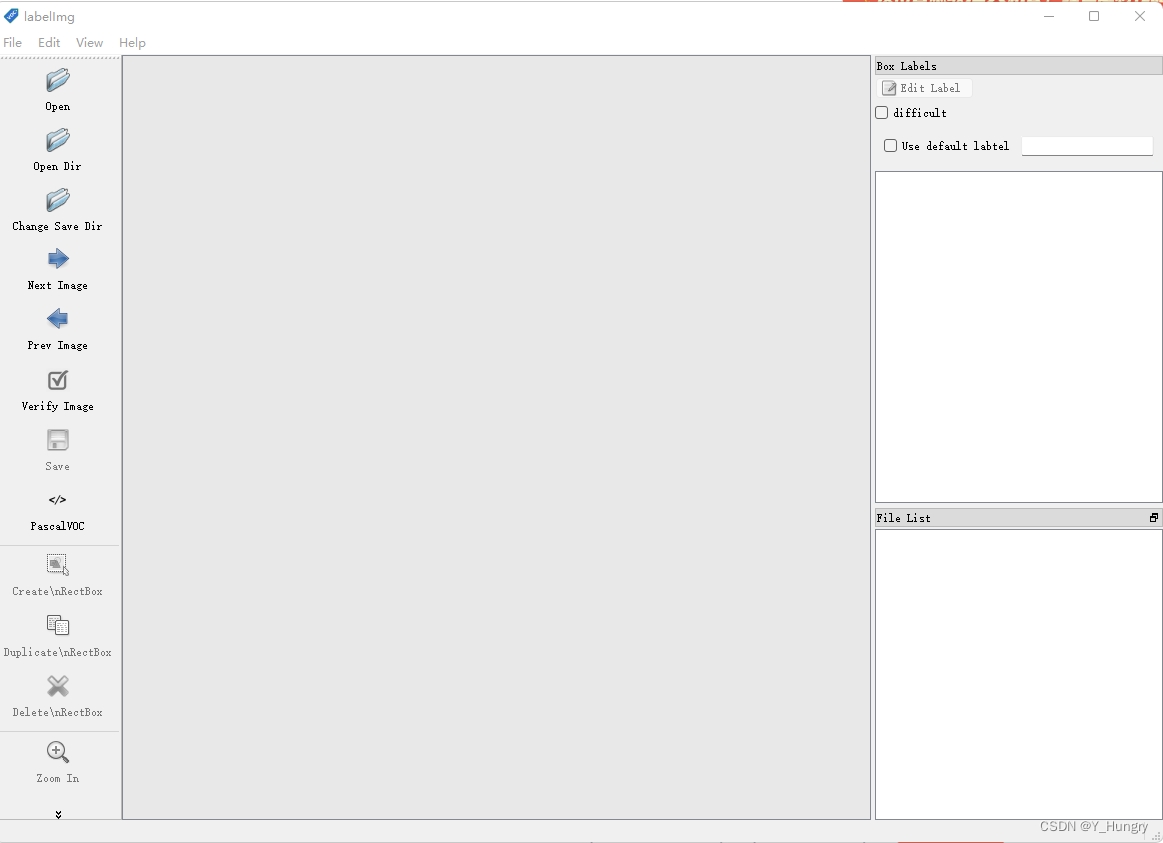
使用LabelImage进行标注,LabelImage的下载安装方法,百度上用的比较多,这里就不赘述了。简单介绍一下LabelImage的标注方法,制作自己的数据集。
1、下载LabelImage
下载LabelImage源码,地址:LabelImage地址。
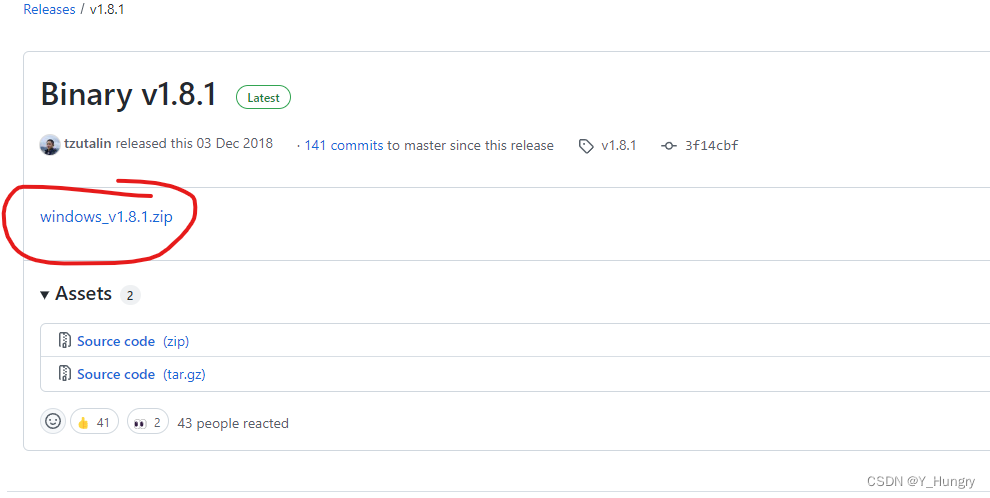
下载LabelImage exe Release Binary v1.8.1 · heartexlabs/labelImg · GitHub
2.安装及快捷键
| Ctrl + u | 选择要标注的文件目录; |
| Ctrl + r | 选择标注好的标签存放的目录; |
| Ctrl + s | 保存标注好的标签(自动保存模式下会自动保存); |
| Ctrl + d | 复制当前标签和矩形框; |
| Ctrl + Shift + d | 删除当前图片; |
| Space | 将当前图像标记为已验证; |
| w | 开始创建矩形框; |
| d | 切换到下一张图; |
| a | 切换到上一张图; |
| del | 删除选中的标注矩形框; |
| Ctrl++ | 放大图片; |
| Ctrl-- | 缩小图片; |
| ↑→↓← | 移动选中的矩形框的位置; |
每标注完一张图片要保存标注的数据,否则切换图片的时候标注的结果会消失!!!!点击快捷方式(CTRL+S)直接保存标注的结果。
反复多张标注完成后,基础数据集已经标注完毕。
3. 制作VOC2007数据集
构建结构目录,我的结构目录如下所示:
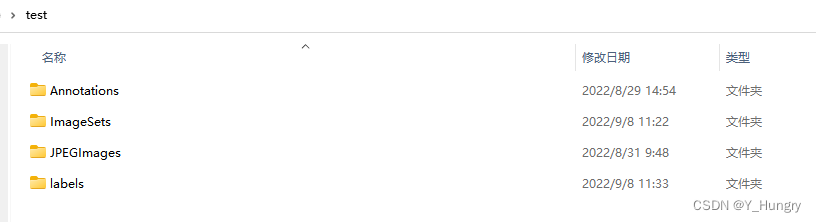
介绍一下各个文件夹的用途:
Annotations:里面是标注图片对应的标注信息,是xml格式的(标注你的xml,可以自行进去看一下结构,里面主要的就是类别和标注的坐标点,其他不重要)。
ImageSets:在后面里面生成Main文件夹,里面包含train和test,主要记录训练集的文件名称和测试集的文件名称。
JPEImages:原始的图片数据。
labels:该文件夹和ImageSets的Main文件夹在后面共同生成,用于生成VOC2007格式的数据集。
4.生成VOC2007数据集的文件
该步骤会将上一步的ImageSets和labels缺少的文件补齐,并生成2007_Train和2007_test的txt文件。下面的代码自动制作VOC2007的数据集,
1)将代码拷贝到ubuntu下yolov7/data目录下新建为main.py
2)在yolov7/data目录下新建文件夹Annotations和JPEImages。并将标注的xml和照片考入进去
3)修改下面代码的路径为自己电脑的文件对应路径
4)直接运行即可
#缺少依赖包的同学自行下载一下,很好下
import xml.etree.ElementTree as ET
import pickle
import os
from os import listdir, getcwd
from os.path import join
import random

#类别根据你的数据集类别进行定义
classes=["mosquitto"]


def clear_hidden_files(path):
    dir_list = os.listdir(path)
    for i in dir_list:
        abspath = os.path.join(os.path.abspath(path), i)
        if os.path.isfile(abspath):
            if i.startswith("._"):
                os.remove(abspath)
        else:
            clear_hidden_files(abspath)

def convert(size, box):
    dw = 1./size[0]
    dh = 1./size[1]
    x = (box[0] + box[1])/2.0
    y = (box[2] + box[3])/2.0
    w = box[1] - box[0]
    h = box[3] - box[2]
    x = x*dw
    w = w*dw
    y = y*dh
    h = h*dh
    return (x,y,w,h)
#下面的文件夹和文件的名称根据你的喜好自定定义,也可以按照我这里的代码直接运行
def convert_annotation(image_id):

    in_file = open('./Annotations/%s.xml' %image_id)
    out_file = open('./labels/%s.txt' %image_id, 'w')
    tree=ET.parse(in_file)
    root = tree.getroot()
    size = root.find('size')
    w = int(size.find('width').text)
    h = int(size.find('height').text)

    for obj in root.iter('object'):
        difficult = obj.find('difficult').text
        cls = obj.find('name').text
        if cls not in classes or int(difficult) == 1:
            continue
        cls_id = classes.index(cls)
        xmlbox = obj.find('bndbox')
        b = (float(xmlbox.find('xmin').text), float(xmlbox.find('xmax').text), float(xmlbox.find('ymin').text), float(xmlbox.find('ymax').text))
        bb = convert((w,h), b)
        out_file.write(str(cls_id) + " " + " ".join([str(a) for a in bb]) + '\n')
    in_file.close()
    out_file.close()

wd = os.getcwd()
work_sapce_dir = os.path.join(wd, "./")
if not os.path.isdir(work_sapce_dir):
    os.mkdir(work_sapce_dir)
annotation_dir = os.path.join(work_sapce_dir, "Annotations/")
if not os.path.isdir(annotation_dir):
        os.mkdir(annotation_dir)
clear_hidden_files(annotation_dir)
image_dir = os.path.join(work_sapce_dir, "JPEGImages/")
if not os.path.isdir(image_dir):
        os.mkdir(image_dir)
clear_hidden_files(image_dir)
VOC_file_dir = os.path.join(work_sapce_dir, "ImageSets/")
if not os.path.isdir(VOC_file_dir):
        os.mkdir(VOC_file_dir)
VOC_file_dir = os.path.join(VOC_file_dir, "Main/")
if not os.path.isdir(VOC_file_dir):
        os.mkdir(VOC_file_dir)

train_file = open(os.path.join(wd, "2007_train.txt"), 'w')
test_file = open(os.path.join(wd, "2007_test.txt"), 'w')
train_file.close()
test_file.close()
VOC_train_file = open(os.path.join(work_sapce_dir, "ImageSets/Main/train.txt"), 'w')
VOC_test_file = open(os.path.join(work_sapce_dir, "ImageSets/Main/test.txt"), 'w')
VOC_train_file.close()
VOC_test_file.close()
if not os.path.exists('./labels'):
    os.makedirs('./labels')
train_file = open(os.path.join(wd, "2007_train.txt"), 'a')
test_file = open(os.path.join(wd, "2007_test.txt"), 'a')
VOC_train_file = open(os.path.join(work_sapce_dir, "ImageSets/Main/train.txt"), 'a')
VOC_test_file = open(os.path.join(work_sapce_dir, "ImageSets/Main/test.txt"), 'a')
list = os.listdir(image_dir) # list image files
probo = random.randint(1, 100)
print("Probobility: %d" % probo)
for i in range(0,len(list)):
    path = os.path.join(image_dir,list[i])
    if os.path.isfile(path):
        image_path = image_dir + list[i]
        voc_path = list[i]
        (nameWithoutExtention, extention) = os.path.splitext(os.path.basename(image_path))
        (voc_nameWithoutExtention, voc_extention) = os.path.splitext(os.path.basename(voc_path))
        annotation_name = nameWithoutExtention + '.xml'
        annotation_path = os.path.join(annotation_dir, annotation_name)
    probo = random.randint(1, 100)
    print("Probobility: %d" % probo)
    if(probo < 75):
        if os.path.exists(annotation_path):
            train_file.write(image_path + '\n')
            VOC_train_file.write(voc_nameWithoutExtention + '\n')
            convert_annotation(nameWithoutExtention)
    else:
        if os.path.exists(annotation_path):
            test_file.write(image_path + '\n')
            VOC_test_file.write(voc_nameWithoutExtention + '\n')
            convert_annotation(nameWithoutExtention)
train_file.close()
test_file.close()
VOC_train_file.close()
VOC_test_file.close()
5.训练模型
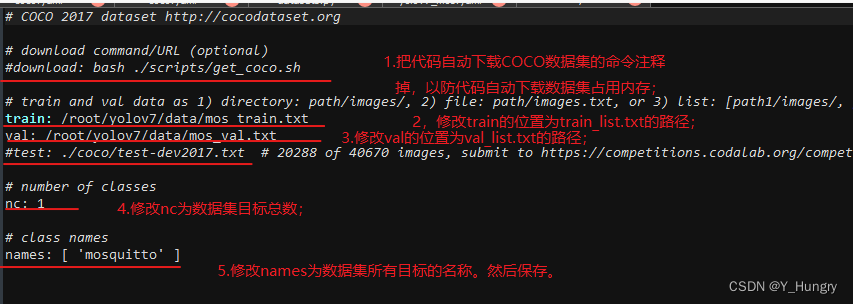
1.修改yolov7/data/coco.yaml代码需要修改的地方为5处。
1):把代码自动下载COCO数据集的命令注释掉,以防代码自动下载数据集占用内存;
2):修改train的位置为train_list.txt的路径;
3):修改val的位置为val_list.txt的路径;
4):修改nc为数据集目标总数;
5):修改names为数据集所有目标的名称。然后保存。
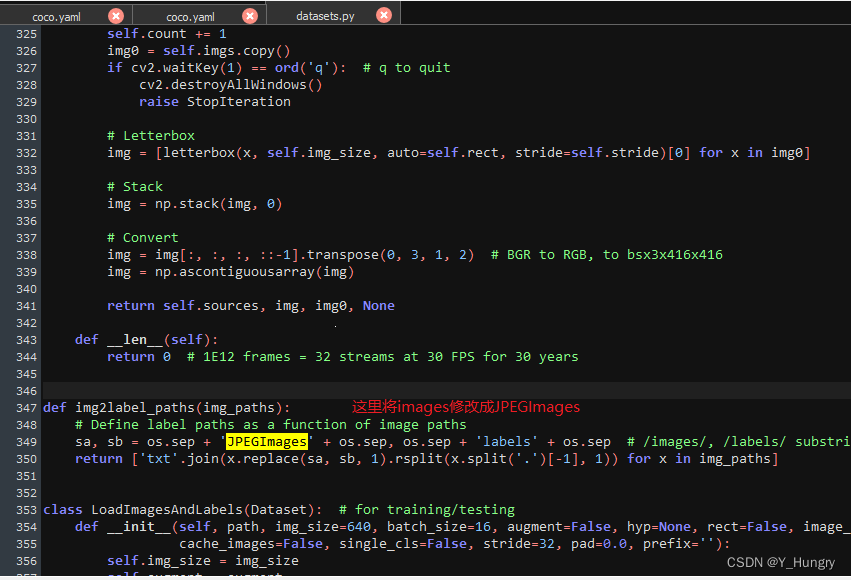
2.修改yolov7/utils/datasets.py代码
如下图所示 将images修改为JPEGImages
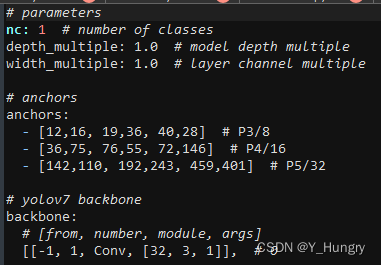
3.将yolov7/cfg/training/yolov7.yaml 复制一共重新命名,修改nc为数据集目标总数;
至此就可以开始训练了
python train.py --weights weights/yolov7.pt --device '0' --cfg cfg/training/yolov7_mos.yaml --data data/coco.yaml --batch-size 16 --epoch 300

下面简单介绍一下相关的参数。
--weights weights/yolov7.pt           # 接收预训练模型路径的参数
--cfg cfg/training/yolov7_mos.yaml    # 接收模型配置文件的参数
--data data/coco.yaml                 # 接收数据配置文件的参数
--device "0"                          # GPU/CPU训练,若1块,则"0";若2块,为"0","1";若CPU,则cpu
--batch-size 16                       # 按照自己GPU内存大小大致确定
--epoch 300                           # 迭代代数
更多参数在yolov7/train.py里查看
6. 训练结果与推理
1. 训练结果
训练结束后,终端会打印出最好的模型和最后一个epoch的模型结果保存在哪里,如下图所示,


 1986
1986


 被折叠的 条评论
为什么被折叠?
被折叠的 条评论
为什么被折叠?
 到【灌水乐园】发言


